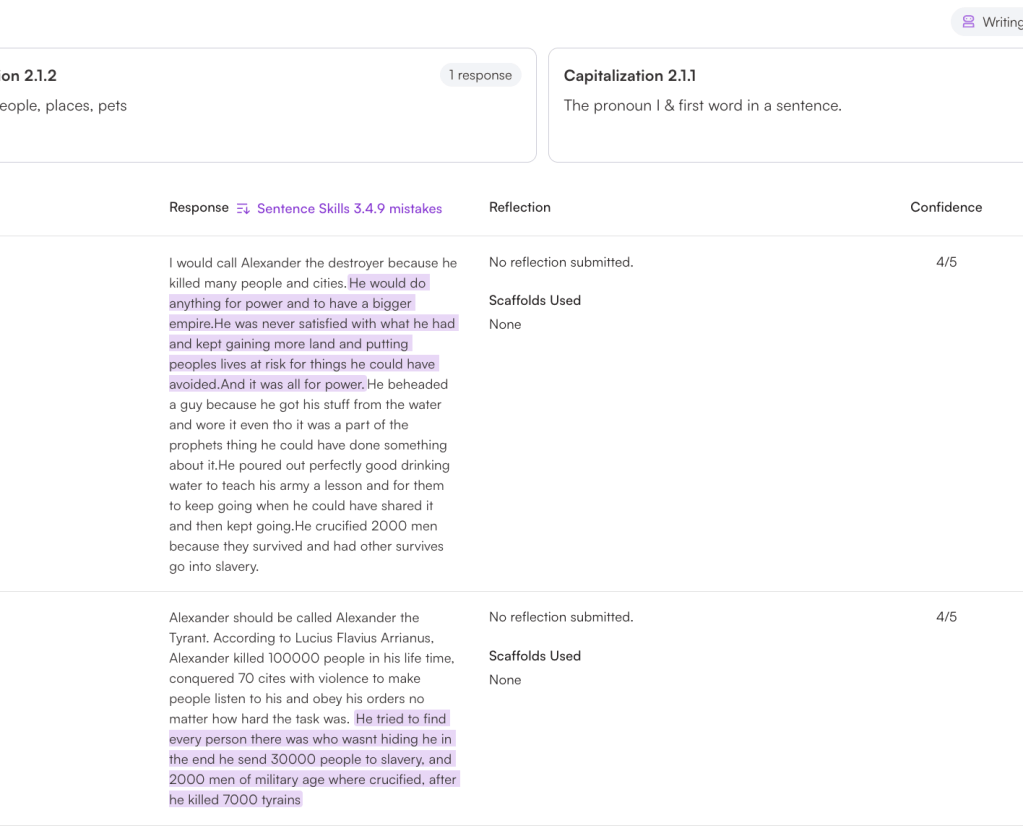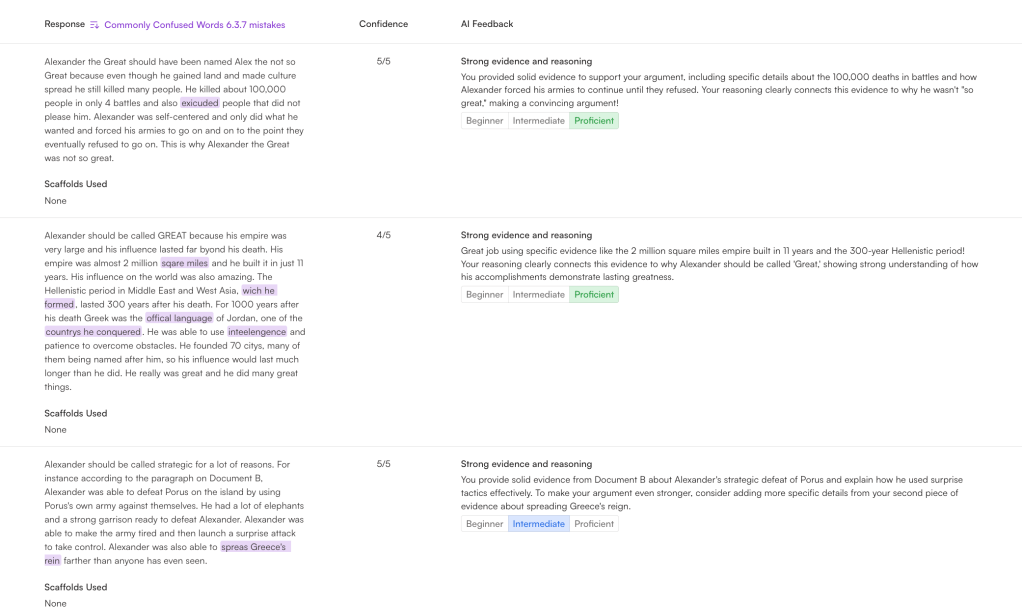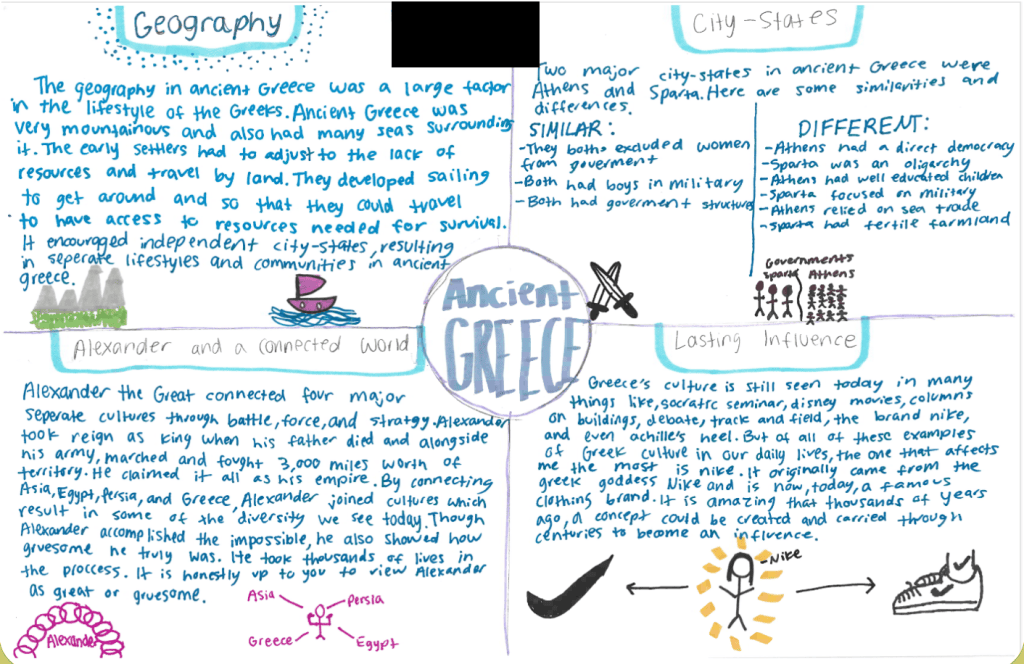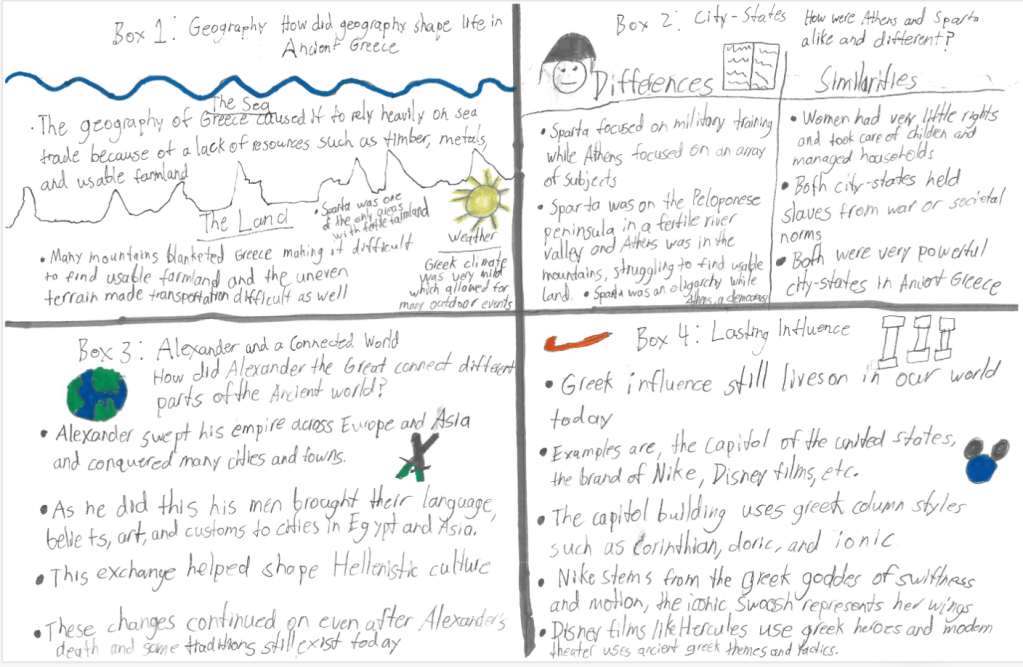
The Year That Was in 103: What Worked and What Needs Work

Another year is in the books, and I found myself reflecting back on this school year and thinking about the patterns that kept showing up throughout Room 103. Some lessons fade immediately, while others still stick in your head because you remember the conversations students had, the moments where they struggled through an idea, or the days where the room just felt different.

The classroom slowly became more collaborative, more discussion-driven, and more focused on students making sense of ideas instead of just collecting information. Students spent more time talking through evidence, defending claims, revising thinking, and trying to organize complicated ideas together.

At the same time, reflecting on the year also made me realize there are still some things I need to improve moving forward. Some parts of this year worked really well. Other parts showed me where I still need to grow.

Building Thinking Classrooms Changed the Culture of the Room

If there was one thing that probably shaped Room 103 more than anything else this year, it was Building Thinking Classrooms.

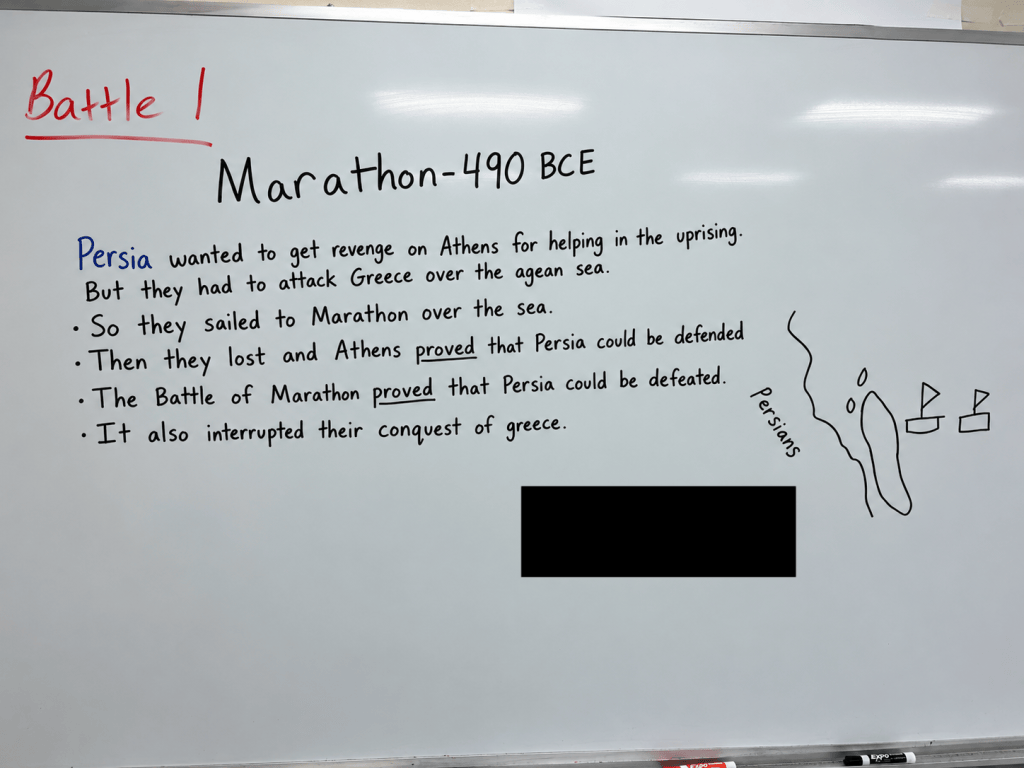
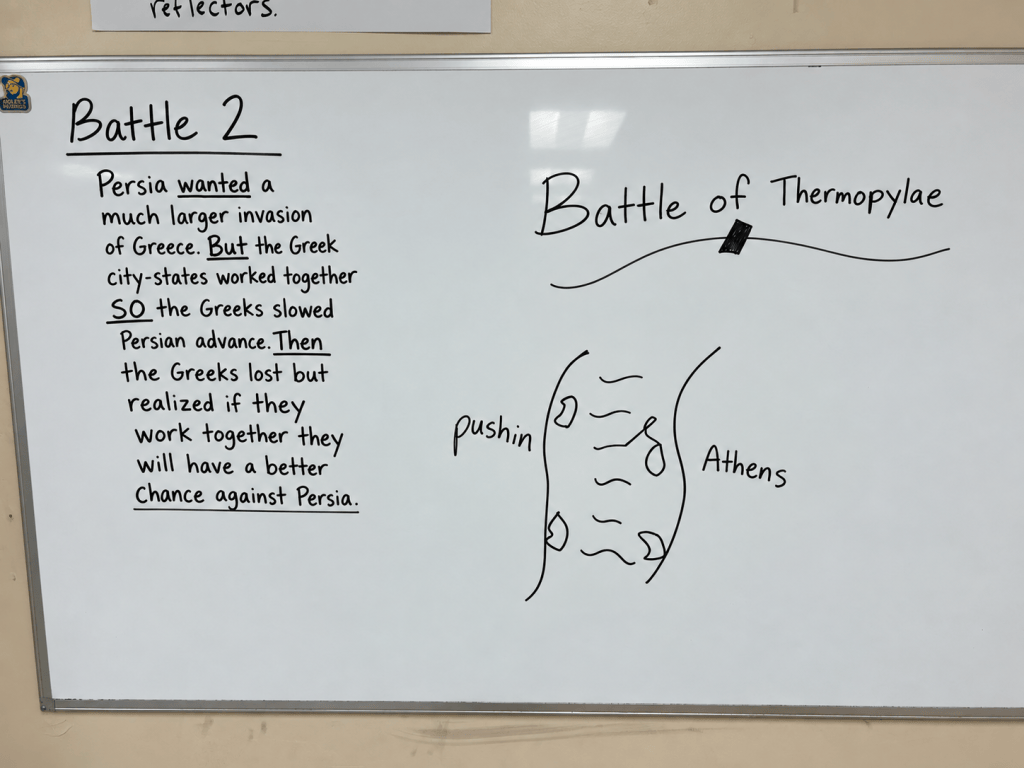
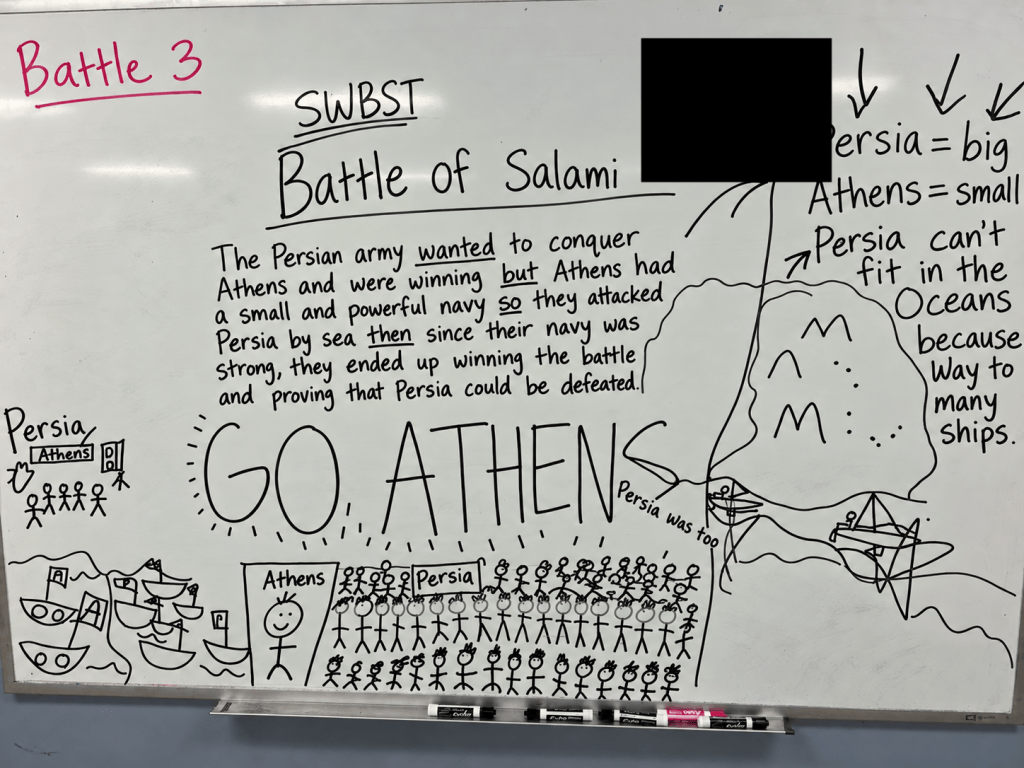
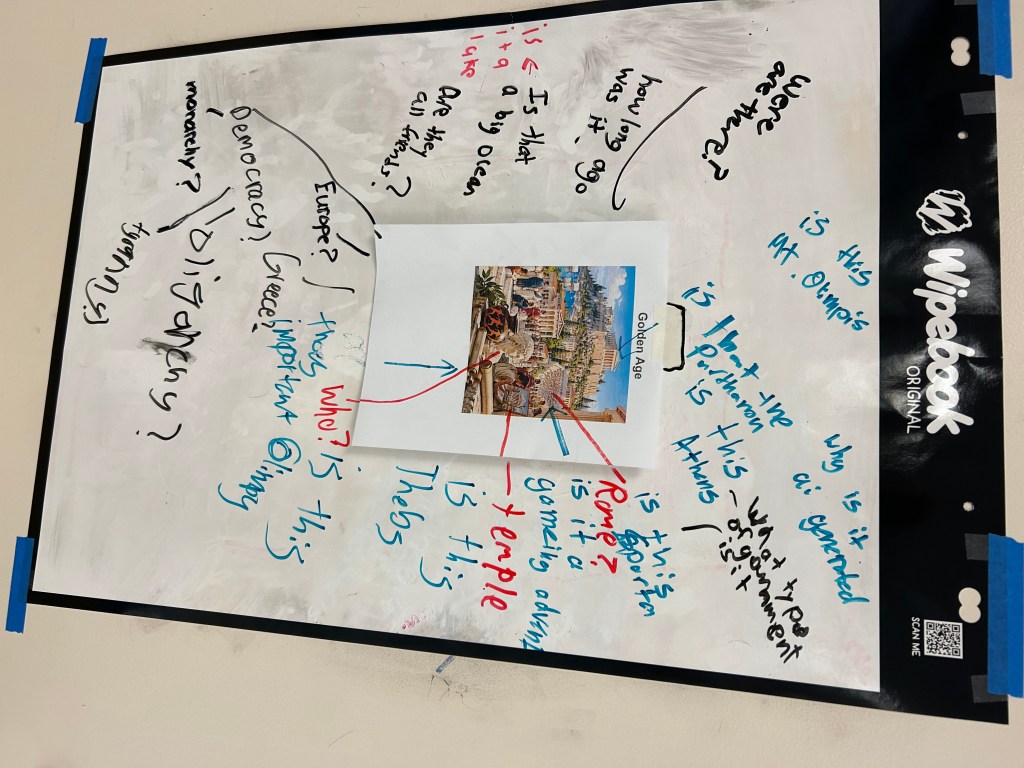
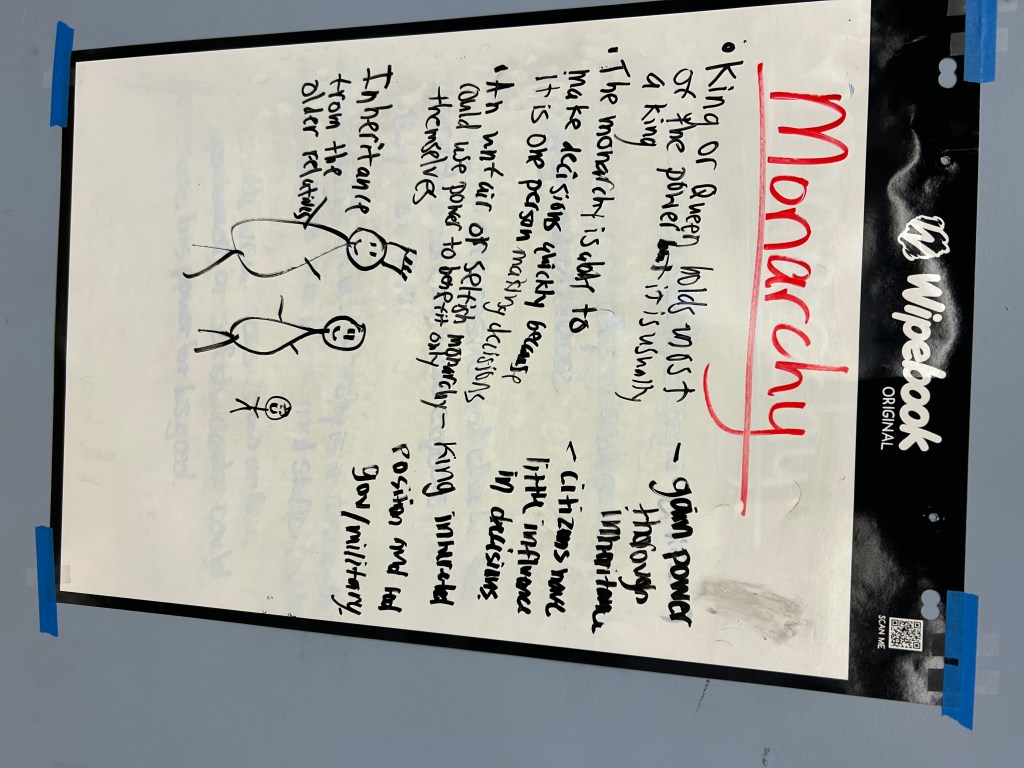
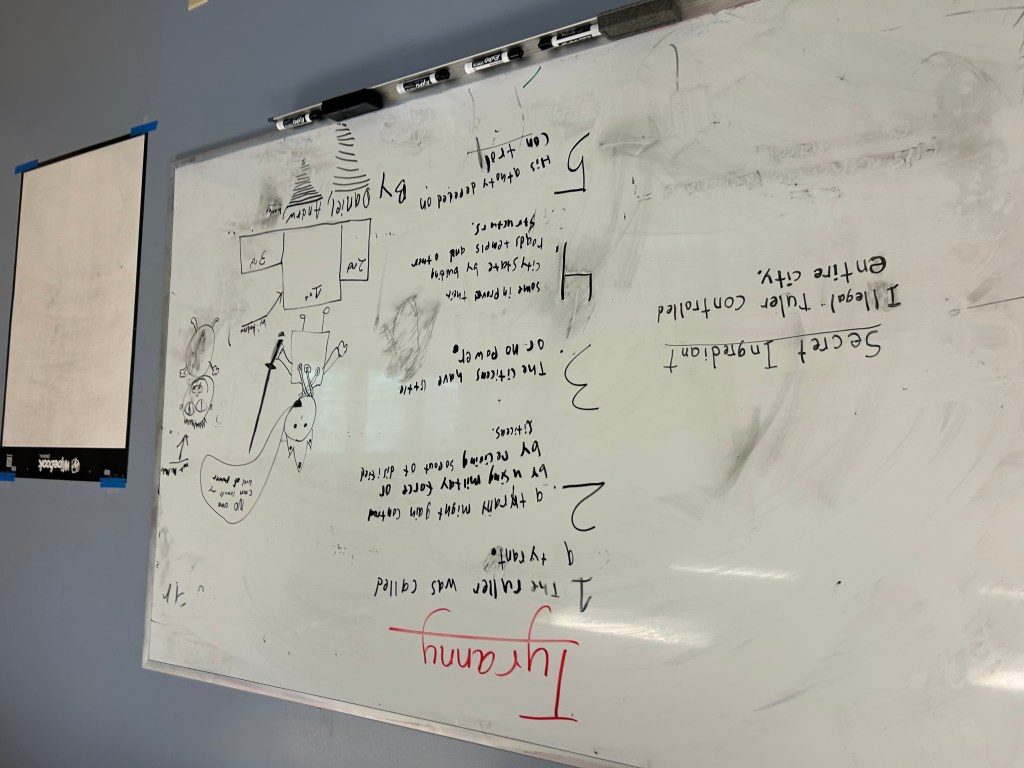
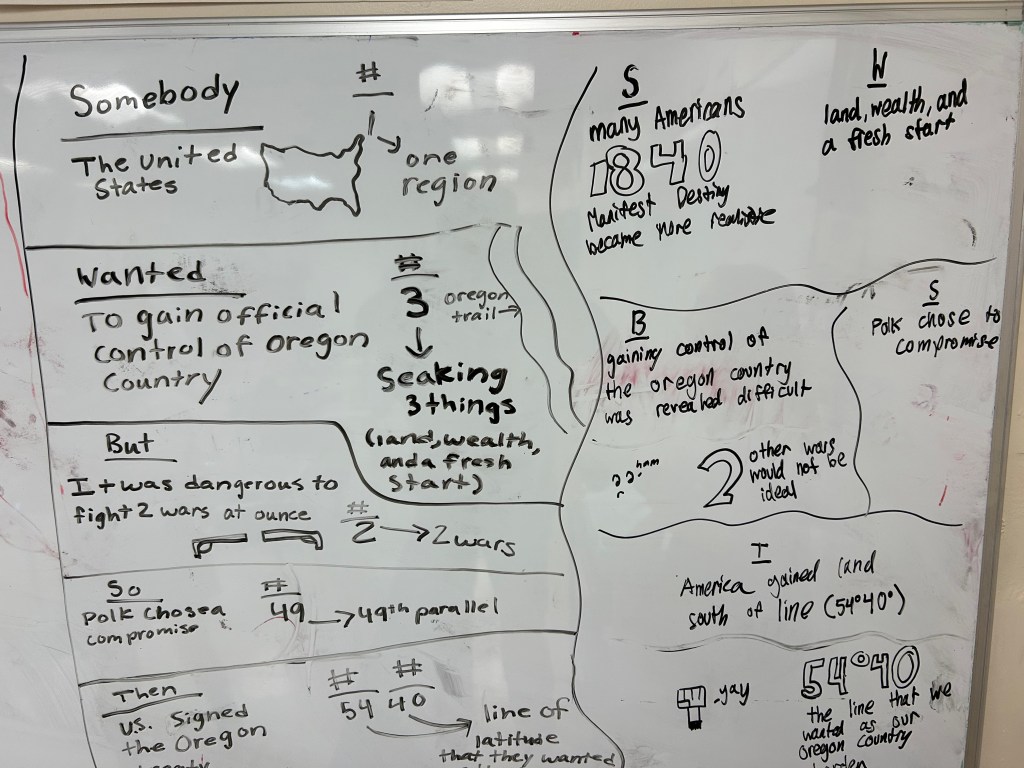
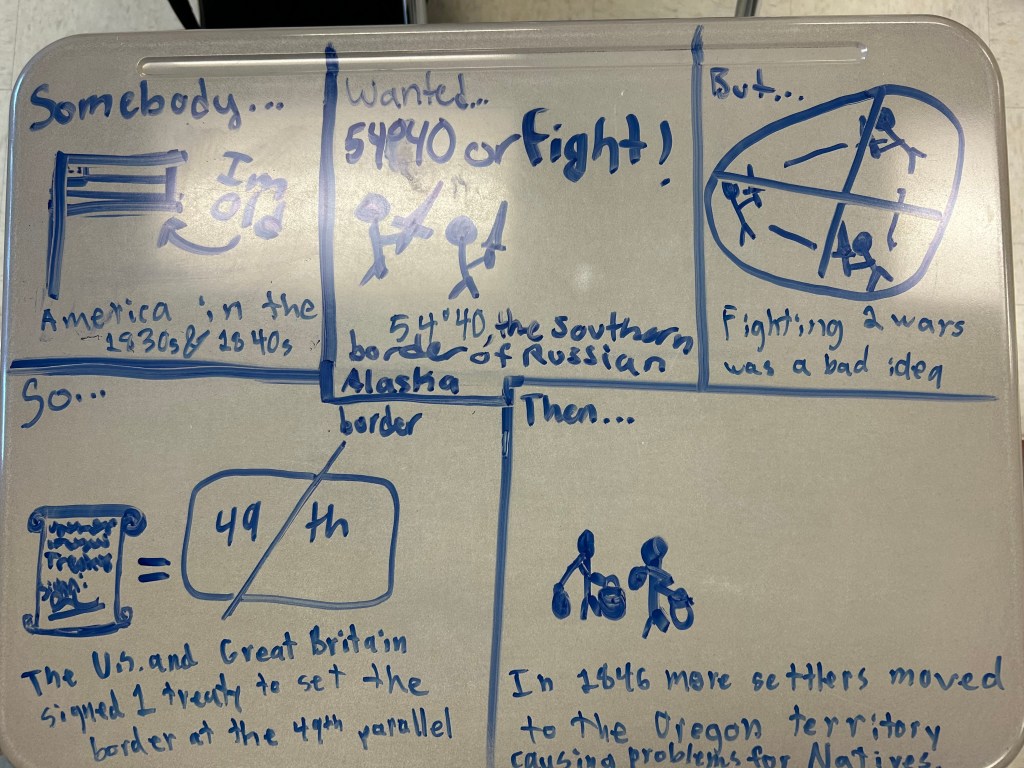
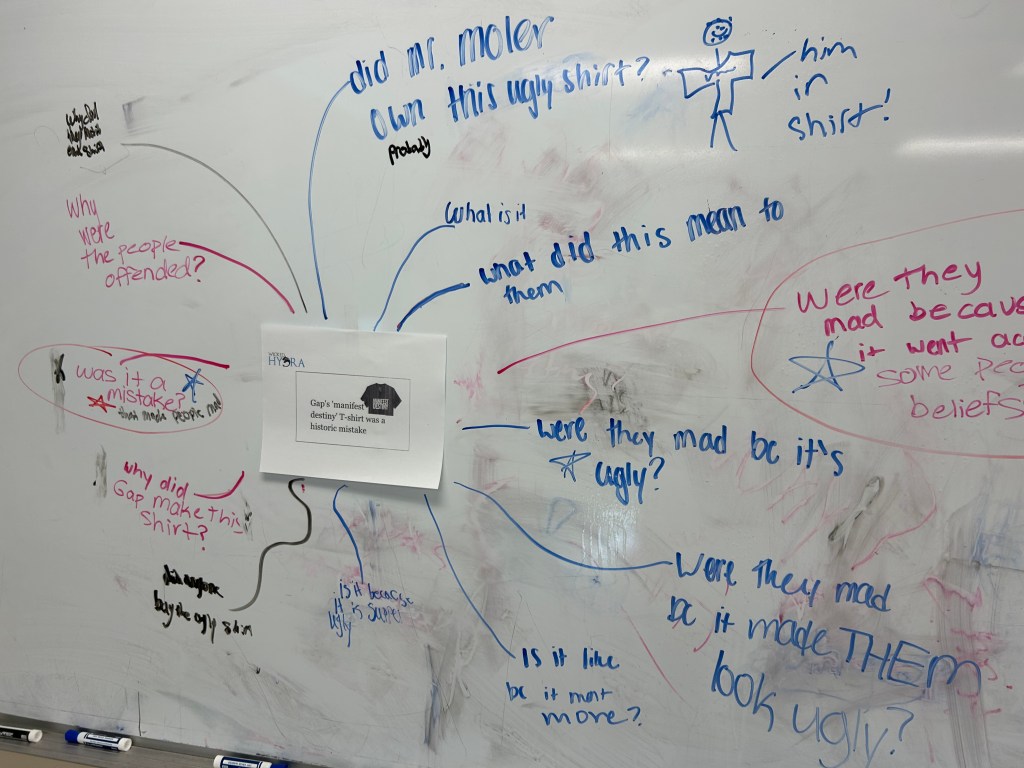
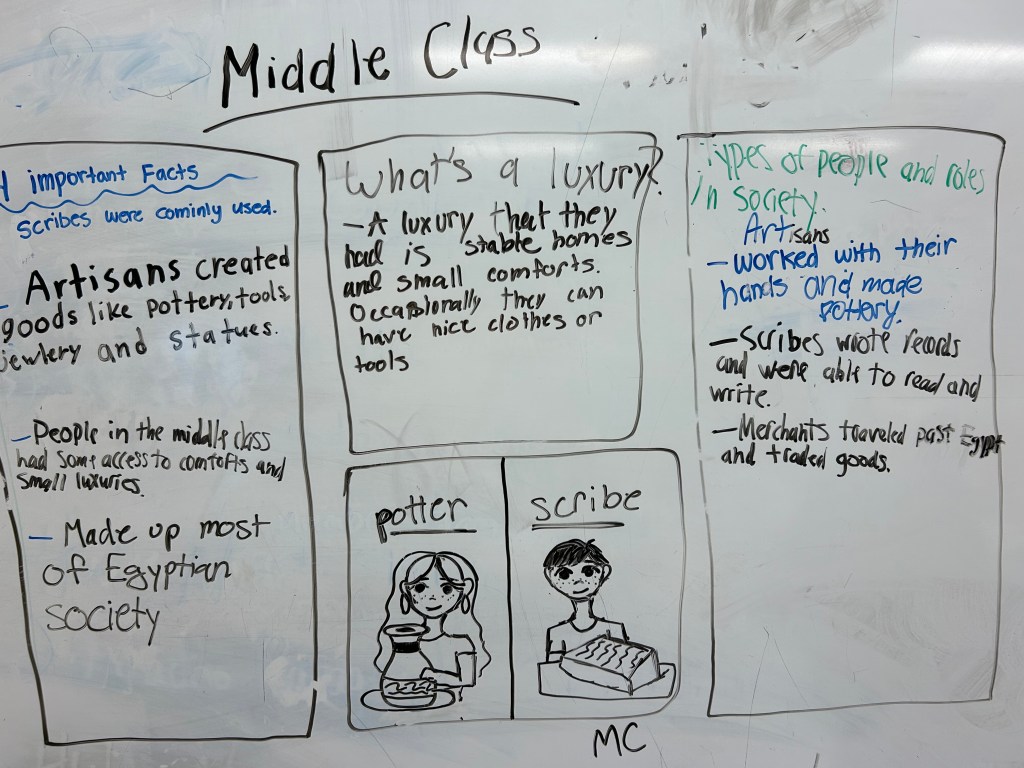
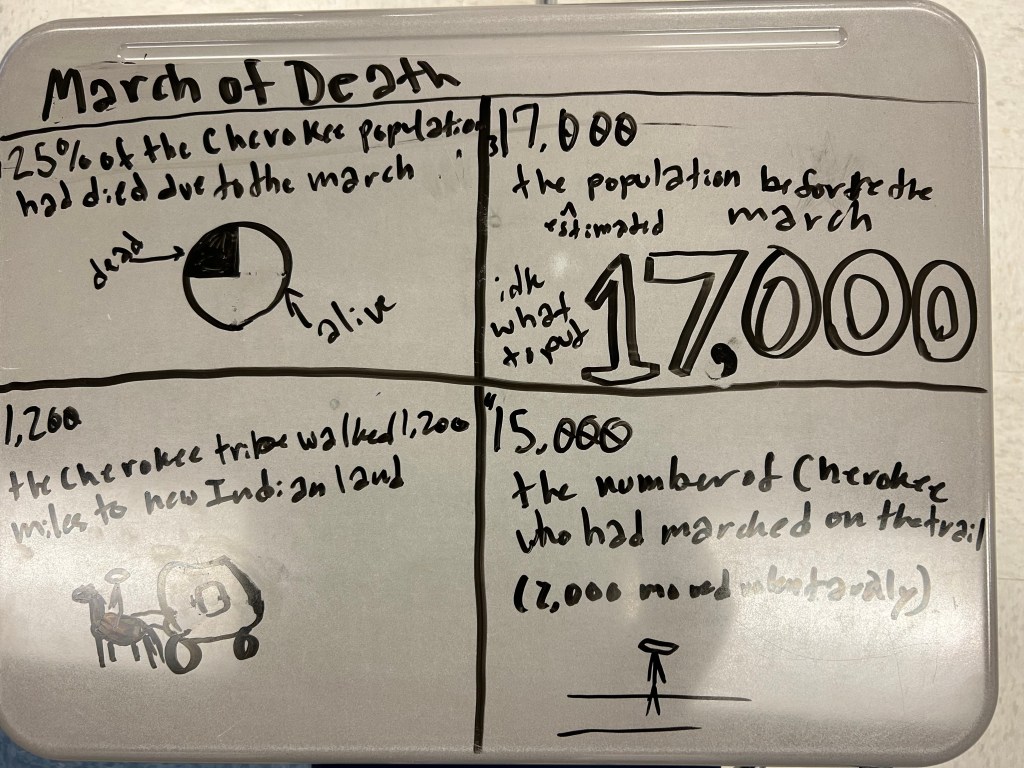
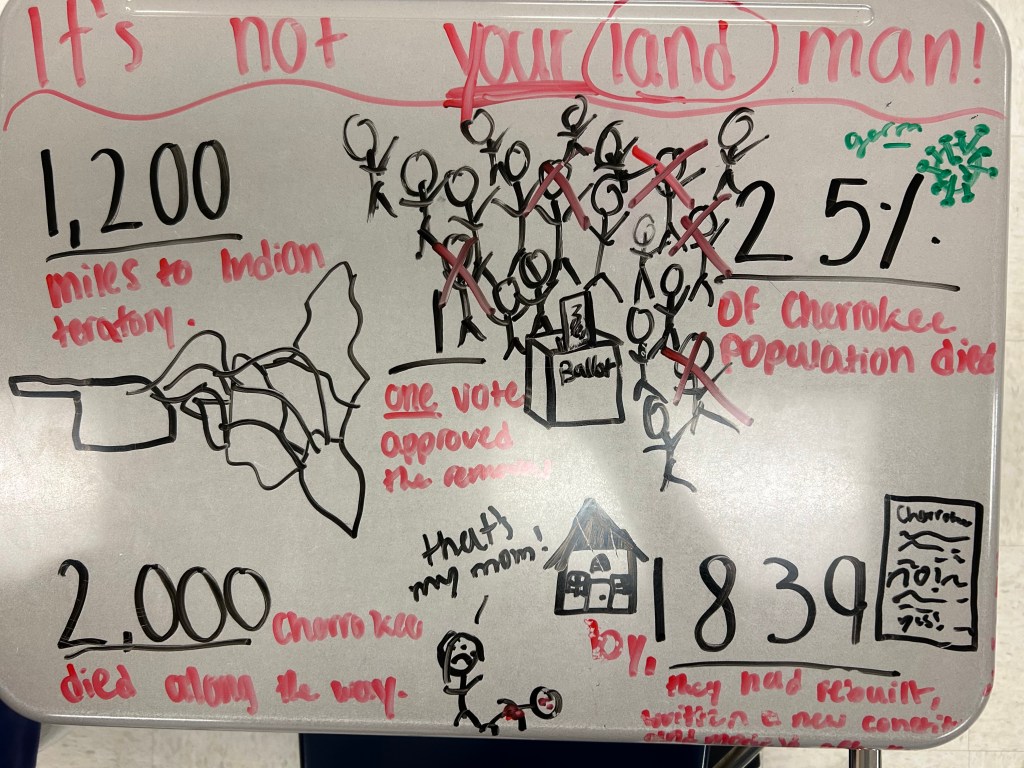
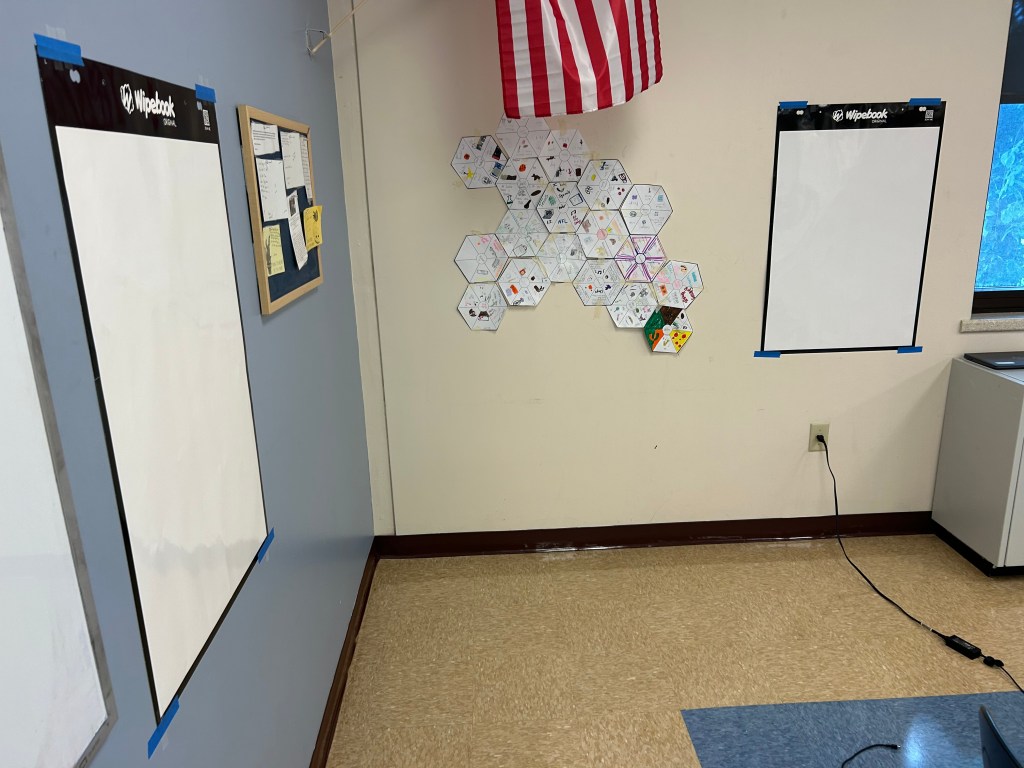
The whiteboards completely changed the feel of the classroom. Students were constantly moving, discussing, comparing ideas, revising answers, and building thinking together. The room stopped feeling like a place where students waited for me to confirm whether something was right or wrong. Instead, students started looking at each other’s ideas and trying to figure things out collaboratively.

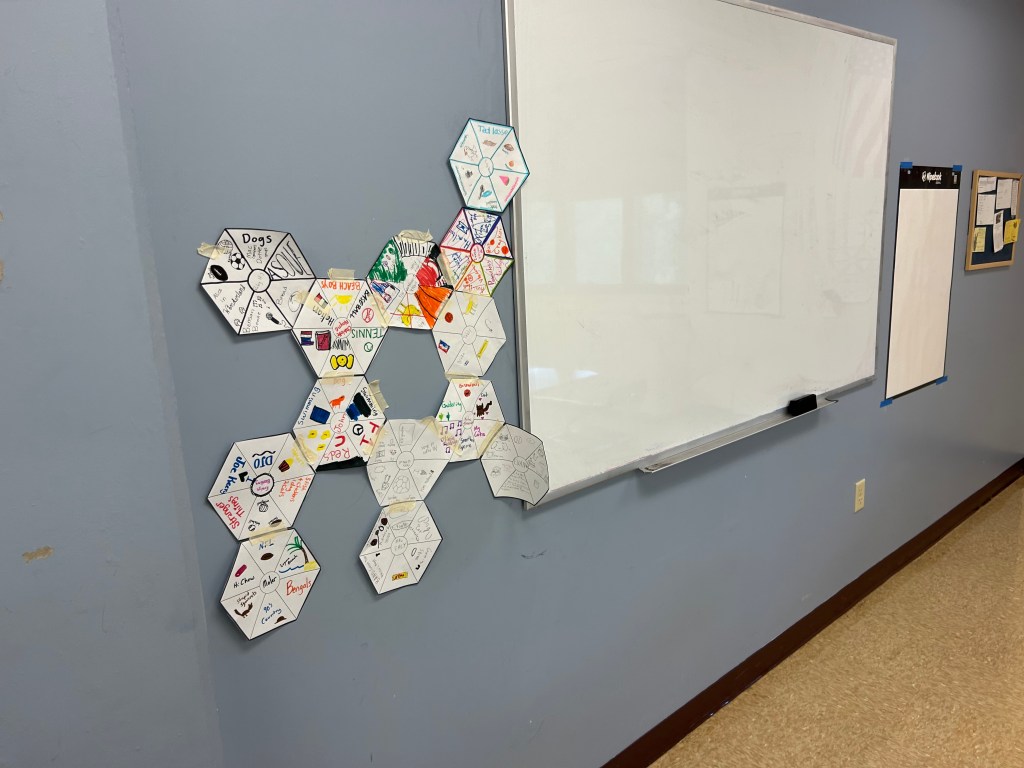
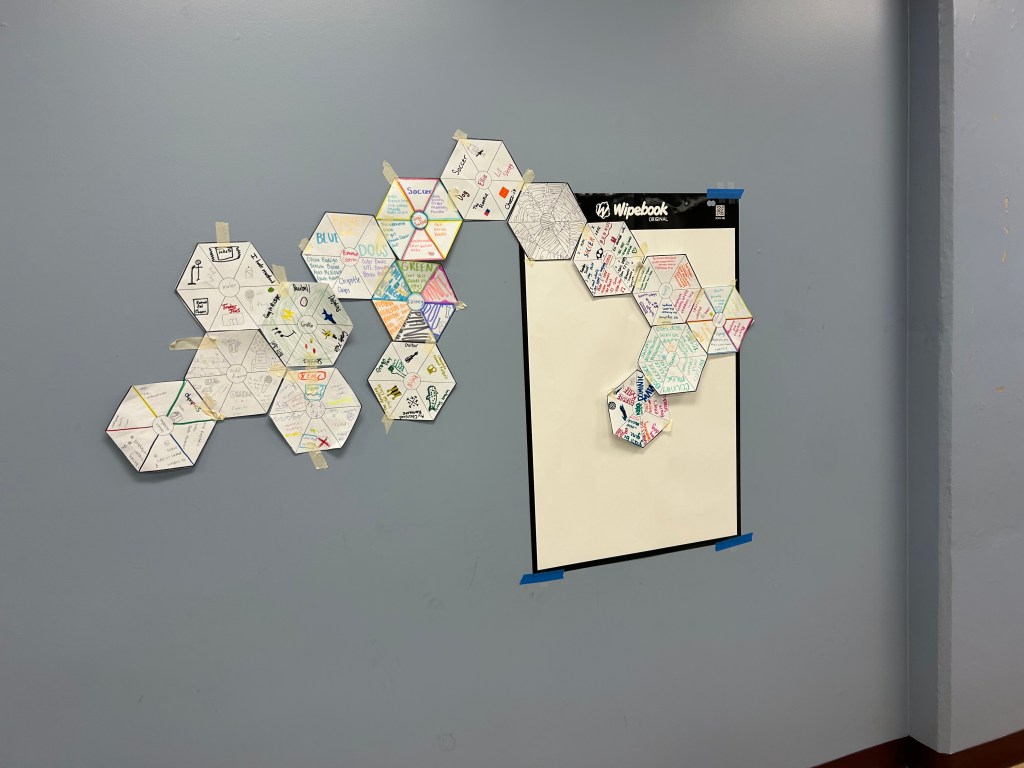
That shift showed up all year long. It happened during abolitionist comparisons when students debated who had the greatest impact and defended their reasoning with evidence. It happened during Number Mania activities where students used data and statistics to support bigger historical claims. It happened during hexagonal thinking when students argued over which events or ideas represented the biggest tests of the Constitution.

The biggest thing BTC did was make thinking public. Students could physically see ideas developing around the room. They could compare their reasoning with other groups, borrow evidence, challenge each other’s thinking, and refine their own ideas in real time. The conversations became better because students were surrounded by thinking instead of isolated from it.

I also think BTC naturally changed assessment. The classroom became less about quietly completing work and more about defending ideas publicly. Students had to explain themselves. They had to justify connections. They had to support arguments. Those are the kinds of skills that feel more important now than simply memorizing information for a test.

Ignite Talks and Snorkl Changed How I Think About Assessment

One of the biggest instructional shifts for me this year was thinking differently about assessment, especially in a world where AI can generate answers instantly.

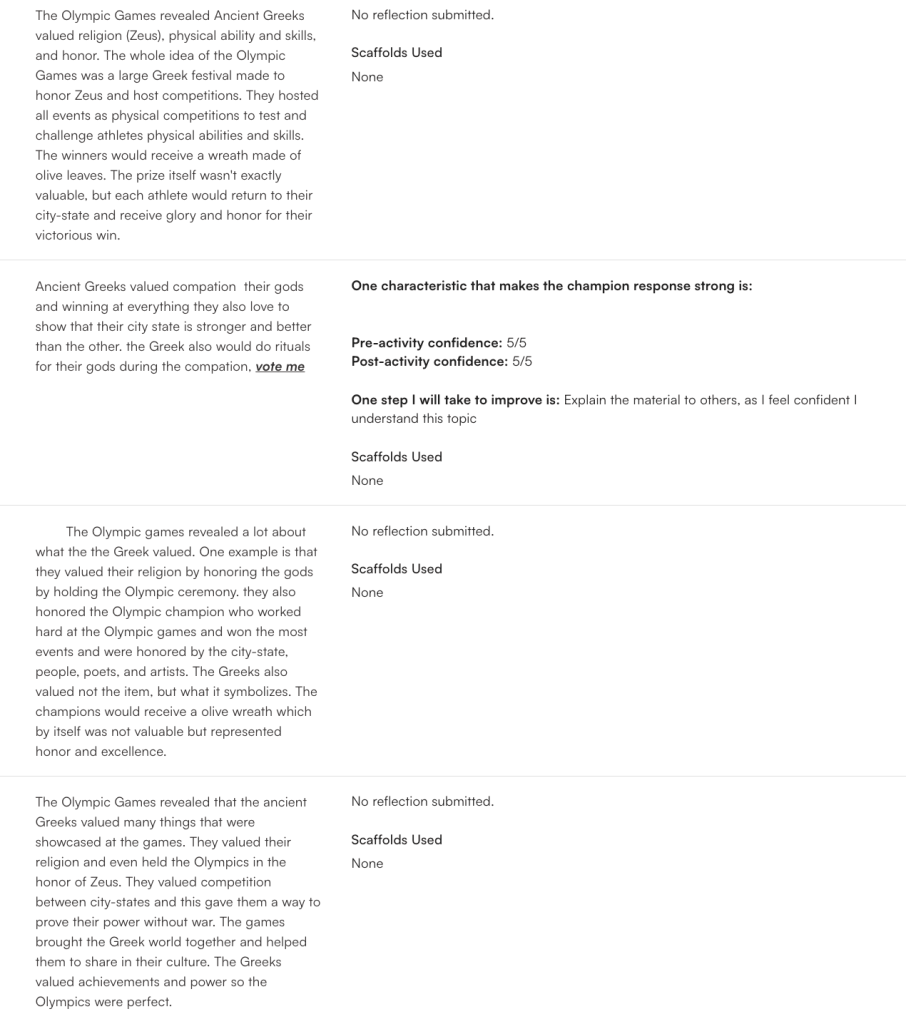
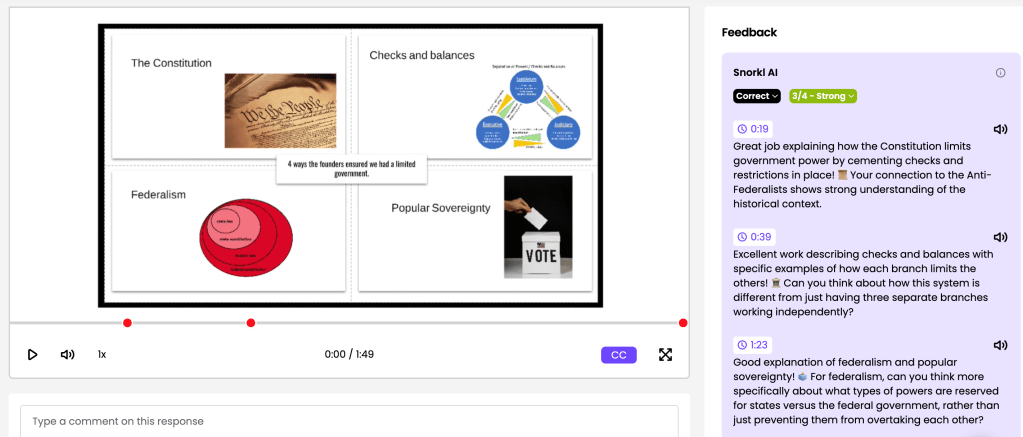
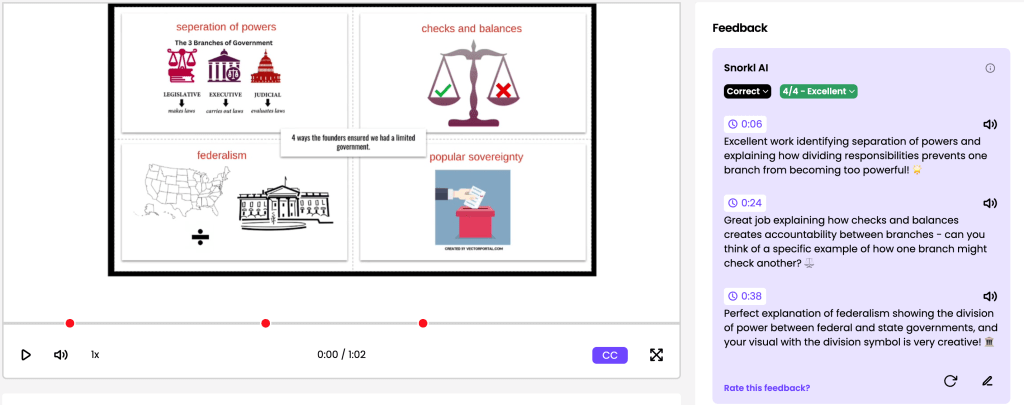
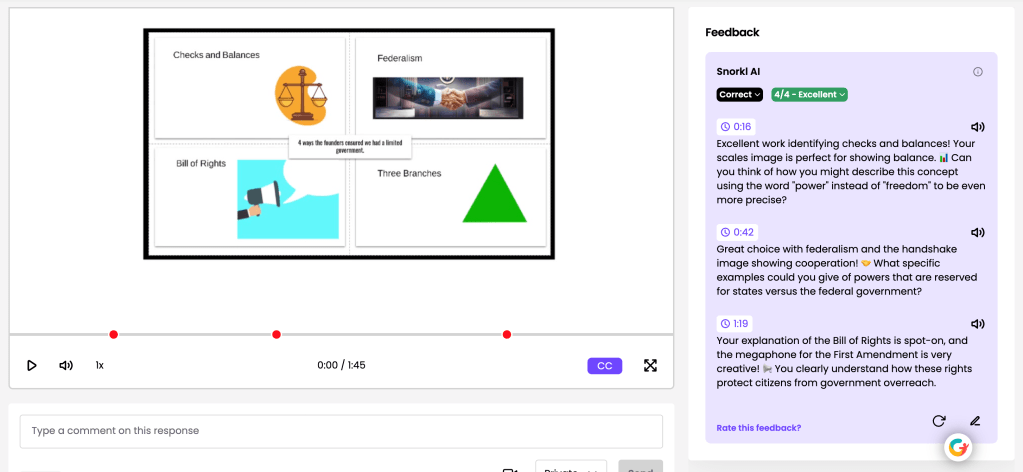
The Ignite Talk over the Constitution and early republic unit really reinforced this for me. Students had to organize ideas, explain historical concepts verbally, connect evidence to claims, and communicate their understanding out loud. AI could support preparation and revision, but it could not do the actual thinking for them.

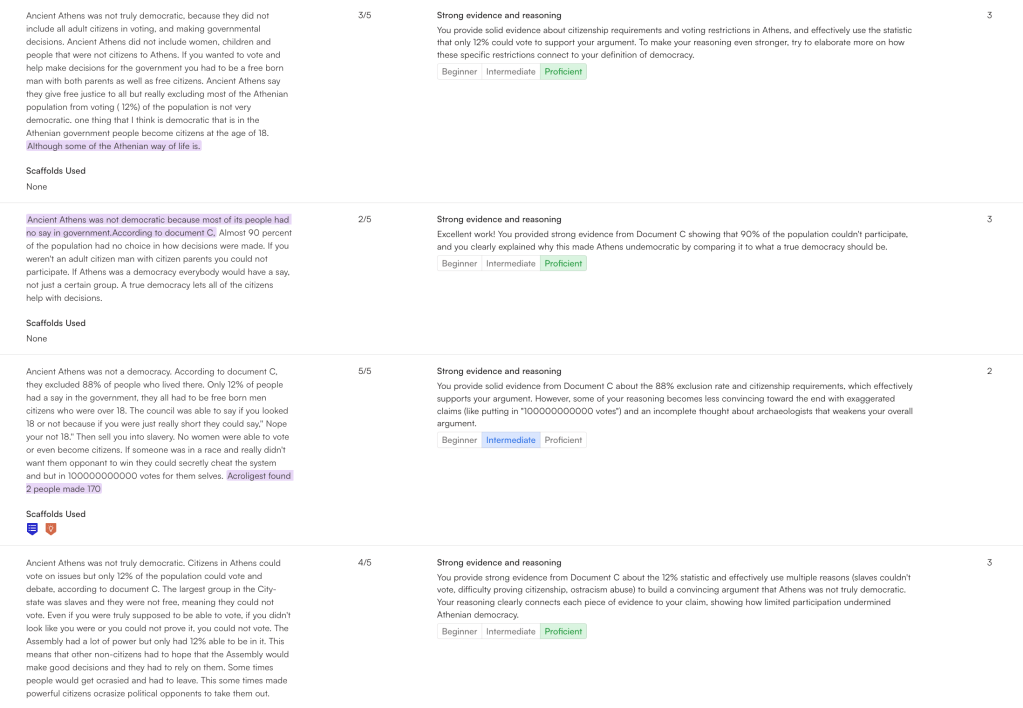
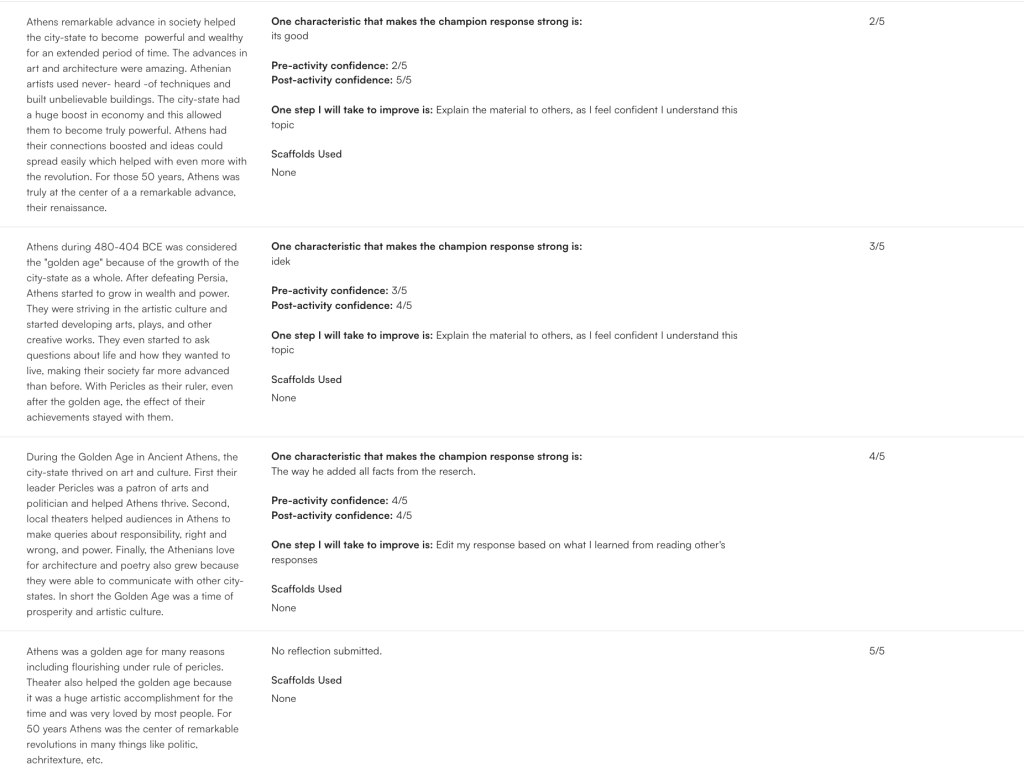
What I liked about using Snorkl alongside writing and discussion activities was how immediate the feedback became. Students no longer had to wait days to find out whether their reasoning made sense. They could revise while the learning was still fresh.

The goal was never to make work easier with AI. The goal was to make feedback faster and revision more meaningful. Students still had to defend ideas, explain evidence, and make sense of historical concepts themselves.

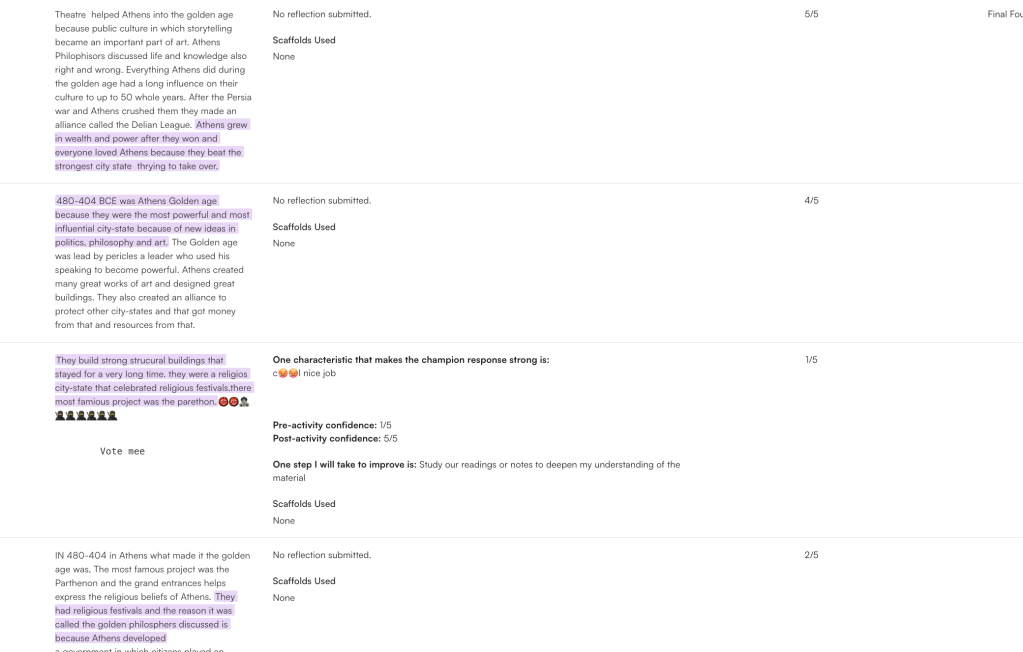
One of my favorite moments all year came during the Cincinnati inquiry when several students asked me to open a Snorkl because they wanted additional feedback on their writing and analysis. That stuck with me because students usually do not ask for more feedback unless they actually care about improving the work.

This year reinforced something I keep thinking about more and more. Assessment cannot just be about recall anymore. Students need opportunities to explain ideas, revise reasoning, communicate verbally, collaborate, and build arguments using evidence. Those skills are much harder to fake, and they also happen to matter far more outside of school.

The Cincinnati Inquiry Unit Became the Strongest Unit of the Year

Out of everything we did this year, the Cincinnati inquiry unit probably became the most meaningful.

Part of that was because it was local history. Students recognized roads, places, and landmarks they had actually seen before. History stopped feeling like something that only happened somewhere else. But the bigger reason the unit worked was because students had to wrestle with contradiction the entire time.

The compelling question asked: “How was Cincinnati a city caught between two worlds before the Civil War?”

That question carried the entire unit because there was never a clean or simple answer. Students explored how Cincinnati represented freedom for some people while still being deeply tied to racism, violence, and systems connected to slavery. They examined the Ohio River as both a symbol of hope and a very real dividing line between free and slave states. They studied Porkopolis, economic growth, abolitionists, anti-abolitionists, and the Cincinnati riots while constantly revisiting the idea that free did not automatically mean equal.

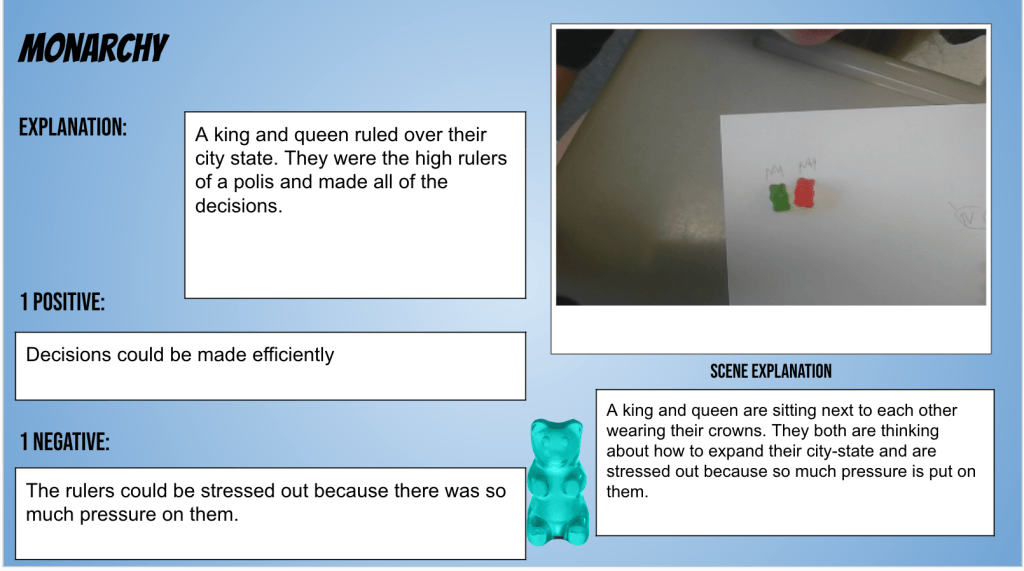
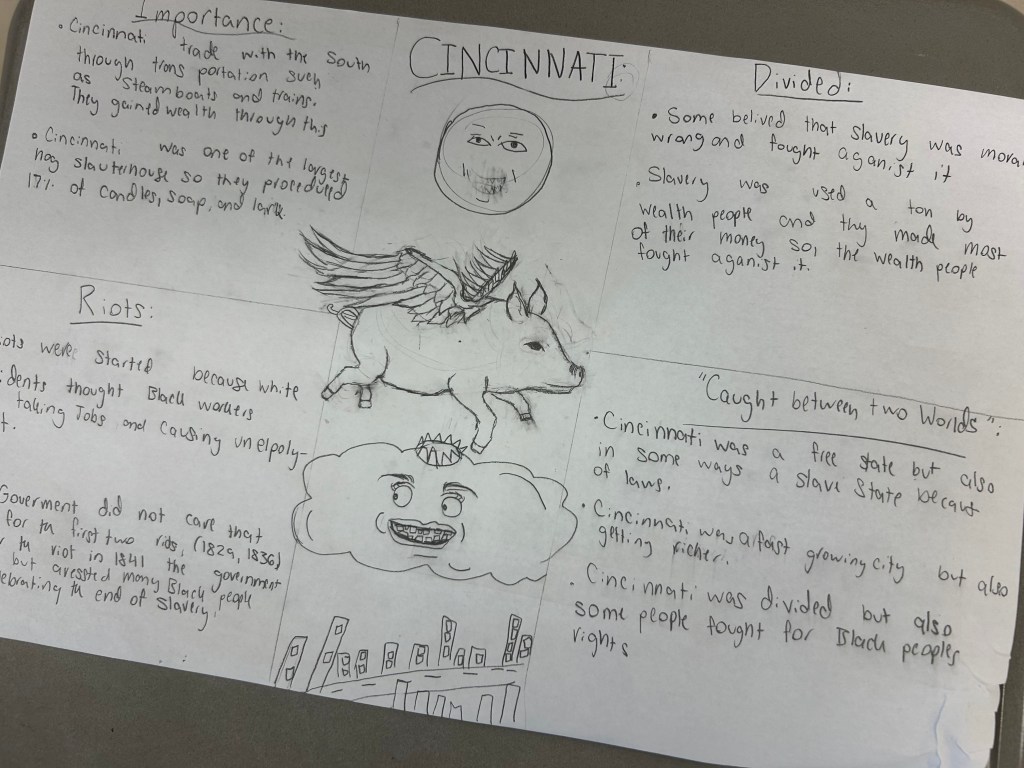
The unit also slowed students down intellectually in a way I really liked. Instead of racing through content, students spent time analyzing evidence, comparing perspectives, discussing tensions, revising ideas, and building understanding piece by piece. The one-pager summative assessments ended up being some of the best work students produced all year because students were not simply repeating information back to me. They were organizing meaning visually and verbally while trying to explain the contradictions within the city itself.
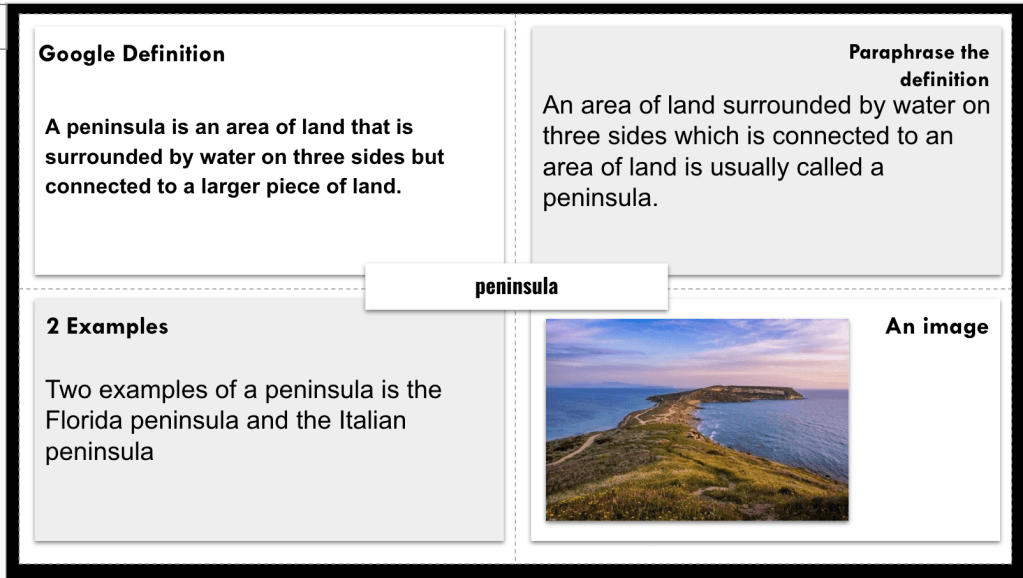
That unit reminded me that inquiry works best when students are trying to make sense of something complicated instead of hunting for a single correct answer.

What I Need to Improve Next Year

As much as I liked many parts of this year, reflecting back also made several things stand out that I need to improve moving forward.

The first is pacing.

Throughout the year, I constantly found myself fighting against time. Shortened classes. Assemblies. Constant schedule changes. Chromebook sign-ins taking forever. Transitions getting interrupted. Some days it felt like half the battle was simply getting everybody logged in and ready to go before losing another chunk of class time.

At the same time, if I am being real about it, I also wish I could have stacked even more EduProtocols together throughout the year. I like tempo in the classroom. I like momentum. I like students constantly shifting between reading, discussing, writing, analyzing, creating, and reflecting while staying connected to the same larger idea or question. Some of my favorite lessons this year were the ones where students moved through multiple structures within the same class period because the energy stayed high and the thinking kept evolving.
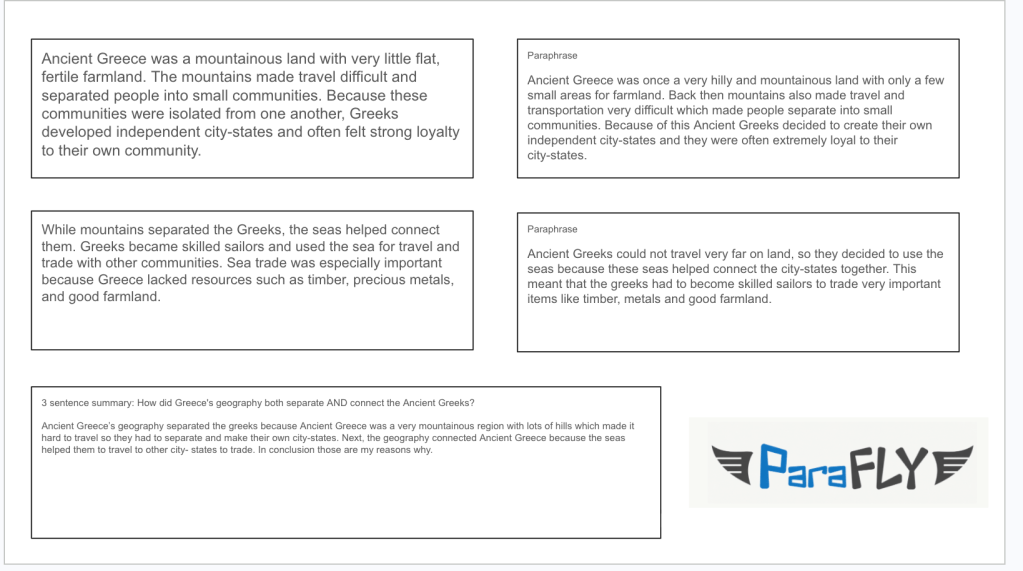
That balance is something I am still trying to figure out.

I do not think the answer is slowing everything down completely. I think the answer is being more intentional with where students need time to process and where the lesson benefits from keeping the pace moving. Some moments need discussion and reflection. Other moments benefit from quick transitions, fast reps, and momentum.
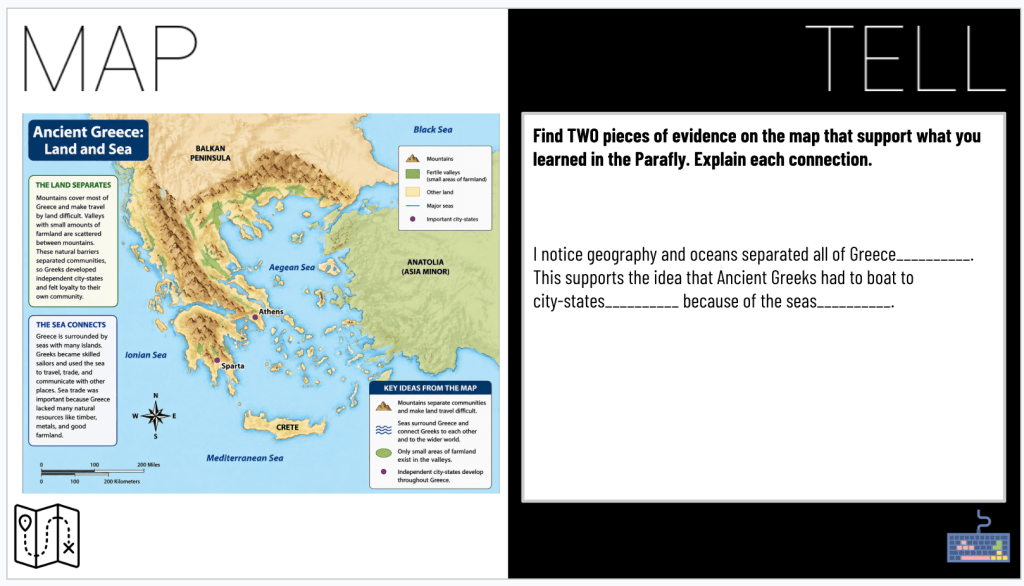
Next year, I want to get better at finding that balance between tempo and processing time. I still want the classroom to feel active and layered, but I also want students having enough time to wrestle with ideas instead of feeling like we always have to move to the next thing.

The second thing I need to improve is being more intentional with how I introduce EduProtocols throughout the year.

This year, students eventually became very comfortable with structures like Thick Slides, Thin Slides, Number Mania, CyberSandwich, Frayer Models, Hexagonal Thinking, and 2xCER. By the second half of the year, students understood the expectations, transitions became smoother, and the protocols started disappearing into the thinking itself instead of becoming the focus of the lesson.

But looking back, I think I could do a much better job intentionally sequencing and introducing those structures from the very beginning of the year.

At times, I introduced protocols because they fit the lesson instead of thinking long term about how they connected together across the entire school year. Next year, I want a clearer progression. I want students building confidence with certain structures early so more complicated thinking routines later in the year feel natural instead of brand new.

I also want students understanding why we are using the structures, not just how to complete them. The goal has never been to do EduProtocols just to say we used an EduProtocol. The goal is helping students organize thinking, communicate ideas, collaborate effectively, and reduce cognitive overload so they can focus on the actual learning.

When I look back at Room 103 this year, the best moments were almost never the moments where students were simply getting the right answer. The best moments were when students argued, revised, questioned, connected ideas, defended claims, and struggled through complicated thinking together.

Locked In Lessons: Why Parafly Works

Why Parafly Matters

One lesson that has become completely locked in for me over the years is Parafly. It can work with any grade level, any subject, and honestly almost any type of content. The reason is simple. Students struggle with paraphrasing far more than we think they do.

I have now been at three different schools, and every single year I ask students about paraphrasing. Every year I get the same response:

“What’s paraphrasing?”

Not “I’m bad at it.” Not “I don’t like it.” Just flat out confusion about what the skill even is. That should probably tell us something about education right now. We assume students know how to paraphrase because they have heard teachers say “put it in your own words” for years. But hearing directions and actually knowing how to do something are two very different things.

I have made the same mistake over and over again myself.

Last school year in 2024, I did not really start using Parafly until November. This past school year in 2025, I somehow waited even longer and did not really start until January. I assumed students already knew how to paraphrase. We all know what happens when you assume.

The reality is students need direct practice with this skill. Especially now. Copying and pasting has become second nature for students. AI has made it even easier. Will Parafly completely solve copying and pasting? No. But it absolutely helps when students feel confident enough to take information and process it in their own words instead of feeling stuck staring at a blank screen.

A lot of students copy because they genuinely do not know what else to do. They panic when they see text. They think writing means changing two random words and hoping nobody notices. Parafly helps students realize they are capable of processing information themselves.

Starting Small and Building Confidence

When I introduce Parafly, I usually do not even start with class content. In years past, I have used ChatGPT and Socrative together to build the routine first before moving into actual social studies content.

I will use ChatGPT to generate one, two, or three sentence animal facts, random funny facts, weird facts, or anything lighthearted enough to lower the pressure. Then I copy and paste those facts directly into Socrative. Students join the room, read the fact, and paraphrase it in their own words. They get one minute. Then I lock it in.

We immediately look at responses together and talk through what students did well. We discuss what stayed too close to the original, what wording changed, how students reorganized information, and what paraphrasing actually looks like. Then we move onto another one. And then another one. Reps. Reps. Reps.

That repetition is the entire point. Students need repeated exposure to the process in a low-stakes environment before they ever apply it to actual class content. What always surprises me is how quickly middle school students start buying into it. Every single year, without fail, a student eventually says: “This is actually fun.”

Paraphrasing. Fun.

Middle school students saying paraphrasing is fun probably sounds ridiculous, but I really think the structure is why it works. The pressure is low. The tasks are short. Students receive immediate feedback. They are not buried under a giant assignment or a massive writing task. They are simply practicing one skill over and over until they start building confidence.

Why the Structure Works

Parafly works because it isolates one important skill and gives students repeated low-stakes practice with immediate feedback. Students are not trying to analyze content, organize an essay, write a paragraph, and cite evidence all at once. They are simply focused on learning how to process information and restate it clearly.

That matters because a lot of students become overwhelmed when too many skills are stacked together immediately. Parafly reduces cognitive overload by narrowing the focus to one manageable task. Students can fully focus on sentence structure, synonyms, shortening ideas, reorganizing information, and understanding meaning without feeling buried by everything else.

Over time, students naturally begin experimenting with writing. They start noticing patterns. They try different sentence structures. They begin combining ideas together or simplifying information more efficiently. Most importantly, they start understanding that paraphrasing is not simply replacing random words with synonyms. It becomes processing meaning.

From a science of learning standpoint, Parafly naturally supports several important areas:

  • Retrieval practice
  • Immediate feedback cycles
  • Low-stakes repetition
  • Cognitive rehearsal
  • Elaboration through sentence restructuring
  • Building automaticity with writing
  • Reducing cognitive overload by isolating one skill
  • Active processing instead of passive copying

Students are actively doing something with information instead of simply transferring words from one place to another. That processing helps students remember information better because they are interacting with meaning instead of memorizing surface-level wording.

Moving Into Actual Content

After students build confidence with the random facts, we transition into actual class content. I will have students paraphrase lines from the United States Declaration of Independence, simplify sections of primary sources, or paraphrase chunks from the textbook.

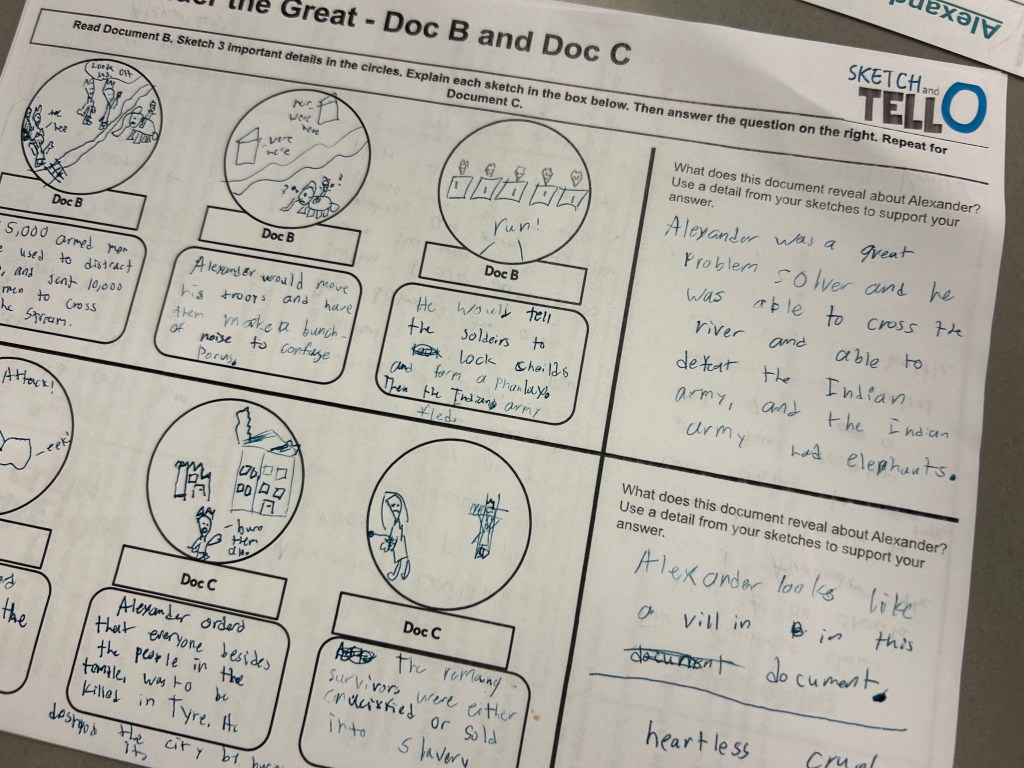
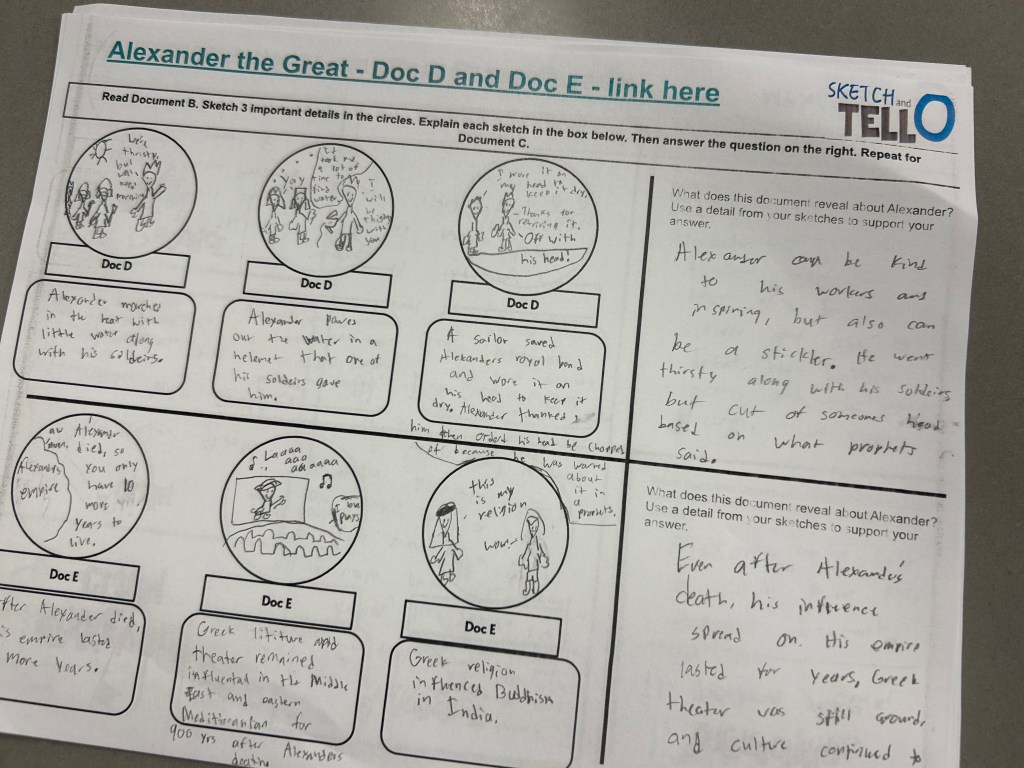
One pairing that works especially well is combining Parafly with Sketch and Tell. Students paraphrase a section, then sketch an image that represents their paraphrase. The sketch forces students to actually process the meaning instead of just swapping words around. Students have to visualize the content and think about what the text is really saying.

I also like having students paraphrase three or four sections from a reading and then use those paraphrases to build a final summary. Suddenly a difficult textbook section feels much more manageable because students are chunking information into smaller pieces instead of trying to summarize everything all at once.

The lesson can honestly be done in ten to fifteen minutes, which is another reason I like it so much. It does not require complicated preparation. It does not require some giant project. It is simple, structured, and repeatable. And the reps add up quickly.

Connecting Parafly to Other EduProtocols

What I also like about Parafly is how naturally it fits into other EduProtocols. It rarely feels like a standalone activity. Instead, it becomes part of the larger learning process throughout the unit.

Students might Parafly information before transferring it into Number Mania. They might use paraphrased notes while building Thick Slides. They might directly paraphrase during Iron Chef. Students can use paraphrases to prepare for summaries, discussions, or even larger writing assignments later in the week.

One strategy I especially like is pairing Parafly with concise writing challenges. Sometimes I will have students paraphrase information and then limit them to a certain number of words. That structure forces students to think carefully about word choice and clarity while removing unnecessary details.

The options really are endless because paraphrasing is not just an English skill or a writing skill. It is a thinking skill. Once students become more comfortable putting ideas into their own words, almost every other classroom activity becomes stronger too.

Final Thoughts

At the end of the day, Parafly is locked in for me because it solves a real problem students have. Students need confidence with writing. Students need opportunities to process information in their own way. Students need structured practice with summarizing and rewording ideas. And honestly, students need to realize they are more capable writers than they think they are.

Parafly helps build that confidence one repetition at a time. Sometimes the best lessons are not the flashy ones. Sometimes the lessons that stay locked in are the ones that quietly build foundational skills students desperately need.

The Week That Was in 103

This week looked a little different. Between interruptions, schedule changes, and all the end-of-year randomness that comes with May, this was not a clean “day-by-day” kind of week. Instead of forcing content forward, we slowed down and focused on a few things that deserved more time. One of the biggest was wrapping up our Cincinnati inquiry unit.

Cincinnati: Caught Between Two Worlds

Our essential question throughout the unit was: “How was Cincinnati a city caught between two worlds before the Civil War?”

Students learned about the Ohio River and how it symbolically divided free and slave states, but we also talked about the reality of the river itself. Before modern dams and river systems, the Ohio River was not always deep or difficult to cross. At certain times of the year, parts of it could be only one to three feet deep or frozen over completely. That small detail changed how many students viewed escape, movement, and the idea of freedom itself.

We also explored why pigs are everywhere in Cincinnati and why the city became known as Porkopolis. Students connected the river to trade, transportation, and economic growth. Cincinnati was booming because of its location, but students also began to realize how connected the city still was to the South economically and culturally.

That contradiction became the center of the inquiry. A free state did not mean free from racism, discrimination, or violence. Students examined the Cincinnati riots of 1829, 1836, and 1841 and discussed what those events revealed about the city. Many students walked into the unit assuming “North = good” and “South = bad.” Local history complicated that thinking in important ways.

Ending the Unit with One-Pagers

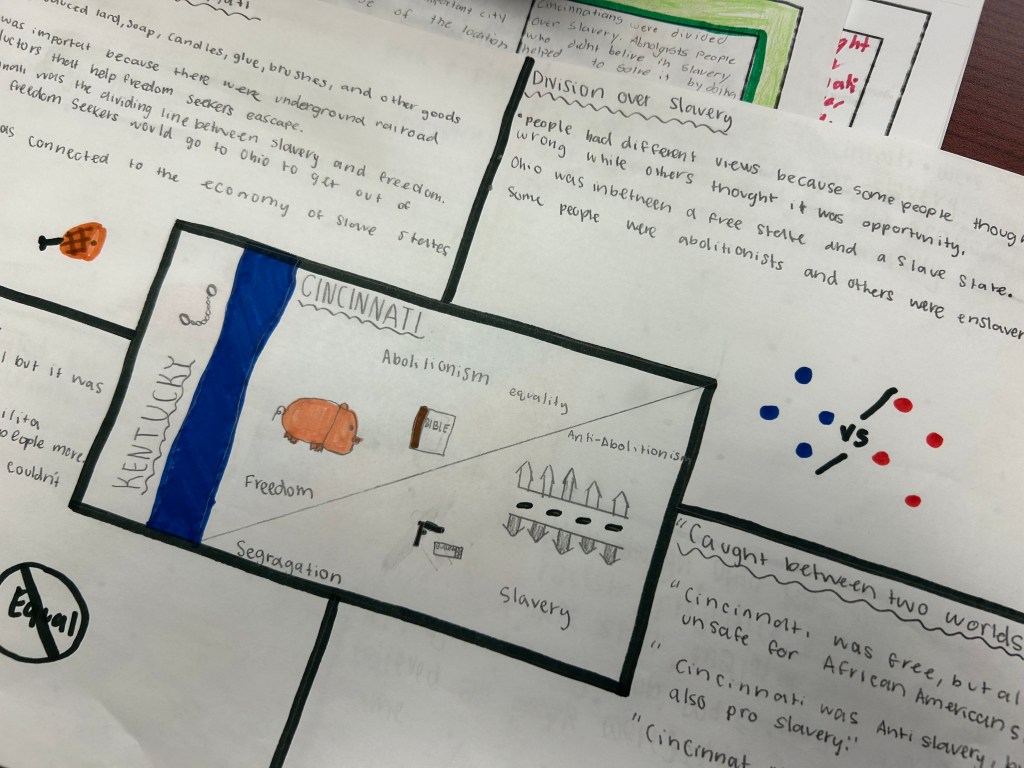
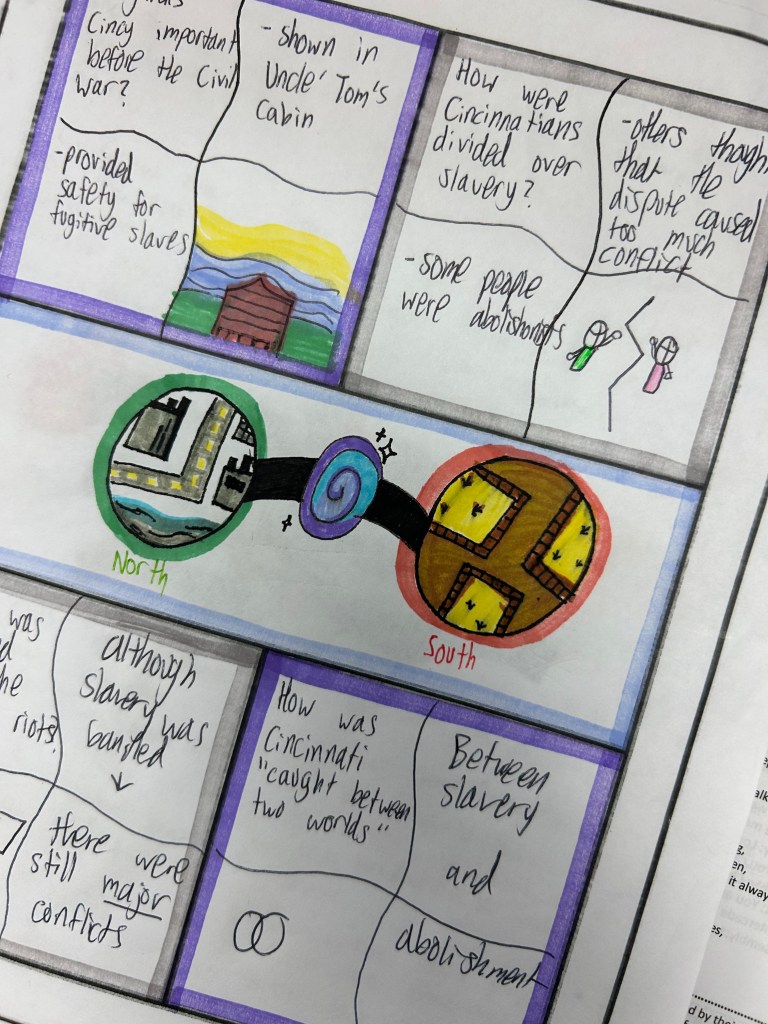
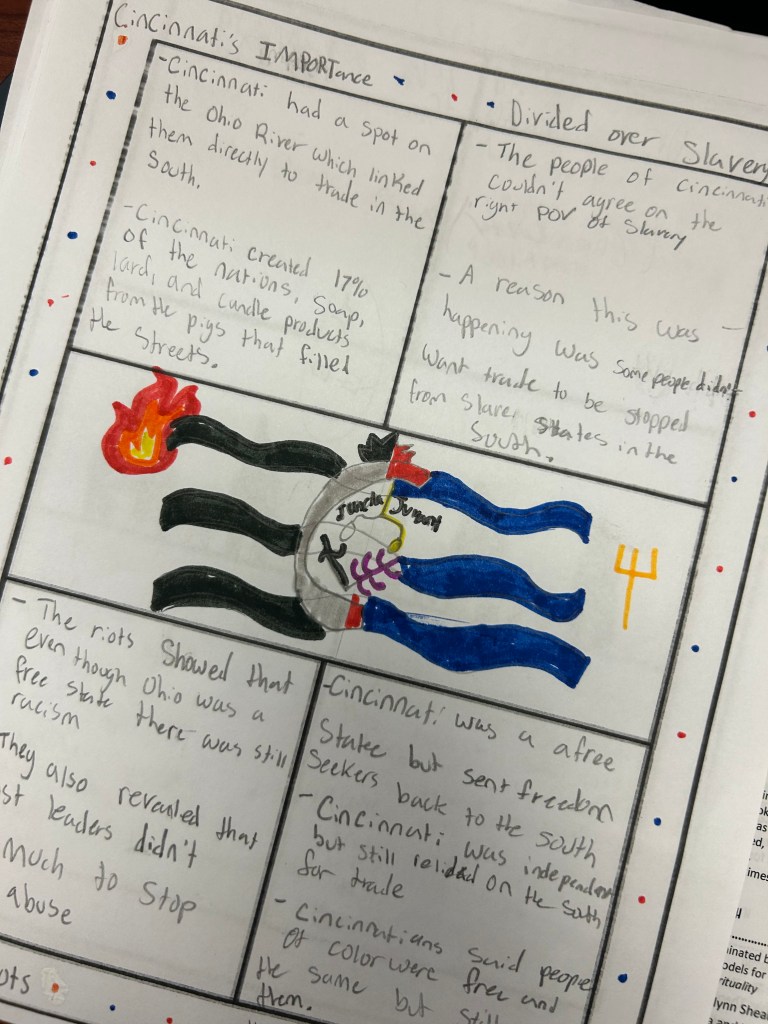
To finish the inquiry, students created one-pagers that visually explained the tensions and contradictions of Cincinnati before the Civil War. The structure of the assignment asked students to break the inquiry into sections:

  • Why Cincinnati became important before the Civil War
  • How Cincinnatians were divided over slavery
  • What the riots revealed about the city
  • Why Cincinnati was “caught between two worlds”

One of my favorite parts was the contradiction statements:
“Cincinnati was ____________, but also ____________.”

Those statements forced students to move beyond simple answers. Cincinnati was a free city, but also deeply discriminatory. It was economically successful, but also divided. It was connected to freedom seekers, but also connected to pro-slavery beliefs and racial violence.

The one-pagers also gave students room to show understanding in different ways. Some students leaned heavily into symbolism with rivers, chains, bridges, and divided maps. Others focused more on evidence and written explanations. A few created visuals that connected Porkopolis, the Ohio River, and the riots all together on the same page.

That is the kind of work I want students doing at the end of a unit. Not just repeating information, but organizing ideas, wrestling with contradictions, and building meaning from evidence.

Turning Coloring Pages Into History

The other thing we did this week was much lighter. My 8th graders are graduating soon. At this point in the year, they still need structure and purpose, but they also need room to breathe a little. I wanted something creative, low stress, and genuinely fun. So I went down a rabbit hole.

I found coloring pages on Crayola’s website, used ChatGPT along with old pictures of myself, and made a collection of weirdly specific coloring pages connected to our class. Then students had to transform the coloring page into a historical scene or moment. That was it. Add at least five historical details or symbols and explain what you added.

Some students turned Bluey into historical figures. Others added scenes from westward expansion, the American Revolution, or industrialization. One student turned a coloring page into a tea protest scene complete with taxation references and a burning building. Another added a Mississippi River reference into a western expansion design. One student even turned me into a coloring page.

And honestly, it ended up being one of those assignments where students quietly worked longer than expected because they were invested in it.

There was something fun about watching middle schoolers take a simple coloring page and turn it into something historical, creative, and weirdly thoughtful. Some were funny. Some were surprisingly detailed. A few looked like absolute chaos in the best way possible.

Locked In Lessons: Annotated Maps and Helping Students See Geography as Part of the Story

Why Annotated Maps Matter

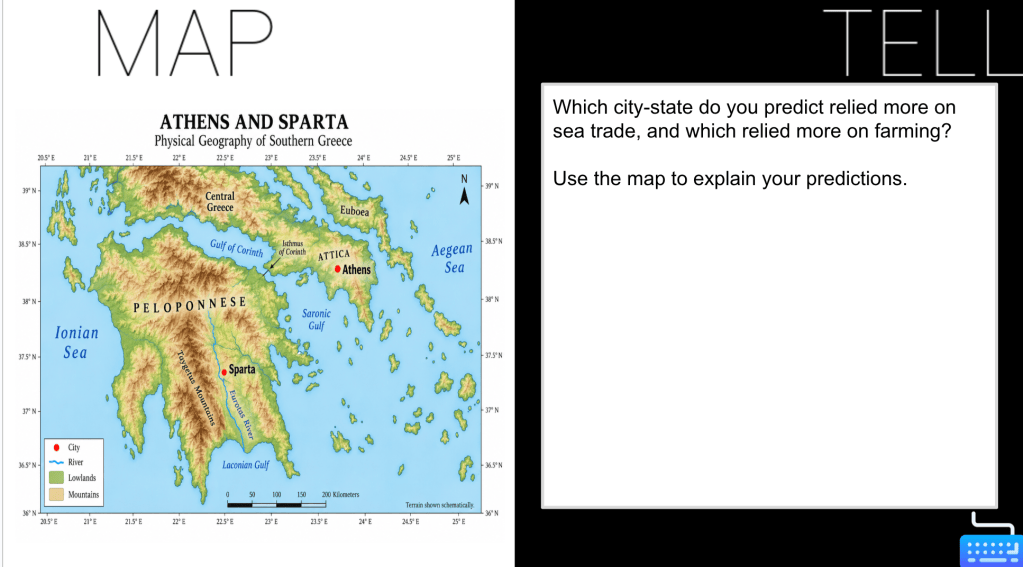
One strategy that has become completely locked in for me over the years is annotated maps. I have used annotated maps with Westward Expansion, the Crusades, the French and Indian War, European Exploration and Colonization, and the Causes of the Civil War. No matter the topic, the goal always stays the same. I want students to see the relationship between geography and history instead of viewing maps as something separate from the actual content.

Too often students look at maps as a quick reference tool instead of historical evidence. They memorize locations for a quiz, but never fully think about why rivers mattered, why cities developed where they did, why territories became contested, or why expansion happened in certain directions. Annotated maps slow students down and force them to think about those relationships while they are building the map itself.

The activity also combines so many important skills together naturally. Students are researching, organizing information, analyzing cause and effect, discussing ideas, creating visuals, and continuously revisiting a larger historical question. The map becomes much more than a geography assignment. It becomes a thinking activity.

Starting With a Driving Question

The entire process starts with a compelling or driving question. Questions like:

  1. How did manifest destiny contribute to Westward Expansion?
  2. How did Europeans explore and colonize North America?
  3. Which led most to the expansion of Islam – innovation, trade, or conflict?

The question gives the map purpose. Students are not simply drawing locations because the teacher told them to. Every label, annotation, and piece of research should connect back to answering the larger historical question.

I think the driving question changes the quality of student thinking immediately. Students stop seeing the map as a worksheet and start seeing it as evidence that helps explain historical events. Instead of memorizing isolated facts, they begin making connections between geography and the decisions people made throughout history.

Hand Drawing the Maps

I also have students hand draw the maps. No tracing and no pre-made outlines. I hear complaints every single time we start, but I continue doing it because students pay far more attention to geography when they physically create the map themselves.

The process of drawing the map forces students to interact with the geography instead of passively looking at it. Students slow down and begin recognizing patterns they normally would not notice if they were simply filling in labels on a printed worksheet. I also think there is value in students physically creating something themselves instead of instantly relying on technology to do the work for them.

The maps are rarely perfect, but perfection is not the goal. The goal is building understanding through the process of creating the map.

Building the Annotations Through EduProtocols

Once the maps are drawn and labeled in the center of the page, students begin building annotations around the outside of the map. Those annotations might include statistics, explanations, cause and effect relationships, evidence from readings, visuals, symbols, or short written responses connected to the driving question. The annotations are what transform the activity from a geography worksheet into a historical thinking activity.

What I really like about annotated maps is how naturally they pair with EduProtocols. The annotations do not need to come from one giant lecture or packet. Instead, students build their annotations from the learning and research they complete throughout the unit using different protocols.

In the past, I have done a series of CyberSandwiches where students read, discussed, and summarized information connected to the driving question. As students built summaries throughout the week, they continuously referred back to those summaries while creating annotations around the map. This worked really well because students already had manageable chunks of information prepared instead of trying to start the entire map from scratch at the very end.

I have also paired annotated maps with Thick Slides. Students completed a series of Thick Slides connected to different parts of the unit, then used those slides as references while building the annotations around their maps. The Thick Slides helped students organize important information, visuals, and evidence before transferring their thinking onto the poster itself.

One pairing that worked especially well was using the ParaFLY EduProtocol before students annotated the maps. Students practiced paraphrasing information from readings, then transferred their paraphrased information directly onto the poster. This helped students avoid simply copying information word for word and forced them to process the content more carefully before adding it to the map.

A strategy I really liked using alongside ParaFLY involved rolling dice to help students practice concise writing. I used a dice with numbers ranging from 10 to 30. After rolling the dice, students had to annotate and explain information using that exact number of words. The structure forced students to think carefully about word choice, summarize information clearly, and avoid adding unnecessary details. It also created a simple challenge that kept students engaged while practicing paraphrasing and summarizing skills.

The combination of annotated maps and EduProtocols works well because students are constantly revisiting information, discussing ideas, summarizing learning, and transferring knowledge into a visual format. Instead of the map becoming a standalone assignment at the end of the unit, it becomes the place where all of the learning throughout the week starts coming together.

Formative or Summative? Both Work.

One reason annotated maps have stayed locked in for me is because they are flexible. Sometimes students build the map over several days as a formative assessment where they continuously add new learning and revise their thinking throughout the unit. Other times the annotated map becomes the final summative assessment where students synthesize everything they learned into one product.

I have paired annotated maps with several EduProtocols where students answer the compelling question directly beside the map using evidence gathered throughout the unit. That combination works really well because students are visually organizing information while also practicing historical writing skills.

The finished products also give me a much clearer picture of student thinking than many traditional assessments. Students are organizing, connecting, explaining, and applying information instead of simply selecting answers on a multiple choice test.

Why the Structure Works

What I like most about annotated maps is that students are constantly doing something with the information. They are researching, organizing, discussing, connecting ideas, revisiting the driving question, and visually showing relationships between geography and history. Students begin recognizing that geography is not just background information. Geography shapes decisions, trade, migration, conflict, expansion, and power.

I also think annotated maps work well because they naturally keep cognitive load manageable. Instead of overwhelming students with a massive project all at once, students build understanding piece by piece while continuously connecting information back to the same central question. The map becomes an organizational structure for their thinking.

The structure also works because students create something meaningful while interacting with content from multiple angles. They are writing, drawing, researching, discussing, and analyzing all within the same activity.

Final Thoughts

At the end of the activity, students have something visual and tangible that represents their learning. More importantly, they begin seeing history differently. Historical events stop feeling random because students can physically see how geography influenced the story.

That connection between geography and history is why annotated maps have stayed completely locked in for me for years.

The Week That Was in 103: Cincinnati, Conflict, and a City Caught Between Two Worlds

Sometimes the timing of a unit matters just as much as the content itself.

As the school year winds down, it can be tempting to rush through major topics just to “cover” them before summer. I’ve never believed in that approach. I refuse to sprint through the causes of the Civil War just so I can say I taught it. Especially when I know I’ll have these same students again next year and can teach it the right way with the depth and time it deserves.

Instead, this became the perfect opportunity to slow down and teach something meaningful: local history.

This week in Room 103, we launched a brand new inquiry unit centered around the compelling question: “How was Cincinnati a city caught between two worlds before the Civil War?”

The unit built directly off our previous learning about slavery and abolition, but shifted the focus toward our own city. Too often, students learn history as something distant that happened somewhere else to someone else. I wanted students to understand that Cincinnati was deeply connected to the tensions surrounding slavery, freedom, economics, racism, and division before the Civil War.

I also wanted students to wrestle with an important truth that sometimes gets lost in simplified historical narratives: crossing the Ohio River did not automatically mean freedom in the way many people imagine it today.

Yes, the Ohio River represented hope. It represented possibility. But freedom from slavery did not mean freedom from racism, discrimination, segregation, or violence. Cincinnati had Black Laws designed to oppress African Americans. Slave catchers still roamed the riverbanks. Racial tensions exploded into riots in 1829, 1836, and 1841. The city itself was divided economically, politically, and morally over slavery.

That complexity became the heart of the unit. Instead of teaching Cincinnati as a simple “free city,” students explored the idea that it was a place caught between North and South, freedom and oppression, growth and division.

The entire unit was designed using an Inquiry Design Model structure with supporting questions that built toward that bigger understanding. We ended up focusing on Supporting Questions 1, 2, and 4 this week. I ultimately removed Supporting Question 3 because it started feeling repetitive once the inquiry evolved.

I also revised Supporting Question 2 to better fit the direction of the unit: “How were Cincinnatians divided over slavery?” Students needed to see that the conflict wasn’t just happening nationally. It was happening in neighborhoods, newspapers, businesses, churches, and homes right here in Cincinnati.

One thing I really liked about this week was how naturally local history increased engagement. Students recognized street names. They recognized locations. They recognized connections to places they’ve driven past their entire lives.

The inquiry structure also helped slow students down intellectually. Instead of memorizing disconnected facts, they spent the week analyzing evidence, discussing competing viewpoints, interpreting numbers, comparing perspectives, and building arguments about their own city.

Staging the Question

Number Mania: Cincinnati on the Rise

To begin the unit, we staged the question with a Number Mania paired with a Short Answer Battle Royale. The goal was to immediately establish Cincinnati as a growing and increasingly important city before the Civil War. I wanted students to see Cincinnati not just as a dot on a map, but as a rapidly expanding river city connected to trade, migration, movement, and opportunity because of its location along the Ohio River.

Students analyzed a Number Mania infographic built around the question: “What evidence shows Cincinnati was growing into an important city before the Civil War?”

The infographic included population growth, trade statistics, immigration numbers, housing growth, and other data tied to Cincinnati’s early development. Instead of simply reading about the city’s growth, students had to interpret the numbers and determine what they revealed about Cincinnati’s rise shortly after its founding.

Short Answer Battle Royale

After analyzing the infographic, students moved into Short Answer where they explained how the numbers proved Cincinnati was becoming an important city. Students attached screenshots of their Number Mania directly into their responses so the evidence and explanation were connected together.

One thing I liked about this lesson was that it naturally pushed students beyond just identifying numbers. They had to explain significance. A large population number by itself means nothing unless students can connect it to trade, opportunity, immigration, industry, or geographic importance. To wrap up the activity, we ran a Battle Royale focused on one simple goal: the clearest explanation of the content.

Students compared responses, evaluated clarity, and saw examples of strong historical reasoning from their classmates. It turned what could have been a basic writing response into something far more engaging and discussion-driven.

Student Ownership and Feedback

One thing that stood out to me was that several students actually requested that I set up a Snorkl afterward so they could get feedback on both their Number Mania analysis and their writing. That was a cool moment because it showed students were invested enough in the task that they wanted additional feedback and revision opportunities instead of simply turning something in and moving on. It also reinforced something I’ve talked about a lot this year: when students care about the work, feedback becomes valuable instead of feeling like punishment.

Building the Foundation for the Inquiry

More importantly, the lesson helped establish one of the major ideas for the entire inquiry unit: Cincinnati’s location and growth made it incredibly important before the Civil War, but that same growth also intensified many of the tensions that would divide the city.

Supporting Question #1

What Made Cincinnati an Important City Before the Civil War?

After staging the question with Number Mania, students moved into Supporting Question #1 where they began digging deeper into why Cincinnati became such an important city before the Civil War.

Students worked through a series of sources connected to trade, the Ohio River, Porkopolis, transportation, and Cincinnati’s economic growth.

One thing I wanted students to understand was that Cincinnati’s growth was not random. Geography mattered. The Ohio River mattered. Trade mattered. The city’s location connected it to both the North and the South, which helped Cincinnati grow rapidly into a major economic center.

At the same time, students also began seeing the complicated reality underneath that growth. Cincinnati benefited economically from trade connected to slavery even while existing in a free state. That idea became one of the foundational understandings for the rest of the inquiry unit.

Working Through the Sources

Students answered questions connected to each source before bringing all of their thinking together into a Thick Slide. I’ve found that this process helps students organize their thinking before asking them to synthesize larger ideas. The sources themselves also helped challenge some misconceptions students had about Cincinnati and the Ohio River.

One source focused on Porkopolis and how Cincinnati’s pork industry exploded because of Southern trade and plantation economies. Another examined the Ohio River itself and how different it looked before dams were built. Students were shocked to learn that the river was not always the giant barrier they imagine today and that, during dry periods, some areas became shallow enough to carefully cross on foot.

Too often, students hear simplified Underground Railroad stories that make the crossing sound like an automatic path to freedom. I wanted them to understand the danger, uncertainty, and complexity involved. Crossing the river mattered, but it did not magically erase racism, discrimination, or danger.

Thick Slides as Learning Artifacts

Once students worked through the sources and questions, they summarized their learning using a Thick Slide template.

Students created titles, identified five important facts, added visuals, wrote a summary explaining why Cincinnati was important before the Civil War, and finished with a three word summary that captured the overall idea of the lesson.

I want students leaving each supporting question with something meaningful they can revisit later during the summative assessment. Instead of isolated worksheets or notes that disappear into folders, students are building a collection of evidence and thinking throughout the inquiry.

By the end of the unit, students won’t just have “completed activities.” They’ll have artifacts showing how their understanding evolved across the inquiry itself.

Supporting Question #2

How Were Cincinnatians Divided Over Slavery Before the Civil War?

For Supporting Question #2, students shifted from studying Cincinnati’s growth to studying Cincinnati’s divisions. This part of the inquiry focused on a question that became more and more important as students moved through the sources: “How were Cincinnatians divided over slavery before the Civil War?”

To explore this question, students examined four very different Cincinnati voices and perspectives connected to slavery and abolition. Students analyzed Harriet Beecher Stowe and how her experiences living in Cincinnati helped shape Uncle Tom’s Cabin and spread anti-slavery ideas across the North. They examined Salmon P. Chase and how he defended freedom seekers and challenged slavery in court while living in Cincinnati. Students also studied Charles McMicken and how some wealthy Cincinnati businessmen benefited from systems connected to slavery even while living in a free state.

Finally, students analyzed an article from the Cincinnati Post and Anti-Abolitionist newspaper that argued abolitionists were creating division and threatening the future of the country. I thought this lesson really helped students understand that Cincinnati was not unified in its thinking about slavery. Some people actively fought against slavery. Others economically benefited from it. Others feared abolitionists would destroy the Union itself.

Too often students want history to fit into clear “good side vs. bad side” categories. This lesson forced students to wrestle with the uncomfortable reality that people living in the same city could view slavery in completely different ways.

Thick Slides and Consistency Across the Inquiry

To keep consistency across the inquiry unit, students once again created Thick Slides as their learning artifact for the supporting question. Students summarized four different views over slavery in Cincinnati, added visuals, wrote explanations about why Cincinnatians were divided, and created a three word summary capturing the overall tension within the city.

I’ve found that keeping a consistent structure across the inquiry helps students focus more on the thinking and less on figuring out a brand new activity every day. The consistency also allows students to clearly see how each supporting question connects back to the larger compelling question. By this point in the unit, students were beginning to recognize a major theme: Cincinnati was economically, politically, and morally caught between North and South.

Short Answer Battle Royale

We finished class with another Short Answer Battle Royale where students used evidence from their Thick Slides to answer the supporting question. What I liked about this part was that students already had organized evidence directly in front of them from the learning artifact they created. Instead of scrambling to remember information, students could focus on constructing stronger explanations and arguments.

The discussions were also stronger because students had analyzed multiple perspectives beforehand. They weren’t just repeating one side. They were comparing viewpoints, weighing evidence, and trying to explain why divisions existed in the first place. That’s the kind of historical thinking I want students doing at this point in the year.

Supporting Question #3

What Did the Cincinnati Riots Reveal About the City Before the Civil War?

For this supporting question, we used a CyberSandwich focused on the Cincinnati riots of 1829, 1836, and 1841.

Each student received a different article connected to one of the riots. Students individually read their assigned source, took notes, and prepared to teach their classmates about what happened during that specific riot.

The note taking focused on several major questions:

When did the riot take place?
Who was involved?
What happened during the riot?
Why did the riot happen?
How did leaders or the government respond?
What did the riot reveal about Cincinnati?

The structure worked really well because students became responsible for becoming “experts” on their specific riot before collaborating with others.

Comparing the Riots

After students completed their notes, they worked together to compare all three riots using a Triple Venn Diagram. This led to some incredibly strong discussions. Students started noticing patterns across all three riots. Racism, economic competition, fear, discrimination, weak government responses, and violence appeared repeatedly. They also noticed that the riots evolved over time as tensions surrounding slavery and abolition grew stronger before the Civil War.

One of the most important understandings I wanted students to walk away with was this: Crossing the Ohio River did not mean escaping racism and discrimination. I think sometimes the Underground Railroad gets oversimplified into a happy ending story where freedom automatically meant equality and safety. The reality was much more complicated. African Americans in Cincinnati still faced discriminatory Black Laws, violent mobs, segregation, unequal protection under the law, and the constant threat of slave catchers and racial violence.

Short Answer Battle Royale

After the discussions and note taking, students moved back into Short Answer for another Battle Royale.

Students answered the question: “What did the Cincinnati riots reveal about the city before the Civil War?” I liked ending the lesson this way because students had to synthesize information across all three riots rather than simply summarizing one event. They had to identify larger patterns and explain what the riots revealed about Cincinnati as a whole.

The discussions during the Battle Royale were some of the strongest conversations of the week because students were no longer just talking about isolated events. They were talking about contradictions within the city itself. Cincinnati was free from slavery by law, but not free from racism, discrimination, segregation, or violence.

Summative Assessment

Bringing the Inquiry Together

The summative assessment for this unit will take place next week. One thing I’ve learned over time is that inquiry units like this work best when students create something meaningful with their learning instead of simply taking a traditional test. When students spend days analyzing sources, discussing perspectives, comparing evidence, and building understanding, I want the final assessment to reflect that process.

For this unit, the best assessment options will most likely be either a one pager centered around the compelling question or some type of creative project that allows students to synthesize their learning.

The compelling question students will answer is: “How was Cincinnati a city caught between two worlds before the Civil War?” What I like about this question is that there is no simple answer. Students have to wrestle with contradictions throughout the unit.

Cincinnati was a free city, yet deeply connected to slavery through trade and economics.
The Ohio River represented freedom, yet crossing it did not guarantee safety or equality.
Some Cincinnatians fought against slavery, while others defended systems connected to it.
The city grew rapidly and became economically successful, yet racial tensions repeatedly exploded into violence.

Throughout the inquiry, students have been building learning artifacts tied to each supporting question. Instead of relying on memorization, students now have a collection of evidence, visuals, writing, notes, and summaries they can pull from when constructing their final product.

I think that’s one of the strengths of inquiry based learning. Students are not just “doing activities.” They are building understanding piece by piece over time.

I’m less interested in students memorizing every detail about Cincinnati before the Civil War and more interested in whether they can explain the larger tensions, contradictions, and realities that shaped the city.

If students can walk away understanding that history is often messy, complicated, and deeply connected to the communities around them, then the unit accomplished what it was supposed to do.

Lessons

Staging the Question – Number Mania with Reading Linked

Supporting Question 1 – Sources, Questions, Thick Slide

Supporting Question 2 – Thick Slide, Sources

Supporting Question 3 – CyberSandwich, Sources

The Week That Was in 103

This week in Room 103, we wrapped up a mini-unit centered around one driving question:

How did slavery shape the lives of people in different ways in the United States?

Throughout the week, students explored the impact of the cotton gin, analyzed primary sources from formerly enslaved people, examined the lives and methods of abolitionists, debated historical impact at the whiteboards, and finished the week by building CER responses using evidence gathered across the unit.

As I reflected on the week, I also found myself thinking a lot about my co-author and friend, Dr. Scott Petri. This week marked one year since his passing.

So much of what happened in Room 103 this week connects back to things Scott taught many of us about social studies instruction. He pushed teachers to move beyond lectures and memorization and create classrooms where students discuss, connect, create, compare, and think deeply about history.

Scott helped many of us see social studies through a literacy lens. He emphasized vocabulary, background knowledge, listening, scaffolds, and helping students make connections between ideas. A lot of the structures from this week reflect those ideas. Students worked with primary sources, built connections between concepts, collaborated at the whiteboards, created visual representations of learning, and revisited evidence from multiple lessons to support historical claims.

One year later, his influence is still showing up in classrooms everywhere. It definitely showed up in Room 103 this week.

Monday – The Cotton Gin

This week in Room 103, we kicked off a mini-unit on slavery with a question that sat at the center of everything we did:

How did slavery shape and impact different people within the United States?

Instead of starting with a giant lecture or pages of notes, we started with an invention. One machine. One idea. One decision that changed the course of the country forever.

The cotton gin.

What made this lesson powerful was that students quickly realized this was never really just about a machine. It was about consequences, innovation, economics, human suffering, expansion, profit, power, and perspective. The cotton gin became the entry point into all of it.

Archetype Four Square: Eli Whitney Beyond “Inventor”

We opened class with an Archetype Four Square over Eli Whitney.

I wanted students thinking beyond the simple “inventor who made life easier” narrative they often hear. Archetypes force students to evaluate people instead of simply memorizing facts. Students debated whether Whitney represented a visionary, a creator, a disruptor, or someone whose invention unintentionally caused harm on a massive scale.

What I like about archetype work is that it pushes students into gray areas. History is rarely clean and simple. Students had to support their thinking with evidence instead of just throwing out opinions.

Some students compared Whitney to modern tech innovators, while others started wrestling with the idea that inventions can help some groups while hurting others. That tension became a theme throughout the lesson.

Annotate and Tell with Primary Sources

Next came Annotate and Tell using historical newspaper excerpts about the cotton gin.

Students examined how people in the early 1800s praised Whitney’s invention. The sources focused heavily on economic growth, increased cotton production, and Southern prosperity. One source even described Whitney as one of the “greatest benefactors of the age.”

This became a great opportunity to remind students that primary sources are not neutral. They reflect perspective, priorities, and values from a specific moment in time.

Students highlighted phrases showing the positive economic impact, but the deeper conversations started once we asked harder questions. Positive for who? Who benefited from this growth? Who paid the price?

That shift in thinking moved the lesson from surface-level recall into deeper historical analysis.

Graph and Tell: Numbers Tell a Story Too

After working through the sources, students moved into Graph and Tell where they analyzed the relationship between cotton production and slavery over time. The graphs and numbers completely changed the conversation. Students could visually see cotton production explode after the invention of the cotton gin while the enslaved population increased dramatically alongside it.

This mattered because many students initially assumed machines reduce labor needs. The cotton gin actually increased the demand for enslaved labor because cotton became so profitable. The graph gave students evidence to challenge the celebratory tone of the earlier sources. It created tension between economic success and human cost, which tied directly back to our unit question.

2xPOV: Seeing the Cotton Gin Through Different Eyes

To wrap up the lesson, students created their own 2xPOV narratives.

This may have been my favorite part of the day because students had to step into the perspectives of different people impacted by the cotton gin and write in first person. Some wrote from the perspective of plantation owners excited about profits, while others wrote from the perspective of enslaved people facing increased labor and harsher conditions. A few explored Northern factory workers, small farmers, or merchants connected to the cotton economy.

The activity forced students to move beyond saying “the cotton gin increased slavery” and instead think about how different groups experienced the same event in completely different ways. That is the heart of social studies. It is not simply learning what happened. It is understanding how events shaped real people in very different ways.

Why This Worked

This lesson reminded me why I love stacking EduProtocols together instead of treating them as isolated activities. Each part of the lesson built naturally into the next. Archetype Four Square pushed students to evaluate Eli Whitney. Annotate and Tell grounded students in historical evidence. Graph and Tell helped students interpret trends and data. Finally, 2xPOV moved students into empathy, perspective, and synthesis.

Students were constantly doing something different, but every activity connected back to the same central question. The lesson also balanced retrieval, collaboration, writing, visual analysis, and discussion without overwhelming students cognitively. Instead of front loading everything through lecture, students uncovered the story piece by piece.By the end of class, students were no longer talking about the cotton gin as “just an invention.” They were talking about consequences.

Tuesday: Shifting the Focus to the Lives of the Enslaved

On Tuesday, we shifted our focus from the invention of the cotton gin to the lived experiences of enslaved people themselves. After spending Monday examining the economic impact of slavery, students now had to confront the human side of it.

EdPuzzle: Building Context Through Video

We started class with an EdPuzzle focused on slavery and resistance to slavery. The video helped provide students with background knowledge before they worked directly with primary sources.

I like using EdPuzzle this way because it creates a shared foundation without requiring a long lecture. Students are still actively engaged through embedded questions and checkpoints while building the context they need for the deeper analysis later in class.

The video also introduced students to the idea that enslaved people constantly resisted slavery in both large and small ways. Resistance was not always dramatic. Sometimes it looked like slowing work, preserving culture, learning to read, escaping, or simply surviving another day.

Annotate and Tell: Solomon Northup and Harriet Jacobs

From there, we moved into Annotate and Tell using excerpts from Solomon Northup and Harriet Jacobs. Students worked through the sources carefully, highlighting evidence, annotating important details, and identifying moments that revealed the realities of slavery.

What made this lesson powerful was that students were not reading textbook summaries. They were reading the words of people who actually lived through slavery. Solomon Northup’s account helped students understand the brutality, fear, and dehumanization enslaved people faced daily. Harriet Jacobs added another layer entirely as students examined the unique dangers and struggles enslaved women experienced. Her writing sparked thoughtful conversations because students began realizing slavery impacted people differently depending on age, gender, and circumstance.

As students annotated the sources, they started noticing patterns between the two accounts while also recognizing important differences in experiences and perspectives. Some students focused on examples of resistance, while others highlighted family separation, emotional trauma, survival, or the loss of freedom and identity.

Thick Slide: Pulling the Learning Together

To finish class, students created a Thick Slide where they synthesized everything from the lesson. The Thick Slide pushed students beyond simply repeating details from the readings. Students had to think about the larger story the sources were telling and explain how those experiences connected back to our unit question about how slavery shaped different people within the United States.

The combination of video, primary sources, annotation, discussion, and synthesis created a lesson where students were constantly processing information in different ways without the class feeling repetitive. More importantly, students were engaging directly with human experiences instead of viewing slavery as just another topic in a textbook.

Wednesday and Thursday: Abolitionists, Perspective, and Historical Judgment

By Wednesday, students had spent the first part of the week examining the expansion of slavery and the realities enslaved people faced. The next step was exploring the people who challenged slavery and the different methods they used to push for change.

This lesson sequence became one of my favorite kinds of lessons because students were constantly learning, discussing, comparing, evaluating, and building ideas together without the class ever feeling repetitive.

Thin Slide: Framing the Lesson

We opened with a Thin Slide built around the quote: “Change begins when someone refuses to stay silent.” Students responded using one image and one word or phrase. It was quick, simple, and gave every student an immediate entry point into the lesson.

Before students ever discussed abolitionists, they were already thinking about courage, resistance, speaking out, and standing against injustice. Starting this way helped frame the larger human ideas connected to the lesson before we ever got into historical details.

EdPuzzle: Building Background Knowledge

From there, students completed a short EdPuzzle focused on abolitionism and reform movements.

The goal was not to overload students with information. It was simply to provide enough background knowledge so students could move into the deeper thinking activities confidently.

Sometimes students do not need a lengthy lecture. They need focused context, key vocabulary, and enough information to begin making sense of the topic.

That is exactly what this portion of the lesson accomplished.

Thick Slide: Becoming the Expert

The Thick Slide became the centerpiece of the lesson.

Each student selected an abolitionist and created a slide including:

  • Background information
  • Motivations for ending slavery
  • Methods they used
  • A quote or important moment connected to them

This is where the lesson shifted beyond simple fact collection. Students had to decide what information mattered most and organize it in a way that others could learn from.

Every student became responsible for bringing one abolitionist into the room’s shared understanding. Instead of passively receiving information, students became contributors to the lesson itself.

Sharing and Learning From Each Other

Once students completed their Thick Slides, they shared them with classmates.

This part of the lesson completely changed the dynamic of the room because students were now learning directly from one another. Students introduced classmates to figures like Frederick Douglass, Harriet Tubman, William Lloyd Garrison, Harriet Beecher Stowe, John Rankin, and James G. Birney. The sharing process also gave students repeated exposure to important ideas while hearing them explained in different ways by their peers.

Frayer Model: Organizing the Learning

After the presentations, students used a Frayer Model to collect notes on four additional abolitionists from their classmates.

Students focused on:

  • Background
  • Motivations
  • Methods
  • Impact

The Frayer Model helped students organize information while also forcing them to compare similarities and differences between abolitionists. By this point in the lesson, students were beginning to recognize patterns in how different people challenged slavery. Some used speeches. Others used writing, newspapers, political action, religion, or direct resistance.

BTC Whiteboards: Comparing Abolitionists

Once students had built enough background knowledge, we shifted into Building Thinking Classrooms style comparisons at the whiteboards.

Students worked in groups comparing two or three abolitionists while discussing questions connected to influence, courage, methods, effectiveness, and long-term impact. The whiteboards immediately raised the level of discussion.

Students debated:

  • Who took the biggest risks
  • Who changed the most minds
  • Which methods were most effective
  • Which abolitionist had the greatest long-term impact

Because students had already completed the Thick Slides and Frayer Models, they actually had evidence to support their arguments. The conversations became much deeper than simple opinions. The visible thinking at the boards also helped students build ideas collaboratively instead of waiting for the teacher to confirm whether they were right or wrong.

Superlatives: Ending With Historical Judgment

To finish the lesson sequence, students completed a Superlatives activity where they selected abolitionists for categories like:

  • Most Courageous
  • Most Determined
  • Strongest Voice for Change
  • Most Influential

This activity pushed students into historical judgment and evaluation. Students had to weigh evidence, compare people, defend their reasoning, and explain why certain abolitionists deserved specific categories. There were very few easy answers, which made the conversations even better.

The lesson naturally progressed from learning about abolitionists to evaluating them, comparing them, and defending claims with evidence. That progression is what made the sequence work so well. Students were not just memorizing names. They were thinking deeply about how different people attempted to create change and how those efforts shaped the country.

Friday: Pulling the Unit Together With 2xCER

Friday became our day to wrap up the unit and bring everything together.

Students first finished their Superlatives activity from Thursday. The conversations carried over naturally because students were still debating impact, courage, effectiveness, and influence. By this point in the week, students knew the abolitionists well enough to defend their thinking with actual evidence instead of surface-level responses.

After wrapping up Superlatives, we shifted into the unit assessment piece using Snorkl and a 2xCER activity.

2xCER: Revisiting the Entire Unit

For the 2xCER, I provided students with two claims connected directly to our unit question:

How did slavery shape the lives of people in different ways in the United States?

The first claim focused on the cruelty and realities of slavery:
“Slavery was a cruel system that used violence, fear, and harsh labor to control enslaved people.”

The second claim focused on abolitionists:
“Abolitionists used different methods to fight against slavery and convince Americans that it needed to end.”

Instead of giving students all the evidence, students had to revisit the week’s lessons and pull evidence from their own work, readings, annotations, Thick Slides, Frayer Models, primary sources, and discussions.

That part of the lesson was important because students were not simply answering questions from memory. They had to go back into their learning, locate evidence, determine what best supported the claims, and then create reasoning that connected the evidence back to the argument.

Snorkl: Organizing Evidence and Reasoning

Students completed the activity through Snorkl, where they typed their evidence and reasoning directly into the platform.

What I liked about this structure was how naturally it forced students to revisit the entire week instead of viewing each lesson as disconnected. Students pulled information from multiple activities and sources throughout the unit.

Some students referenced Solomon Northup and Harriet Jacobs when discussing the cruelty and realities of slavery. Others connected back to the cotton gin lesson and explained how the increase in cotton production expanded the demand for enslaved labor. For the abolitionist claim, students brought in evidence connected to Frederick Douglass, Harriet Tubman, William Lloyd Garrison, Harriet Beecher Stowe, and other abolitionists we studied earlier in the week.

The activity also shifted the focus away from simple recall. Students had to think about which evidence best supported each claim and explain why that evidence mattered.

Ending the Week With Synthesis

By Friday, the classroom conversations sounded very different than they did on Monday.

Students were no longer discussing slavery as a single topic with one perspective. They were discussing systems, economics, resistance, perspective, cruelty, activism, and consequences. They were comparing experiences, evaluating impact, and supporting ideas with evidence from multiple lessons and sources.

That progression across the week is what made the unit feel successful.

Every lesson built into the next:

  • The cotton gin introduced consequences and economic expansion
  • Primary sources humanized the realities of slavery
  • Abolitionists showed how people resisted and fought for change
  • The CER brought everything together through evidence and reasoning

Instead of ending the week with a traditional test focused entirely on memorization, students finished the unit by revisiting evidence, connecting ideas, and building historical arguments across the entire week of learning.

Lesson for the Week

Monday – Cotton Gin Rack and Stack

Tuesday – Life of the Enslaved Rack and Stack

Wednesday and Thursday – Abolitionist Thick Slide, Frayer Notes, Superlatives

Locked In: Utopia, Ohio and the Search for a Perfect Society

Why This Lesson Matters

One of the most important things we can do in social studies is help students realize history did not just happen somewhere else. Some of the best stories are sitting right in our own communities. This lesson has become one that is completely locked in for me because it takes a national movement from the 1830s and 1840s and brings it directly into students’ backyard through the story of Utopia, Ohio.

During our reform movements unit, students learn about the Second Great Awakening and how many Americans believed society could be improved or even perfected. Some fought against slavery, others pushed for prison reform or education reform, and some groups went even further. They attempted to build entirely new communities based on their beliefs about what a perfect society should look like.

That is where Utopia, Ohio comes in.

A tiny town along the Ohio River near Cincinnati became the site of multiple attempts to create a “perfect” community. The story is strange, fascinating, local, and perfect for middle school history because students immediately start asking, “Wait… this actually happened here?” That local connection matters. It turns abstract reform movements into something tangible and memorable.

Starting With Student Thinking

The lesson starts with students thinking about their own version of a perfect society. Sometimes I use a Padlet. Other times I use a Sketch and Tell-O. The prompt is simple: What would make a perfect society?

Students usually bring up fairness, safety, equality, money, laws, freedom, religion, or the absence of conflict. Before we ever touch history content, students are already wrestling with the same ideas reformers debated in the 1800s.

This opening works because students are personally invested before the history even begins. They are not just learning about historical groups. They are comparing those groups’ ideas to their own beliefs about how society should function.

Introducing Utopia, Ohio

From there, I introduce Utopia, Ohio. I use either a short informational video or a reading about the town and its history. Students learn how different groups moved into the community trying to create their own version of perfection.

The local aspect completely changes the energy of the lesson. Students know the Ohio River. They know Cincinnati. They know Clermont County. Suddenly reform movements stop feeling distant and become something connected to their own community.

Frayers and the CyberSandwich

The core activity revolves around three Frayer-style organizers focused on:

  • Communalists
  • Spiritualists
  • Anarchists

Each organizer asks students to define the group, explain important facts, identify examples of how the group attempted to create a perfect society, and explain what ultimately caused problems or collapse.

I also structure this almost like a CyberSandwich. Students become “experts” on one group, then compare, discuss, and share information with classmates.

That discussion piece matters because students quickly realize every group defined “perfect” differently. Some prioritized shared property. Others focused on religion or spiritual communication. Others believed government itself caused problems.

Students start noticing that humans bring different beliefs, priorities, and conflicts into every attempt at building a society.

The Final Question

The lesson ends with one final writing task: Can humans ever achieve a perfect society? Why or why not? Use evidence from the case studies of Utopia, Ohio.

I love this final question because it pushes students beyond simple recall. They are making a claim, backing it with evidence, and thinking philosophically about human nature, conflict, and society itself.

Some students argue perfection is impossible because people always disagree. Others argue societies can improve even if perfection is unrealistic. The conversations end up being far deeper than most students expect heading into the lesson.

Why the Lesson Structure Works

What makes this lesson structure work is the progression of thinking.

Students first create their own vision of a perfect society. Then they learn historical examples through structured Frayer work. Next they compare and discuss ideas with others. Finally they synthesize everything into a claim supported with evidence.

The lesson moves from personal thinking, to content acquisition, to collaboration, to argumentation. That sequence helps students build understanding instead of just memorizing facts about a town called Utopia.

The structure also keeps cognitive load manageable. Students are not overwhelmed with one giant reading or lecture. Instead, they build understanding piece by piece while constantly revisiting the core idea of what makes a society “perfect.”

Final Thoughts

At the end of the day, this lesson is also my reminder to teachers to go digging for local stories. Look through old newspapers. Search historical societies. Screenshot old articles and let AI help analyze difficult text or uncover interesting stories buried in scanned archives.

Some of the best classroom moments come from students realizing history happened right where they live. That is what makes lessons stick.

Lesson Link

Utopia Lesson Link

From “Super-Laxative” to Better Thinking: Why I Keep Using Superlatives

First, before anything else, you have to teach middle schoolers how to actually say the word superlative. Every year I hear “super-lative,” “super-laxative,” and a few completely original versions that honestly deserve awards of their own.

Once we get past that, we talk about what a superlative actually means.

A superlative is the extreme of something. The “most,” “best,” “worst,” “biggest,” or “most important.” That’s what makes this EduProtocol so useful in social studies and honestly almost any content area. It pushes students past simply gathering information and into evaluating it.

Superlatives, created by Kim Voge as a spinoff of Number Mania, works especially well at the end of a unit, a lesson sequence, or after students have interacted with a lot of information. By that point, students have enough background knowledge to compare ideas, categorize information, defend opinions, and synthesize what they’ve learned.

The setup is simple:

  • Give students a list of superlatives connected to your content
  • Students choose one or more
  • They match a person, place, event, idea, or geographic feature to the superlative
  • Then they defend their thinking with evidence

At first, I’ll usually use ChatGPT to help generate a list of superlatives tied to the topic. After students get a few reps with the protocol, I’ll start having them create their own superlatives, which raises the level of thinking even more because students begin deciding what matters within the content itself.

Recently, I used it during a lesson on abolitionists. Students had to choose superlatives like:

  • Loudest Voice for Change
  • Most Courageous
  • Boldest Actions Award
  • Best Speaker or Writer
  • Biggest Unsung Hero

Students then selected an abolitionist that fit each category and justified their thinking using evidence from readings, discussions, and notes.

I also used it in 6th grade geography during a China unit. Students rotated through stations on geographic features and then created posters using superlatives like:

  • Most Important Geographic Feature
  • Best Place to Settle
  • Most Valuable for Trade
  • Most Difficult Environment
  • Geographic Feature That Shaped China the Most

Students selected a geographic feature and matched it with multiple superlatives using evidence from the stations.

What I like about this protocol is that there often isn’t one perfect answer. Students naturally start debating and defending ideas:

  • Was the Huang He the most important river or the most dangerous?
  • Was Frederick Douglass the most inspiring or the boldest?

Those conversations are where the thinking starts to deepen.

The protocol is flexible too. It works digitally or on paper. It can be quick or extended. You can use teacher created superlatives or student created ones. It also naturally moves students into higher-level thinking without making the activity feel overly complicated.

Superlatives gives students a reason to evaluate information instead of just repeating it back. And that’s probably why I keep coming back to it.

Lesson Template

Superlatives Template

Locked In – Lessons Worth Running Again (A Lesson About the Cotton Gin)

This lesson works because students are starting from almost nothing. Most of them do not walk in with background knowledge about the cotton gin. In fact, the most common response when I introduce it is something like, “They make gin from cotton?” That actually helps. Instead of correcting misconceptions, I am building understanding from the ground up. The goal is not just to explain what the cotton gin is, but to help students understand how one invention can reshape an economy and deepen an existing problem at the same time.

Language Matters

We start with a short mini lesson on language, and it immediately sets the tone for how we approach the content. We talk about using enslaved instead of slaves, enslaver instead of owner, and freedom seekers instead of runaways. It is a small shift, but it forces accuracy. Students begin to see that the words we use can either clarify or hide what actually happened. This matters because if they do not have the right language, they will not build the right understanding of the system we are about to study

Making It Real

From there, I put raw cotton in their hands. Seeds still stuck in it, pieces tangled together, nothing cleaned up. I show them what cotton looks like on a stalk and let them react to it. There is always a moment where they realize how messy it is and how much work it would take to clean. That is intentional. Before we ever talk about Eli Whitney or the machine itself, students understand the problem that needed to be solved. This step gives them something concrete to anchor their thinking, and it makes the invention feel necessary instead of abstract.

Archetype Four Square

When we move into Archetype Four Square on Eli Whitney, the focus shifts from the problem to the person. Students are not just collecting facts. They are deciding how to categorize him and supporting that choice with evidence. Is he an innovator, a problem solver, or something more complicated? That question matters because it opens the door to thinking about impact. It moves students away from a simple mindset of memorizing and toward a deeper look at what his invention actually led to.

Annotate and Tell

The lesson then moves into Annotate and Tell using primary sources that describe the cotton gin’s impact. Students read closely and pull out evidence about production, labor, and economic growth. One source explains how machines could clean enormous amounts of cotton compared to hand labor, while another shows how quickly cotton exports increased and how the Southern economy shifted in a short period of time. This part matters because students are not just hearing the story from me. They are seeing the claims and evidence directly from the time period, which makes the learning more grounded.

Graph and Tell

After that, we bring in data with Graph and Tell. Students look at the growth of cotton production alongside the growth of the enslaved population and begin turning those numbers into meaning. This is where things start to click. The machine made cotton easier to process, but instead of reducing the need for labor, it increased it. Students start to notice that connection on their own, which is far more powerful than being told.

Multiple Perspectives (2xPOV)

We close by shifting perspectives and asking students to think about the cotton gin from different points of view. Enslavers, enslaved people, Northern businesses, and Southern farmers all experienced the impact differently. Students have to explain those differences and make sense of how the same invention could be seen as progress by some and harmful by others. This part brings everything together because it forces students to move beyond describing what happened and into explaining why it mattered.

How It All Fits Together

What makes this lesson work is how each part builds into the next. The language shapes how students think about people. The cotton makes the problem real. The archetype builds an understanding of the individual. The sources add evidence. The data creates tension. The perspectives add complexity. Students are not overwhelmed because they are building their understanding step by step.

Why This One Stays

This lesson stays because it changes how students think about cause and effect. They start with very little understanding of the cotton gin and leave with the ability to explain how one invention could increase efficiency while also expanding slavery. They are not just learning what the cotton gin is. They are learning how to think about impact, and that is what makes the lesson worth running again.

The Lesson Link

The Cotton Gin Lesson – What was the impact of the cotton gin?

The Week That Was In 103

This week was about pulling everything together. We moved from understanding why people went west to the risks they faced getting there. With shorter class periods, every lesson had to stay focused and connected. The goal was not just to learn about westward expansion, but to make sense of the decisions, risks, and outcomes that shaped it.

Monday: Pull Factors of Westward Migration

We started Monday by shifting from push factors to pull factors. The guiding question asked students: What factors pulled people out west? With limited time, the focus was on clarity. Students needed to move beyond general ideas and start identifying specific opportunities that drew people west.

EdPuzzle + Source Work (Cybersandwich) + Short Answer

We opened with an EdPuzzle on the Gold Rush, but this was not a separate activity. It was built directly into a Cybersandwich structure. As students watched and worked through sources, they recorded key ideas about opportunity, wealth, and why California became such a strong draw.

Students examined multiple documents that highlighted different pull factors. They looked at opportunities like land ownership through the Homestead Act, which offered 160 acres to settlers willing to move and farm the land. They also analyzed how gold discoveries, high wages, and advertisements like the California Clipper Ship encouraged people to take the risk of moving west.

Using whiteboards and visibly random groups, students compared their notes with a partner, added new ideas, and challenged each other’s thinking in real time. This made the Cybersandwich more than just note taking. It became a space where students refined their understanding of what actually pulled people west.

We closed with a short answer response to the guiding question. Students had to cite specific examples from the sources, which pushed them to be precise in their thinking. By the end of the lesson, most students were not just saying people moved for a better life. They were explaining exactly what that better life looked like and why it was worth the risk.

Tuesday: The Hero’s Journey

With shortened classes, the goal was not to push new content but to build a structure students could use later in the week. We focused on introducing the Hero’s Journey and helping students understand how stories are built.

TED-Ed + Commercial Analysis + Mapping

We opened with a TED-Ed video that introduced the stages of the Hero’s Journey. This gave students a basic framework, but the real focus was on applying it.

Instead of jumping into history right away, we used commercials. Students watched the Chef Boyardee commercial and the Melissa McCarthy Kia commercial and mapped each one using the Hero’s Journey structure.

Students were able to identify the call to adventure, challenges, and transformation in a setting that felt familiar. It lowered the barrier and helped them focus on the structure instead of getting lost in content.

By the end of class, students were not just watching videos. They were breaking them down, identifying patterns, and starting to see how stories follow a predictable path. That structure will carry into Wednesday.

Wednesday: Risks of Westward Migration

Wednesday turned into a bit of an EduProtocols smash. The goal was to take the Hero’s Journey from Tuesday and apply it to real historical situations.

Cybersandwich + Hero’s Journey + Short Answer

We focused the lesson around one question: What were the risks of migrating west?

Students worked with eight different stories of people and groups who went west, including the Donner Party, the Whitmans, the Latter-day Saints, and Lewis and Clark. Instead of reading everything, students chose two stories to focus on.

They mapped each story using the Hero’s Journey structure. This forced them to think about more than just what happened. They had to consider why people went, what challenges they faced, and what risks showed up along the way.

After mapping, students partnered up and compared their stories. This is where the Cybersandwich came in. Students shared, added to each other’s thinking, and looked for patterns across different groups.

The focus of those conversations stayed tight:

  • Why did people go west?
  • How did they get there?
  • What risks did they face?

Students started to see common threads. Harsh weather, lack of resources, difficult terrain, and unexpected challenges came up across multiple stories.

We closed with a short answer response to the guiding question. Students had to cite evidence from their stories, which pushed them to ground their thinking in specific examples instead of general statements.

By the end of the lesson, students were not just listing dangers. They were explaining the risks of westward migration through real experiences.

Thursday: Oregon Trail Simulation

After spending the week focused on why people moved west and the risks involved, Thursday was about experiencing it. We played the original Oregon Trail game the entire class period. That was it. No extra layers. No added tasks. Just the game.

What made it work is that students already had the background. They understood pull factors, they had analyzed risks, and they had worked through real stories of people going west. The game gave them a chance to see those ideas play out.

Decisions mattered. Supplies ran out. People got sick. Progress was not guaranteed. Students started connecting back to what we had already done without being prompted. They recognized the challenges, the trade-offs, and the unpredictability of the journey.

It was simple, but it hit. Sometimes the best follow-up is letting students experience the content in a different way.

Friday: Netflix Summary Assessment

We wrapped up the unit by bringing everything together through a Netflix-style summary.

Netflix Template + Summative Assessment

Students created a three-episode series that answered the unit question: How did Manifest Destiny change America’s map and affect the lives of people?

They had the option to choose their format. Some went with a straightforward documentary, focusing on explaining events clearly. Others created a historical story, building a narrative around a character experiencing westward expansion.

Each episode had a clear focus:

  • Episode 1 centered on Manifest Destiny and why people believed in expansion
  • Episode 2 focused on territories and how the United States acquired land
  • Episode 3 highlighted the people who went west and the impact it had on their lives

This structure mattered. It forced students to organize their thinking across the entire unit instead of treating each topic separately.

What stood out was how much they were able to pull in from the week. Students referenced pull factors, risks, and real groups as they built their episodes. Some leaned into the opportunity side of expansion. Others focused more on conflict and consequences.

By the end, students were not just summarizing westward expansion. They were making sense of it.

Lessons for the Week

Monday – Pull Factors CyberSandwich, Pull Factors Documents

Wednesday – Hero’s Journey

Friday – Netflix Template