This week we started state testing – “yeah” (sarcastic voice). Thursday and Friday were shortened days as students completed parts 1 and 2 of the Ohio ELA test. Classes were 22 minutes in length. As for social studies, Students finished the comparing the Northern and Southern United States during the Industrial Revolution with an annotated map.
After this lesson, I have a student teacher who designed a mini-lesson on the abolitionist movement to end slavery. The focus for the lesson was teaching students about different abolitionist, tying in some local history, and the methods abolitionists used to ends slavery.
Monday – Finish Annotated Maps on paper or with Google Drawings.
Tuesday – Thin Slide (nearpod), Fast and Curious, Thick Slide
Wednesday – Fast and Curious, Frayer
Thursday and Friday – Assessment Choice
Monday
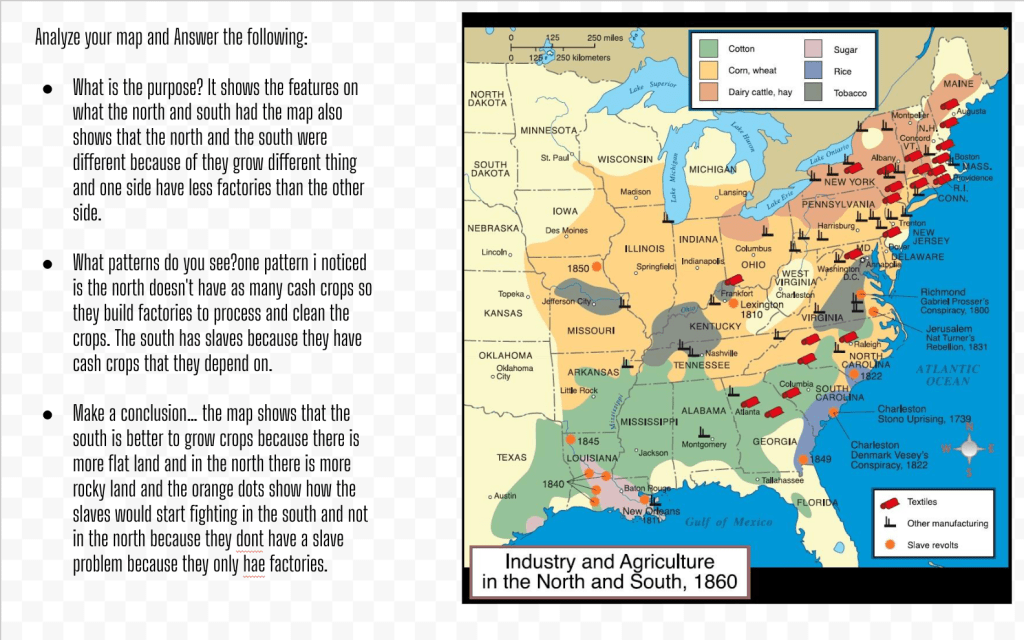
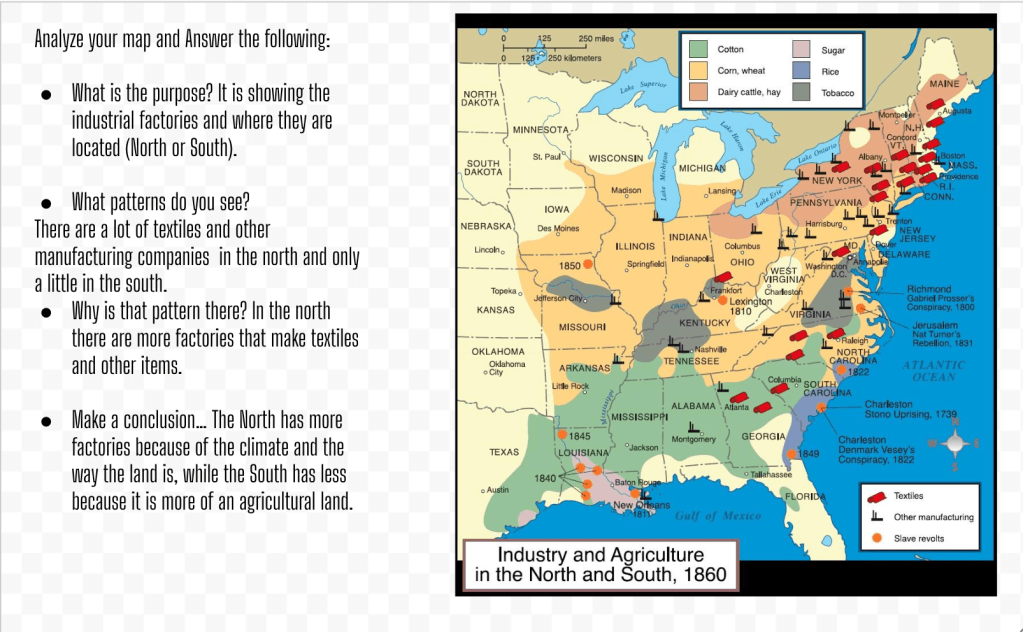
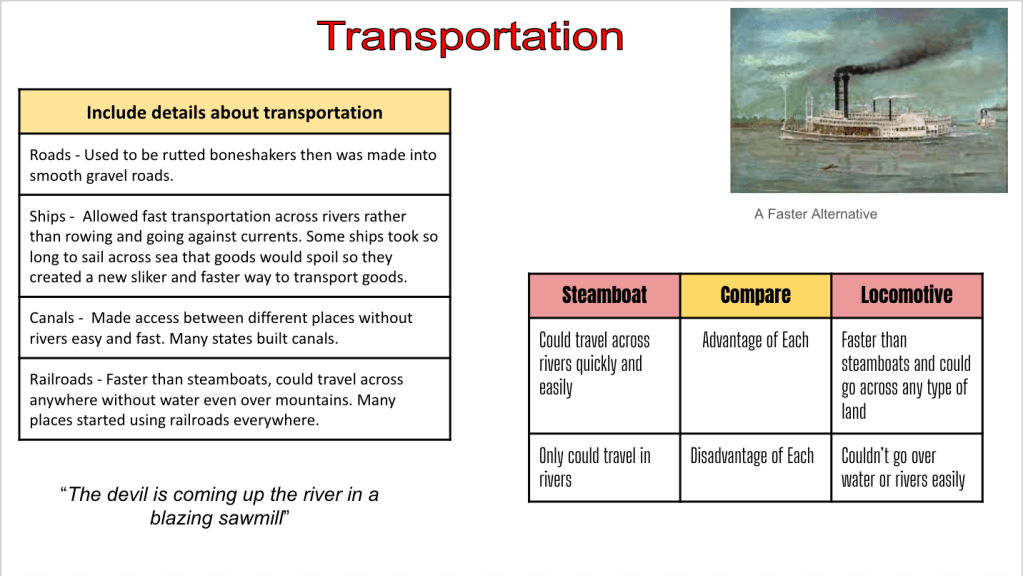
Today was used for students finishing their annotated maps showing differences between the Northern and Southern United States during the Industrial Revolution. I offered two options – a digital version on Google Drawings or a hand drawn map on paper.
With the rubric, I had students adding symbols to represent the differences in geography, economy, and transportation. They had to include 2 geographical differences, 3 economic differences, and 1 transportation difference. After their map completion, students answered some basic geography map analysis questions I got from Robert Mayfield:
- What is the purpose of the map?
- What patterns do you see?
- Why was that pattern created?
- What can you conclude?
Here are some completed student maps (I forgot to take pictures of the hand drawn maps, but they are incredibly well done):


The completed maps were awesome, but I ran into a problem on Monday. Some students missed a lot of days and there was no way they were going to make some of this up. This is where my special education background kicks in and I excel – adapting, accommodating, and modifying things on the fly. I remembered another idea I got from Robert Mayfield – a Mapwich.
I took the original Google Drawing map template from above and added a premade map. I kept the questions the same, but changed the map. Here are those results:
Tuesday
Today was the start of the mini-lesson created by my student teacher. I shared the standards about reform movements with him and here is the lesson he created:
- Thin slide on Nearpod – what does it mean to reform something?
- Thin slide graffiti board – Without looking it up – can you name an Abolitionist?
- Fast and Curious Quizizz
- Thick Slide – a focus on abolitionists and their motivations and methods used to bring an end to slavery.
- Share the Thick Slide link through a Google Form
- Create a Frayer – collect information on 4 other abolitionists
- Create a Brochure about Abolitionists and their methods.
We ran a test run of this mini lesson in 2nd period and made adjustments. Going from a Nearpod to Graffiti Board to Quizizz to Google Classroom to a Thick Slide – whew, too much!! So, we changed the “Name and Abolitionist” graffiti board to a Nearpod collaborative board. That small change made a huge difference.
Then we adjusted the “Name and Abolitionist” discussion after the Fast and Curious. We did this because the Fast and Curious gave some ideas for Abolitionists. Many students listed Abraham Lincoln as an abolitionist which led to a great discussion.
The Fast and Curious results ranged from 40% to 53% class averages. The questions and answer choices were well done and related to the topics. Some of the questions were vocabulary related, with the main question being, “What is the best definition for abolition?” After the first lesson test run, I asked my student teacher, “On Quizizz, does your definition for abolition contain the word reform?” I asked this because we started with the word reform, but it the word appeared again the rest of the lesson or throughout any reading. We made that small adjustment and we were set.
Next, students rolled dice to determine their abolitionist to study for the Thick Slide. The Thick Slide was set up for students to include background information, motivations, conflict, and methods of reform. Plus, it included a space to define abolition and include a picture with a caption. This is the 5th or 6th Thick Slide completed by students and each one gets better. Here are some examples:


A couple of teachable moment from the Thick Slide – addressing background information. For example, students would say to me, “Mr. Moler, I don’t see where he/she is from for the background information.” I replied with, “Does background information always mean where someone is from? Are you only defined by where you are from?” It led to a nice discussion.
We finished the day with another Fast and Curious and the class averages were raised 30% to 35%. Feedback and the Thick Slide are powerful tools for student learning.
Wednesday
The next day, we began class with a Fast and Curious again for a third rep. Class average remained the same or went a bit higher – 85% to 90%. Following the Fast and Curious, we shared a Google Form for students to share their Thick Slide. From the form we made a Google Sheet with the slide links and shared with the students. During this time, I highly recommend to teach your students how to change the share settings on a Google Slide.
Originally, we were going to have students use a Frayer on a Google Slide and then I suggested using paper. I suggested this to limit copying and pasting. Students made a Frayer on paper and chose 4 abolitionist to study. They collected background information, motivations, conflicts, and methods used for each abolitionist. Students were going to use this information to make a brochure.
Thursday and Friday
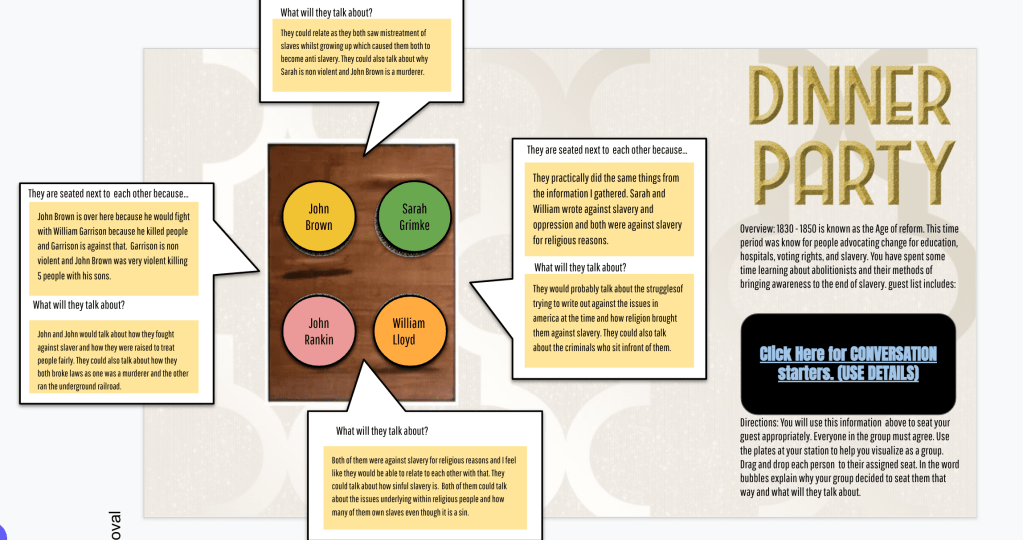
The final part of this mini lesson was making a brochure highlighting the abolitionists and their methods to end slavery. I was going to stay out of it, and not suggest anything. However, I can’t help myself. I remembered an Amanda Sandoval template and suggested a Dinner Party – choose 4 abolitionists to send to a dinner party and place them at the table. Then think about these questions:
- Why did you seat them next each other?
- What would they discuss or debate?
To me a brochure is great for a hands on project if the internet is down. But the dinner party takes critical thinking and creativity to a new level. What was awesome is my student teacher created conversation starters to scaffold the dinner party.
As students began the dinner party, they struggled to include details and the answers were basic. Was this from taking a 2 part ELA test? Was it from lack of knowledge? We pushed the students for more and they ended up doing a great job.
In typical Moler fashion, I didn’t stop with the dinner party, I decided to create a list of assessment options for all students. I ended up offering a dinner party, sketch and tell, Instastory, or Somebody – Wanted – But – So – Then. Here are some students exmaples: