The Week That Was In 103

I’m discovering as the year moves along that life at the Villa comes with a steady stream of interruptions to the normal school rhythm. Practice high school placement tests, walk-a-thons, shadow visits, pep rallies, and more. Honestly, it feels like way more than I ever experienced in public schools. But here’s the thing, it’s all good. These moments create a climate and culture that is unlike any place I’ve been, and I’m learning to embrace them as part of what makes this community special.

At the same time, I’m not getting as much done in class as I would like. This is a process and these kids are not used to my style or the tech usage I bring. Eventually, I want to get back to where I was getting three to five protocols accomplished in a class period.

Even with the curveballs, we kicked off Unit 2 on exploration and colonization this week. We started with a Number Mania preview to frame the big picture, then dug into how Native Americans arrived, adapted, survived, and thrived. We took a pause to step into a one-day lesson on 9/11, and then the week closed with two days of unusual schedules that didn’t leave much time for momentum.

Monday – Unit Preview Number Mania

Tuesday/Wednesday – Regions Organizer, 6 Word Story

Thursday/Friday – 9/11 Retro Report

Monday

We started the week by previewing Unit 2 and setting the tone with a Fast and Curious. I introduced our guiding question for the unit: How did European colonization and exploration impact Native peoples and North America? Scores on the quiz ranged from 60 to 74 percent, which gave us a good baseline for where we’re starting.

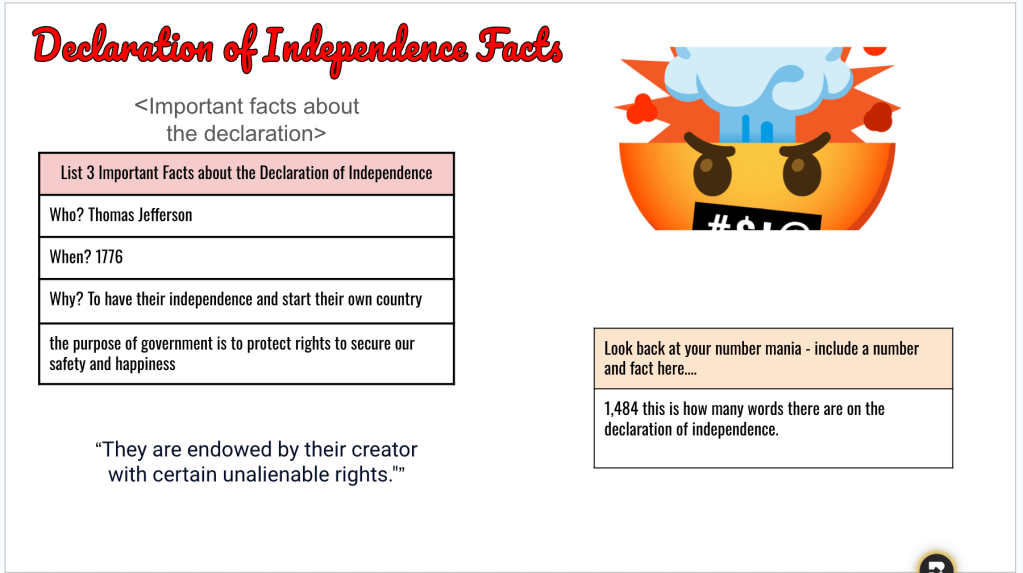
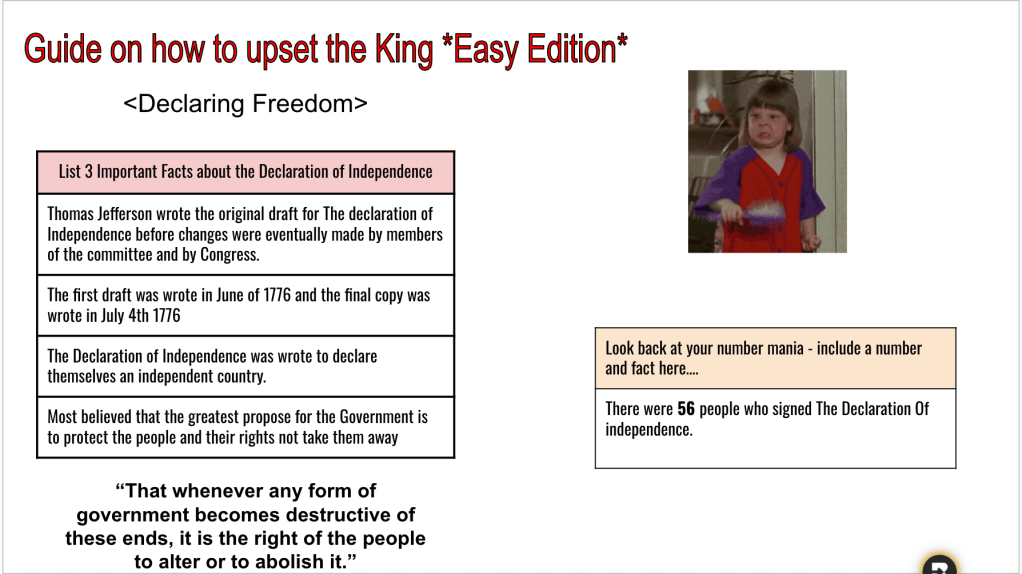
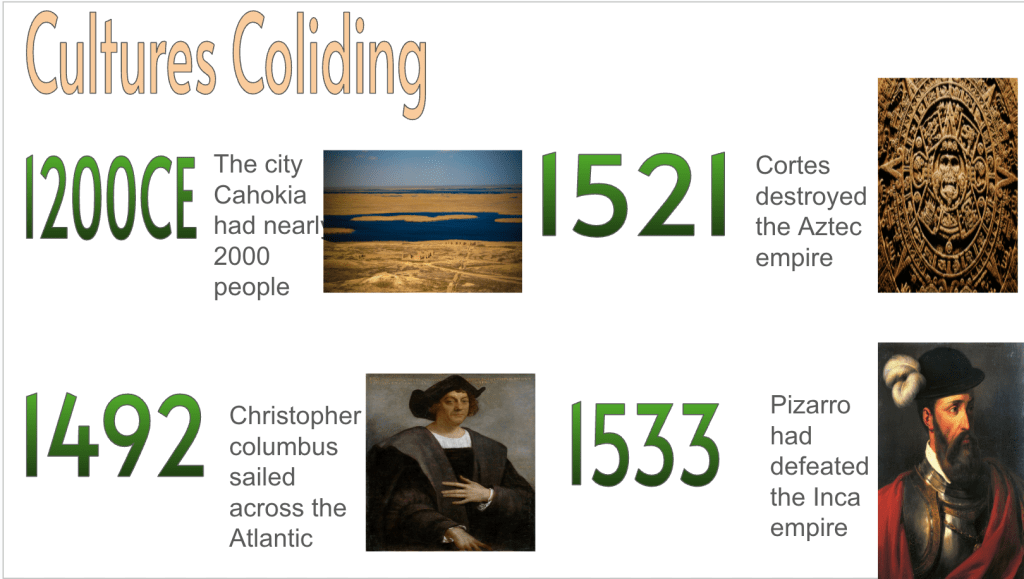
From there, I passed out a one-page reading that matches the flow and structure of the unit. It began with Beringia, moved through Native peoples growing, adapting, and thriving, and then shifted to the arrival of Europeans and the impact that followed. We paired this reading with a Number Mania. I have found that opening units with a Number Mania gives students a ton of data points to help frame the big picture in space and time. For this one, students had to find four numbers that proved Europeans impacted and disrupted Native life.

Something that stood out was how students reacted to this activity compared to Friday. When we first did a low-cognitive, smart start Number Mania, many of them rolled their eyes and wondered why we were doing it. Some even thought it was cheesy. I get it. These kids have been together since preschool, and with grade levels of only 30 to 40 students, they know each other well. Icebreakers feel strange. But today was different. Several admitted that the smart start practice actually made today’s Number Mania super easy. It was a small win.

Tuesday and Wednesday

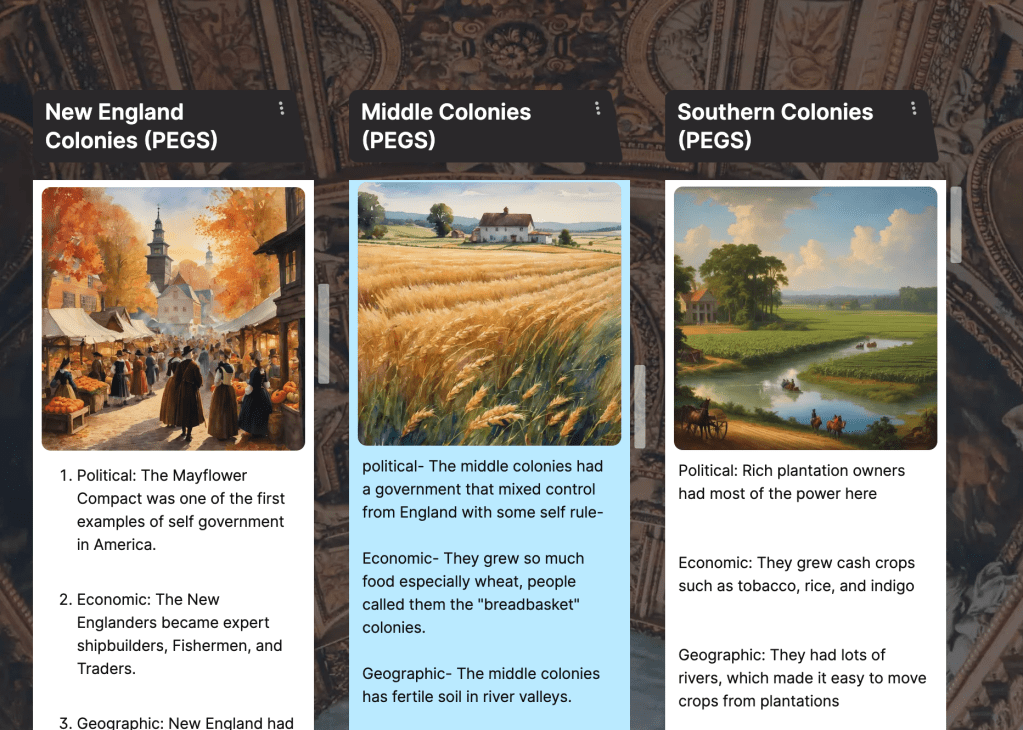
We spent two days on a lesson that simplified what the textbook made overwhelming. The text mentioned around 14 Native tribes, which is too much to meaningfully process, so I narrowed it down to five regions: Eastern Woodlands, Mesoamerica, Southwest, Northwest, and Plains. The goal was for students to understand how Native peoples adapted, survived, and thrived within their regions based on geography

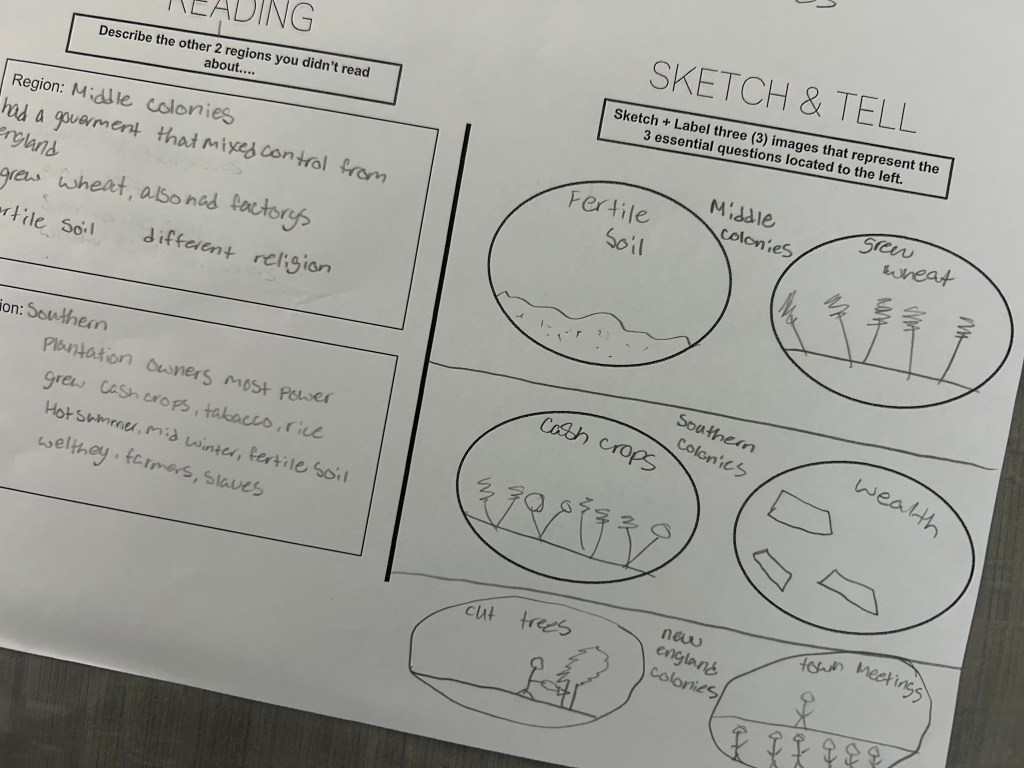
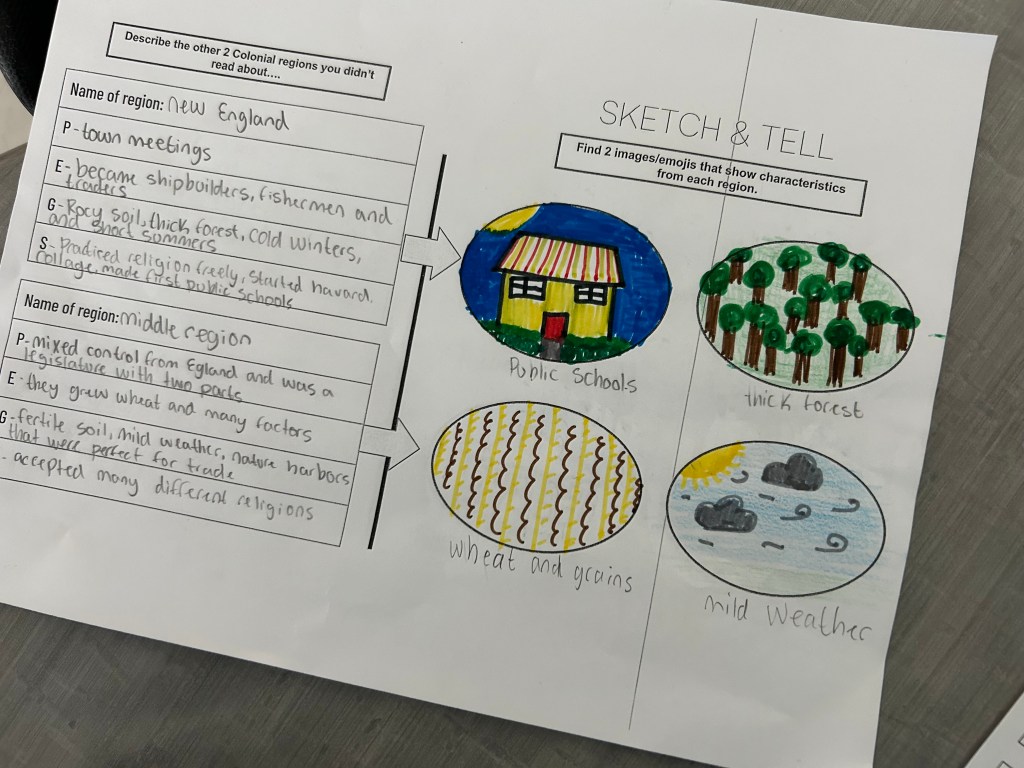
I structured the lesson to move from DOK 1 to DOK 2 to DOK 3. Many of these students are used to recall and rote memorization, but I want to push their critical and creative thinking. We started with stations where students read about the different regions and tribes, then categorized information into location, religion, environment, food, and housing. As they worked, I explained the learning process. I told them that transferring information from a reading to an organizer is DOK 1.

The next step was choosing three of the five regions and comparing them with a triple Venn diagram. At first, many students filled the middle space with answers like “they were in North America.” I kept coming back with the question, “If I asked you how they adapted and survived, would saying they were all in North America answer that question?” That pushed them to think deeper, and many went back and improved their comparisons.

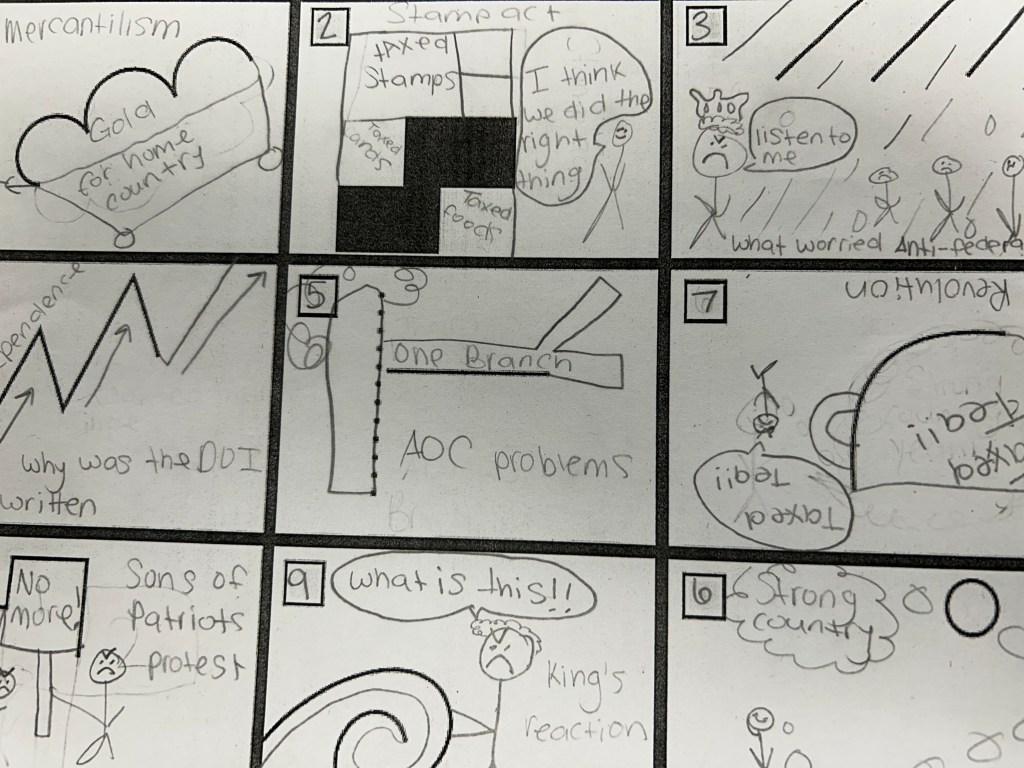
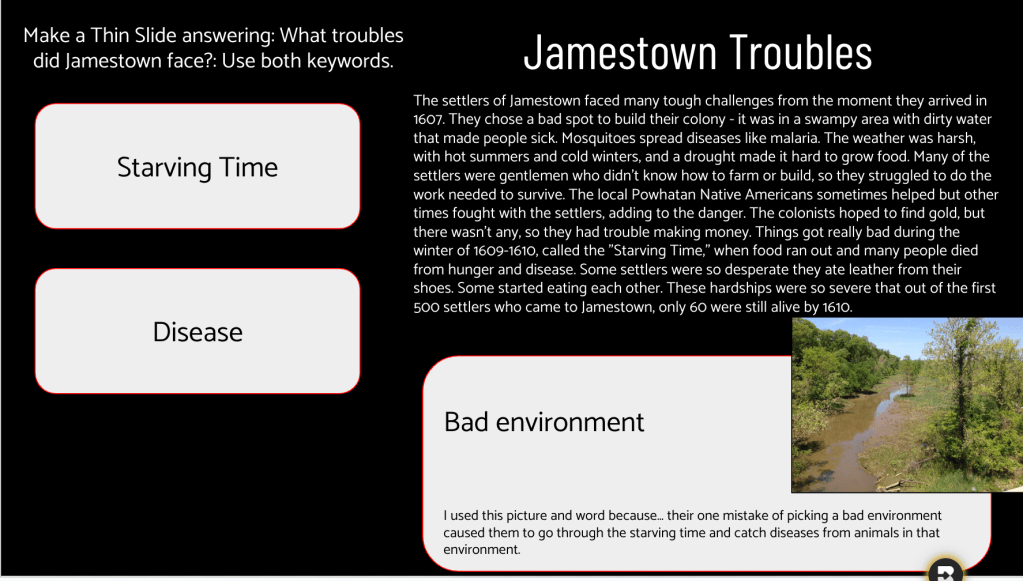
For the last part, I used a strategy from EMC2Learning and had students write three six word memoirs about the three regions from their Venn diagram. The focus was on adaptation and survival. I explained that comparing information with a Venn diagram is DOK 2, while writing six word memoirs that capture the essence and most important information is DOK 3. I chose this activity because it is creative, simple, and gave them practice on Google Slides again. Students added text boxes, pictures, and changed word art, while also working part of the lesson on paper for balance and familiarity.

We wrapped up both days with a Fast and Curious, which raised class averages into the 80 to 94 percent range. That growth showed them that practice and persistence are paying off.

Thursday and Friday

Thursday
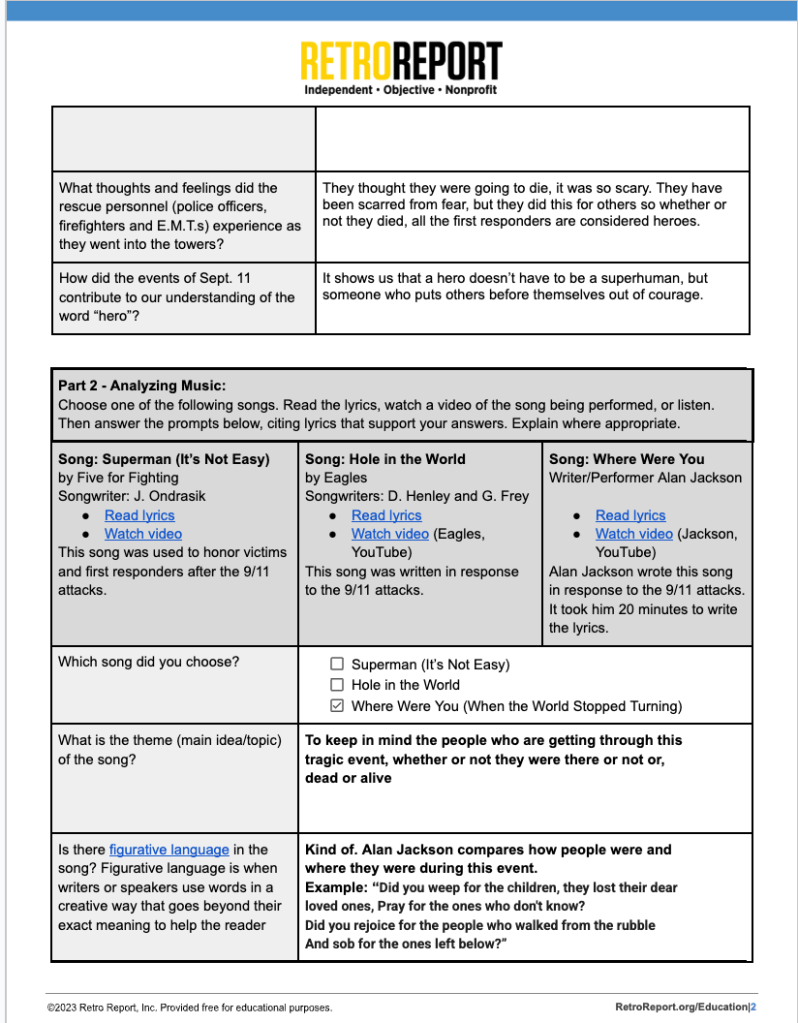
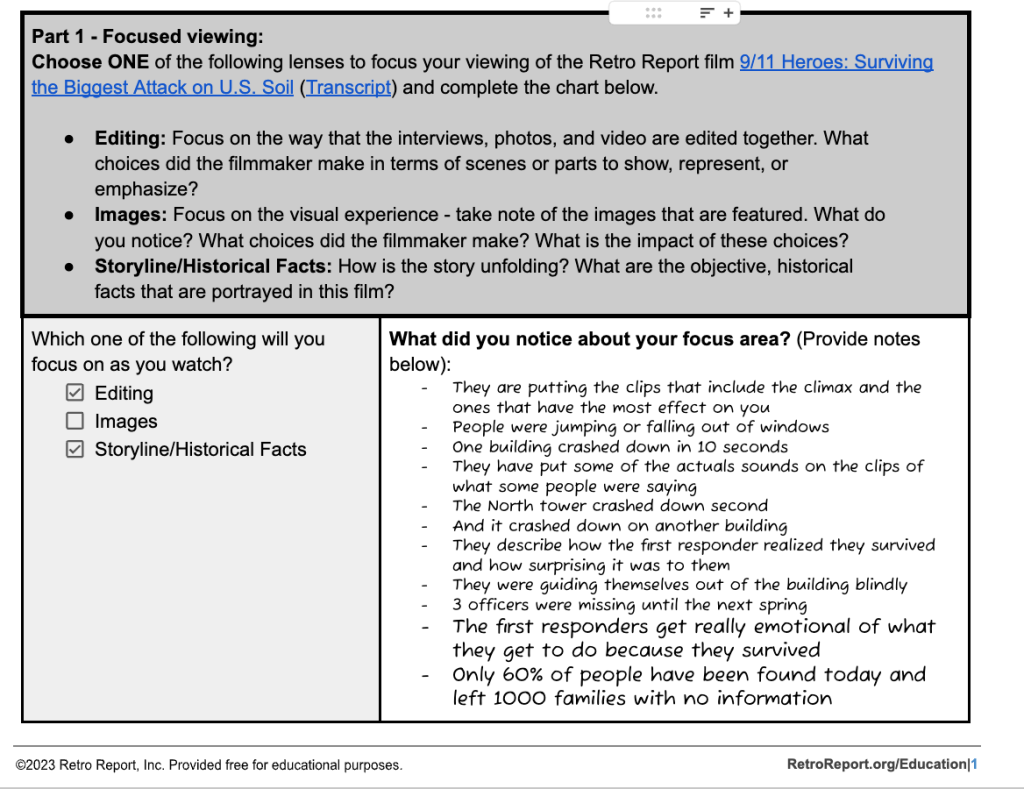
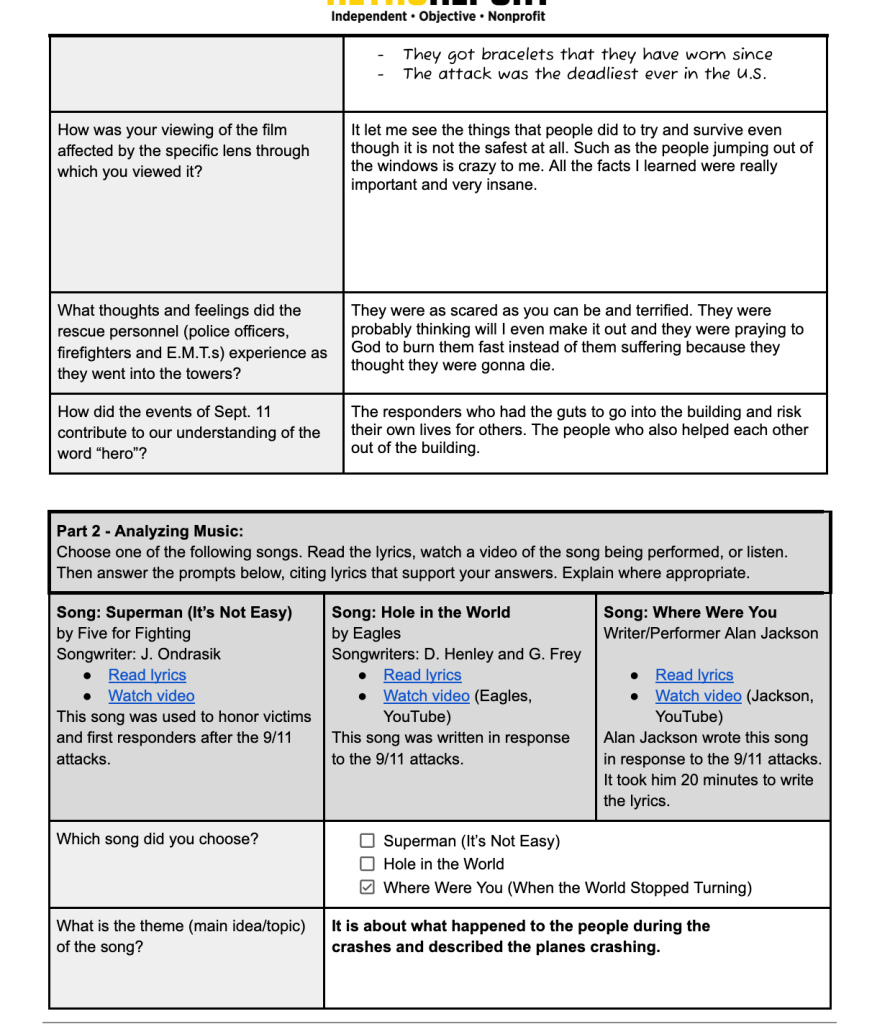
I set aside Thursday to focus on 9/11. I found a powerful Retro Report lesson with the objective: Analyze the impact of the terrorist attacks of Sept. 11, 2001 through different media sources. What I appreciated about this lesson is that it focused less on the events themselves and more on the heroes of 9/11 and the impact felt by the country afterwards. The main thread was exploring how Americans coped and grieved in the aftermath.

This one hit home for me. At 42 years old, I lived through that day, and I could share my perspective with students. For example, there was a song analysis portion where students chose one of three songs: Superman by Five for Fighting, Hole in the World by the Eagles, or Where Were You (When the World Stopped Turning) by Alan Jackson. I told them how Jackson’s song was one I leaned on at the time to help process what happened. I was able to connect with them in a way that felt authentic and personal.

Another part of the lesson had students analyze Mike Piazza’s iconic home run or President Bush’s first pitch at the Yankees game. There was also an introductory video created by Retro Report that students could view from one of three lenses: editing, imagery, or stories. I did cut a few activities to fit our schedule, which in hindsight I probably should have left in, but even with that the lesson was meaningful. I had thought about layering EduProtocols into it but decided to keep the original structure, and it worked.

What struck me most was how engaged the students were. Many admitted they had never studied 9/11 in depth before. They were curious, asking thoughtful questions, and processing the material in ways that impressed me. Instead of the blackout poetry originally suggested, I had them create a six word story about how Americans coped and grieved. Their responses showed just how much they were thinking and feeling. It was one of those lessons where the kids carried the learning, and I was just guiding them along.

The Week That Was In 234

This week was all about variety, structure, and student voice—anchored by a solid lineup of EduProtocols. I leaned on Fast & Curious for foundational vocab, layered in Annotate & Tell to break down complex readings, used Number Mania to push students toward using evidence, and wrapped lessons with Short Answer and Nacho Paragraphs to bring writing and thinking together. We even threw in some creative fun with Thin Slides, Craft-a-Cola, and a few MagicSchool tools to help students prompt and produce in more engaging ways. It wasn’t just about covering content—it was about designing experiences that stuck.

Monday – Industrialization Rack and Stack

Tuesday – Inventions Rack and Stack

Wednesday – Lowell Mills Rack and Stack

Thursday – Labor Unions Reading

Monday

We kicked off the week with a lesson on industrialization and how it changed the northern states—and I tried a Rack and Stack combo I was really happy with. It wasn’t flashy, but it had purpose at every step. Each EduProtocol built on the last, and everything came back to our guiding question: How did industrialization change the northern states?

Fast and Curious: Vocab First

We opened with a Gimkit Fast and Curious using vocabulary that kids were likely to struggle with—rivers, factories, mass production, loom, spinning, sewing machine. A lot of times I assume kids know basic words, but they don’t. After the first round, I gave feedback and cleared up confusion around things like loom and mass production. Then we ran it again. By the second round, scores had gone way up—evidence that repetition and feedback work.

Thin Slide: Why the North?

Next, I used a Thin Slide variation I learned from Justin Unruh. Students were asked to answer the question: Why did industrialization occur more in the North? using the keywords rivers and factories. They found or created an image and gave a one-sentence explanation. They had 8 minutes total—then they shared live, 8 seconds per student. This was a great way to preview the bigger concepts without overwhelming them.

Annotate and Tell: 3 Phases of Industrialization

We moved on to an Annotate and Tell with a short reading on the three phases of industrialization. Students highlighted the three phases in yellow and highlighted any inventions or machines in blue. The reading wasn’t long, but it was packed with information. I asked them two big questions to process:

  • What are the three phases of industrialization, and how did each one change the way goods were made?
  • How did machines like looms and sewing machines change the way people worked in factories?

Kids worked in partners to discuss and respond, and I was impressed with how well they broke it down.

Sketch & Tell Comic Edition: Visualizing the Phases

After the reading, I had students create a 3-frame comic using the Sketch and Tell Comic Edition to show how the three phases changed life and work. I got this idea from Justin Unruh again, and it’s become one of my favorite go-to protocols for visual processing. Instead of just retelling, students visualized each stage and added one sentence of explanation. This helped students slow down and make sense of how the shift happened over time—from breaking down tasks, to building factories, to powering machines.

Padlet Thin Slide: Bringing It Back to the Big Question

To wrap it up, we returned to our original question—How did industrialization change the northern states?—with a final Thin Slide posted on Padlet. I gave them 5 minutes to respond using what they had just learned, and they had to include at least one piece of evidence from the comic or Annotate and Tell. This helped me see who really got it and who might need more support.

It was a solid Rack and Stack, and I loved how each piece of the lesson connected. The goal wasn’t to cover everything—it was to build background, layer the concepts, and give students multiple ways to process. That’s what makes EduProtocols work.

Tuesday

I’ll be honest—Monday didn’t go how I hoped. The engagement across all my classes hovered around 25%, and that’s not something I’m used to. It frustrated me, and it forced me to take a step back. I told the students on Tuesday that I intentionally design lessons to build on familiar ideas. I don’t want them to feel overwhelmed—but I also don’t want them to zone out.

So I had to flip the script.

Fast and Curious: Quizizz Rebound

We opened class with a Fast and Curious on Quizizz using questions tied directly to industrialization in the North. This wasn’t just vocab—it was context-based. Words like steamboat, reaper, plow, and telegraph were sprinkled in. I noticed how often students missed even basic terms. Sometimes we assume students know what words like “petition” or “shift” mean, but they don’t. The data from Quizizz told me exactly where to go next.

Frayer Models With a Twist

We jumped into a Frayer activity using the textbook reading on four major inventions of the 1800s: the steamboat, the mechanical reaper, the steel plow, and the telegraph. But this wasn’t just a regular Frayer. I added some chaos—two dice rolls per invention. The first determined how many bullet points they had to write, the second decided how many words each bullet needed. This created structure, accountability, and a layer of challenge.

Chatbot Collaboration: Magic School AI

Next, I had students select the invention they thought was the most revolutionary. Using Magic School’s chatbot, they prompted the AI to speak as if it were that invention. They asked follow-up questions and gathered more support. This was one of my favorite moments—watching students debate themselves through the screen, pushing AI for deeper evidence.

Short Answer: Writing With a Purpose

We wrapped up with a Quick Write on ShortAnswer. This tool has been a game-changer. I selected two rubric elements: clear use of evidence and strong conventions. The AI gave instant feedback and categorized responses as beginner, intermediate, or advanced. Then it added up class scores to see if we hit our class goal. Three of my four classes crushed it.

But the best part? I disabled copy and paste. The words they wrote were their own.

I told them if they hit the class goal, I’d wipe away their Monday mess. They locked in and crushed it. Students were writing. For real. Because the task had structure, purpose, and a chance to improve.

Wednesday

Today’s lesson was all about one sentence:
“The Lowell Mill Girls had an extraordinary opportunity.”
That was it. That was the line that carried us through the whole class. My goal? Get students to keep circling back to that claim—support it, refute it, challenge it, reframe it. Think about it, talk about it, write about it.

I used a Rack and Stack of familiar EduProtocols, but I tried to tweak the flow a little to hit a rhythm. And honestly, it worked.

Fast and Curious: Start with What They Don’t Know

We kicked things off with a Fast and Curious using Gimkit. Vocabulary was pulled straight from the lesson:
boardinghouse, wage, petition, strike, shift.
You’d be surprised how many students don’t know what a “shift” is. Or “petition.” Or “boardinghouse.” After one 3-minute round and some direct feedback, we ran it again—and it made a big difference. The repetition and immediate correction helped lock it in. And it gave us a foundation to move forward.

EdPuzzle + Thin Slide = Instant Reflection

Next, we watched a 4-minute EdPuzzle about the Lowell Mill Girls. I embedded a Thin Slide right in the middle and brought the original claim back:
“Did this video support that statement or not?”
Some said yes—they got paid, they had housing. Others said no—the pay was awful, the work was grueling, and the living conditions weren’t great either. It was cool to see students start forming opinions and backing them up with specific parts of the video. The Thin Slide forced them to pick a side and start thinking critically before we even got to the meat of the lesson.

Number Mania: Let the Numbers Talk

Then we moved into Number Mania. Originally, I had six stations planned, each with a short reading—some primary, some secondary. But after thinking about cognitive load (and remembering that part in Blake Harvard’s book), I cut it down to four. Best decision I made all week.

At each station, students had to pick a number from the reading that could be used to refute the original statement. Of course, we had to stop and break down what “refute” actually meant—another word straight off the state test that most students didn’t know.

To make it even more fun (and to fight copy-paste laziness), I rolled dice. The first die told them how many words they had to use. That forced them to be intentional and selective with their evidence. Every station, every round, they got better at it.

Short Answer x Nacho Paragraph: Final Hit

To bring it all together, we used the Nacho Paragraph protocol inside Short Answer. I told students to copy and paste the original statement and revise it. Fix it. Refute it. Use the numbers and facts they just found in the Number Mania.

We ran it Battle Royale style. They saw each other’s answers. They compared. They got feedback. And most importantly, they thought.

They were engaged. They weren’t writing because I told them to. They were writing because they had something to say.

Thursday

After a deep dive into the Lowell Mill Girls earlier in the week, I wanted to extend the conversation—this time with a focus on labor unions and how the legacy of early industrial labor still echoes today.

We kicked things off with a short, one-page reading about the Lowell Mill Girls and labor unions. The reading did a solid job tying the historical context to modern labor movements. Students answered five questions to check comprehension and pull key ideas.

Then we pivoted into something a little more creative: a template from EMC² Learning called Craft-a-Cola.

Here’s the setup:
Students had to design a pop can inspired by the Lowell Mill Girls and the rise of labor unions. Their can needed:

  • A creative soda name
  • A slogan or promotional phrase
  • A short write-up explaining the historical inspiration behind their product

This was a fun twist, but I knew right away some students would struggle with generating ideas. So I built a Magic School classroom with a custom idea generator chatbot. Students used it to brainstorm potential pop names and promotional language.

Here’s what I learned: 8th graders don’t always know how to prompt clearly. At first, a lot of the results were pretty off—or the bot responded with something like “I can’t do that, but here’s a suggestion…” It turned into an unexpected mini-lesson on how to write better prompts.

We took a few minutes to break down what makes a good prompt, rewrote some together, and suddenly the ideas started flowing.

What I liked most about today’s lesson:

  • It gave students a new way to process content they’ve been learning about all week
  • It tied creative thinking to historical understanding
  • It sneakily taught them better AI prompting skills without me planning for that to happen

Some of their designs were pretty awesome.
A few were flat-out hilarious.
But all of them reflected some understanding of how labor unions began and why they mattered—proof that even a pop can can tell a powerful story.

The Role of Vocabulary and Working Memory

This year, one of the biggest challenges in my classroom has been students’ limited knowledge of Tier 1, Tier 2, and, no surprise, Tier 3 vocabulary. It’s had a major impact on their ability to learn and engage with content. The textbook we use is packed with unfamiliar words, even in the instructions or basic sentences, which only adds to the struggle.

I believe in challenging students and keeping expectations high, but when vocabulary knowledge is shaky, it affects everything else—reading comprehension, class discussions, writing, and even their confidence. That’s where I’ve had to rethink how I approach instruction, especially when introducing complex concepts like federalism.

Here’s how I’ve been using vocabulary strategies and the Fast and Curious EduProtocol to help students not just survive, but grow.

What Is Working Memory?

Working memory is the space in the brain where students process information they’re learning in the moment. But it’s limited—students can only juggle a few pieces of information at once before their brains become overwhelmed.

How Vocabulary Impacts Learning

If a student is unfamiliar with a term like federalism, which is a Tier 3, subject-specific word, and they’re also unsure about related Tier 2 academic words like authority, system, or structure, their working memory fills up quickly. Instead of chunking the idea into one meaningful unit, they’re stuck trying to decode every word. That’s a recipe for overload, and learning often shuts down.

What It Looks Like in Class

Let’s say you show students this sentence:

“Federalism is a system of government in which power is divided between a national and state government.”

A student who lacks vocabulary support might be thinking:

  • What’s federalism?
  • What does system mean here?
  • Divided how?
  • What’s a state goverment?

By the time they work through those questions, the main idea is lost.

Strategy: Use Fast and Curious to Build Vocabulary

Start with Fast and Curious. Use a platform like Quizizz to introduce and repeat vocab words daily. It only takes five to seven minutes, and the repetition helps move those terms into long-term memory. This frees up working memory to focus on learning. and helps students feel more confident going into the lesson.

Build a quiz that includes a mix of terms:

  • Tier 1: law, rule
  • Tier 2: authority, system, divide
  • Tier 3: federalism, goverment, Constitution

This supports students at different vocabulary levels and helps build a foundation they can use during lesssons.

Use Visuals and Analogies

Pair federalism with a simple image, like a pizza split between friends or a tug-of-war between state and national goverments. These visual anchors make abstract concepts more concrete and easier to understand.

Make Connections to Their Lives

Connect new terms to students’ own experiences. For example, ask: “Do you have rules at home and rules at school? That’s kind of like federalism—different groups in charge of different things.” When students can relate to the vocabulary, they’re more likely to remember and apply it. And it’s also a good chance to build some trust and engagment.

Repeat and Revisit the Words

Don’t expect mastery after one lesson. Keep using the terms throughout the week—in review games, warm-ups, and writing prompts. Every time students hear and use a word, they build confidence and free up space in working memory for deeper thinking.

Final Thought

When students know the words, they can hold more ideas in their minds. That frees up their working memory to think critically, participate in discussions, and make meaningful connections. If federalism doesn’t stick the first time, don’t give up. Slow down, build vocab intentionally, and give students the space they need to succeed.

Using Snorkl to Deepen Historical Thinking in the Classroom

One of the biggest challenges in history education is engaging students in meaningful analysis while encouraging collaboration and critical thinking. Enter Snorkl, an AI-powered whiteboard tool that allows students to interact with historical content by annotating images, adding text, drawings, or even recording their voices. By integrating Snorkl with historical inquiry, EduProtocols, and depth and complexity strategies, we can create a dynamic space where students engage deeply with the past.

1. Image & Source Analysis (8 Parts)

A picture is worth a thousand words—but only if students know how to analyze it! Post a primary source image (painting, political cartoon, propaganda poster) on Snorkl and have students:

  • Identify nouns, adjectives, and verbs within the image.
  • Annotate details with text boxes explaining who, what, when, where, and why.
  • Add speech bubbles or thought bubbles from different perspectives within the image.
  • Record a voice memo explaining their interpretation and the historical significance.

This works perfectly with the 8 Parts EduProtocol, where students systematically break down the visual to gain a deeper understanding.

Depth & Complexity:

  • Multiple Perspectives: Consider how different groups would interpret the image.
  • Patterns Over Time: Compare similar images from different eras (e.g., Revolutionary War vs. Civil War propaganda).
2. Think Slide Expansion (Thin Slides to Thick Slides)

Think Slides are a great way to introduce a topic, but what if we took them a step further? Post a Thin Slide prompt (one image, one word) on Snorkl, then challenge students to expand it into a Thick Slide by:

  • Adding three key facts about the topic.
  • Sourcing where their information comes from.
  • Comparing their topic to a related historical event or figure.
  • Leaving voice comments on peers’ slides to encourage discussion.

EduProtocol Tie-In: This follows the Thin Slides method but adds a deeper research component with the Thick Slide approach.

Depth & Complexity:

  • Ethics: Was the event just or unjust?
  • Big Idea: What lasting impact did this have on history?
3. Timeline Construction

History is all about connections. Instead of giving students a pre-made timeline, post randomized images and descriptions of historical events and have students:

  • Drag and arrange them in chronological order.
  • Draw arrows showing cause-and-effect relationships.
  • Add text boxes explaining why some events were turning points.
  • Compare two different events and their outcomes.

Depth & Complexity:

  • Cause & Effect: What led to this event? What were its consequences?
  • Big Idea: How does this event connect to larger themes in history?
4. Historical Debate Board

Engage students in historical argumentation by posting a controversial historical question (e.g., “Was Andrew Jackson a hero or a villain?”). Have students:

  • Add arguments on both sides of the debate.
  • Use Snorkl’s drawing tools to connect related ideas.
  • Record an audio response defending their position.
  • Engage in peer review by responding to others’ claims.

Depth & Complexity:

  • Different Perspectives: How might different groups view this event?
  • Unanswered Questions: What evidence is missing from this debate?
5. Document-Based Investigation

Primary sources can be intimidating, but Snorkl makes them interactive. Upload a primary source document excerpt and ask students to:

  • Highlight key phrases and annotate their meanings.
  • Add images or drawings to represent key ideas.
  • Answer sourcing questions (Who wrote this? When? Why?).
  • Summarize the document in one sentence.

Depth & Complexity:

  • Point of View: What bias does the author have?
  • Trends: How does this document compare to other sources from the same period?
6. Westward Expansion Map Activity (Sketch & Tell)

When studying Westward Expansion, post a blank map of the U.S. on Snorkl and have students:

  • Label newly acquired territories.
  • Use arrows to indicate migration patterns.
  • Draw icons or add images to represent key events (e.g., the Gold Rush, Trail of Tears).
  • Compare the perspective of settlers vs. Native Americans by adding speech bubbles or text boxes.

Using Sketch & Tell, students can create quick illustrations with short written explanations to reinforce their understanding.

Depth & Complexity:

  • Different Perspectives: What were the benefits and consequences of expansion?
  • Across Disciplines: How did technology and economics impact migration?
7. Empathy Map for Historical Figures (Frayer Model Adaptation)

History is filled with complex figures. Post an image of a historical person and have students create an empathy map with four sections:

  • What they see (their environment)
  • What they think (their beliefs)
  • What they feel (emotions, struggles)
  • What they say (quotes or imagined dialogue)

Adapt this using a Frayer Model, where students also add vocabulary and contextual information.

Depth & Complexity:

  • Ethics: Were their actions justified?
  • Big Idea: How does this figure’s story connect to historical trends?

Final Thoughts

By using Snorkl’s interactive whiteboard tools, combined with EduProtocols, we can transform the history classroom into a space where students actively analyze, compare, and collaborate on historical content. These activities not only help students develop historical thinking skills but also allow them to engage with the past in a way that fosters depth, complexity, and critical inquiry.

What are some ways you’ve used interactive tools like Snorkl in your history classroom? Let’s share and collaborate!

The Week That Was In 234

When I think of teaching the Early Republic, I think about political parties, presidential decisions, and how those decisions shaped the federal government. I think about how the first five presidents kept us out of wars, expanded federal power, and navigated political tensions. I think about how political parties influenced those choices and how the nation evolved under their leadership. But this damn textbook has other plans.

Instead of keeping the focus on political parties, foreign policy, and domestic growth, it randomly throws in sectionalism, the Missouri Compromise, the Industrial Revolution, and some random westward expansion facts—all jammed into two weeks. It’s way too much, and it makes no sense. This is the Early Republic, not a scattershot of everything that happened between 1800 and 1825.

Then Friday rolled around, and we hit the common assessment from the textbook—a test that somehow completely ignores the Monroe Doctrine but includes a question asking students to identify three battles from the War of 1812. Who cares?! It’s not even an important part of the unit.

But I digress.

So, with all that, we kicked off Monday learning about growing sectionalism after the War of 1812. SMH.

Monday – War of 1812 Rack and Stack

Tuesday – Industrial Revolution

Monday

We kicked off Monday with a Content Compactor that acted as a quick review of the causes of the War of 1812. This got students thinking about the political, economic, and regional tensions that led to the war while allowing them to summarize key ideas concisely—an essential skill as we transitioned into the concept of sectionalism.

Frayer Model: Defining Sectionalism

Next, we tackled sectionalism with a Frayer Model. Students defined the term, provided examples and non-examples, and listed key characteristics. The goal was to help students see sectionalism not just as a word, but as a major force that would shape U.S. history for decades. This activity ensured that students grasped the economic, political, and social divisions developing between regions of the country.

Thin Slides: Visualizing Sectionalism

Once students had a working definition, they moved into a Thin Slides activity. Using a short reading on sectionalism, they selected two words and two images that best represented how sectionalism grew after the War of 1812. In the speaker notes, they explained their choices, addressing:

  • Why did the North oppose the war?
  • Why did the South support it?
  • How did economic and political differences lead to sectionalism?

This was a quick, low-stakes way for students to process how sectional tensions formed and why they mattered.

Sketch & Tell: Answering Essential Questions

Students then tackled three essential questions through a Sketch & Tell activity:
1️⃣ How did the North and South develop differently after the war?
2️⃣ How did these differences contribute to sectionalism?
3️⃣ How did the War of 1812 reveal sectionalism in the U.S.?

They created two labeled sketches that visually represented their answers, reinforcing how regional differences in economy, industry, and policy contributed to rising sectional tensions.

Class Companion: Writing About Sectionalism

To wrap it up, students used Class Companion to answer the question:
💡 How did the War of 1812 reveal sectionalism after the war?

This allowed students to take their thoughts from their sketches and turn them into a structured response with real-time AI feedback. Since some students needed more time to refine their writing, we carried this over into Tuesday, giving them an opportunity to perfect their responses and ensure they fully understood sectionalism’s impact.

Why This Works
  • Content Compactor helped students refresh prior knowledge in a concise, engaging way.
  • Frayer Model ensured students developed a strong conceptual foundation before moving forward.
  • Thin Slides encouraged visual learning and synthesis of ideas.
  • Sketch & Tell helped students explain complex historical trends in a creative, student-centered way.
  • Class Companion allowed students to organize their thoughts in writing with immediate, personalized feedback.

Instead of just reading about sectionalism, students were building their understanding step by step, using visual, discussion-based, and writing activities to make the concept stick.

Tuesday & Wednesday

We started Tuesday by finishing up Class Companion responses from Monday on how the War of 1812 revealed sectionalism. Once students submitted their final responses, we pivoted to the Industrial Revolution—a topic that the unit test oddly prioritizes with fill-in-the-blank questions on patents, corporations, and capitalism, but barely acknowledges the Monroe Doctrine or foreign policy under the early presidents. Because that makes total sense.

Gimkit Fast & Curious: Industrial Revolution Vocab

Since the test focuses so much on random economic terms, we ran a Gimkit Fast & Curious with key Industrial Revolution vocabulary—words like patent, corporation, free enterprise, and capitalism. First round: class averages were pretty bad. After giving a quick mini-lesson on the most-missed words, we ran the Gimkit again, and scores jumped up significantly.

To lock in the most commonly missed terms, we followed up with Frayer Models for:
🔹 Patent
🔹 Corporation
🔹 Free Enterprise

Reading, Videos & Thick Slides

After breaking down the vocabulary, students read about key innovations of the Industrial Revolution—factories, mechanization, interchangeable parts, and yes, the cotton gin (because clearly, that fits into an Early Republic unit 🤦‍♂️).

To help process the reading, students worked on Thick Slides focused on four ways the Industrial Revolution transformed America. They had to:
✅ List four key impacts
✅ Find an image to represent industrialization
✅ Compare the North and South’s role in industrialization

Why This Works
  • Gimkit Fast & Curious ensured students got multiple reps with essential vocabulary.
  • Thick Slides helped synthesize and apply learning, rather than just memorizing random terms.
  • Multiple formats (reading, videos, notes, discussion, and visuals) ensured everyone had a way to engage with the content.

Even though this topic was awkwardly shoved into the unit, we made it work in a way that actually helped students understand and retain the material—instead of just cramming information for a test.

Thursday

With the unit test coming up, I wanted to make sure students had multiple opportunities to review key concepts in an engaging and structured way. Enter Brain, Book, Buddy, Boss—one of my favorite review strategies because it reinforces retrieval practice, collaboration, and teacher-guided clarification all in one lesson.

Step 1: Brain (Independent Recall)

Students received the review sheet (matching terms, short answer questions, and key concepts from The Early Republic). Before looking at any resources, they went through the entire review sheet independently, answering as many questions as they could from memory.

The goal? Get a sense of what they already know.

Some students flew through it, while others stared blankly at the paper. That’s the beauty of this step—it exposes strengths and gaps immediately.

Step 2: Book (Reference-Based Learning)

Next, students used their notes, textbooks, and classwork to fill in missing answers and correct any mistakes. This phase is where light bulbs start going off as students piece together information they’ve seen throughout the unit.

Of course, this is also where they discover just how terribly worded some of these test questions are.

For example, here’s an actual test question:
“What were some effects of the Alien and Sedition Acts?”

A. The policy of nullification became largely discredited.
B. The French stopped attacking U.S. ships.
C. Fewer people immigrated to the United States from Europe.
D. The principle of states’ rights gained public support.

This question assumes a level of vocabulary knowledge that most 8th graders simply don’t have. The wording is vague enough to confuse even students who understand the Alien and Sedition Acts. What 8th grader uses discredited in conversation?

Step 3: Buddy (Peer Discussion & Comparison)

After self-correcting with their books, students paired up to compare answers and discuss any remaining gaps. If they disagreed on an answer, they had to explain their reasoning to each other.

These conversations were gold—students challenging each other, correcting mistakes, and realizing where they were off-track. They got into heated debates over Federalist vs. Republican beliefs and the importance of Marbury v. Madison. This step solidified a lot of key concepts.

Step 4: Boss (Teacher Q&A)

For the final step, I opened the floor for questions. Students could ask me about anything still unclear—but with a catch:

They only had 8 minutes.

Once the timer hit zero, I was done answering. This forces students to prioritize their questions and keeps the review focused and efficient.

Why This Works
  • Brain (independent recall) activates retrieval practice.
  • Book helps reinforce accuracy and self-correction.
  • Buddy provides peer discussion and clarification.
  • Boss allows for focused teacher intervention in a structured way.

By the end of class, students had worked through misconceptions, clarified their understanding, and felt more confident about the material. It was one of the best review strategies for this test, and it reinforced just how flawed some of the test’s wording really was.

Friday: Test Day

Friday was test day, and I had everything set up on Class Companion for the short answer questions, while using McGraw Hill’s testing program for the multiple-choice and fill-in-the-blank sections.

One of the fill-in-the-blank questions asked about the beliefs of Democratic-Republicans. Most students simply typed “Republicans”, which is a reasonable answer considering the textbook even calls them that at times.

But McGraw Hill marked it wrong because they didn’t type the answer exactly as programmed: “Democratic-Republicans, Republicans”. I wish I were making this up.

So now, instead of assessing whether students actually understood the beliefs of the party, we were stuck in a battle of formatting.

Class Companion: At Least It Scored Correctly

For the short answer responses, Class Companion scored and provided feedback, but students only had one attempt—no revisions, just one shot. At least it evaluated their responses based on content rather than formatting nonsense.

I need a damn drink.

The Week That Was In 234

Coming back from winter break, we hit the ground running with the principles of the Constitution. The transition wasn’t easy—snow delays and uneven class times on Wednesday threw off our rhythm, and the textbook’s overwhelming vocabulary and dense content didn’t help. After some reflection and collaboration with a trusted colleague, I decided to adjust my approach.

This week, I focused on balancing structured teaching with interactive activities. By combining brief lectures, discussions, and EduProtocols, I aimed to make the principles of the Constitution accessible, engaging, and meaningful for my students. Here’s how the first two days unfolded.

Wednesday

After a snow-filled delay, Wednesday marked our first day back from winter break—and what a chaotic return it was. With a 2-hour delay, my classes were unevenly shortened to 30–46 minutes, and the pressure to cram an entire week’s worth of lessons into a limited timeframe only added to the frustration.

Teaching the principles of the Constitution is one of my favorite units, but the constraints of the textbook and deadlines imposed by common assessments make it hard to teach the way I know my students need. The textbook oversimplifies and overcomplicates at the same time—cramming seven principles into one chapter, with little focus on building foundational knowledge like understanding the branches of government or their roles. Cognitive load theory is completely ignored, and it’s clear the materials weren’t designed with middle school learners in mind.

Despite the challenges, I’m determined to make this unit engaging and meaningful for my students. Teaching shouldn’t feel like a race against a textbook or an arbitrary deadline—it should be about meeting students where they are and guiding them to where they need to be.

Starting with a Pre-Assessment

Given the shortened day and the need for a strong foundation, I kicked off the unit with a pre-assessment using questions from the U.S. citizenship test. I chose 10–11 questions that were directly tied to the principles of the Constitution. To keep the focus on critical thinking, I didn’t include answer choices—students had to come up with their responses based on their prior knowledge.

Here’s how the activity worked:

  1. Read Aloud: I read each question aloud, giving students time to think and respond.
  2. Trade and Grade: Students swapped papers with a partner to grade each other’s responses.
  3. Discussion: We went over each question as a class, discussing the correct answers and why they mattered.
Why It Worked

This activity served as both a pre-assessment and an opportunity to spark curiosity. Students were engaged in the discussion, and it gave me a sense of where they stood in terms of their knowledge of the Constitution’s principles. It also set the stage for deeper dives into each principle later in the week.

Reflection

It wasn’t the most exciting day, but it was an important one. The citizenship test questions provided a low-stakes way to ease back into learning while laying the groundwork for the unit. With the time crunch and external pressures, it’s not the start I wanted, but I’m determined to make the most of the days I have.

This week will be about finding ways to engage my students, break down complex ideas, and show them why the principles of the Constitution still matter today—despite the challenges of the snow, the textbook, and the ticking clock.

Thursday

After reflecting on Wednesday and discussing with my colleague Drew Skeeler, I decided to adjust my approach to teaching the principles of the Constitution. While I typically avoid lecturing, it became clear that short, focused direct instruction was what my students needed to build foundational knowledge. The plan was simple: 5–10 minutes of direct teaching, followed by turn-and-talks, and then an activity that built on the lecture using EduProtocols.

This shift felt necessary. Even though it’s not my preferred teaching style, it aligns with what will help my students engage with and understand the content right now.


The Lesson Plan

1. Lecture and Turn-and-Talks
I started with a 10-minute lecture introducing the seven principles of the Constitution:

  • Popular Sovereignty
  • Limited Government
  • Separation of Powers
  • Checks and Balances
  • Federalism
  • Republicanism
  • Individual Rights

The goal was to provide a high-level overview with examples to make each principle relatable. For example, I explained checks and balances by describing how the president can veto a law passed by Congress, but Congress can override that veto.

After the lecture, students turned to a partner to discuss two questions:

  • Which principle seems the most straightforward to you?
  • Which principle do you think will be the hardest to understand?

These quick discussions helped students process the information and gave them a chance to voice initial thoughts or questions.

2. Fast and Curious Gimkit
Next, we jumped into a Fast and Curious Gimkit to reinforce the principles. The game included vocabulary and short explanations related to each principle.

  • Students played for 3 minutes.
  • I provided feedback on commonly missed questions.
  • We ran the Gimkit again to improve accuracy.

3. Worksheet and Activity
I pulled a worksheet from the textbook, but as usual, the vocabulary and phrasing were too complex for my 8th graders. To make it accessible:

  • I simplified the questions to focus on key ideas like Why is separation of powers important?
  • On the back, I added a Sketch and Tell-O activity where students drew a symbol for one of the principles and explained their choice.
  • I also included a reflection question: Which principle do you think is the most important? Why?

4. Closing with Fast and Curious
We ended the lesson with one more round of the Gimkit to lock in what they’d learned. By the third round, scores were improving, and I could see the growth in their confidence.


Reflection

This lesson was a blend of compromise and creativity. The short lecture laid a clear foundation, the turn-and-talks helped students process the information, and the combination of EduProtocols and a modified worksheet gave them multiple ways to engage with the content.

While lecturing isn’t my favorite approach, it felt like the right choice today. Pairing it with interactive and creative activities made the lesson balanced and effective. Watching my students improve through the Fast and Curious Gimkit rounds and seeing their creativity in the Sketch and Tell-O reminded me that sometimes, adapting is the best way to meet students where they are.

The Week That Was In 234

Introduction

The past few weeks have been challenging—probably some of the toughest I’ve faced as a teacher. Being sick on and off for nearly a month has left me drained, both physically and mentally. Adjusting to a new school setting, new students, and trying to figure out what works has added to the weight. This year has forced me to stray from some of my core teaching philosophies. I’ve had to rely on strategies like extra credit, guided notes, and even the textbook more than I’d like.

I’m not relying on the textbook entirely, but it’s jam-packed with far too much information for 8th graders to process effectively. Pair that with vocabulary that feels overwhelming—words like negotiate, stimulate trade, inland, and emerged—and it’s clear the textbook isn’t a practical tool for building understanding. The challenge of teaching Tier 1 and Tier 2 vocabulary alongside complex historical concepts often feels insurmountable. When a student recently asked me, “What’s a stencil?” (I’m serious), I realized just how wide the gap can be.

The workload is also a challenge. There’s so much material to cover, and balancing meaningful activities with manageable workloads has been a constant juggling act. It’s hard not to feel like everything is just too much—for my students and for me.

I love writing in this blog; it’s a space to reflect and process. But lately, it’s felt like one more thing I can’t always keep up with. From here on, I’ll write when I can and focus on sharing what feels meaningful.

This week, though, I had three big wins. These are moments where my students were engaged, excited, and learning—and that’s what keeps me going.

Finish the Drawing Template


1. Gimanji: Gamified Review

What It Is:
Gimanji is a competitive review activity created by Alexis Turnbull that combines Gimkit, Blooket, Quizizz, Kahoot, or any mix of platforms. It’s a hit with students because it’s fast-paced, fun, and team-based.

How to Run It:

  1. Start with a Gimkit
    • Create a short, themed quiz. For example, I made a holiday-themed Gimkit with 12 questions about winter holidays.
    • Run the game for about 5 minutes and let the top 4 or 5 finishers choose their teams.
  2. Switch to a Blooket
    • Pick a mode that keeps the energy high. For our holiday version, I chose Santa’s Workshop, which is based on speed and luck.
    • Award points to the top 5 finishers—5 points each worked well for us.
  3. Add a Kahoot
    • Create a Kahoot quiz based on a fun theme. Ours was holiday songs represented by emojis. Students earn points based on accuracy and speed.
    • Keep it short—5 to 8 minutes is perfect.
  4. End with Quizizz
    • Finish with another short quiz. We did a round on holiday cookies.
    • Again, the top 5 finishers earned points for their team.

Why It Worked:
The variety of platforms kept students engaged, and the team-based competition added an extra layer of excitement. By rotating through different tools, you can cater to a range of learning styles and keep the activity fresh. Gimanji is flexible—you can adapt it to any subject or theme.


2. WeWillWrite: Gamified Writing

What It Is:
WeWillWrite is a platform that turns writing into a gamified activity. Students respond to creative prompts in secret teams, assess their peers’ writing, and compete for points.

How to Run It:

  1. Sign Up and Create a Session
    • Log in to WeWillWrite and create a session. The platform has premade prompts for all grade levels.
  2. Introduce the Activity
    • Students join with a code, similar to Gimkit or Blooket.
    • The platform automatically places them into secret teams.
  3. Write and Assess
    • Display the first prompt (e.g., “Convince your grandma her cringe gift is perfect”).
    • Students write for 3 minutes—there’s no submit button, so they’re encouraged to write the entire time.
    • After writing, students self-assess and read the work of their teammates.
  4. Vote and Award Points
    • Teams vote on the best, funniest, or most thoughtful piece.
    • Winning entries are displayed, and AI highlights literary elements like metaphors, adjectives, and personification.
  5. Repeat for Additional Rounds
    • Continue with new prompts, tracking team scores along the way.

Why It Worked:
The prompts were fun and accessible, encouraging even reluctant writers to participate. The anonymity of secret teams removed the fear of judgment, and the AI feedback added a layer of validation and learning. It was exciting to see students so invested in writing, and the self-assessment piece encouraged reflection on their work.


3. Finish the Drawing

What It Is:
This activity, inspired by Howson History, combines creativity with content. Students complete partially drawn images based on prompts tied to your curriculum.

How to Run It:

  1. Prepare the Drawings
    • Create a sheet with 9 unfinished drawings—simple shapes or partial designs that students can build upon.
    • Provide space under each box for labels.
  2. Randomize and Assign Prompts
    • Have students randomly number the boxes on their sheet.
    • Call out prompts one at a time. For example:
      • “How would King George react to the Declaration of Independence?”
      • “Illustrate mercantilism in action.”
      • “What worried Anti-Federalists about the Constitution?”
  3. Drawing and Labeling
    • Give students 3 minutes to complete their drawing and label it with key terms or ideas.
  4. Repeat and Discuss
    • Continue with new prompts, encouraging students to share and explain their drawings as time allows.

Why It Worked:
This activity made abstract concepts more tangible. Students who might struggle with writing or vocabulary could still demonstrate understanding through visuals. It sparked great discussions and could easily transition into a Sketch and Tell or Sketch and Tell-O.


Final Thoughts

This week reminded me why I love teaching, even during tough seasons. These activities—Gimanji, WeWillWrite, and Finish the Drawing—brought energy and engagement back into my classroom. They provided ways to work around vocabulary gaps while keeping students focused and excited.

If you’re looking for ways to shake up your lessons and get your students excited, I highly recommend trying these strategies. They’re flexible, fun, and effective—proving that a little creativity can make a big difference!

The Week That Was In 234

This week focused on building a strong base for our Revolutionary War unit through EduProtocols and engaging activities. We used Gimkit rounds to reinforce key vocabulary, Thick Slides to explore foundational ideas like government’s role, and Brain-Book-Buddy-Boss for structured retrieval practice. Midweek, students independently analyzed the Declaration of Independence, paraphrasing and summarizing key passages.

By Friday, we launched into the war itself, pairing Sketch and Tell-O with a Choose Your Own Adventure as Continental soldiers and a creative Funko Pop project. These varied protocols helped make complex history accessible and memorable, laying the groundwork for deeper exploration of the Revolutionary era.

Monday

DOI Parafly Link, Thick Slide Link

This week, we continued our journey into the Declaration of Independence, working to break down complex ideas and bring clarity to an iconic but challenging text. The goal was to keep the Declaration manageable, balancing cognitive load with targeted analysis. I aimed to help students connect with the key concepts through consistency, vocabulary focus, and engaging paraphrasing work. Here’s a look at how it unfolded.

Breaking Down the Declaration

We picked up with the Declaration, focusing on why it was created, who was involved, and what it outlined for the future of governance. Knowing the text can be overwhelming, I broke it down into digestible sections—five key excerpts, starting with its description of government’s role. This approach allowed students to work with smaller, manageable parts and helped me pace the class to keep focus high.

We kicked off with a Gimkit review of core vocabulary from the Declaration—terms like political bands, unalienable, endowed, self-evident, usurpations, and tyranny. Running Gimkit in short rounds gave students a fast-paced vocabulary review; after three minutes, I provided quick feedback and immediately launched another round to reinforce retention.

Parafly: Paraphrasing with Scaffolding

Moving into the Parafly activity, I used Socrative to facilitate the paraphrasing practice. To get students warmed up, we started with random trivia and fun animal facts, adding some lighthearted engagement before diving into the Declaration’s text. I then introduced the five excerpts, inviting students to either paraphrase the original or work from a simpler translation if needed—an approach inspired by my special education background to support all learners. I pointed out the relevant vocab terms as we went along, helping to connect meaning and context in real time.

The Parafly took a bit longer than expected, with students getting involved in the layers of meaning within each excerpt. Although I aimed for a fast pace, I found it rewarding to see their focus as they grappled with language and intent.

Wrapping Up with Vocabulary Reinforcement

With time running out, we returned to Gimkit for a third and final round. It reinforced our vocabulary in a quick and dynamic way, although we didn’t quite make it to the Thick Slide summary I’d planned to close with. Still, seeing their engagement and progress with the Declaration was a win.

The week’s start has been a balance of repetition and exploration, and the students are beginning to see the Declaration not just as words but as ideas that shaped history. EduProtocols like Gimkit and Parafly have helped make the content accessible, and I’m looking forward to building on this foundation in the days ahead.

Tuesday

While I presented at an AI conference, my students worked independently on two key areas: wrapping up our exploration of the Declaration of Independence and diving into a basic introduction to the Electoral College for Election Day. With both activities, my focus was on reinforcing their understanding of purpose and process in government while also beginning the slow shift away from traditional worksheets.

Thick Slide: Synthesis and Locke’s Influence

For the Declaration, I left a Thick Slide assignment designed to help students synthesize what they’ve learned. They were tasked with listing three facts about the Declaration, explaining why it was written, and defining the purpose of government. To add a layer of historical analysis, I had them find a quote reflecting John Locke’s influence and select an image that could show King George’s reaction to the Declaration. It was an opportunity for them to connect the ideas we’ve been exploring and to bring a bit of creativity into the mix.

Election Day Connection: Electoral College Intro

Given the significance of Election Day, I added a brief lesson on the Electoral College. I provided a simple reading, a set of questions, and an Edpuzzle video to introduce the basics. While I’m gradually moving away from basic worksheets, I recognize that some students are accustomed to this format and often gravitate toward it. The goal is to phase out these simpler resources without overwhelming them—a gradual balance of cognitive load and new skills.

Most students completed the Electoral College worksheet, but the Thick Slide remained unfinished for many. I’d hoped they’d prioritize the slide, but I understand that their inclination toward worksheets is simply a comfort zone I’m working to expand. Since the Thick Slide is key to consolidating their learning on the Declaration, we’ll wrap it up together on Wednesday.

The day was a reminder that gradual shifts in learning habits take time. As we move forward, I’ll keep guiding students toward deeper reflection and away from surface-level tasks. It’s a process, but it’s encouraging to see their growing confidence with more complex activities like the Thick Slide.

Wednesday

Brain-Book-Buddy-Boss Link

With the end of our unit in sight, Wednesday was dedicated to solidifying knowledge and preparing for what’s next. We began with a Gimkit review covering British taxes, colonial protests, and the Declaration of Independence—an all-in-one refresher to activate students’ memory of the unit’s main ideas. Following that, students completed the Thick Slide they’d started on Tuesday, giving them 12 focused minutes to synthesize their understanding before moving into our big review activity: Brain-Book-Buddy-Boss.

Brain-Book-Buddy-Boss: A Layered Approach to Review

This review approach remains one of my favorites because it gives students multiple ways to retrieve information, collaborate, and clarify. Each part of the protocol has a unique focus:

  • Brain: Students started with 10 minutes of solo retrieval, jotting down everything they could remember from the unit. It’s a powerful way to see what truly “stuck” from the lessons.
  • Book: Using the EduProtocols we completed, students had 12-15 minutes to revisit their notes and review resources. This stage encourages them to reflect on what we covered together and reinforces their recall with structured material.
  • Buddy: Partnering up, students spent 8-10 minutes discussing and cross-checking their answers. This peer support helps bridge gaps in understanding and often leads to those “Aha!” moments.
  • Boss: Finally, students could ask me questions for eight minutes. I set a timer and told them that when the timer was up, so was the Q&A—creating a sense of urgency and encouraging focused, meaningful questions.
Reflections on Class Differences

It’s always intriguing to see how each class performs during Brain-Book-Buddy-Boss. Some groups had extensive recall during the Brain phase, while others needed more time with their notes. These variations make me think critically about my own teaching—was something presented differently, or did attendance play a role? Each class brings its own dynamic, and this reflection helps me adapt and refine my approach for next time.

Overall, today’s review reminded me of the power of structured retrieval and peer collaboration. By giving students a framework to recall, reflect, and refine, I saw their confidence grow as they connected the dots across the unit. It’s a gratifying way to close a chapter and prepare for what’s ahead.

Thursday

Thick Slide Link

Today, I was out of the classroom, but I set up a dual assessment to gauge students’ understanding of our unit on colonial unrest and independence. Knowing that my students were well-prepared after multiple reviews and practice with the material, I felt confident leaving them with activities that encouraged both quick recall and deeper analysis.

Self-Paced Gimkit Review

I kicked off their assessment with a Gimkit assignment set to complete when students answered 20 questions correctly. I like this self-paced approach because it adapts to students’ mastery levels—those who know the content can finish quickly, while others get more repetitions to reinforce their learning. The class averages came in at 83%, 80%, 74%, and 86%. The 74% average in one class stood out to me, given the number of review sessions we’ve done. It’s something I’ll need to revisit to ensure we’re addressing any lingering gaps.

Thick Slide: Independent Analysis

For the second part of the assessment, I left a Thick Slide assignment designed to capture various levels of understanding (DOK 1, DOK 2, and DOK 3). On the Thick Slide, students had to:

  1. Create a title and subtitle.
  2. Find an image illustrating the colonists’ desire for independence and explain it in a caption.
  3. Compare Loyalists to the Sons of Liberty.
  4. Identify and describe two British taxes.
  5. Select a quote from the Declaration of Independence that reflects Enlightenment influence.

This mix of tasks allowed them to showcase both foundational knowledge and analytical skills. Despite my absence, 83% of students were able to complete the Thick Slide, which was encouraging. It’s rewarding to see them synthesize information independently and apply key concepts we’ve covered.

Today’s self-paced setup allowed for some great insight into both their grasp of the material and areas where we might need to focus more in future lessons. The combination of Gimkit for quick recall and the Thick Slide for deeper analysis created a balanced assessment that catered to different learning strengths.

Friday

Life As A Soldier Link, Sketch and Tell-O with Reading

Today marked the beginning of our Revolutionary War unit, and I used a blend of strategies to introduce core vocabulary, guide focused reading, and foster creative engagement with historical content. From targeted vocabulary practice to a Choose Your Own Adventure activity, each step was designed to give students multiple entry points into understanding the complexities of the Continental and British armies.

Gimkit Vocabulary Practice and Strategic Reading

We started with a Gimkit focused on essential terms like minutemen, Continental Army, and Redcoats—words they’ll see repeatedly as we dive deeper into this period. After running through the questions, I reviewed the most commonly missed terms, helping to solidify their understanding. I then had students skim the reading to locate these terms in context, connecting vocabulary to real content.

For the reading, I handed out a streamlined, one-page document that highlighted the strengths and weaknesses of both armies. (Our textbook dedicated three pages to this, but I find that a more concise approach keeps students focused and reduces cognitive load.) I prompted them with, “How long should it take to read this?” Responses varied from 5 to 10 minutes, so I set a 4-minute timer to add a sense of urgency and purpose. Their goal: highlight one strength and one weakness under each heading, keeping their focus clear and purposeful. By giving them a structured task with a set time frame, I aimed to improve both their reading efficiency and comprehension.

Sketch and Tell-O: Visualizing Key Points

With their highlights in hand, students moved on to a Sketch and Tell-O, where they created four quick sketches representing the key points they’d just highlighted—one for each strength and weakness. Importantly, they did this without looking back at the reading, challenging them to recall and process the information in a new way. After sketching, they discussed their drawings with a partner, building verbal communication skills and reinforcing the content through peer-to-peer explanation. This was followed by a summary writing task, helping them consolidate their understanding in their own words.

Immersive Learning with Choose Your Own Adventure & Funko Pop Creation

To cap off the day, we turned to an engaging, interactive Choose Your Own Adventure experience inspired by Mike Meehan (@MrMeehanHistory). Students stepped into the shoes of a Continental or minuteman soldier, making choices to navigate the realities and hardships of Revolutionary War life. This approach gave students a more personal connection to the material, encouraging empathy and a deeper grasp of the soldiers’ experiences.

As a creative wrap-up, students crafted their own Funko Pop soldier. They incorporated the strengths, weaknesses, and lifestyle aspects they’d learned throughout the lesson, transforming the facts into a personalized, imaginative artifact. This final activity allowed them to express their understanding in a tangible, visual way and capped off the lesson with a memorable project.

Each part of the lesson was carefully structured to balance cognitive load and engagement. The use of concise readings, strategic highlights, timed tasks, peer discussion, and hands-on creativity gave students multiple modes to interact with the content, making the start of our Revolutionary War unit both educational and memorable.

The Week That Was In 234

This week, my focus was all about scaling back and simplifying. I realized I’ve been expecting too much from my students in a short amount of time. Instead of overwhelming them, I shifted to teaching them how to work efficiently, meet deadlines, and build confidence with every task. EduProtocols like Thin Slides, Iron Chef, and Sketch and Tell-O became the foundation for helping students succeed. The goal wasn’t just to cover content, but to teach them how to learn and apply skills independently. Small wins are adding up, and I’m already seeing the results in their engagement and confidence.

Monday

Lesson Link

I came into class on Monday knowing I needed to simplify and keep things engaging. I leaned into some tried-and-true strategies to break down the lesson, making it easier for students to digest.

Starting with Gimkit: Fast and Curious
We began the day with a quick 4-minute Gimkit focusing on 8 questions about Jamestown. This activity—Fast and Curious—is all about rapid retrieval and feedback. The class averages ranged between 57% and 70%, but more importantly, it set the tone for the lesson. Fast and Curious is an excellent way to boost content retention while adding a layer of competition. It was a simple but effective way to kick things off.

Breaking It Down with Thin Slides
Next, we used Justin Unruh’s Thin Slide template to chunk the reading. Jamestown can be dry, and our textbook doesn’t do it any favors. I used AI to extract the key parts of the reading and then chunked it into manageable sections. Each Thin Slide had one word and one picture, and I modeled how to provide an explanation using the keywords provided. Each slide took about 5 minutes, which kept the class moving while giving students time to process the content.

Somebody, Wanted, But, So, Then Sketch and Tell
After completing the Thin Slides, I had the students combine their work into a Somebody, Wanted, But, So, Then Sketch and Tell comic. This is basic reading comprehension but framed in a way that’s simple enough for everyone to grasp. The students created a visual summary of Jamestown, which reinforced the lesson’s main points while keeping it creative and interactive.

Breaking the “Right Answer” Mindset
A lot of students were still raising their hands, hoping for the “right” answer, but I’m working hard to break them out of the mindset that social studies is just about filling in blanks. I want them to engage with the content and think critically—there are no simple answers here!

Wrapping Up with Gimkit
To close out the class, we ran the same Gimkit again, and the improvement was clear. Class averages shot up to 85%-94%. This repeated retrieval practice solidified their learning, and the jump in scores showed they were starting to internalize the material.

By keeping things simple and focusing on strategies that chunked the content, I was able to make this lesson engaging and accessible. The results? The students worked through the material effectively, and I didn’t feel like I was overwhelming them. It’s a win-win.

Tuesday

Lesson Link

Tuesday’s lesson followed the same structure as Monday, and the results continued to impress. Keeping it simple, consistent, and achievable is key to building student confidence and engagement.

Starting with Gimkit: Fast and Curious on Plymouth
We kicked off the day with a custom Wordle. I made the Wordle “Religion” and asked the kids to figure it out because the word related to Plym outh. Next we did a Fast and Curious Gimkit, this time focusing solely on Plymouth. The quiz was 9 questions, and the class averages ranged from 52% to 65%. It was a great way to gauge what the students already knew and give immediate feedback.

Thin Slide: Chunking the Reading
Just like Monday, we used the Thin Slide template. The readings were chunked into smaller sections, with each slide featuring a keyword and a picture. The students had 5 minutes per slide to process the information and build their slides, using the provided keywords as a guide. The familiarity of the Thin Slide made it an achievable task for the students. There was no need to introduce new techniques or overwhelm them with too much at once.

Somebody, Wanted, But, So, Then Sketch and Tell
Once the Thin Slides were complete, we wrapped up the reading with another Somebody, Wanted, But, So, Then Sketch and Tell comic. This is such a simple yet effective way to summarize content. It allows the students to visually capture the key points of the lesson in a creative format, reinforcing comprehension in a way that feels both achievable and rewarding.

Ending with Gimkit: Building Confidence
We ended the class with the same Gimkit as the beginning. This time, the class averages soared to 86%-94%. The consistency in approach, combined with the immediate feedback and the opportunity to retry, boosted the students’ confidence. And despite the repetition of Monday’s format, there were no complaints. In fact, 90% of the students finished the task, which is a win in itself.

Why I’m Sticking with Thin Slides
The Thin Slide strategy is becoming a staple in my classroom for a reason: it’s simple, familiar, and helps students feel like they can finish something. Pairing that with Gimkit, which builds their confidence through repeated practice, is setting the foundation for a stronger work ethic. These small wins will add up over time, and I’m seeing the early signs of engagement taking root.

Wednesday

Inquiry Lesson Link, Questions, Funko Pop, Gimkit

On Wednesday, we switched gears and used paper for an inquiry-based lesson straight from the textbook. The lesson focused on the hardships and survival stories of colonists in Jamestown and Plymouth, but let’s be real—the textbook readings were way too much. The language was jargon-filled, dry, and not exactly something an 8th grader doesn’t give a damn about.

Simplifying Primary Sources with AI
My goal was to simplify the lesson while still helping students build confidence and learn. To do that, I took the primary sources straight out of the textbook and ran them through Claude AI with a simple prompt: “Keep the primary sourceness of these documents but make them so 8th graders can understand them.” I also had Claude add author names and context since the textbook didn’t bother to provide that crucial information.

The revised documents were a mix of Jamestown and Plymouth hardships and survival stories. With the language made accessible, the students were much more engaged. They worked in pairs, reading the sources and answering questions. This took about 35 minutes and gave them a deeper understanding without the confusion of outdated jargon.

Funko Pop Character Creation
For the final part of the lesson, I wanted to tap into their creativity, so I had them create a Funko Pop character who had journeyed to either Jamestown or Plymouth. The biography for the Funko Pop had to include why their character went to the colony (reviewing the content from Monday and Tuesday), the hardships they faced, and whether they survived—or not. This activity took 25 minutes, and it allowed the students to synthesize what they had learned in a fun, engaging way.

Combining Jamestown and Plymouth in Gimkit
We ended the day with a combined Jamestown and Plymouth Gimkit. This was a great way to reinforce everything from the week so far. The class averages ranged from 86% to 92%, showing solid retention of the material.

Takeaway
The key here was breaking down the overwhelming textbook content, making it relatable, and allowing students to demonstrate their understanding through a creative, personalized project. By the end of the day, they had a solid grasp on both the hardships of colonial life and the survival strategies of early settlers.

Thursday

Thursday was all about pivoting and simplifying—sometimes less is more. I had originally planned to pack the lesson with multiple activities, but it quickly became clear that was overambitious.

Finishing the Funko Pop Characters
We kicked off class by wrapping up the Funko Pop characters from Wednesday. The students had 15 minutes to finalize their creations, adding in the last details about their colonial hardships and survival stories. Once that was done, we shifted focus to something new.

Colonial Regions Mapping
The natural next step was to move into the colonial regions. This is where I initially tried to cram in too much. My original plan was an Iron Chef, followed by a Sketch and Tell, followed by a mapping activity—but it became obvious after the first bell that this was a disaster in the making. I scrapped the Iron Chef and Sketch and Tell, deciding to focus solely on the map and some Wordwall practice.

Using a Mnemonic Device
The map we used came from Howson History, and it featured a helpful mnemonic device for remembering the colonial regions. I explained what a mnemonic device was using examples like ROY G. BIV and DeSSert means strawberry shortcake (never miss that double ‘S’ in dessert!). After that, the students created their own mnemonic device for the colonial regions.

Mapping the Colonies
Once the mnemonic was sorted, we got down to the mapping activity. The students looked up the colonies and labeled them on the map. It was simple but effective, reinforcing both geography and historical knowledge.

Wordwall Practice and Rolling Recap
To reinforce the mapping, I had the students practice using a drag-and-drop map on Wordwall. It gave them some hands-on repetition, which helps with retention. After finishing the Wordwall, we still had some time left, so I pulled out a Rolling Recap. This is a fun retrieval practice where I roll a 20-sided dice and give the kids a prompt. They have to respond to the prompt in exactly the number of words rolled. The questions focused on Jamestown and Plymouth, and it was a creative way to review key content while keeping things engaging.

Takeaway
Thursday reminded me that sometimes, simplicity wins. The mapping activity and mnemonic device were more than enough to carry the lesson. And, as always, building in some creative retrieval like Rolling Recap kept the students engaged while reinforcing their learning.

Friday

Iron Chef with Sketch and Tell-o, Thick slide

On Friday, we continued working on our colonial regions, focusing on reinforcing knowledge and boosting confidence. Here’s how the day went.

Starting with Gimkit: Colonial Regions
We began with a quick 4-minute Gimkit on the colonial regions, which featured 12 questions. The class averages were 68% to 73%. After running the game, I gave feedback, and we quickly moved on to the next activity.

Colonial Regions Iron Chef on Padlet
For the main part of the lesson, we did an Iron Chef on Padlet. Each student received a half-page of reading about a different colonial region. They logged onto Padlet and shared four facts related to their region using the PEGS format—political, economic, geography, and social. Once their notes were posted, they used the “I can’t draw” feature on Padlet to create a picture representing their region. This visual aspect gave them a creative outlet to express their understanding.

Experimenting with Thick Slide vs. Sketch and Tell-O
After the Iron Chef, I decided to try an experiment. In two classes, I had students create a Thick Slide using the shared information from Padlet. In the other two classes, I used a Sketch and Tell-O activity instead. The results were interesting—classes that made Thick Slides had second Gimkit scores of 85% and 87%, while the Sketch and Tell-O classes scored slightly higher at 88% and 89%. While the difference wasn’t huge, it was enough to show me that both methods can be effective, depending on the class dynamic.

Finishing with Wordwall
We wrapped up with the same Wordwall practice from Thursday, this time with a twist. I challenged the students to complete the activity without any map help. Many of them surprised themselves by getting 100% on their own! It was great to see that kind of confidence and self-assurance building as we closed out the week.

Takeaway
Friday showed me that the methods we’ve been using—whether it’s Padlet, Gimkit, Thick Slides, or Sketch and Tell-O—are all helping to build both knowledge and confidence. The slight variation in results also confirmed that students respond differently to various activities, but the key is keeping things engaging and accessible.

Experimental Idea

I created a Colony Founder GPT. This GPT is designed to let students immerse themselves in history by interviewing the founders of the original 13 American colonies. Instead of reading static facts, students can interact with historical figures like William Penn, John Winthrop, or Roger Williams and ask them questions directly. It’s an engaging way to explore the personal motivations behind each colony’s founding, the challenges they faced, and their unique perspectives. Whether you’re learning about religious freedom in Rhode Island or the tobacco economy in Virginia, this tool offers a conversational approach to make research more dynamic and memorable.

Here is the link – try it out!