This year, one of the biggest challenges in my classroom has been students’ limited knowledge of Tier 1, Tier 2, and, no surprise, Tier 3 vocabulary. It’s had a major impact on their ability to learn and engage with content. The textbook we use is packed with unfamiliar words, even in the instructions or basic sentences, which only adds to the struggle.
I believe in challenging students and keeping expectations high, but when vocabulary knowledge is shaky, it affects everything else—reading comprehension, class discussions, writing, and even their confidence. That’s where I’ve had to rethink how I approach instruction, especially when introducing complex concepts like federalism.
Here’s how I’ve been using vocabulary strategies and the Fast and Curious EduProtocol to help students not just survive, but grow.
What Is Working Memory?
Working memory is the space in the brain where students process information they’re learning in the moment. But it’s limited—students can only juggle a few pieces of information at once before their brains become overwhelmed.
How Vocabulary Impacts Learning
If a student is unfamiliar with a term like federalism, which is a Tier 3, subject-specific word, and they’re also unsure about related Tier 2 academic words like authority, system, or structure, their working memory fills up quickly. Instead of chunking the idea into one meaningful unit, they’re stuck trying to decode every word. That’s a recipe for overload, and learning often shuts down.
What It Looks Like in Class
Let’s say you show students this sentence:
“Federalism is a system of government in which power is divided between a national and state government.”
A student who lacks vocabulary support might be thinking:
What’s federalism?
What does system mean here?
Divided how?
What’s a state goverment?
By the time they work through those questions, the main idea is lost.
Strategy: Use Fast and Curious to Build Vocabulary
Start with Fast and Curious. Use a platform like Quizizz to introduce and repeat vocab words daily. It only takes five to seven minutes, and the repetition helps move those terms into long-term memory. This frees up working memory to focus on learning. and helps students feel more confident going into the lesson.
Build a quiz that includes a mix of terms:
Tier 1: law, rule
Tier 2: authority, system, divide
Tier 3: federalism, goverment, Constitution
This supports students at different vocabulary levels and helps build a foundation they can use during lesssons.
Use Visuals and Analogies
Pair federalism with a simple image, like a pizza split between friends or a tug-of-war between state and national goverments. These visual anchors make abstract concepts more concrete and easier to understand.
Make Connections to Their Lives
Connect new terms to students’ own experiences. For example, ask: “Do you have rules at home and rules at school? That’s kind of like federalism—different groups in charge of different things.” When students can relate to the vocabulary, they’re more likely to remember and apply it. And it’s also a good chance to build some trust and engagment.
Repeat and Revisit the Words
Don’t expect mastery after one lesson. Keep using the terms throughout the week—in review games, warm-ups, and writing prompts. Every time students hear and use a word, they build confidence and free up space in working memory for deeper thinking.
Final Thought
When students know the words, they can hold more ideas in their minds. That frees up their working memory to think critically, participate in discussions, and make meaningful connections. If federalism doesn’t stick the first time, don’t give up. Slow down, build vocab intentionally, and give students the space they need to succeed.
This past weekend, I presented at the Gifted Fair conference at the Hamilton County Educational Service Center and had the chance to attend a session on depth and complexity. It really got me thinking. Developed by Dr. Sandra Kaplan, depth and complexity is a framework designed to push students beyond surface-level understanding by helping them think like experts in any subject. Too often, when we talk about rigor in education, we focus only on making questions harder. But depth and complexity isn’t just about the types of questions we ask—it’s about changing the tasks we give students.
EduProtocols already help students move beyond memorization and into deeper thinking, but when we pair them with depth and complexity, we help students analyze, synthesize, and evaluate information in meaningful ways. Instead of just answering harder questions, they engage in perspective-taking, making connections, and evaluating historical impact. Here’s how we can enhance thick slides, sketch & tell, and parafly by embedding depth and complexity into each step of the lesson.
Thick Slides + Depth and Complexity
Thick slides go beyond listing facts—students make claims, compare ideas, and provide evidence. But how can we push even deeper?
Ways to add depth and complexity:
Big idea: Frame the slide around a larger concept. Instead of just listing facts about the Monroe Doctrine, students answer: how did the Monroe Doctrine shape American foreign policy for the next century?
Patterns: Identify recurring themes within a topic. If studying reform movements, students compare abolitionism, women’s rights, and education reform: what patterns exist in the strategies reformers used?
Over time: Analyze historical progression. Example: how did political parties evolve from the Federalists and Democratic-Republicans to modern-day parties?
Multiple perspectives: Assign different viewpoints. One student may create a slide from Mexico’s perspective on Texas independence, while another represents an American settler’s viewpoint.
Example lesson: The Age of Jackson Standard thick slide: Students summarize Jacksonian democracy and list key policies. Depth and complexity layer: Students compare Jacksonian democracy to modern populism, tracking patterns of how political leaders appeal to “the common people.”
Sketch & Tell + Depth and Complexity
Visual representation forces students to process and conceptualize information rather than just memorize it. Adding depth and complexity helps students examine underlying themes and historical connections.
Ways to add depth and complexity:
Language of the discipline: Require students to include key vocabulary in their sketches. Example: if sketching manifest destiny, students must label annexation, expansion, and sovereignty.
Ethics: Have students create two sketches—one that supports an event and one that critiques it. Example: was the Trail of Tears an unavoidable consequence of expansion, or a violation of Native rights?
Rules: Students depict who created the rules and who had to follow them. For instance, sketch how the spoils system benefited Jackson’s supporters but also led to corruption.
Across disciplines: Connect ideas across subjects. A history class sketching the Industrial Revolution might also examine how innovations in machinery affected economic systems and scientific advancements.
Example lesson: The Texas Revolution Standard sketch & tell: Students illustrate one major event in the Texas Revolution. Depth and complexity layer: Students compare two sketches—one from the perspective of Texan settlers and another from Mexico’s leaders.
Parafly + Depth and Complexity
Parafly already challenges students to improve their paraphrasing skills, but adding depth and complexity ensures that students analyze information rather than just rewrite it.
Ways to add depth and complexity:
Rules: Students not only paraphrase a text but also identify what rules are being set or broken. Example: in the Missouri Compromise, students highlight who benefits from the agreement and who is restricted by it.
Details matter: After paraphrasing, students explain what was left out and why it might be important. Example: what details are often omitted in textbook discussions of manifest destiny?
Ethical considerations: In addition to paraphrasing, students evaluate the morality of a historical decision. Example: was the annexation of Texas justified or an act of aggression?
Unanswered questions: Students paraphrase a passage and then write one question that remains unanswered. This helps spark deeper discussion about what the text does not address.
Example lesson: The Oregon Treaty Standard parafly: Students paraphrase textbook excerpts on the U.S.-British treaty dividing Oregon. Depth and complexity layer: Students evaluate the treaty’s fairness—who benefited most, and why didn’t the U.S. fight for 54°40’?
Final Thoughts
After attending the session at the Gifted Fair, it became clear that depth and complexity isn’t just about making things “harder”—it’s about giving students the right tools to think critically. When paired with EduProtocols, these strategies:
Encourage critical thinking instead of rote memorization
Make learning more engaging and relevant
Help students connect history to today
Depth and complexity doesn’t have to be a separate strategy—it can be woven into everything we already do. When paired with EduProtocols, it transforms simple activities into deeper, more meaningful learning experiences.
How are you using depth and complexity in your classroom? Let’s keep the conversation going!
One of the biggest challenges in history education is engaging students in meaningful analysis while encouraging collaboration and critical thinking. Enter Snorkl, an AI-powered whiteboard tool that allows students to interact with historical content by annotating images, adding text, drawings, or even recording their voices. By integrating Snorkl with historical inquiry, EduProtocols, and depth and complexity strategies, we can create a dynamic space where students engage deeply with the past.
1. Image & Source Analysis (8 Parts)
A picture is worth a thousand words—but only if students know how to analyze it! Post a primary source image (painting, political cartoon, propaganda poster) on Snorkl and have students:
Identify nouns, adjectives, and verbs within the image.
Annotate details with text boxes explaining who, what, when, where, and why.
Add speech bubbles or thought bubbles from different perspectives within the image.
Record a voice memo explaining their interpretation and the historical significance.
This works perfectly with the 8 Parts EduProtocol, where students systematically break down the visual to gain a deeper understanding.
Depth & Complexity:
Multiple Perspectives: Consider how different groups would interpret the image.
Patterns Over Time: Compare similar images from different eras (e.g., Revolutionary War vs. Civil War propaganda).
2. Think Slide Expansion (Thin Slides to Thick Slides)
Think Slides are a great way to introduce a topic, but what if we took them a step further? Post a Thin Slide prompt (one image, one word) on Snorkl, then challenge students to expand it into a Thick Slide by:
Adding three key facts about the topic.
Sourcing where their information comes from.
Comparing their topic to a related historical event or figure.
Leaving voice comments on peers’ slides to encourage discussion.
EduProtocol Tie-In: This follows the Thin Slides method but adds a deeper research component with the Thick Slide approach.
Depth & Complexity:
Ethics: Was the event just or unjust?
Big Idea: What lasting impact did this have on history?
3. Timeline Construction
History is all about connections. Instead of giving students a pre-made timeline, post randomized images and descriptions of historical events and have students:
Add text boxes explaining why some events were turning points.
Compare two different events and their outcomes.
Depth & Complexity:
Cause & Effect: What led to this event? What were its consequences?
Big Idea: How does this event connect to larger themes in history?
4. Historical Debate Board
Engage students in historical argumentation by posting a controversial historical question (e.g., “Was Andrew Jackson a hero or a villain?”). Have students:
Add arguments on both sides of the debate.
Use Snorkl’s drawing tools to connect related ideas.
Record an audio response defending their position.
Engage in peer review by responding to others’ claims.
Depth & Complexity:
Different Perspectives: How might different groups view this event?
Unanswered Questions: What evidence is missing from this debate?
5. Document-Based Investigation
Primary sources can be intimidating, but Snorkl makes them interactive. Upload a primary source document excerpt and ask students to:
Highlight key phrases and annotate their meanings.
Add images or drawings to represent key ideas.
Answer sourcing questions (Who wrote this? When? Why?).
Summarize the document in one sentence.
Depth & Complexity:
Point of View: What bias does the author have?
Trends: How does this document compare to other sources from the same period?
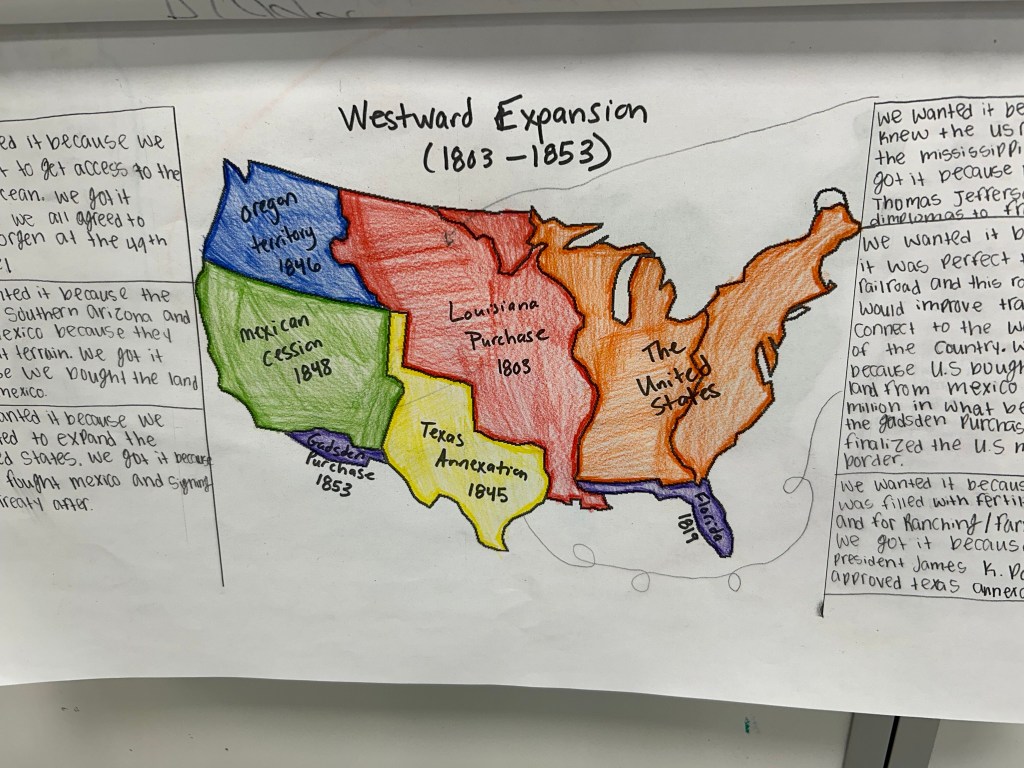
When studying Westward Expansion, post a blank map of the U.S. on Snorkl and have students:
Label newly acquired territories.
Use arrows to indicate migration patterns.
Draw icons or add images to represent key events (e.g., the Gold Rush, Trail of Tears).
Compare the perspective of settlers vs. Native Americans by adding speech bubbles or text boxes.
Using Sketch & Tell, students can create quick illustrations with short written explanations to reinforce their understanding.
Depth & Complexity:
Different Perspectives: What were the benefits and consequences of expansion?
Across Disciplines: How did technology and economics impact migration?
7. Empathy Map for Historical Figures (Frayer Model Adaptation)
History is filled with complex figures. Post an image of a historical person and have students create an empathy map with four sections:
What they see (their environment)
What they think (their beliefs)
What they feel (emotions, struggles)
What they say (quotes or imagined dialogue)
Adapt this using a Frayer Model, where students also add vocabulary and contextual information.
Depth & Complexity:
Ethics: Were their actions justified?
Big Idea: How does this figure’s story connect to historical trends?
Final Thoughts
By using Snorkl’s interactive whiteboard tools, combined with EduProtocols, we can transform the history classroom into a space where students actively analyze, compare, and collaborate on historical content. These activities not only help students develop historical thinking skills but also allow them to engage with the past in a way that fosters depth, complexity, and critical inquiry.
What are some ways you’ve used interactive tools like Snorkl in your history classroom? Let’s share and collaborate!
This week was all about making westward expansion more engaging and interactive while reinforcing key historical concepts through EduProtocols. From annotated maps and Thick Slides to Map & Tell and Parafly, students used a variety of strategies to build knowledge, analyze sources, and develop writing skills. We started with a Great American Race to introduce westward territories, followed by a Map & Tell to break down the meaning of “54°40′ or Fight.” Parafly helped students strengthen their paraphrasing skills with key readings on Oregon, and a MiniReport paired with Class Companion gave them practice comparing sources on the Texas Revolution.
Monday through Wednesday were a mix of different activities. Some students were completing Restart Readiness ELA tests, which involved reading two passages, answering comprehension questions, and writing an essay. Others were catching up on missed work, either for ELA or social studies. For those working on social studies, I focused on building background knowledge about how the U.S. acquired its western territories.
Mapping Westward Expansion
To start, students labeled and colored a map of westward territories, then cut it out and glued it to the center of a giant piece of paper. From there, they chose a specific territory—Louisiana, Texas, Oregon, the Gadsden Purchase, etc.—to analyze in depth.
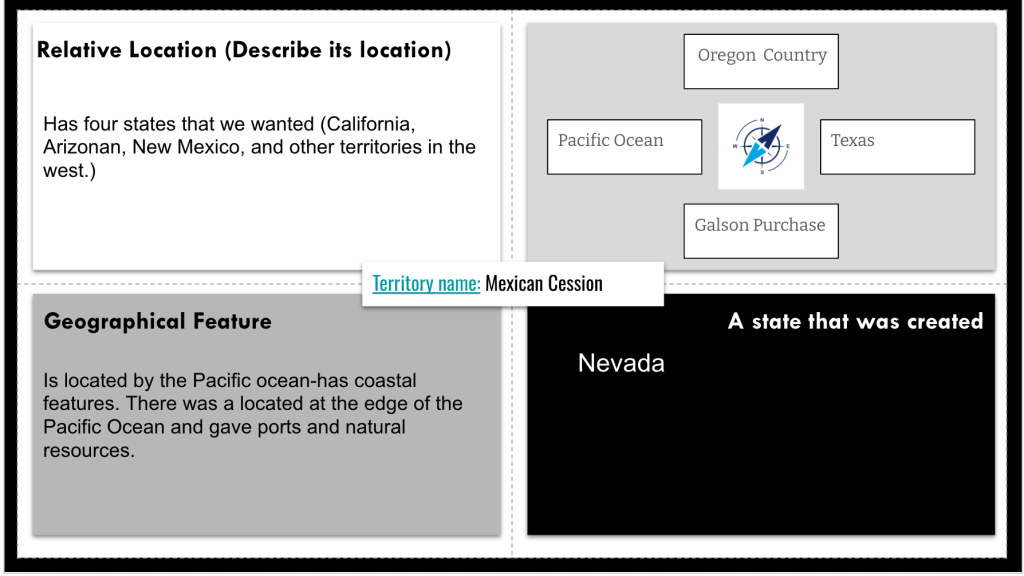
Frayer Model + Thick Slides
Using a Drew Skeeler template, students created a Frayer Model for their chosen territory:
Relative location (what’s north, south, east, and west?)
A geographic feature from the territory
A state that came from the territory
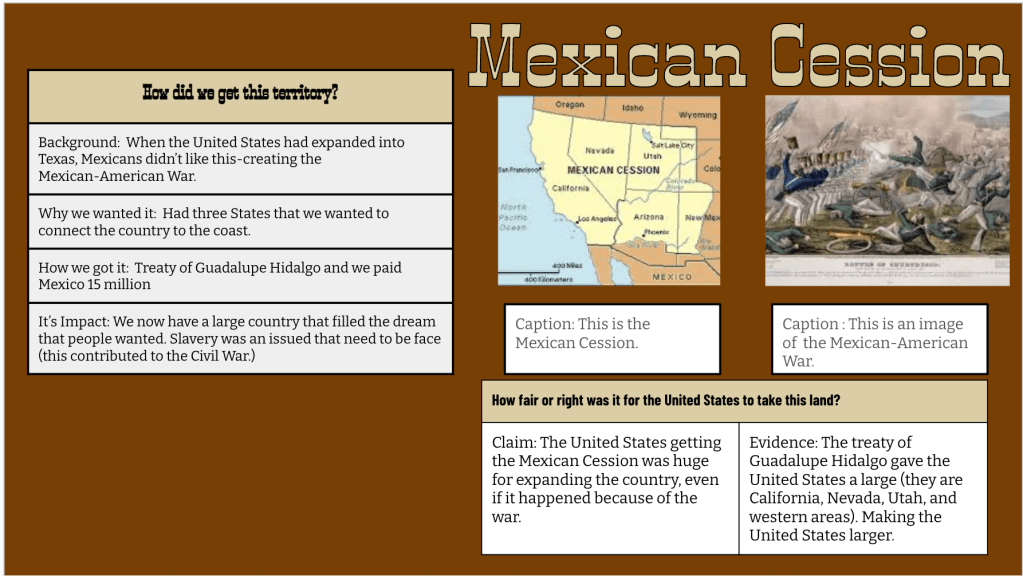
Then, students moved on to a Thick Slide, where they:
Provided background information on the territory
Explained why and how the U.S. acquired it
Discussed its impact
Wrote a claim on how justifiable the acquisition was, supported with evidence
Added two pictures and a title
Students submitted their Thick Slides through a Google Form, which I compiled into a Google Sheet for reference.
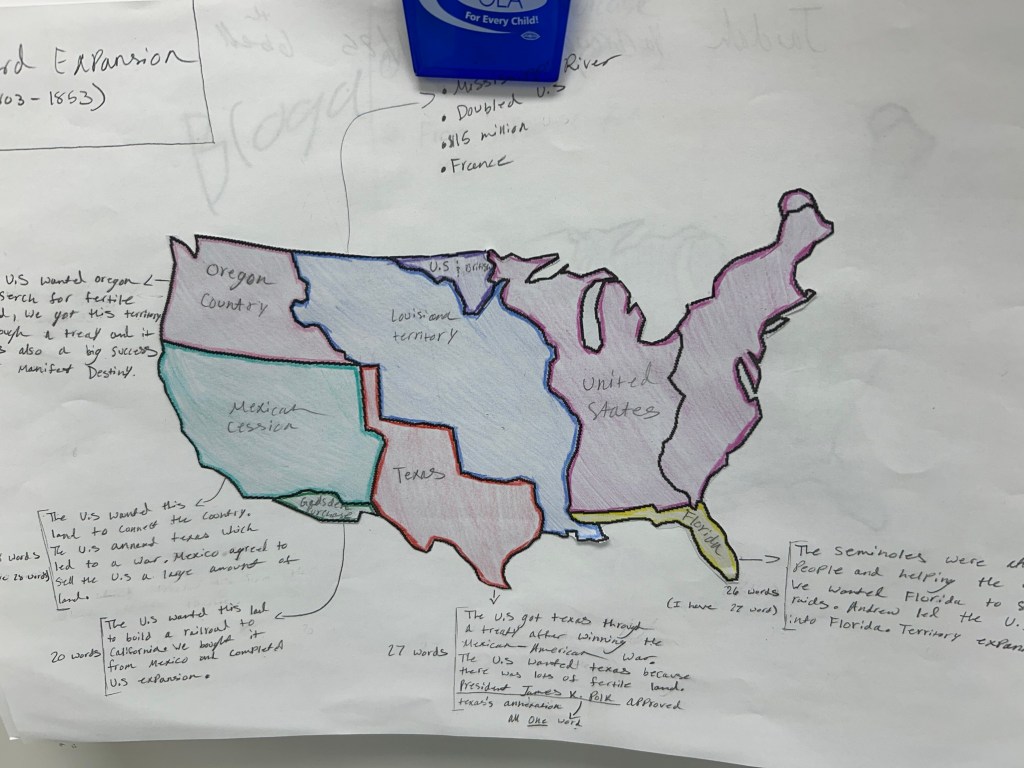
Annotated Maps + Dice Challenge
On Wednesday, students took an initial Quizizz on how the U.S. acquired each territory. The class average across all periods was 49%—clearly, they needed more time with the content.
Enter the Annotated Map—a strategy that helps students apply history to geography the way they would annotate a text. Using the Google Sheet of Thick Slides, students pulled key information and wrote annotations around their maps explaining how and why the U.S. acquired each territory.
To combat copy-pasting, I introduced a dice challenge: 🎲 I rolled three dice—a 20-sided, 12-sided, and 6-sided—and the total determined how many words students had to use for each annotation. Each round, they had to summarize the acquisition using only that many words. This forced them to think critically, be selective with word choice, and paraphrase rather than copy directly.
At the end of class, we took the Quizizz again—this time, class averages jumped to 82%. Huge improvement, and it reinforced why layered, interactive learning beats simple memorization every time.
Thursday
Thursday’s lesson focused on how and why the U.S. acquired Oregon, along with the experiences of those who traveled west.
Gimkit Warm-Up
We started with a 5-question Gimkit about Oregon, running it for three minutes before I gave feedback. Then, we ran it again for two minutes—already, students were improving just from this quick retrieval practice.
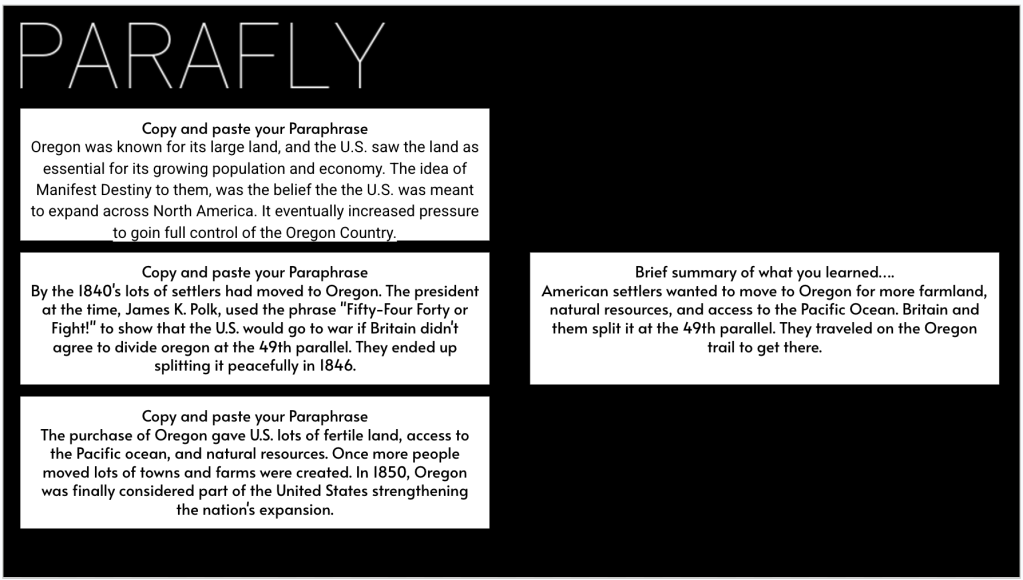
Parafly: Mastering Paraphrasing
Since the textbook’s explanation of Oregon was dense and overly wordy, I had AI break it into three digestible paragraphs. Using Socrative, I shared one paragraph at a time, and students paraphrased and submitted their responses.
Round 1: Students had four minutes to paraphrase the first paragraph. To help those who struggled, I provided a cheat sheet (generated with AI) that highlighted key words to keep and suggested substitutions for complex terms.
Round 2: I shared the second paragraph, gave quick feedback, and students paraphrased again—this time, they were faster.
Round 3: By the third paragraph, students had built confidence and speed in paraphrasing.
After each round, students copied and pasted their paraphrases into a Google Slide, where they also wrote a three-sentence summary of what they learned about Oregon.
Map and Tell
To visualize the territorial dispute, we completed a Map & Tell activity that helped students grasp the meaning behind the slogan “54°40′ or Fight.” Using a historical map, students marked key locations and boundaries to understand the tensions between the U.S. and Britain over Oregon Country. They starred the 54°40′ latitude, which was the northernmost boundary some Americans wanted to claim. Then, they used colored lines to map the dispute, drawing a red line at 54°40′ to represent the aggressive claim and a green line at the 49th parallel, which became the actual U.S.-British border agreement. This hands-on approach reinforced why “54°40′ or Fight” was a powerful rallying cry but ultimately not the reality of the final negotiation.
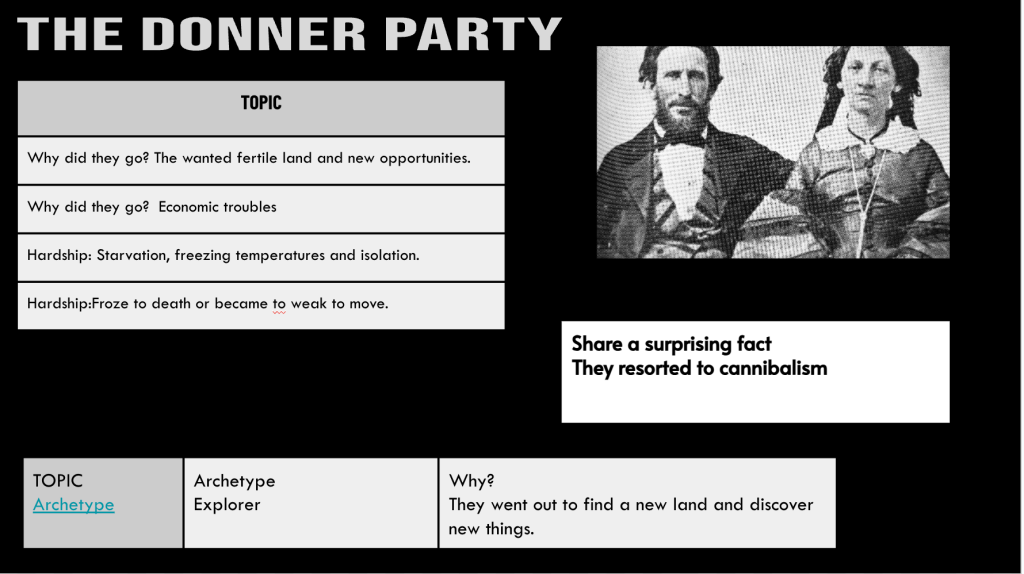
Thick Slide: Life on the Trail
Next, students chose one of two groups that traveled west:
The Donner Party
Mountain Men
They created a Thick Slide covering:
Who they were
Why they went west
The hardships they faced
Oregon Trail & Final Review
To wrap up, we ran the same Gimkit for two minutes—this time, scores jumped significantly. Then, I shared a link to the classic Oregon Trail game online, letting students explore the challenges of westward expansion in a fun, interactive way.
This lesson balanced retrieval, paraphrasing, and content creation, reinforcing key ideas about why people moved west and the struggles they endured.
Friday
To get students thinking about the Texas Revolution on a personal level, I started class with this question: “Have you ever agreed to something—only for the rules to suddenly change? Or, maybe you realized it was unfair? How did you react?” This simple question helped students connect historical events to real-life experiences, making them more engaged from the start.
EdPuzzle for Background Knowledge
Before diving into the details, students watched a 7-8 minute EdPuzzle video about the Texas War for Independence. I use these short videos to provide a visual foundation and background knowledge before we break things down further.
MiniReport and Class Companion
For the main lesson, we used the MiniReport EduProtocol to structure our analysis of Texas’ independence and annexation. I took the textbook sections on Texas and split them into two sources:
Source 1: Americans Rebel in Texas
Source 2: The Lone Star Republic and Annexation
Students had 8-10 minutes to gather information from both sources. They paraphrased ideas and recorded key points without needing to write in full sentences. Each student then summarized the main idea of what they gathered in their own words.
Once their notes were complete, they wrote a quick paragraph about Texas’ fight for independence and its annexation into the United States.
To wrap up, students submitted their writing into Class Companion for immediate AI-generated feedback. Since we ran out of time, we’ll finish refining and improving their responses next week.
Writing is one of the most essential skills students need to develop, but getting them to actually enjoy it? That’s another challenge entirely. Short Answer is changing that by turning writing into an engaging, social, and gamified experience. Whether you teach ELA, history, math, or science, this platform is designed to improve student writing without adding hours of grading to your workload.
Short Answer is quickly becoming a go-to tool for teachers looking to make writing instruction more interactive, meaningful, and effective.
How Does Short Answer Work?
At its core, Short Answer helps students develop stronger writing skills through peer comparison, real-time feedback, and social learning. Students complete short writing responses, compare their work to peers, and select which response is stronger based on clear criteria—helping them see what good writing actually looks like in a low-stakes, engaging way.
Teachers can create writing prompts for any subject and integrate them seamlessly into their existing curriculum. The best part? Students want to participate because it feels more like a game than an assignment.
Why Short Answer Works
Authentic Audience → Writing improves when students know their peers will see and evaluate it.
Instant Peer Feedback → Students learn from each other by comparing and discussing writing in real time.
Cross-Curricular Applications → It’s not just for ELA! Teachers across all subjects are using Short Answer to get students thinking, analyzing, and explaining their ideas more clearly. They have Math, Science, and Social Studies prompts ready to go.
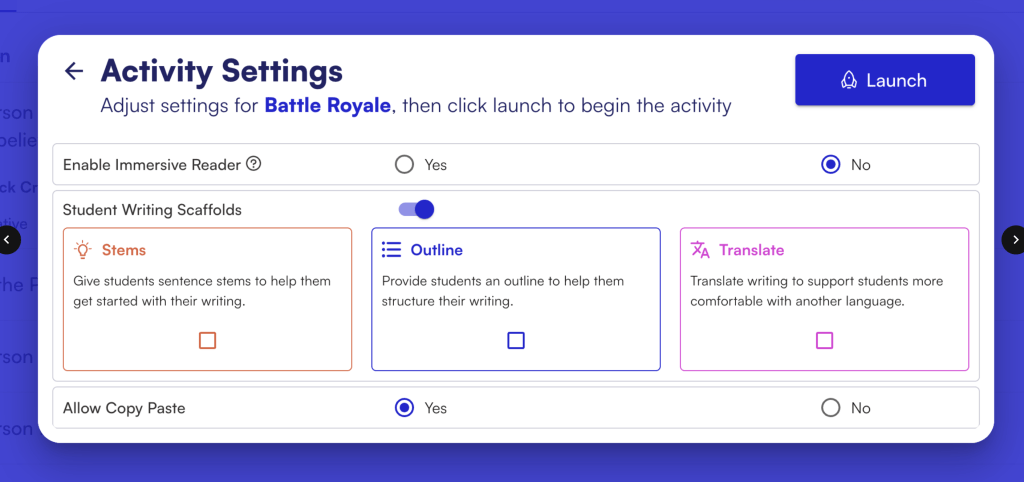
AI-Powered Supports → AI-generated sentence stems, outlines, and prompts give students structured support without giving them the full answer.
UDL & Accommodations → Voice typing features allow all students to participate, including those who struggle with typing or have accommodations. It also contains an immersive reader.
Embedded Readings & Images → Teachers can upload pictures and reading files to any question to provide context and scaffolding.
Writing Portfolios → Short Answer automatically compiles student writing into PDFs, making it easy to track growth over time.
Timers for Writing Sprints → Teachers can set a timer for 1, 3, or 5 minutes, helping students focus on short bursts of writing.
How I Use Short Answer in My Classroom
I’ve been incorporating Short Answer into my lessons, and it’s been a game-changer. Here’s how I’ve been using it:
3xPOV – Analyzing American Progress
Students examined the famous American Progress painting and wrote from three different perspectives:
A settler moving west
A Native American witnessing expansion
Columbia – The personification of Manifest Destiny
After writing, students compared responses in Short Answer’s Battle Royale feature, where they voted on the most compelling perspectives. The engagement was off the charts—students were excited to read, critique, and improve their writing.
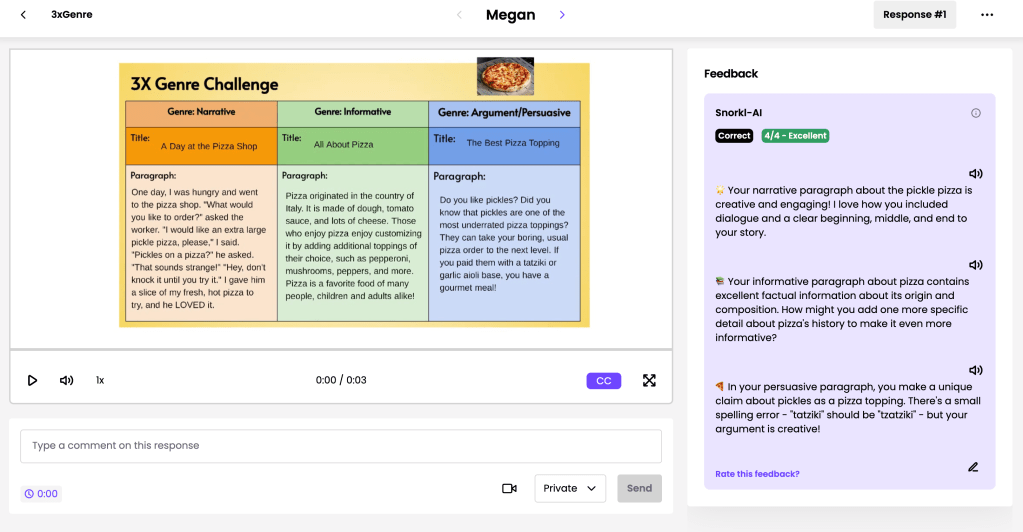
3xGenre – The Great Pizza Debate
To make writing fun and versatile, I ran 3xGenre using pizza as the topic.
Narrative Writing – Students wrote a short, creative story about pizza in 3 minutes.
Informational Writing – They wrote an explanatory piece on how pizza is made or its history.
Argument Writing – The final challenge: Which pizza topping is the best?
The students were so into it that they wanted one more round—so we debated which pizza chain is superior. Using Short Answer for feedback and comparisons kept them engaged, competitive, and improving.
EduProtocols That Work with Short Answer
Short Answer naturally fits with EduProtocols, giving students structured, high-rep writing practice that’s engaging and effective. Here are a few that work perfectly:
3xGenre → Students write narrative, informative, and argumentative responses on the same topic, seeing how writing purpose changes.
3xPOV → Students write from three different perspectives, then compare and refine.
3xCER → Students write a claim three times, each time strengthening their argument.
CyberSandwich Summaries → Students read, summarize, compare, and improve their responses based on peer examples.
Random Emoji Power Paragraph (REPP) → Short Answer’s timer feature makes it easy to run quick writing sprints where students incorporate random emojis into their responses.
Parafly → A fast-paced paraphrasing writing protocol that improves writing fluency and speed.
Why This Matters in an AI World
AI tools like ChatGPT aren’t replacing writing—they’re changing how we need to teach it. Short Answer makes writing interactive, social, and structured, ensuring students still develop their own thinking while learning to refine and critique writing.
Instead of fighting AI, we should use tools like Short Answer to: ✅ Keep writing authentic and engaging ✅ Help students compare their work to exemplars ✅ Provide scaffolds without giving answers ✅ Build stronger, more independent thinkers
If you’re looking for a game-changing way to get students writing, revising, and improving without dreading the process, Short Answer is worth checking out.
📌 Sign up for free trial and start using it in your classroom today: Short Answer
Writing doesn’t have to feel like a chore—for teachers or students. With Short Answer, it becomes a collaborative, competitive, and engaging experience that builds stronger writers in any subject.
This week was all about using EduProtocols to drive deeper thinking, engagement, and writing practice as we explored westward expansion and Manifest Destiny. Instead of just reading from the textbook and answering questions, students worked through activities that encouraged them to generate their own questions, analyze sources, and compare perspectives. We used Fast & Curious to build vocabulary, Wicked Hydra to spark curiosity, Sourcing Parts to break down historical imagery, and MiniReport to develop writing skills with multiple sources. Class Companion provided immediate feedback on their writing, helping them refine their responses. The combination of these strategies helped students interact with history in meaningful ways while reinforcing critical thinking and writing—exactly the kind of skills they need as we approach testing season.
Monday and Tuesday were all about finishing the Age of Jackson unit and transitioning into what’s next. It wasn’t the most eventful start to the week, but there were some clear takeaways from how students engaged with the material and performed on the final assessment.
Trail of Tears Number Mania
We closed out the unit with a Number Mania activity focused on the Trail of Tears. Students worked to prove this statement correct using four numbers and supporting facts from the reading:
“The Trail Where They Cried was not only a physical journey but also a moment that reshaped Cherokee history, causing loss, suffering, and ultimately rebuilding.”
This strategy forced them to dig into the reading, prioritize key details, and make connections between the numbers and the broader historical context.
Review Day: Where Did Students Struggle?
After Number Mania, we jumped into a self-assessment review where I encouraged students to answer as many questions as possible without looking at their notes first. I wanted to see what truly stuck.
The results were telling: ✅ Strong understanding of Jacksonian Democracy and the Bank War ❌ Struggled with Nullification and Tariffs
Looking at what worked, the MiniReport EduProtocol (which we used for Jacksonian Democracy and the Bank War) stood out as a clear success. This structured approach to reading, analyzing, and writing about sources helped cement those concepts more effectively than other methods.
Final Test & Class Companion for Writing
Tuesday was test day. To keep the writing portion meaningful, I had students complete their short-answer responses on Class Companion, giving them two attempts this time. The difference was noticeable—students were reading the feedback, revising their responses, and improving their writing in real-time.
At the end of the test, I tallied up the class averages: 📉 Pre-Assessment Scores: 22%, 19%, 22%, 25% 📈 Final Assessment Scores: 82%, 68%, 76%, 80%
In just five class periods, the gains were solid. I wish I had more time to dive deeper into certain topics, but when you’re locked into a common assessment deadline, you make the most of the time you have. The biggest takeaway? The MiniReport works, Class Companion feedback works, and students rise to the challenge when given the right tools.
Wednesday
This week, I kicked off a mini-unit on Westward Expansion, focusing on the big question: How did Manifest Destiny change America’s map and the lives of different groups of people?
I like to break this unit down into three key areas: ✅ The idea of Manifest Destiny ✅ How the U.S. acquired different territories ✅ The people and groups who moved west
To start, I introduced some key vocabulary with a Gimkit Fast & Curious covering terms like Manifest Destiny, expansion, territory, annexation, and more. We ran the Gimkit for 3 minutes, I gave quick feedback, and then we ran it again for another 3 minutes. With students now having some familiarity with the key terms, it was time to move into The Great American Race—a fast-paced, high-engagement EduProtocol that reinforces key concepts through collaboration and research.
How I Run The Great American Race
A few teachers have asked me how I set this up, so here’s my process:
1️⃣ Identify the Key Topics
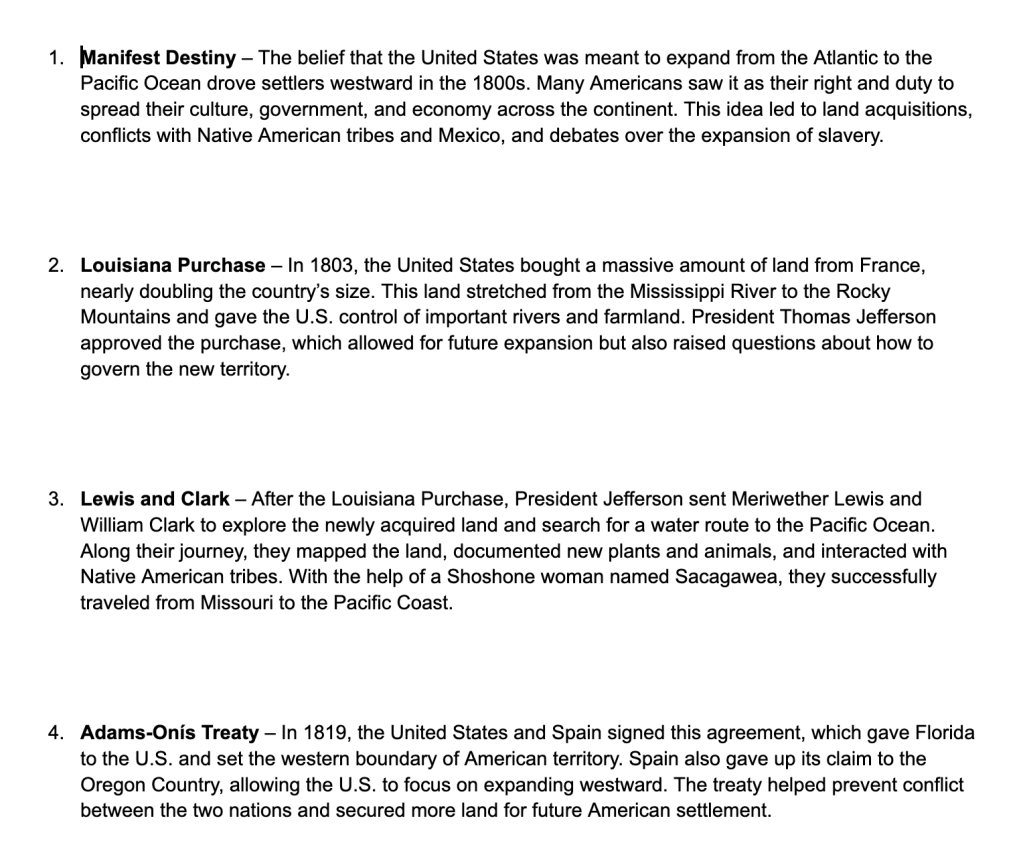
I chose 13 major terms from the unit, including the Louisiana Purchase, Lewis and Clark, James K. Polk, and Manifest Destiny.
Since I had 26 students, they paired up, with each pair responsible for one term.
2️⃣ Use AI to Generate Content
I’ve been using AI to create 4-5 sentence explanations for each term, which students can pull clues from.
Each explanation is labeled with a number corresponding to its term.
3️⃣ Set Up the Activity
I copy and paste the AI-generated explanations into a Google Doc, print them out, and cut them into individual slips for students.
Each pair receives a slip and has 3-4 minutes to create a response on Padlet using the timeline format.
4️⃣ Creating the Clues
On their Padlet post, students enter their term’s number in the subject line.
They write 3 clues and add a related image.
This should take 3-4 minutes, but my students usually take about 6-8 minutes.
5️⃣ Approving and Freezing Posts
I set Padlet so that I approve all posts before they go live.
Once time is up, I approve the posts, and students are ready to start the race.
Why I freeze the Padlet: This prevents students from copying and pasting answers directly into Google. They have to use key terms and context clues to research.
6️⃣ The Race Begins!
Students work with their partner, number their paper 1-13, and get 15 minutes to identify as many terms as possible using the clues from their classmates’ posts.
They can use their notes, their knowledge, and Google—just not copy-paste answers directly.
When time is up, we go over the answers and discuss any misconceptions.
Padlet makes this whole process smooth, especially with the timeline format, which keeps everything organized. The students love the competitive element, and I love that they’re engaged and thinking critically.
Wrapping Up with Big-Picture Questions
To close the lesson, I handed out an introductory reading on Westward Expansion. On the back, I included three deeper-thinking questions to get them thinking beyond just dates and facts:
📌 Evaluating Perspectives: How might an American settler and an Indigenous person have viewed westward expansion differently?
📌 Connecting to Today: Do you think Manifest Destiny still influences how Americans view expansion and progress today? Why or why not?
📌 Comparing Motivations: What were the different reasons people moved westward, and how did those reasons create tensions among settlers, Native Americans, and the U.S. government?
Students had 10 minutes to read and answer the questions. This served as a preview for deeper discussions and activities later in the unit.
Thursday
Fast & Curious: Building Vocabulary
We started class with a Fast & Curious using Gimkit to review key vocabulary related to westward expansion. Students played for three minutes, received feedback, and then played again to reinforce terms like Manifest Destiny, annexation, expansion, and acquisition. This quick repetition helped them solidify essential vocabulary before moving into deeper analysis.
Wicked Hydra: Generating Questions
Next, we transitioned into a Wicked Hydra using the headline, “Gap’s T-Shirt Was a Historic Mistake.” The goal was to get students asking as many questions as possible about what the headline might mean. Originally, we used Padlet for this, but after accidentally deleting the responses, we switched to paper, and students continued writing down their questions. Some of the best questions that came from this activity included:
Why would a T-shirt about Manifest Destiny be controversial?
Who was upset by this, and why?
What does this headline tell us about how history is remembered?
These questions set the stage for students to engage critically with Manifest Destiny as both a historical event and a modern controversy.
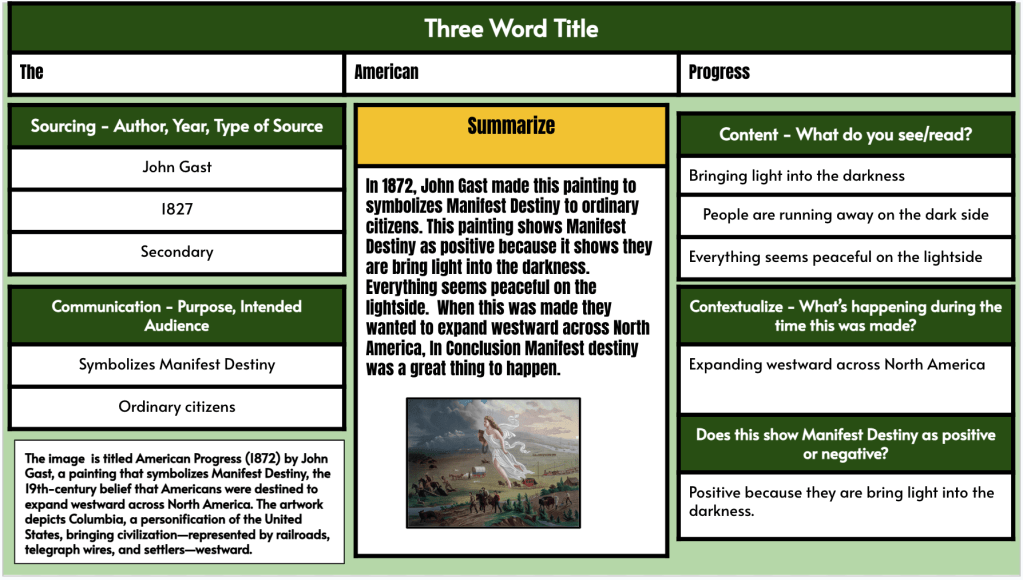
Sourcing Parts: Analyzing “American Progress”
To further analyze the idea of Manifest Destiny, students used the Sourcing Parts protocol to break down the painting American Progress by John Gast. The goal was to help them understand how imagery can be used to justify expansion. They examined the source by identifying who created it, what message was being conveyed, and who was included or left out of the image. The discussion that followed centered on how paintings like this one helped promote the idea of Manifest Destiny as a positive force while ignoring the consequences for Indigenous people and others affected by westward expansion.
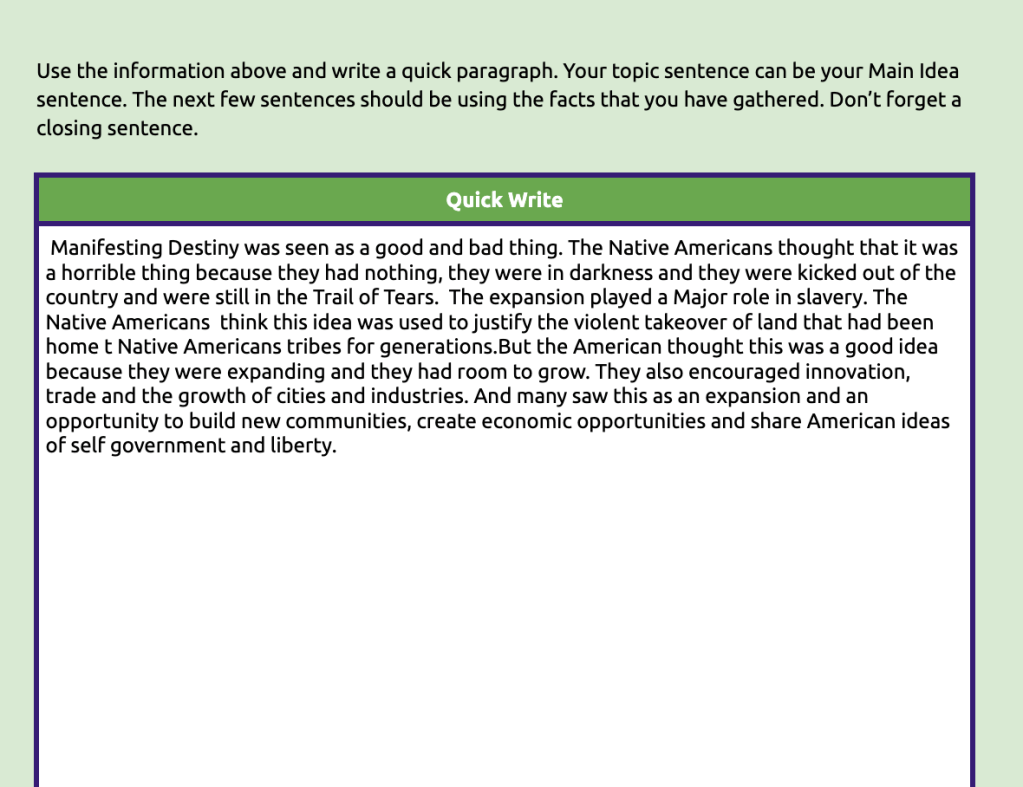
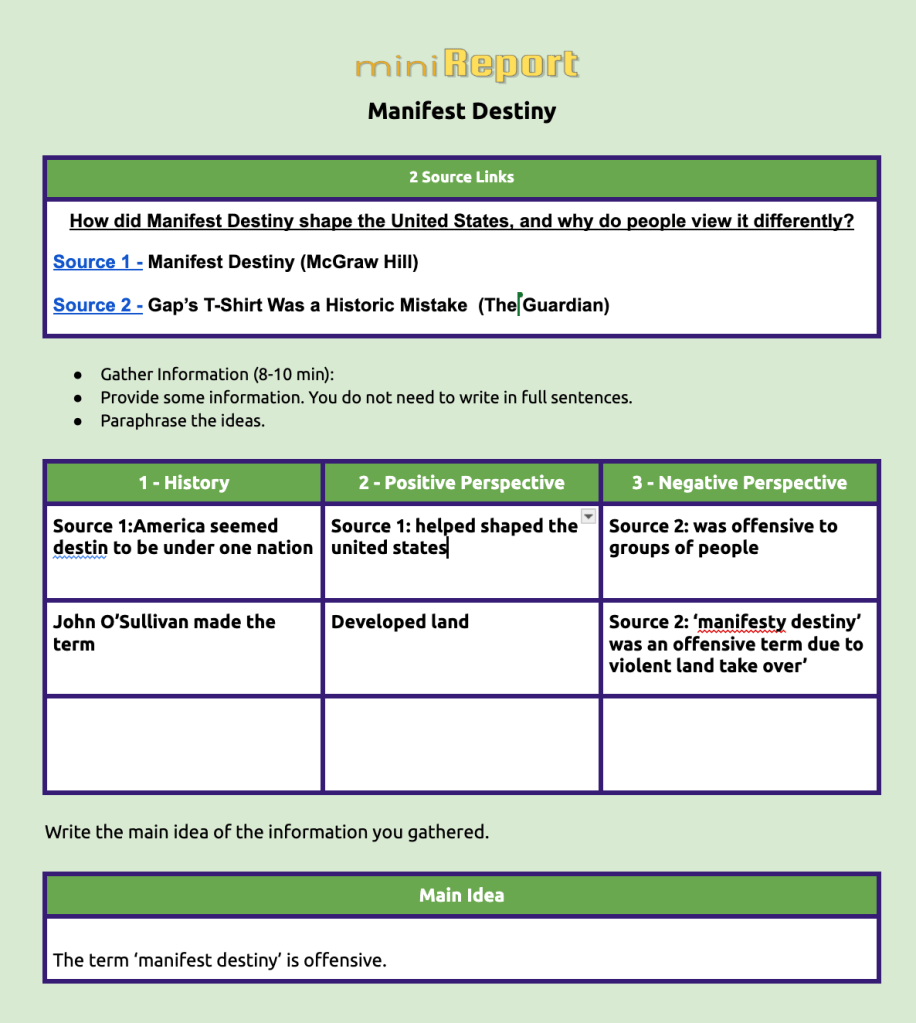
MiniReport: Comparing Perspectives
After this, we moved into a MiniReport comparing two different perspectives on Manifest Destiny. The first source was adapted from the McGraw Hill textbook and explained Manifest Destiny as a natural and necessary part of American expansion. The second source was an article about the backlash to the Gap T-shirt, highlighting the modern-day criticism of the idea.
Students took notes on the key ideas from both sources, categorized them into three sections—historical context, positive perspectives, and negative perspectives—then wrote a main idea sentence. They combined all of this information into a paragraph response and submitted their writing in Class Companion. Since the Ohio state test includes a two-source reading and writing essay, this activity was designed to mirror that format and give students practice organizing their thoughts and using evidence.
Why This Worked
This lesson reinforced a lot of important skills beyond just memorizing historical facts. Students generated their own questions, analyzed visual sources, compared perspectives, and practiced structured writing. The writing in Class Companion showed improvement—students were getting better at organizing information, crafting arguments, and responding to feedback. The next step in the unit will focus on westward expansion’s impact on different groups, continuing to build historical analysis, writing, and connections to the present.
Friday
Gamifying POV Writing: WeWillWrite & ShortAnswer
We started Friday by wrapping up unfinished work from Thursday. Some students needed to complete their Class Companion writing on Manifest Destiny, while others who had finished moved on to labeling and coloring a map of westward expansion territories. Once that was taken care of, we shifted into a creative writing activity, using WeWillWrite and ShortAnswer to explore point of view (POV) writing in a gamified way.
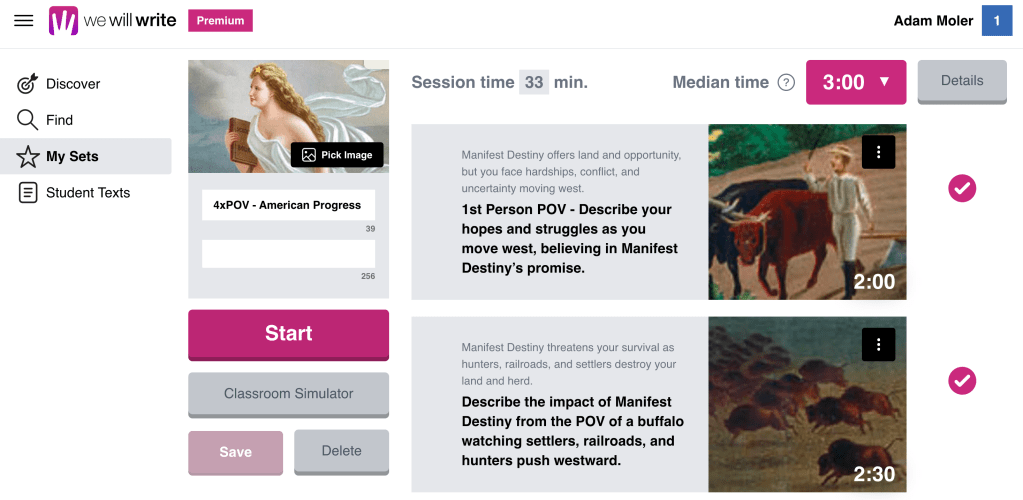
WeWillWrite: POV Writing with Columbia, Natives, Farmers, & Buffalo
For most classes, I used WeWillWrite, a platform that gamifies writing in a way that engages all students. Back in December, I used it for general writing practice, but now you can create custom sets—a feature I didn’t know about until Lucas George mentioned it. I jumped on the chance to create a POV set based on the painting American Progress by John Gast. Students wrote from the perspective of Columbia, Native Americans, Farmers, or the Buffalo, responding to a timed prompt.
Here’s how it worked: ✅ Students logged in with a random pseudonym (just like Gimkit). ✅ They were placed into teams and given three minutes to respond to the prompt. ✅ They could see hints and teammate responses to refine their writing. ✅ Each team voted on their strongest response. ✅ The top four responses battled it out for class-wide voting and points! ✅ We repeated the process for two more rounds, deepening their engagement with perspective writing.
The energy in the room was fantastic—students were thinking critically about how Manifest Destiny impacted different groups, but in a way that felt like a game.
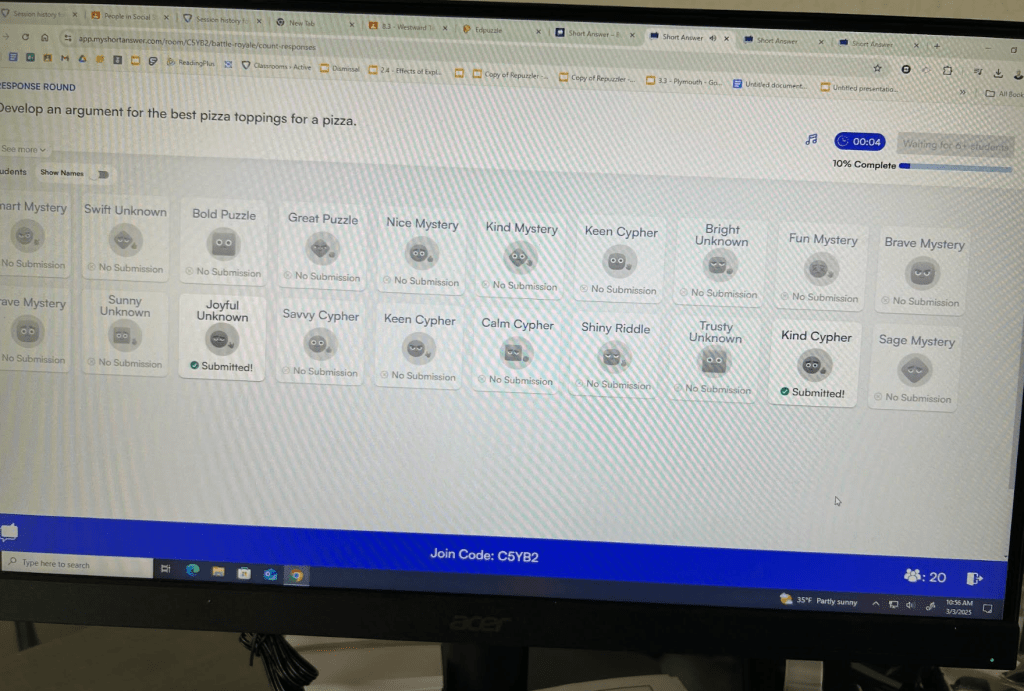
ShortAnswer: Live POV Battle Royale
For 6th period, I decided to switch things up and use ShortAnswer instead. This tool is similar to WeWillWrite but allowed me to create POV questions on the spot. One thing I loved was the built-in voice typing feature, which helped several of my students, especially those with IEPs.
Here’s how the ShortAnswer Battle Royale worked: ✅ I set up a POV question (e.g., “How would a Native American describe Manifest Destiny?”). ✅ Students had five minutes to respond. ✅ After the timer ended, I hid student names (lesson learned—forgot at first, and it became a popularity contest). ✅ Responses were randomly grouped into quadrants, and students voted on the best one. ✅ The top four moved on to a semifinal vote. ✅ The final two battled it out for the top spot.
The hidden names made a huge difference. Suddenly, students who rarely get recognized for their writing were winning! One student on an IEP finished in the top three twice, and after his second win, he threw his arms up and said, “I never win anything!” Absolute highlight of the day.
I also liked how AI-generated sentence stems and outlines helped guide students in their POV writing. Students who typically struggle to write were producing full paragraphs and competing to win. The ability to attach readings and pictures to questions made it even stronger.
When I think of teaching the Early Republic, I think about political parties, presidential decisions, and how those decisions shaped the federal government. I think about how the first five presidents kept us out of wars, expanded federal power, and navigated political tensions. I think about how political parties influenced those choices and how the nation evolved under their leadership. But this damn textbook has other plans.
Instead of keeping the focus on political parties, foreign policy, and domestic growth, it randomly throws in sectionalism, the Missouri Compromise, the Industrial Revolution, and some random westward expansion facts—all jammed into two weeks. It’s way too much, and it makes no sense. This is the Early Republic, not a scattershot of everything that happened between 1800 and 1825.
Then Friday rolled around, and we hit the common assessment from the textbook—a test that somehow completely ignores the Monroe Doctrine but includes a question asking students to identify three battles from the War of 1812. Who cares?! It’s not even an important part of the unit.
But I digress.
So, with all that, we kicked off Monday learning about growing sectionalism after the War of 1812. SMH.
We kicked off Monday with a Content Compactor that acted as a quick review of the causes of the War of 1812. This got students thinking about the political, economic, and regional tensions that led to the war while allowing them to summarize key ideas concisely—an essential skill as we transitioned into the concept of sectionalism.
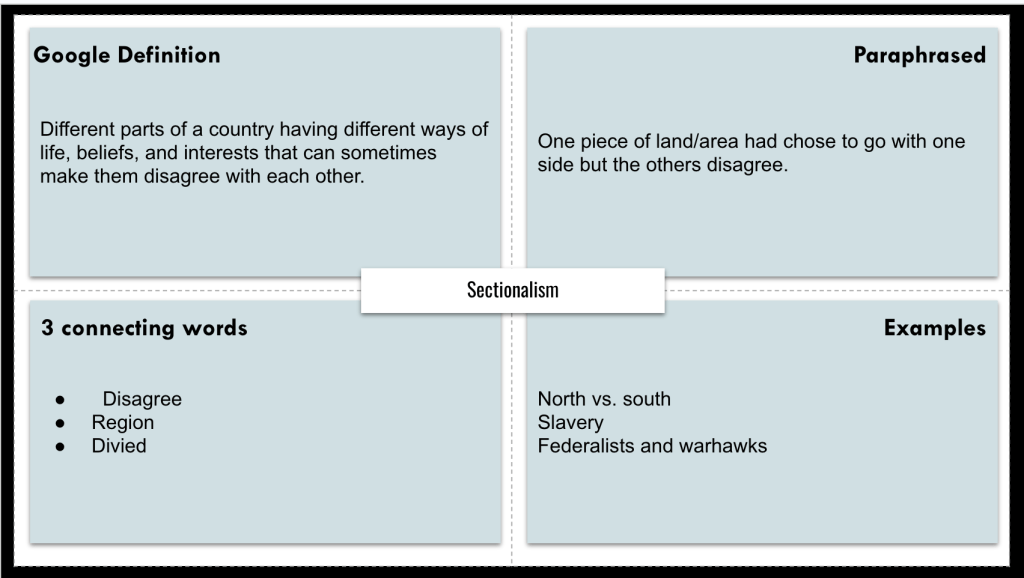
Frayer Model: Defining Sectionalism
Next, we tackled sectionalism with a Frayer Model. Students defined the term, provided examples and non-examples, and listed key characteristics. The goal was to help students see sectionalism not just as a word, but as a major force that would shape U.S. history for decades. This activity ensured that students grasped the economic, political, and social divisions developing between regions of the country.
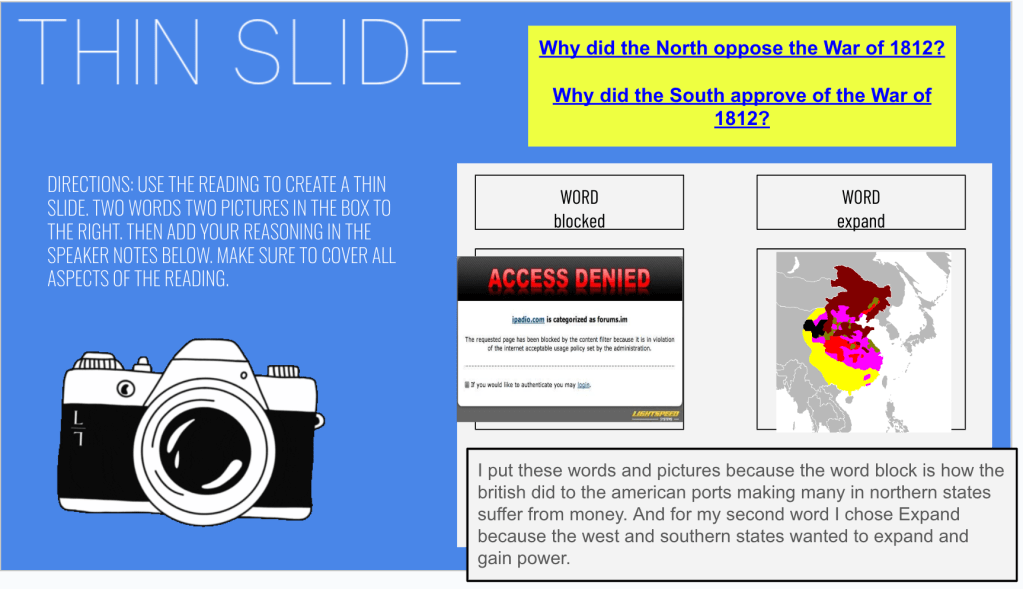
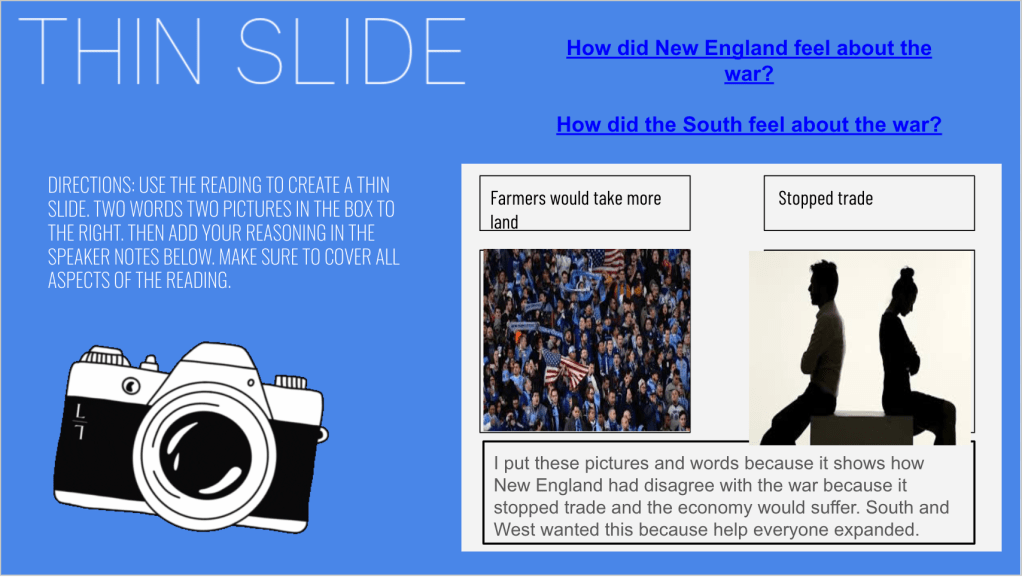
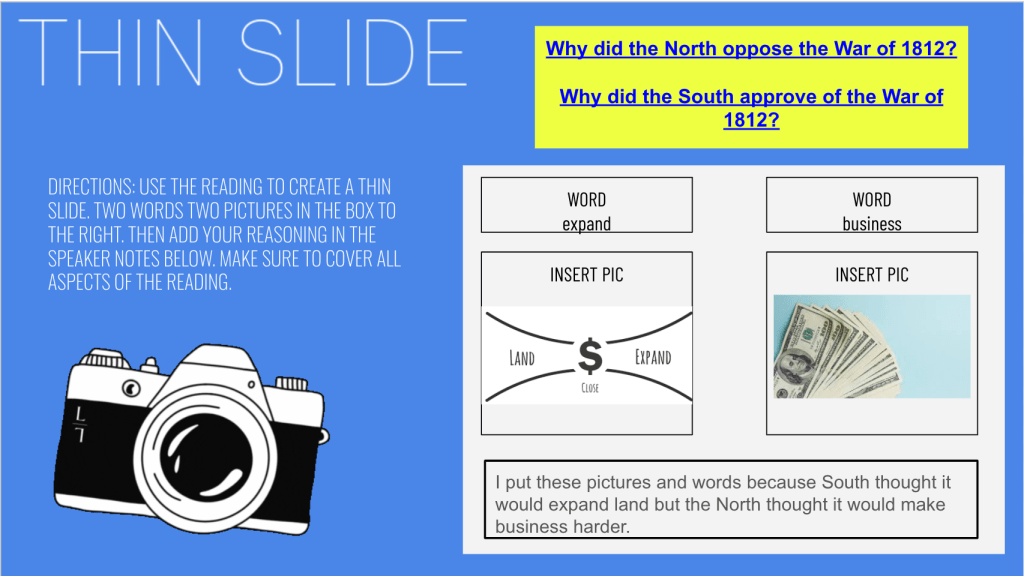
Thin Slides: Visualizing Sectionalism
Once students had a working definition, they moved into a Thin Slides activity. Using a short reading on sectionalism, they selected two words and two images that best represented how sectionalism grew after the War of 1812. In the speaker notes, they explained their choices, addressing:
Why did the North oppose the war?
Why did the South support it?
How did economic and political differences lead to sectionalism?
This was a quick, low-stakes way for students to process how sectional tensions formed and why they mattered.
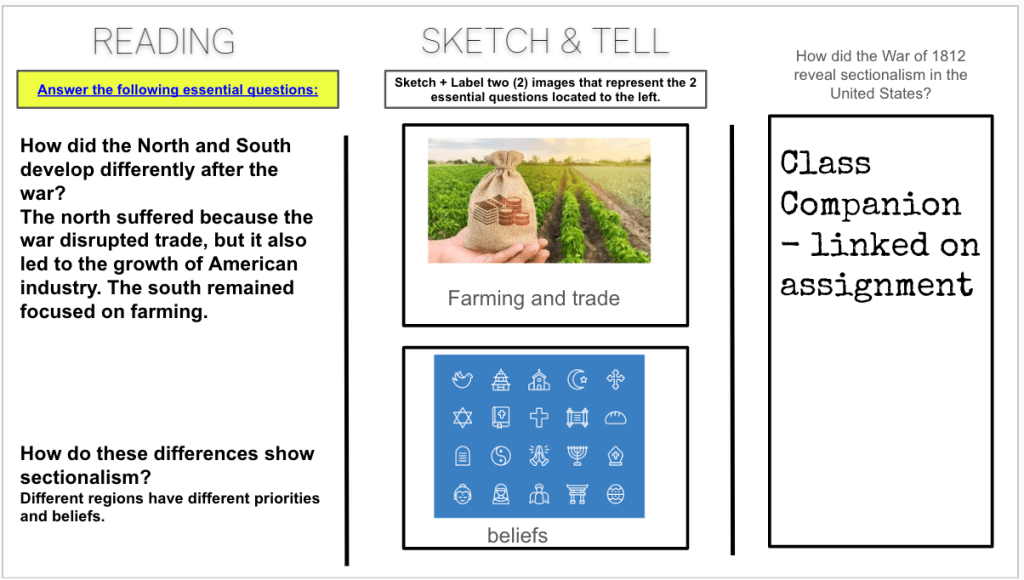
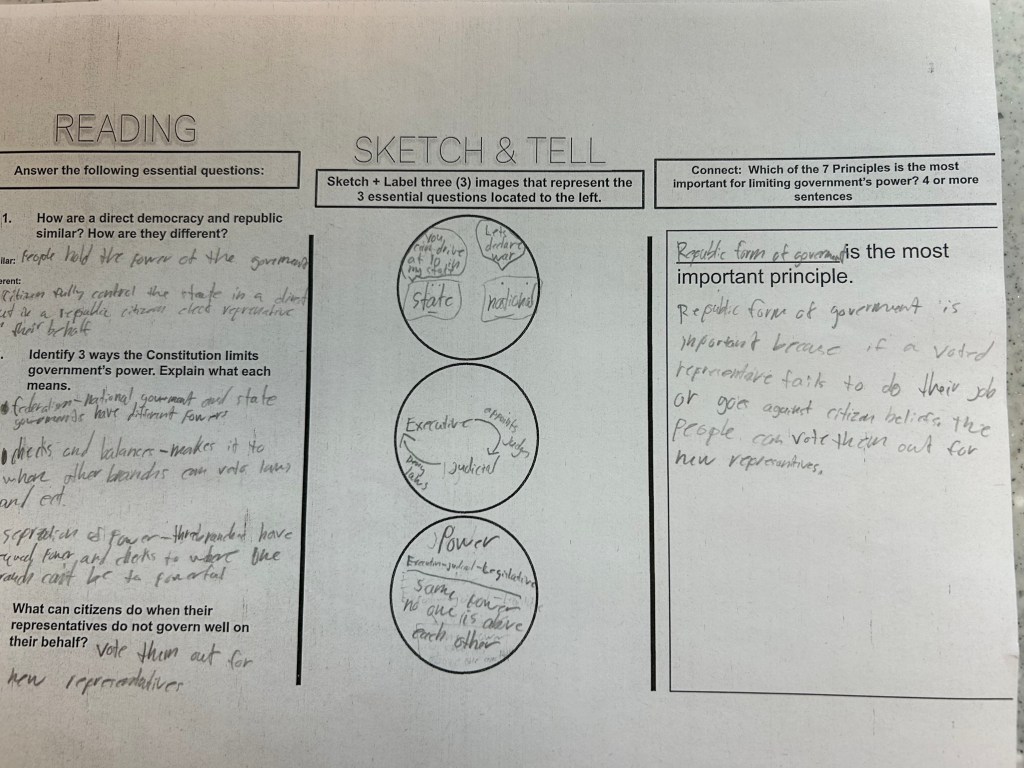
Sketch & Tell: Answering Essential Questions
Students then tackled three essential questions through a Sketch & Tell activity: 1️⃣ How did the North and South develop differently after the war? 2️⃣ How did these differences contribute to sectionalism? 3️⃣ How did the War of 1812 reveal sectionalism in the U.S.?
They created two labeled sketches that visually represented their answers, reinforcing how regional differences in economy, industry, and policy contributed to rising sectional tensions.
Class Companion: Writing About Sectionalism
To wrap it up, students used Class Companion to answer the question: 💡 How did the War of 1812 reveal sectionalism after the war?
This allowed students to take their thoughts from their sketches and turn them into a structured response with real-time AI feedback. Since some students needed more time to refine their writing, we carried this over into Tuesday, giving them an opportunity to perfect their responses and ensure they fully understood sectionalism’s impact.
Why This Works
Content Compactor helped students refresh prior knowledge in a concise, engaging way.
Frayer Model ensured students developed a strong conceptual foundation before moving forward.
Thin Slides encouraged visual learning and synthesis of ideas.
Sketch & Tell helped students explain complex historical trends in a creative, student-centered way.
Class Companion allowed students to organize their thoughts in writing with immediate, personalized feedback.
Instead of just reading about sectionalism, students were building their understanding step by step, using visual, discussion-based, and writing activities to make the concept stick.
Tuesday & Wednesday
We started Tuesday by finishing up Class Companion responses from Monday on how the War of 1812 revealed sectionalism. Once students submitted their final responses, we pivoted to the Industrial Revolution—a topic that the unit test oddly prioritizes with fill-in-the-blank questions on patents, corporations, and capitalism, but barely acknowledges the Monroe Doctrine or foreign policy under the early presidents. Because that makes total sense.
Gimkit Fast & Curious: Industrial Revolution Vocab
Since the test focuses so much on random economic terms, we ran a Gimkit Fast & Curious with key Industrial Revolution vocabulary—words like patent, corporation, free enterprise, and capitalism. First round: class averages were pretty bad. After giving a quick mini-lesson on the most-missed words, we ran the Gimkit again, and scores jumped up significantly.
To lock in the most commonly missed terms, we followed up with Frayer Models for: 🔹 Patent 🔹 Corporation 🔹 Free Enterprise
Reading, Videos & Thick Slides
After breaking down the vocabulary, students read about key innovations of the Industrial Revolution—factories, mechanization, interchangeable parts, and yes, the cotton gin (because clearly, that fits into an Early Republic unit 🤦♂️).
To help process the reading, students worked on Thick Slides focused on four ways the Industrial Revolution transformed America. They had to: ✅ List four key impacts ✅ Find an image to represent industrialization ✅ Compare the North and South’s role in industrialization
Why This Works
Gimkit Fast & Curious ensured students got multiple reps with essential vocabulary.
Thick Slides helped synthesize and apply learning, rather than just memorizing random terms.
Multiple formats (reading, videos, notes, discussion, and visuals) ensured everyone had a way to engage with the content.
Even though this topic was awkwardly shoved into the unit, we made it work in a way that actually helped students understand and retain the material—instead of just cramming information for a test.
Thursday
With the unit test coming up, I wanted to make sure students had multiple opportunities to review key concepts in an engaging and structured way. Enter Brain, Book, Buddy, Boss—one of my favorite review strategies because it reinforces retrieval practice, collaboration, and teacher-guided clarification all in one lesson.
Step 1: Brain (Independent Recall)
Students received the review sheet (matching terms, short answer questions, and key concepts from The Early Republic). Before looking at any resources, they went through the entire review sheet independently, answering as many questions as they could from memory.
The goal? Get a sense of what they already know.
Some students flew through it, while others stared blankly at the paper. That’s the beauty of this step—it exposes strengths and gaps immediately.
Step 2: Book (Reference-Based Learning)
Next, students used their notes, textbooks, and classwork to fill in missing answers and correct any mistakes. This phase is where light bulbs start going off as students piece together information they’ve seen throughout the unit.
Of course, this is also where they discover just how terribly worded some of these test questions are.
For example, here’s an actual test question: “What were some effects of the Alien and Sedition Acts?”
A. The policy of nullification became largely discredited. B. The French stopped attacking U.S. ships. C. Fewer people immigrated to the United States from Europe. D. The principle of states’ rights gained public support.
This question assumes a level of vocabulary knowledge that most 8th graders simply don’t have. The wording is vague enough to confuse even students who understand the Alien and Sedition Acts. What 8th grader uses discredited in conversation?
Step 3: Buddy (Peer Discussion & Comparison)
After self-correcting with their books, students paired up to compare answers and discuss any remaining gaps. If they disagreed on an answer, they had to explain their reasoning to each other.
These conversations were gold—students challenging each other, correcting mistakes, and realizing where they were off-track. They got into heated debates over Federalist vs. Republican beliefs and the importance of Marbury v. Madison. This step solidified a lot of key concepts.
Step 4: Boss (Teacher Q&A)
For the final step, I opened the floor for questions. Students could ask me about anything still unclear—but with a catch:
They only had 8 minutes.
Once the timer hit zero, I was done answering. This forces students to prioritize their questions and keeps the review focused and efficient.
Book helps reinforce accuracy and self-correction.
Buddy provides peer discussion and clarification.
Boss allows for focused teacher intervention in a structured way.
By the end of class, students had worked through misconceptions, clarified their understanding, and felt more confident about the material. It was one of the best review strategies for this test, and it reinforced just how flawed some of the test’s wording really was.
Friday: Test Day
Friday was test day, and I had everything set up on Class Companion for the short answer questions, while using McGraw Hill’s testing program for the multiple-choice and fill-in-the-blank sections.
One of the fill-in-the-blank questions asked about the beliefs of Democratic-Republicans. Most students simply typed “Republicans”, which is a reasonable answer considering the textbook even calls them that at times.
But McGraw Hill marked it wrong because they didn’t type the answer exactly as programmed: “Democratic-Republicans, Republicans”. I wish I were making this up.
So now, instead of assessing whether students actually understood the beliefs of the party, we were stuck in a battle of formatting.
Class Companion: At Least It Scored Correctly
For the short answer responses, Class Companion scored and provided feedback, but students only had one attempt—no revisions, just one shot. At least it evaluated their responses based on content rather than formatting nonsense.
This week in 8th-grade social studies, we brought history to life with engaging EduProtocols that helped students dive deep into the Early Republic and key moments like the Whiskey Rebellion. From Sketch and Tell-O activities that broke down complex ideas to Progressive Sketch and Tell timelines that visualized historical events, we kept creativity at the forefront. Class Companion added an exciting layer of AI-driven writing feedback, while Fast and Curious Gimkits and CyberSandwiches reinforced foundational knowledge and sparked meaningful discussions. These protocols not only engaged students but also helped them build connections, improve comprehension, and master essential skills.
This week, we dove into a new unit on the Early Republic, which will culminate in a common assessment. Starting with a pre-assessment right out of the textbook, I had students tackle 20 of the most challenging, oddly worded questions filled with difficult vocabulary. The pre-assessment was designed to gauge their baseline knowledge and took about 10–15 minutes. Predictably, it was tough, but it gave me a sense of where they stood as we started the unit.
Introducing the Unit with a CyberSandwich
One thing I like about the textbook’s first lesson in this unit is how it revisits key foundational topics that lead into the Early Republic. It highlights the weaknesses and problems in America before the Constitution—like taxation without representation, the Articles of Confederation, Shays’ Rebellion, and foreign and domestic disputes—and positions the Constitution as the solution.
The irony? The textbook doesn’t explicitly connect these issues to the Early Republic or explain how the first five presidents put the Constitution to work and expanded federal power. So, I decided to bridge the gap myself using a CyberSandwich EduProtocol.
Here’s how it went:
Simplified Reading: Instead of fumbling with the textbook or logging into the website, I printed out the reading directly from the online textbook. Paper copies are quick, easy, and let students highlight and annotate as they read.
Guiding Questions: Students spent 12 minutes reading and answering five guiding questions that I generated with AI to focus their attention on key details.
Partner Discussion: After reading, students listed two problems and one solution from the text and discussed their findings with a partner, comparing ideas.
Fixing a Paragraph: To practice critical thinking and writing, I gave them a poorly written paragraph (also AI-generated) about the topic and gave them 10 minutes to improve it.
Wrapping Up with Gimkit
We ended the class with a Gimkit featuring nine questions I pulled from the summative assessment for this unit. The scores showed where we have room to grow:
57%, 47%, 39%, and 42%.
While the scores were low, it was a good baseline and a chance to familiarize students with the material they’ll need to master.
Wednesday: George Washington Takes Office
We jumped into Lesson 2: George Washington Takes Office, diving into how Washington and Congress worked to strengthen the federal government. While the textbook suggests this lesson could take two days, I find that assumption wildly unrealistic. It’s packed with readings, activities, writing tasks, and reviews that assume students have extensive social studies background knowledge—something many students simply don’t have due to the limited time spent on the subject in earlier grades. The disconnect between textbook expectations and real classroom realities is frustrating.
Quick Notes: Setting the Stage
To start the lesson, I introduced key topics through a short lecture. These quick notes laid out the big ideas students would encounter in the lesson:
Washington’s leadership style.
The establishment of key government structures.
The significance of neutrality and Jay’s Treaty.
The goal was to give students a foundation before diving into deeper activities.
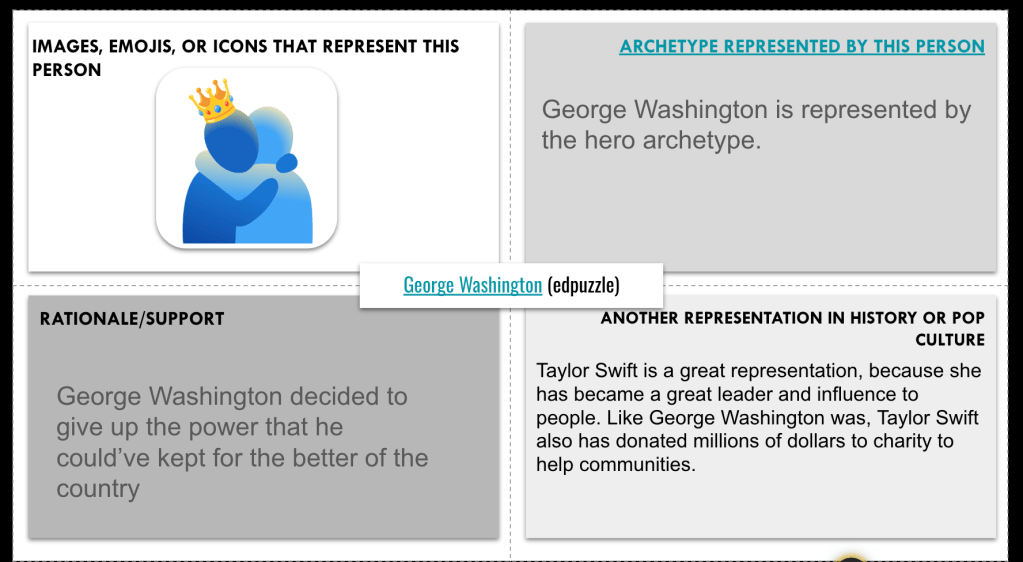
Archetype Foursquare: Connecting History to Stories
Next, I introduced archetypes—a fun and engaging way to connect historical figures to familiar characters. Students brainstormed archetypes in their favorite movies, TV shows, or books and discussed how every character fits an archetype (e.g., hero, mentor, trickster).
We followed this with an EdPuzzle on George Washington, a 4-minute video highlighting his leadership and challenges. While watching, students thought about which archetype best described Washington.
Afterward, students spent 8 minutes completing an Archetype Foursquare for Washington. They:
Identified an archetype for him (e.g., “hero” or “sage”).
Provided evidence from the video to support their choice.
Connected George Washington to someone else.
Compared their archetype ideas with a partner in a quick discussion.
Sketch and Tell-O: Strengthening the Federal Government
We then transitioned into the textbook’s reading on how Washington and Congress strengthened the federal government. Using a Sketch and Tell-O template, students sketched visuals to represent key ideas, such as:
The creation of executive departments.
The establishment of the federal court system.
This visual and creative approach helped break down the dense content into manageable chunks.
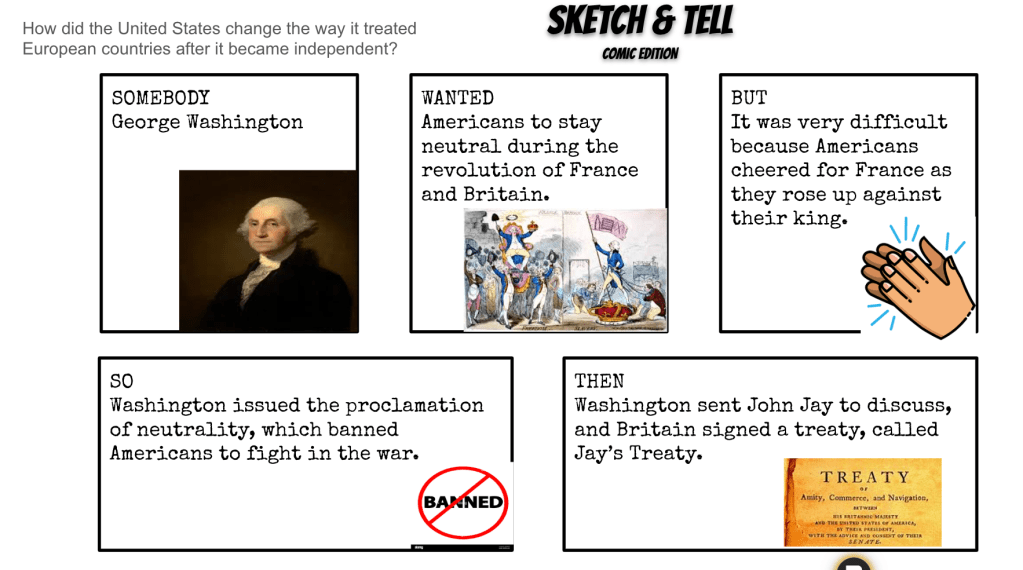
SWBST Sketch and Tell: Neutrality and Jay’s Treaty
Next, we tackled Washington’s foreign policy and Jay’s Treaty using a Somebody, Wanted, But, So, Then (SWBST) Sketch and Tell template. Students read about the challenges of maintaining neutrality during international conflicts and how Jay’s Treaty attempted to resolve tensions with Britain.
The SWBST activity allowed students to:
Summarize the main ideas.
Use both words and pictures to represent what they learned. This strategy is always a hit because it combines comprehension with creativity, making abstract concepts more concrete.
Wrapping Up with Fast and Curious
To close out the lesson, we ran a Fast and Curious Gimkit round focused on key vocabulary and ideas from the day.
Students played for 3 minutes.
I provided immediate feedback on commonly missed questions, reinforcing learning.
Thursday: Hamilton’s Plan
Thursday was all about diving into Hamilton’s financial plan, though I initially hoped to also cover Washington’s domestic issues like the Whiskey Rebellion. My ambition outpaced reality, and we only made it through Hamilton’s plan. That said, the day was packed with meaningful activities that helped students grasp these foundational concepts.
Quick Notes: The Foundation of Hamilton’s Plan
We began class with quick notes to outline Hamilton’s financial plan, focusing on:
Assuming state debts to strengthen the national government.
Establishing a national bank to regulate finances.
Implementing tariffs to protect American industry.
These notes took about 10 minutes and provided the background knowledge students needed for the activities that followed.
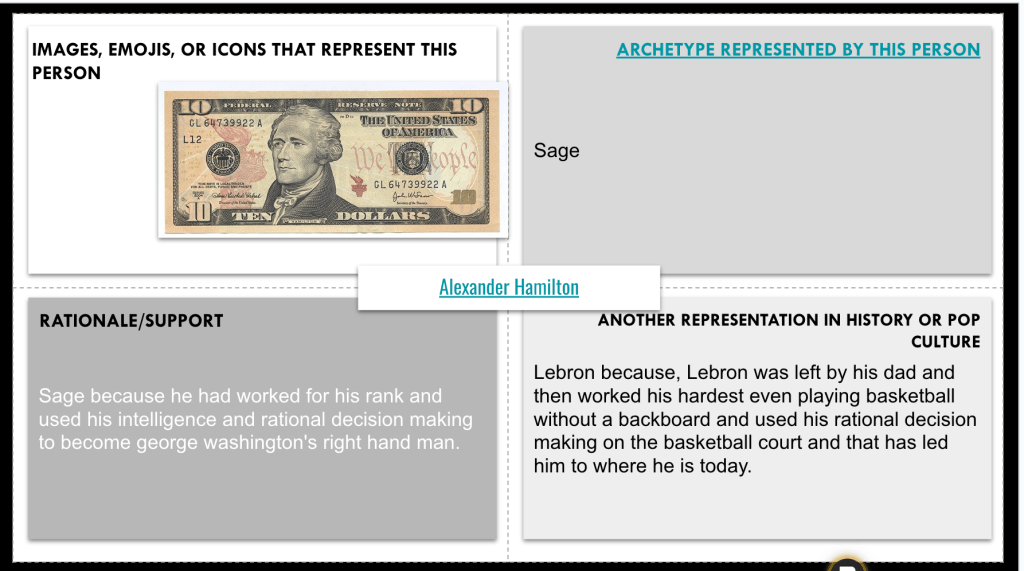
Archetype Activity: Understanding Hamilton
To make Hamilton more relatable, I used the brief biography from the textbook to introduce him as a historical figure. Then, we revisited the archetype activity from Wednesday, applying it to Hamilton. Students identified archetypes like “visionary,” “strategist,” or even “rebel,” depending on their interpretations.
This activity was quicker than Wednesday’s, but still sparked great discussion as students shared their archetype choices with partners and justified their reasoning.
Reading, Questions, and Sketch and Tell-O
We transitioned to a reading about Hamilton’s financial plan, using a combination of structured questions, creative visualizations, and a connections summary. Here’s how it worked:
Read and Respond: Students answered comprehension questions about Hamilton’s plan, focusing on why he wanted to assume state debts, how the national bank would work, and the purpose of tariffs.
Sketch and Tell-O: Students used a Sketch and Tell-O template to represent key ideas from Hamilton’s plan. For example:
A chain symbolizing the unification of state debts under the federal government.
A vault or dollar sign representing the national bank.
Connections Summary: To wrap up, students found an emoji or picture that connected with their answers and explained why they chose it.
I originally planned to use Class Companion, an AI feedback tool, to give students immediate feedback on their summaries. Unfortunately, it was blocked! I emailed the IT department to get it unblocked, but for now, we relied on peer discussions and my feedback instead.
Wrapping Up with Gimkit
We ended class with another Gimkit to reinforce the material. This time, the averages showed improvement:
80%, 74%, 68%, and 70%.
Friday: The Whiskey Rebellion and Government Strength
On Friday, I wrestled with whether to skip the Whiskey Rebellion and dive straight into political parties, but I decided against it. The Whiskey Rebellion perfectly ties back to our first lesson: the Constitution made the government stronger, and putting down the rebellion proved that strength. This connection was too important to pass up, so we dedicated the day to exploring the Whiskey Rebellion in-depth.
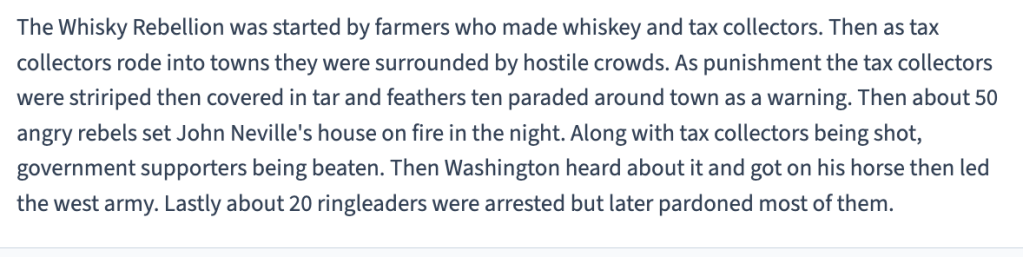
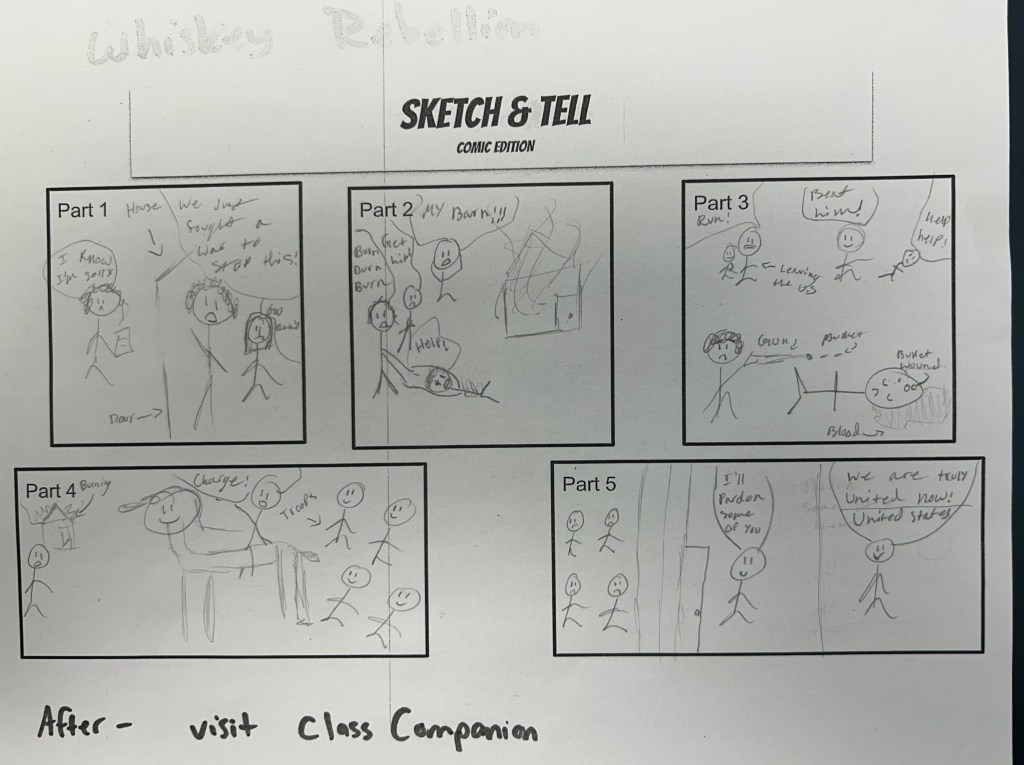
Progressive Sketch and Tell: Unpacking the Story
Inspired by Jake Carr and Justin Unruh, we used a Progressive Sketch and Tell to break the rebellion into digestible chunks. I used AI to divide the Whiskey Rebellion story into five parts, making it manageable and engaging for students.
Setup: Each student received a paper with five Sketch and Tell boxes.
Round 1: I handed out the first part of the story, giving students 3 minutes to read and sketch a visual representation of what they’d read. They then discussed their sketches with a partner.
Rounds 2–5: For each subsequent part, students repeated the process—read, sketch, discuss. This structure kept the class moving while building a deeper understanding of the rebellion.
By the end, students had created a complete visual timeline of the Whiskey Rebellion.
Introducing Class Companion for Writing Feedback
After completing their comics, students used Class Companion, an AI feedback tool, to summarize their Whiskey Rebellion comics in writing. This was my first time successfully using Class Companion after IT unblocked it, and it was a game-changer.
Here’s how it worked:
I set up the assignment by feeding information about the Whiskey Rebellion from our reading into Class Companion.
Students typed their summaries into the platform, receiving real-time feedback and scores on their writing.
They had three attempts to improve their summaries, with each attempt allowing them to act on AI-generated suggestions.
The feedback was eye-opening for many students. It pointed out areas for improvement in clarity, structure, and grammar, and the rubric generated by the AI made expectations crystal clear. Some students became competitive, determined to get the highest score possible by their third attempt.
The results were amazing. Students were engaged in improving their writing and motivated by the detailed feedback. The data Class Companion provided was also incredibly helpful for me to track progress.
Wrapping Up with Gimkit
We ended the day with a Gimkit review on Lesson 2. The class averages were impressive:
91%, 80%, 88%, and 85%.
And just like that – a suggested 2 day lesson took 3 days and probably could have taken another day to do the lesson justice.
Last week, I kicked off my social studies unit with a pre-assessment using a citizenship test. The goal for my students was to answer six or more questions correctly. Out of the 89 students I teach across four periods, only six met that benchmark.
Faced with a tight timeline, I knew I had to make every lesson count. By the end of the week, after incorporating engaging EduProtocols, 70 out of 89 students achieved a score of six or higher on the same test. The growth was incredible and a testament to how these strategies support both understanding and retention.
Focusing on all seven principles of the Constitution is overwhelming for 8th graders, so I start by introducing separation of powers as the foundation of understanding how the government works. My goal is to connect the concept to the branches of government and their basic functions, creating a clear starting point for students.
Tug of War: Introducing Separation of Powers
When students entered the classroom, they were met with a tug of war rope stretched across the room. The curiosity was instant—”Are we playing tug of war?” they asked. Instead of answering directly, I invited them to imagine the floor surrounding the rope represented tyranny, greed, corruption, and despotism.
I asked, “Should a government be surrounded by these negative forces?” Of course, the answer was “no.”
Round 1: One volunteer attempted to lift the rope out of the “corruption.” The catch? They couldn’t bunch it up or stretch it too far—it had to stay taut. Predictably, it didn’t work.
Round 2: A second volunteer joined, but the rope still couldn’t be lifted properly.
Round 3: With three volunteers, the rope was successfully lifted out of the corruption.
I explained that this is why we have separation of powers—no single branch can do it alone. By dividing power, we prevent tyranny and ensure the government operates effectively.
Quick Notes and Fast and Curious
Next, I introduced the three branches of government—executive, legislative, and judicial—through a brief set of notes. These quick notes provided an overview of the branches and their basic responsibilities.
We followed this up with a Fast and Curious Gimkit round, focusing on vocabulary and key concepts like the branches and their roles. Students played for 3 minutes, and I reviewed the most-missed questions afterward to clarify misunderstandings.
Sketch and Tell-O: Exploring the Branches
Using an article from iCivics, students explored each branch in more depth through a Sketch and Tell-O activity. For each branch, they:
Sketched a visual representation of the branch’s role (e.g., a gavel for judicial).
Wrote a brief description summarizing its main function.
This activity helped students connect abstract ideas to tangible visuals and concise explanations.
Fast and Curious: Reinforcing Understanding
After the Sketch and Tell-O, we returned to Gimkit for two more Fast and Curious rounds, each lasting 3 minutes. The goal was to reinforce what students had just learned about the branches of government. Scores improved noticeably, and the repetition solidified their understanding of the material.
Sneaker Sketch and Tell: Creative Connections
To wrap up the day, we used a Dominic Helmstetter Sketch and Tell Sneaker activity. Students designed a sneaker to represent one branch of government and wrote a brief summary explaining their design.
Tuesday: Checks and Balances
Continuing with the principles of the Constitution, Tuesday’s focus was checks and balances. This lesson aimed to go beyond the basics and help students connect vocabulary, real-world applications, and creative thinking to demonstrate their understanding.
Quick Notes: Setting the Stage
To begin class, I gave a brief lecture introducing checks and balances, focusing on key terms like impeach, override, and veto. I also provided basic examples:
The president can veto a bill passed by Congress.
Congress can override a veto with a two-thirds majority.
The judiciary can rule laws unconstitutional.
These quick notes established foundational knowledge for the activities that followed.
Scenario-Based Analysis
Each student received a detailed checks and balances chart, categorizing the actions of each branch and how they could be checked by another branch. Students worked through three simple scenarios requiring them to infer how checks and balances worked in practice.
For example:
“A potential bill was vetoed.”
Students identified that the executive branch (president) has the power to veto a bill.
Then, they determined that the legislative branch (Congress) could check this action by overriding the veto.
These scenarios required students to apply their understanding of the chart and start thinking critically about the system.
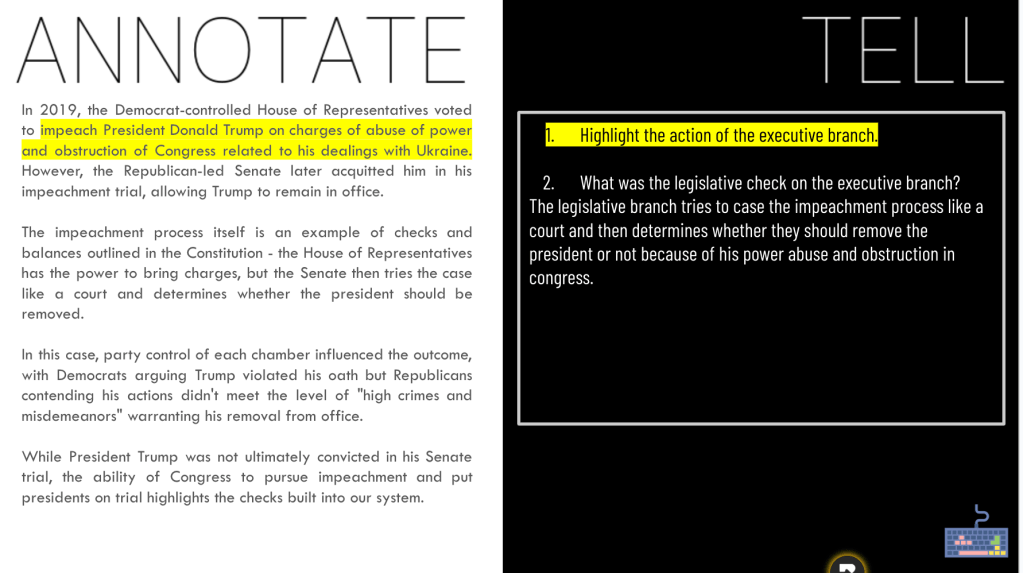
Annotate and Tell: Real-World Examples
Next, students examined three AI-generated short stories based on recent events tied to checks and balances:
Trump’s impeachment.
Obama’s executive orders on gun control.
Biden’s exploration of student debt cancellation.
For each story, students:
Annotated key actions by the executive branch.
Answered analysis questions, such as:
How did the legislative branch check the president in this example?
What role did the judiciary play (if any)?
This activity added context and relevance, showing students how checks and balances function in modern government.
Sketch and Tell Comic: Bringing Stories to Life
To wrap up, students used the Sketch and Tell comic format paired with the SWBST (Somebody, Wanted, But, So, Then) storyboarding technique. Students had two options:
Create an original scenario that demonstrated checks and balances in action.
Illustrate one of the AI-generated stories from earlier in class.
Each comic needed to show how multiple branches interacted, with annotations explaining the characters’ roles and the checks and balances applied.
As students shared their creations, they articulated detailed descriptions of the interactions between branches. For example, one student illustrated Congress overriding a veto with a vivid depiction of lawmakers “lifting” a veto stamp off a bill, while another highlighted a Supreme Court decision striking down an executive order.
Wednesday: Federalism
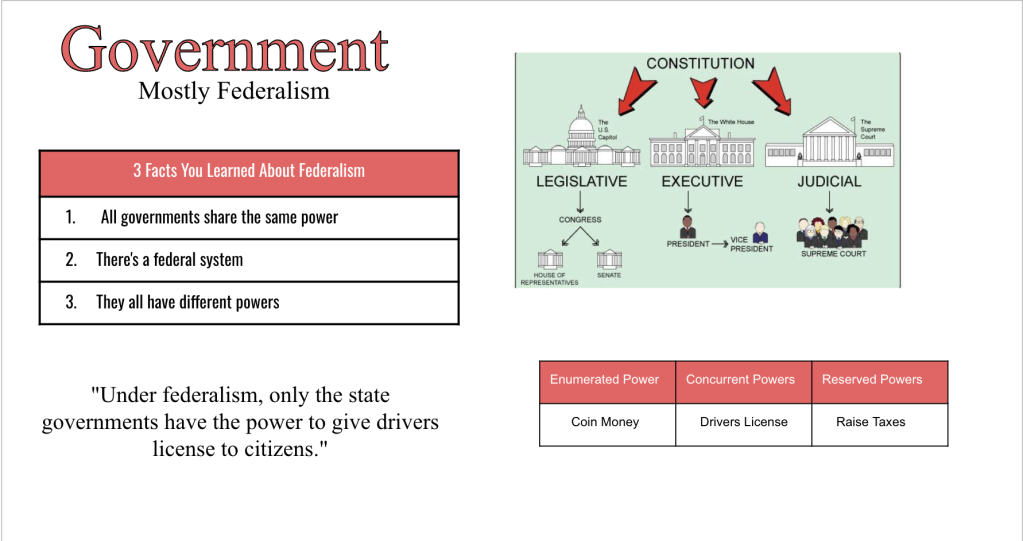
For my federalism lesson this year, I decided to switch things up while keeping the core elements that have worked well in the past. The focus was on making the concept of federalism relatable and interactive, while emphasizing key ideas like enumerated, reserved, and concurrent powers.
Thin Slides: Federalism in Context
The lesson began with Thin Slides, which provided a quick and creative way for students to process information.
For the first slide, students read a brief description of federalism and chose:
One word to represent federalism.
One picture that symbolized the idea.
They then explained their choices, sharing insights like “I chose ‘shared’ because both the state and national government share responsibilities.”
The second Thin Slide focused on real-world examples of federalism. Students looked up the legal driving age in Ohio and compared it to other states. We discussed who sets these laws (state governments) and why they vary.
This activity transitioned into another research task: students looked up the minimum wage in Kentucky, Ohio, and California, noting how state laws differ and how federalism allows for this variation.
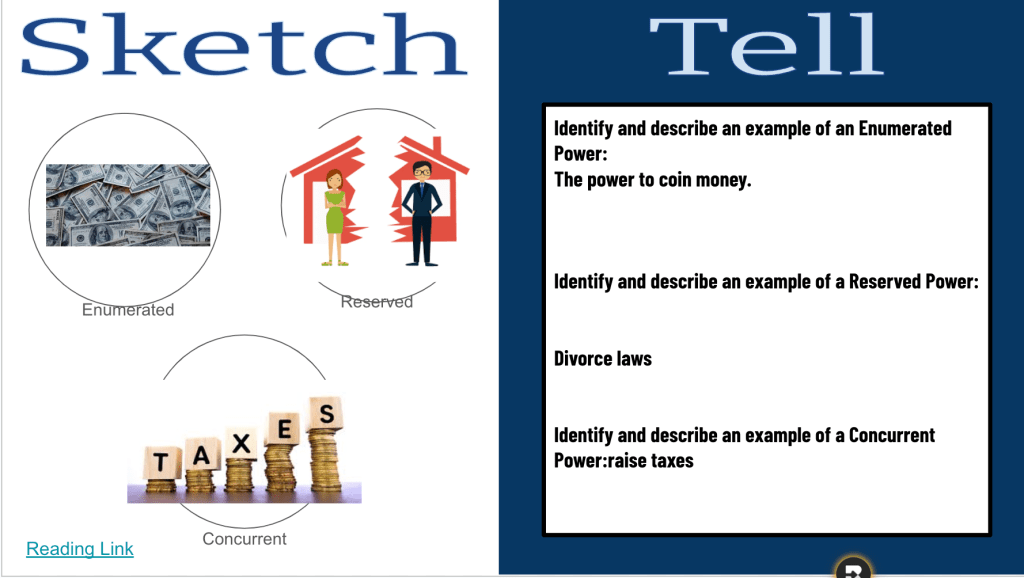
Sketch and Tell: Breaking Down Federalism
Students used a Sketch and Tell template to dive deeper into the structure of federalism.
Using an infographic or a modified textbook reading, students visualized expressed powers, state powers, and concurrent powers.
They created drawings or used icons to represent examples, like a scale for concurrent powers (taxation) or a dollar sign for state powers (setting minimum wage).
This activity helped students connect abstract terms to concrete examples, reinforcing the distinctions between the different types of powers.
Thick Slide: Synthesizing Learning
To wrap up the lesson, students completed a Thick Slide, which allowed them to reflect and synthesize their learning. On their slides, they included:
Three things they learned about federalism.
Examples of enumerated, reserved, and concurrent powers.
A picture that represented federalism.
A correction task, where they fixed an incorrect statement about federalism to make it true.
Thursday: Upgrading Bill of Rights Knowledge
The Bill of Rights can be tricky for 8th graders to memorize and understand, so Thursday was all about making the amendments memorable, engaging, and accessible. I kicked off class with a 10-question Quizizz to assess students’ baseline knowledge. As expected, most students remembered the 1st and 2nd Amendments but struggled with the rest. Class averages reflected this, coming in at 34%, 33%, 41%, and 34%. It was clear we needed a creative strategy to make these amendments stick.
Sketch and Tell-O: Prepping for Memory Aids
I handed out a Sketch and Tell-O template with 10 empty circles, one for each amendment. Students would use this to jot down sketches or notes based on the memory aids I shared during the lesson.
Memorable Mnemonics: Learning from Dave Burgess
For each amendment, I used a fun, engaging strategy inspired by Dave Burgess to help students connect the concept to something they could easily recall.
3rd Amendment: I told the story of Goldilocks making herself at home in the Three Bears’ house, linking it to the prohibition of soldiers being “quartered” in homes without consent.
6th Amendment: I showed a clip of an NFL player’s quick “pick six” interception to emphasize the idea of a speedy trial.
The students were laughing, engaged, and eagerly sketching the memory aids into their templates. They loved the zany connections and seemed to absorb the material effortlessly.
Assessing Growth with Quizizz
After finishing the activity, I had students tuck away their sketches and notes. Then we launched the same Quizizz again to check for growth. The results were encouraging:
Class averages jumped to 74%, 77%, 68%, and 77%.
While the scores were slightly lower than last year’s averages, the improvement from the first round showed the power of these memory tricks. I’ll tweak a few things next time to fine-tune the approach, but overall, this was a win.
Friday: Applying the Bill of Rights
With the foundational knowledge of the Bill of Rights in place, Friday was all about applying that learning to real-world Supreme Court cases. The goal was to help students see how the amendments are interpreted and used in real-life scenarios—especially those that resonate with their own experiences as 8th graders.
Starting with EdPuzzle
Class began with an EdPuzzle video explaining the Supreme Court and how cases make their way to the highest court in the land. This gave students a framework to understand the cases they’d be analyzing later in the lesson.
Landmark Supreme Court Cases: An Interactive Experience
I curated a selection of Supreme Court cases that focused on issues students could relate to, such as:
The Pledge of Allegiance in schools.
Social media speech.
School punishment policies.
Prayer in schools.
Each case summary was printed onto cards and placed in envelopes around the room. To add an extra layer of engagement, one envelope included a bonus Bill of Rights Quizizz (which the students were now averaging 75–80% on—a huge improvement!).
The Activity
Students were divided into small groups and given 25 minutes to circulate through the envelopes and analyze as many cases as possible. For each case, their tasks were to:
Guess which Constitutional amendment was in question.
Predict how the Supreme Court ruled on the case.
The students did a great job identifying the relevant amendments, but the real excitement came when I shared the actual rulings. Many of the decisions surprised them or conflicted with their personal opinions, sparking lively discussions about how amendments are interpreted and applied.
Citizenship Test: Wrapping Up the Week
To end class, we returned to the same citizenship test we started with earlier in the week. The results were remarkable:
At the beginning of the week, only six out of 89 students scored six or higher.
By Friday, after incorporating engaging lessons and EduProtocols, 70 out of 89 students achieved that benchmark.
Coming back from winter break, we hit the ground running with the principles of the Constitution. The transition wasn’t easy—snow delays and uneven class times on Wednesday threw off our rhythm, and the textbook’s overwhelming vocabulary and dense content didn’t help. After some reflection and collaboration with a trusted colleague, I decided to adjust my approach.
This week, I focused on balancing structured teaching with interactive activities. By combining brief lectures, discussions, and EduProtocols, I aimed to make the principles of the Constitution accessible, engaging, and meaningful for my students. Here’s how the first two days unfolded.
Wednesday
After a snow-filled delay, Wednesday marked our first day back from winter break—and what a chaotic return it was. With a 2-hour delay, my classes were unevenly shortened to 30–46 minutes, and the pressure to cram an entire week’s worth of lessons into a limited timeframe only added to the frustration.
Teaching the principles of the Constitution is one of my favorite units, but the constraints of the textbook and deadlines imposed by common assessments make it hard to teach the way I know my students need. The textbook oversimplifies and overcomplicates at the same time—cramming seven principles into one chapter, with little focus on building foundational knowledge like understanding the branches of government or their roles. Cognitive load theory is completely ignored, and it’s clear the materials weren’t designed with middle school learners in mind.
Despite the challenges, I’m determined to make this unit engaging and meaningful for my students. Teaching shouldn’t feel like a race against a textbook or an arbitrary deadline—it should be about meeting students where they are and guiding them to where they need to be.
Starting with a Pre-Assessment
Given the shortened day and the need for a strong foundation, I kicked off the unit with a pre-assessment using questions from the U.S. citizenship test. I chose 10–11 questions that were directly tied to the principles of the Constitution. To keep the focus on critical thinking, I didn’t include answer choices—students had to come up with their responses based on their prior knowledge.
Here’s how the activity worked:
Read Aloud: I read each question aloud, giving students time to think and respond.
Trade and Grade: Students swapped papers with a partner to grade each other’s responses.
Discussion: We went over each question as a class, discussing the correct answers and why they mattered.
Why It Worked
This activity served as both a pre-assessment and an opportunity to spark curiosity. Students were engaged in the discussion, and it gave me a sense of where they stood in terms of their knowledge of the Constitution’s principles. It also set the stage for deeper dives into each principle later in the week.
Reflection
It wasn’t the most exciting day, but it was an important one. The citizenship test questions provided a low-stakes way to ease back into learning while laying the groundwork for the unit. With the time crunch and external pressures, it’s not the start I wanted, but I’m determined to make the most of the days I have.
This week will be about finding ways to engage my students, break down complex ideas, and show them why the principles of the Constitution still matter today—despite the challenges of the snow, the textbook, and the ticking clock.
Thursday
After reflecting on Wednesday and discussing with my colleague Drew Skeeler, I decided to adjust my approach to teaching the principles of the Constitution. While I typically avoid lecturing, it became clear that short, focused direct instruction was what my students needed to build foundational knowledge. The plan was simple: 5–10 minutes of direct teaching, followed by turn-and-talks, and then an activity that built on the lecture using EduProtocols.
This shift felt necessary. Even though it’s not my preferred teaching style, it aligns with what will help my students engage with and understand the content right now.
The Lesson Plan
1. Lecture and Turn-and-Talks I started with a 10-minute lecture introducing the seven principles of the Constitution:
Popular Sovereignty
Limited Government
Separation of Powers
Checks and Balances
Federalism
Republicanism
Individual Rights
The goal was to provide a high-level overview with examples to make each principle relatable. For example, I explained checks and balances by describing how the president can veto a law passed by Congress, but Congress can override that veto.
After the lecture, students turned to a partner to discuss two questions:
Which principle seems the most straightforward to you?
Which principle do you think will be the hardest to understand?
These quick discussions helped students process the information and gave them a chance to voice initial thoughts or questions.
2. Fast and Curious Gimkit Next, we jumped into a Fast and Curious Gimkit to reinforce the principles. The game included vocabulary and short explanations related to each principle.
Students played for 3 minutes.
I provided feedback on commonly missed questions.
We ran the Gimkit again to improve accuracy.
3. Worksheet and Activity I pulled a worksheet from the textbook, but as usual, the vocabulary and phrasing were too complex for my 8th graders. To make it accessible:
I simplified the questions to focus on key ideas like Why is separation of powers important?
On the back, I added a Sketch and Tell-O activity where students drew a symbol for one of the principles and explained their choice.
I also included a reflection question: Which principle do you think is the most important? Why?
4. Closing with Fast and Curious We ended the lesson with one more round of the Gimkit to lock in what they’d learned. By the third round, scores were improving, and I could see the growth in their confidence.
Reflection
This lesson was a blend of compromise and creativity. The short lecture laid a clear foundation, the turn-and-talks helped students process the information, and the combination of EduProtocols and a modified worksheet gave them multiple ways to engage with the content.
While lecturing isn’t my favorite approach, it felt like the right choice today. Pairing it with interactive and creative activities made the lesson balanced and effective. Watching my students improve through the Fast and Curious Gimkit rounds and seeing their creativity in the Sketch and Tell-O reminded me that sometimes, adapting is the best way to meet students where they are.