This week we continued learning the principles of American government. We continued the Bill of Rights and focused on Federalism and the Separation of Powers.
Monday – Bill of Rights scenarios Resource Rumble and Bill of Rights Review for absent students.
Tuesday – Federalism with a sketch and tell
Wednesday – Makeup work and review day with a checklist
Thursday – Separation of Powers Choice Board
Friday – Separation of Powers continued
Monday
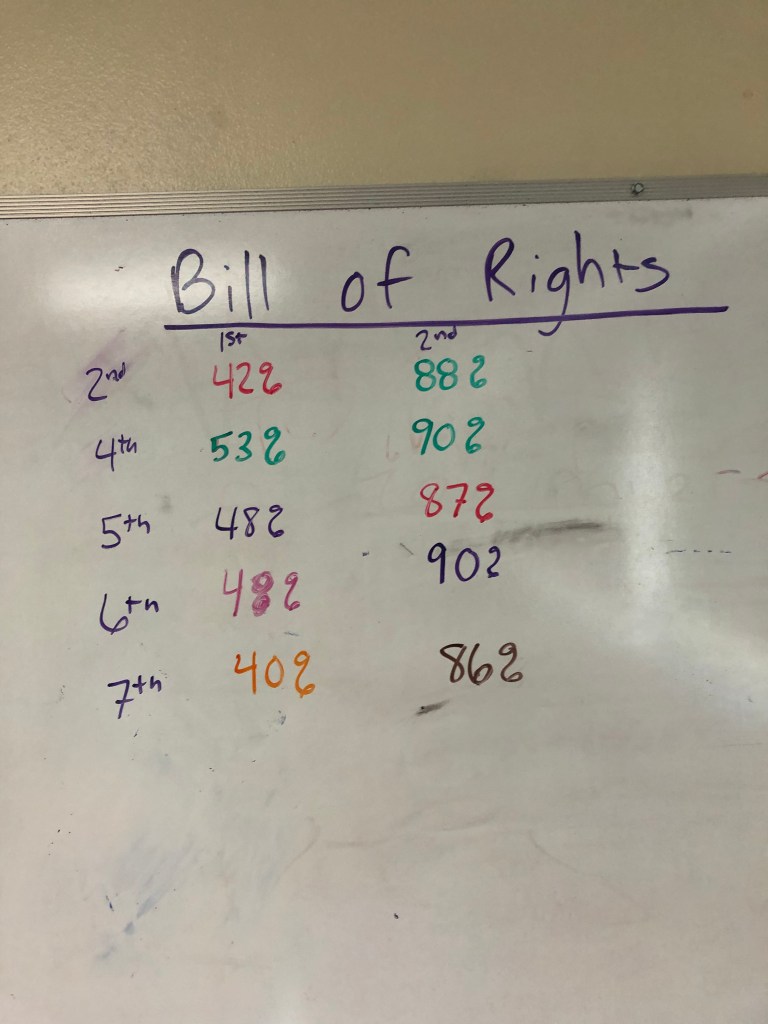
Coming off the excitement from the Bill of Rights mnemonic device lesson from Friday, Monday was used for looking at Bill of Rights scenarios. We started class with a Quizizz and I reminded students to remember the mnemonic device used for remembering the amendments. All classes averaged together was an 81% which is great considering it was a Monday.
Friday had many absent students so I created a Bill of Rights review. The Bill of Rights review contained some ideas I picked up from Amanda Sandoval and Dominic Helmstetter on Twitter – amendments concept sort and defining the 10 amendments with emojis. I also included some Bill of Rights scenarios that involved some Supreme Court cases.
The Resource of Rumble contained 8 treasure chests set up around the room. Students worked together, would read a Bill of Rights scenario from a real supreme court case. Students discussed the decision as a group and determined if it was a Fact or a Fib (I got this idea from Amanda Sandoval as well). After students decided if it was a fact or fib, they could roll 2 dice for correct answers or 1 dice incorrect answers. After rolling dice, students collected legos to build a monument related to an amendment. I gave students 35 minutes to complete as many treasure chests as possible and build their monument. At the completion of the timer, students had to explain their monument and how it related to an amendment.
All in all it was a great day with students – the Bill of Rights review helped absent students and provided the same learning opportunity as the Resource Rumble.
Tuesday
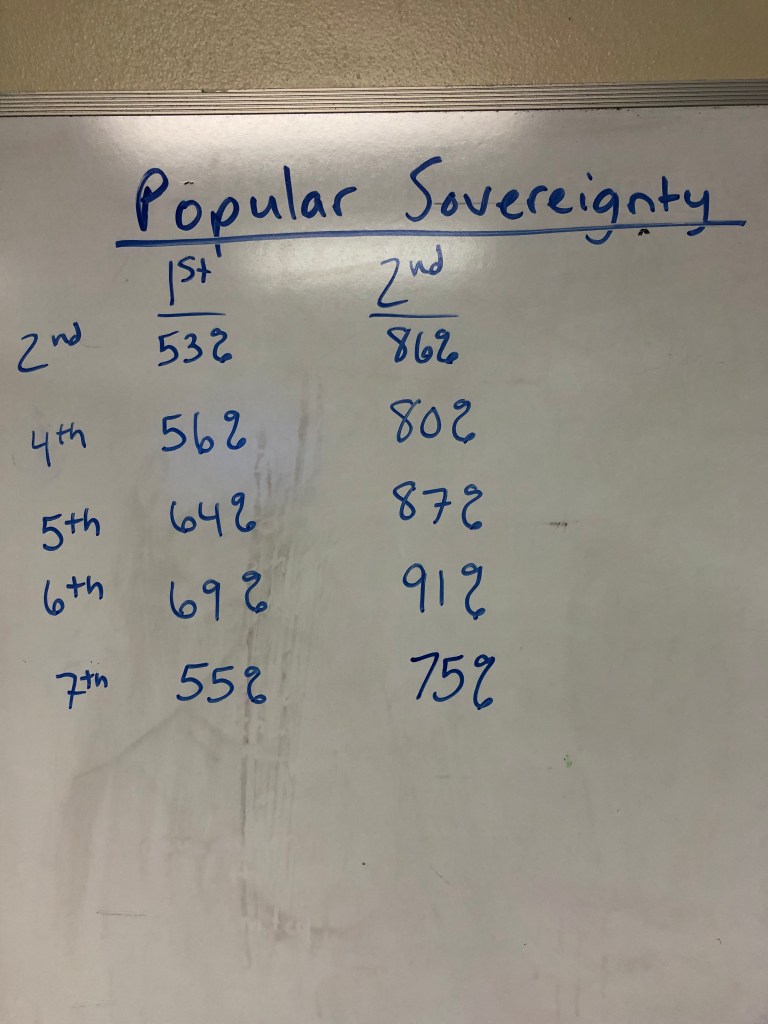
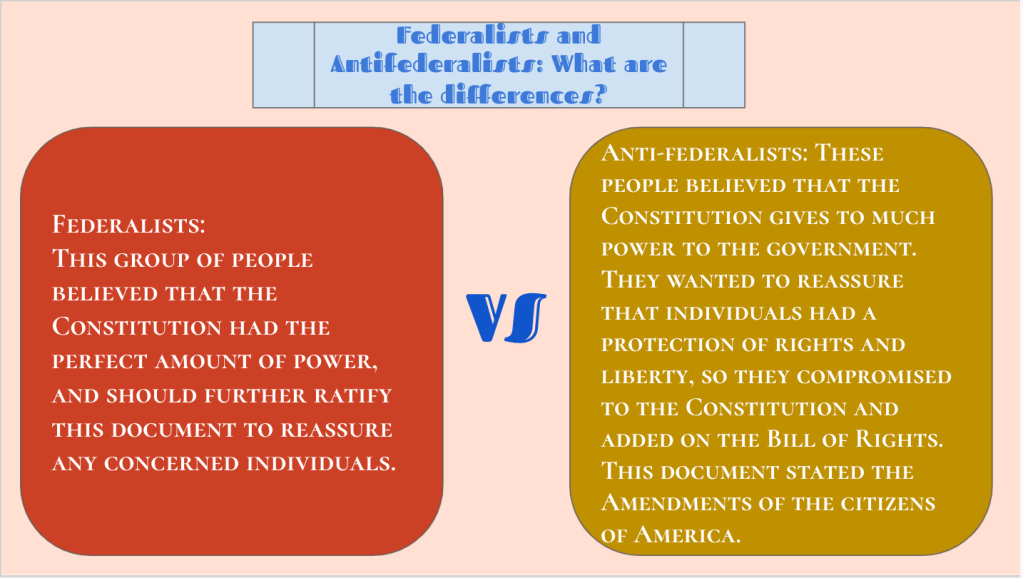
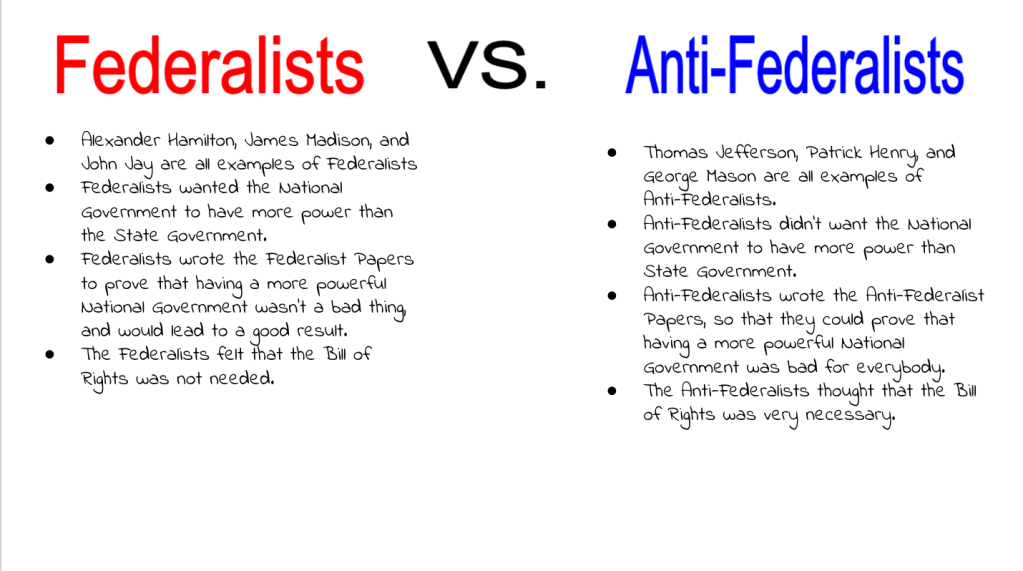
Tuesday was used for Federalism and is one of my favorite lessons. I began class with a fast and curious Quizizz over expressed, reserved, and concurrent powers. The class averages were as follows: 57%, 59%, 58%, 56%, 53%. Some students got 7/8 or all 8 questions correct to which i asked them, “Do you feel like you know this?” All of the students replied, “No, I felt like I guessed the whole time.”
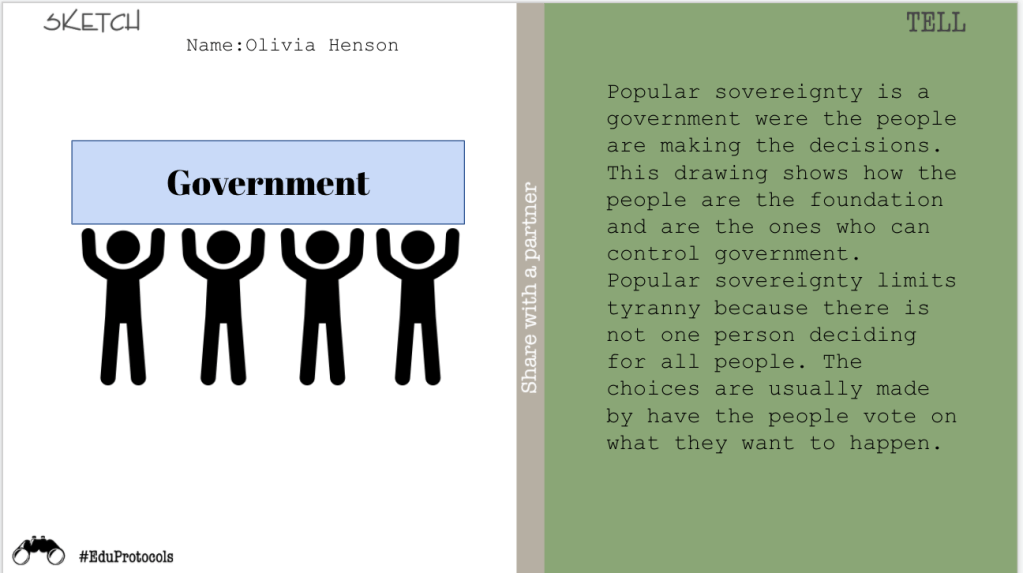
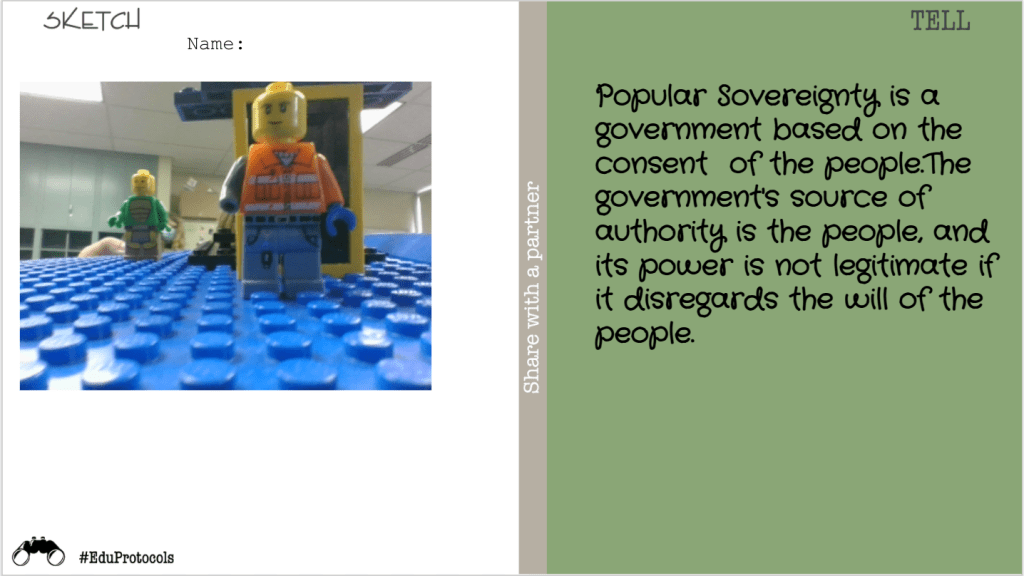
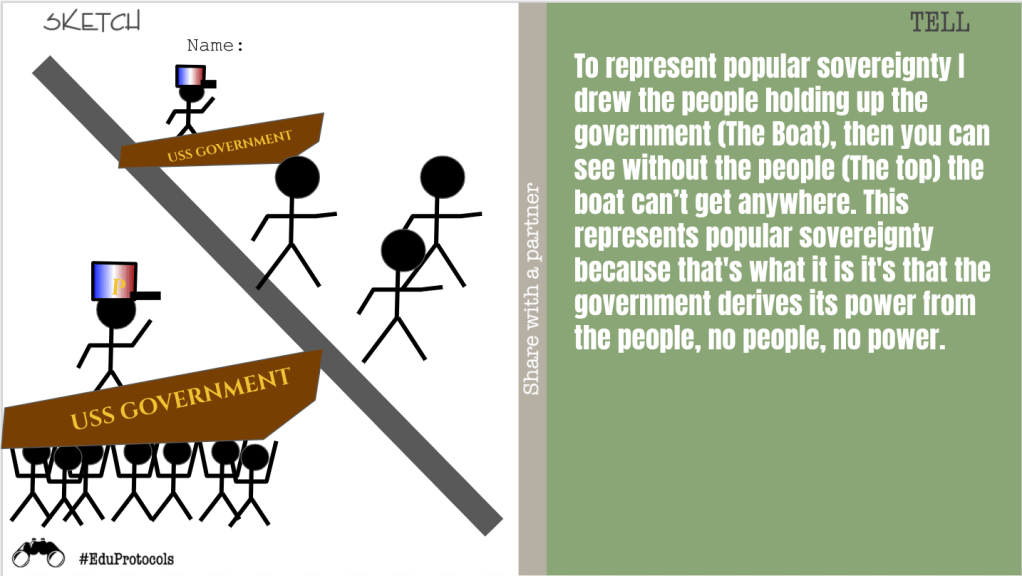
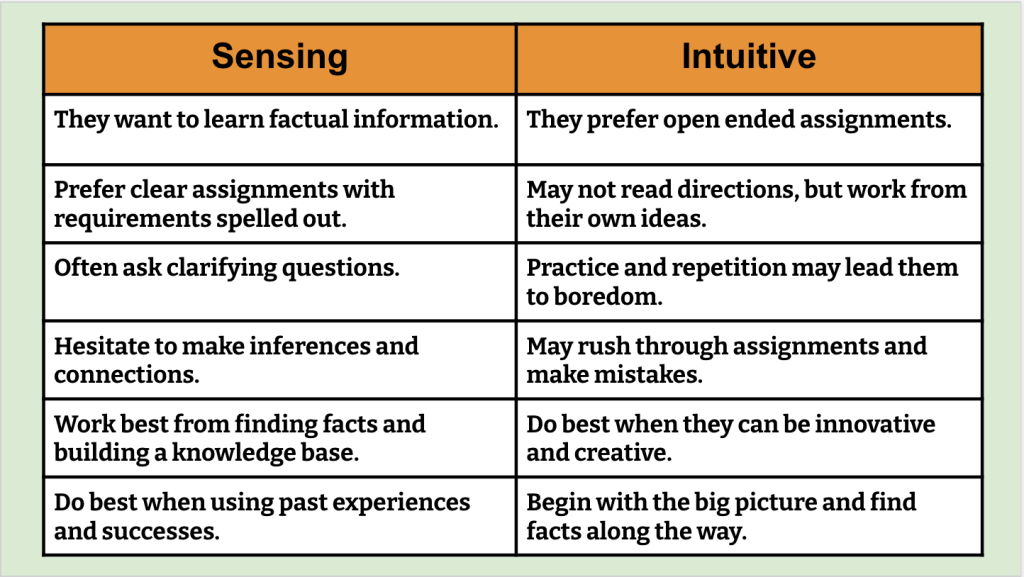
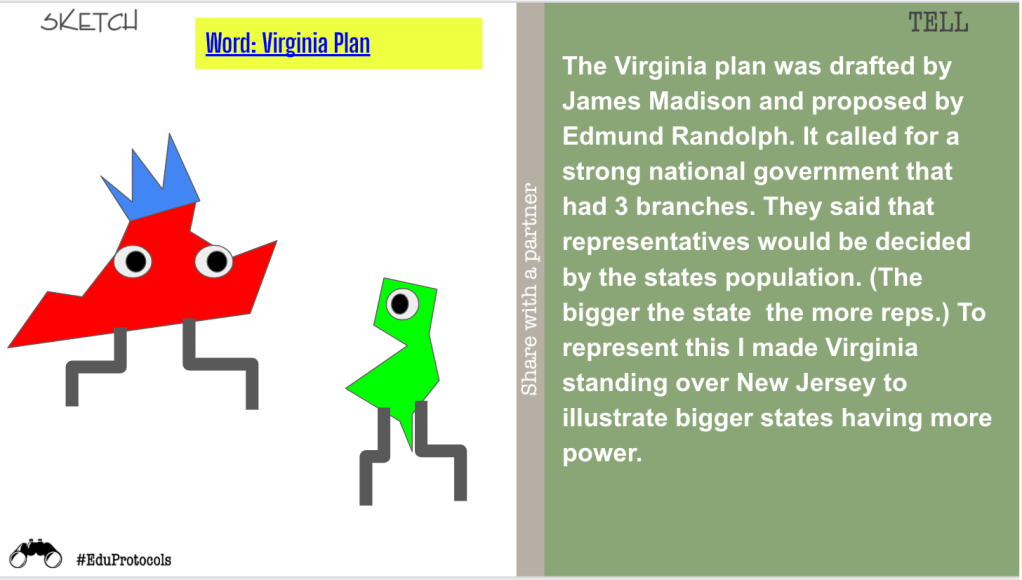
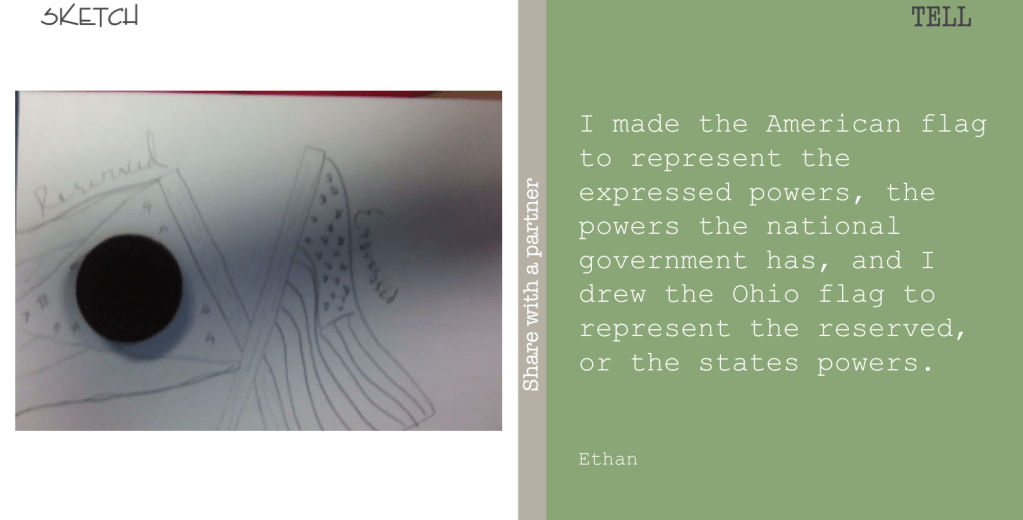
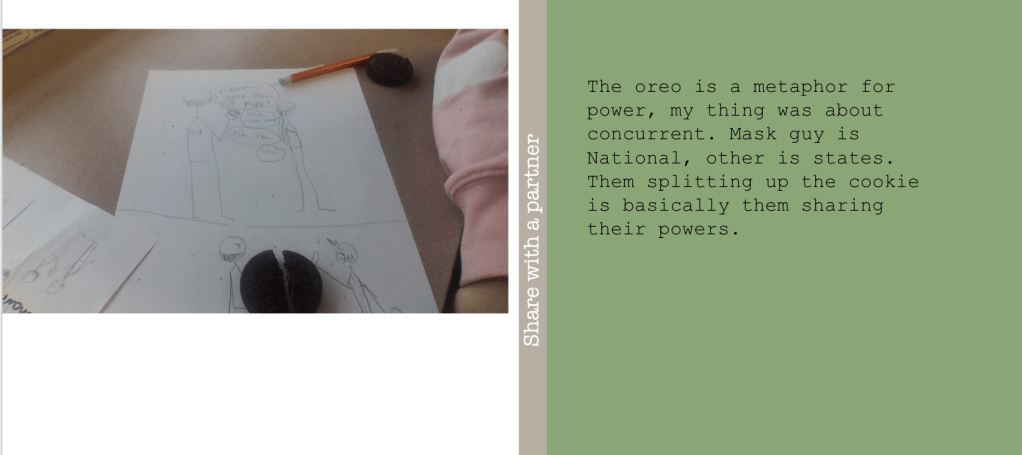
The next part of the lesson was a mystery box lesson. I place Oreo cookies in a mystery box and I use direct instruction to teach federalism. I provided 4 kinds of notes sheets for different processing styles – venn diagram, frayer, bubble map, or sketch notes. Students chose their notes and I began teaching Federalism.
Throughout my instruction, I drop hints to what’s in the mystery box. My hints are: 3 layers, blue, filling, stuff, milk, and Sam Porcello. Eventually students pick up on and guess that Oreos are in the box. Then I ask students, “Why do you think Oreos reminded me of federalism?”
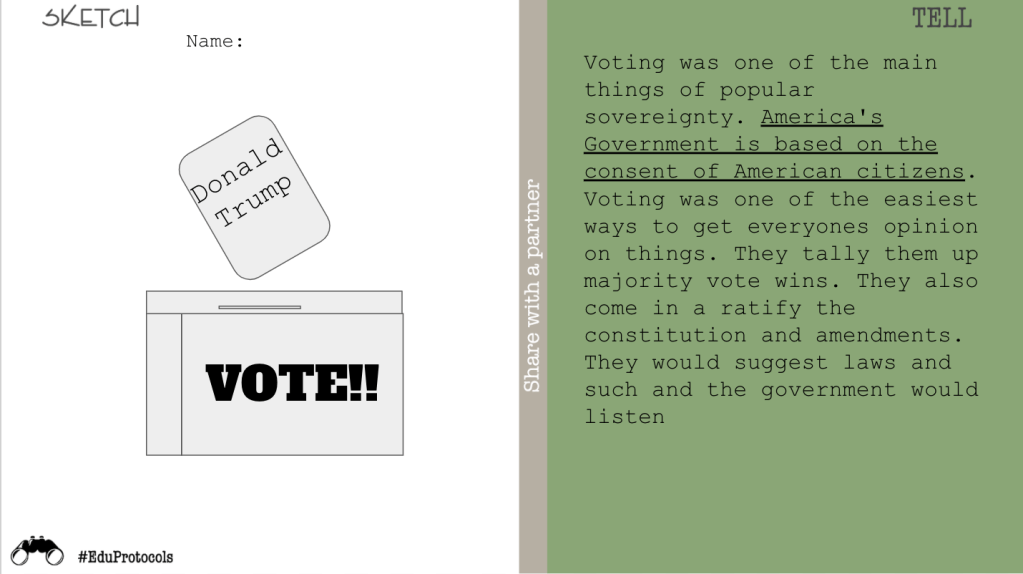
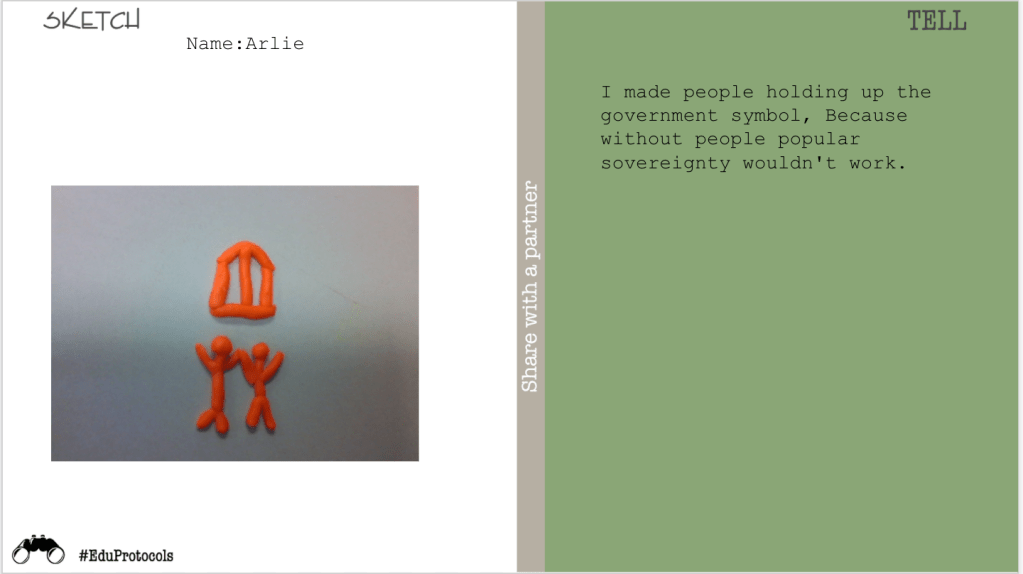
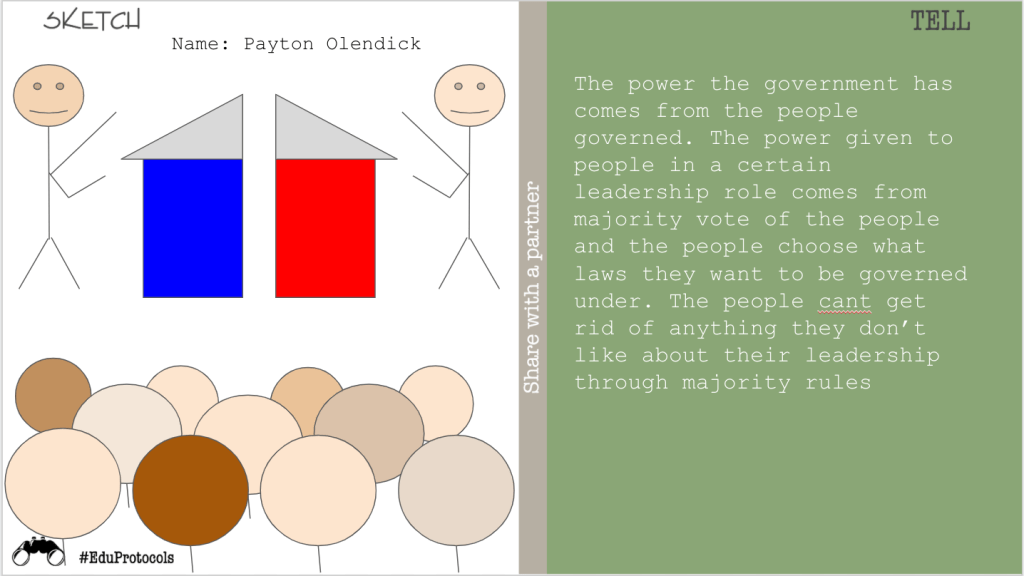
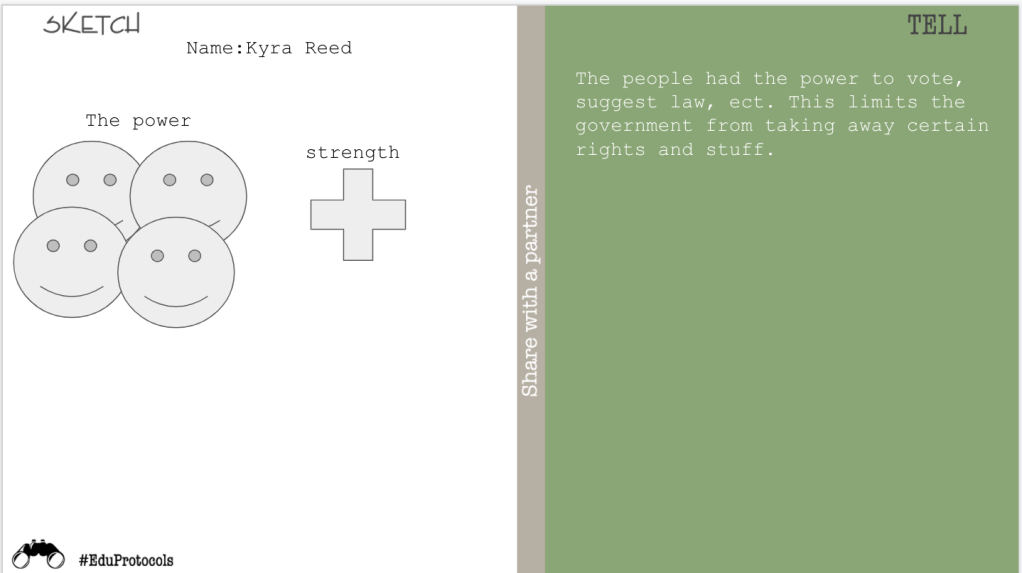
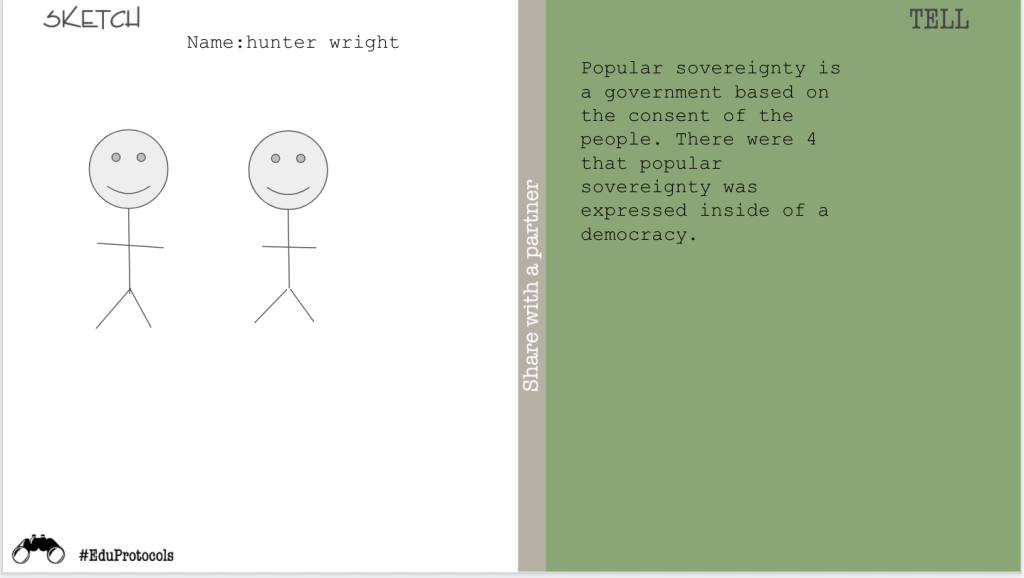
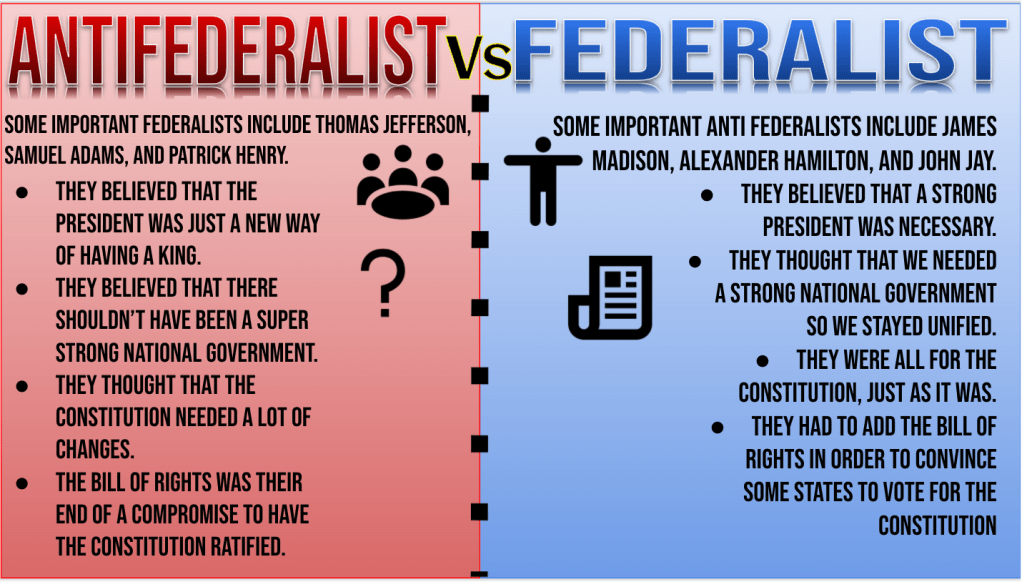
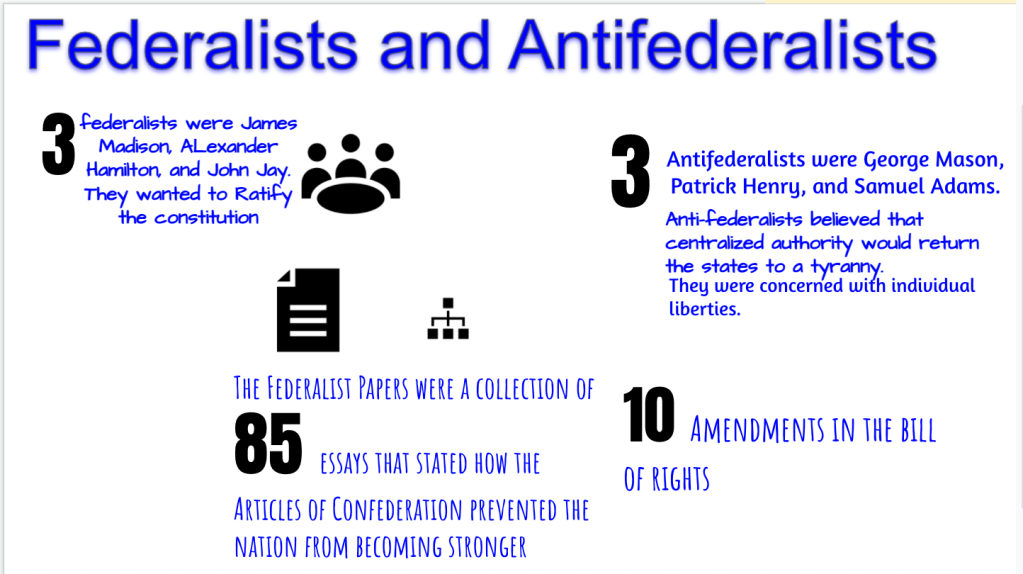
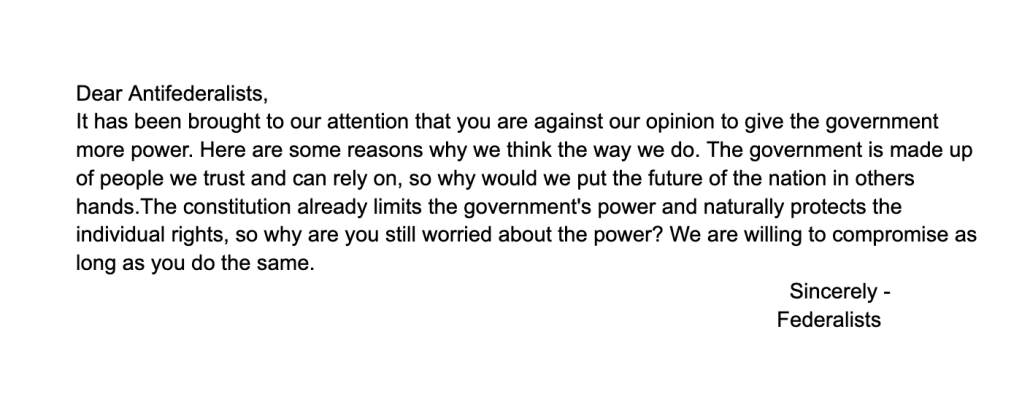
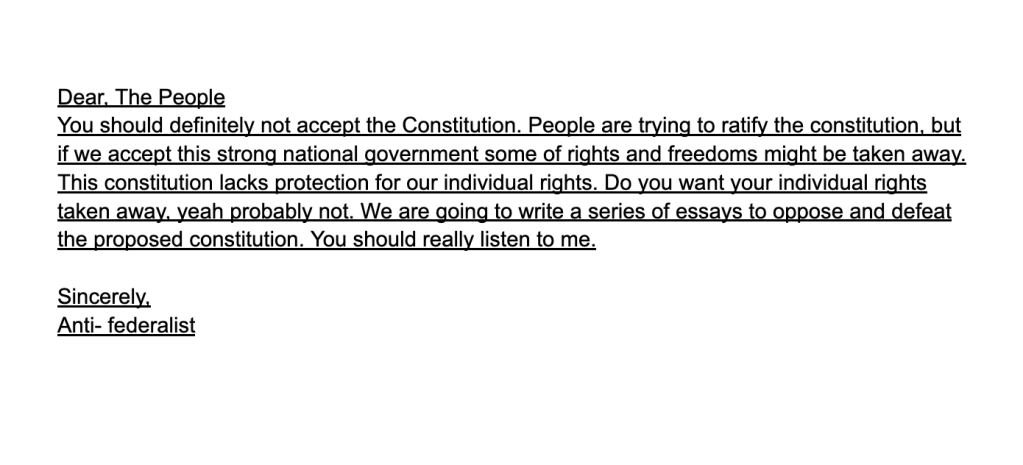
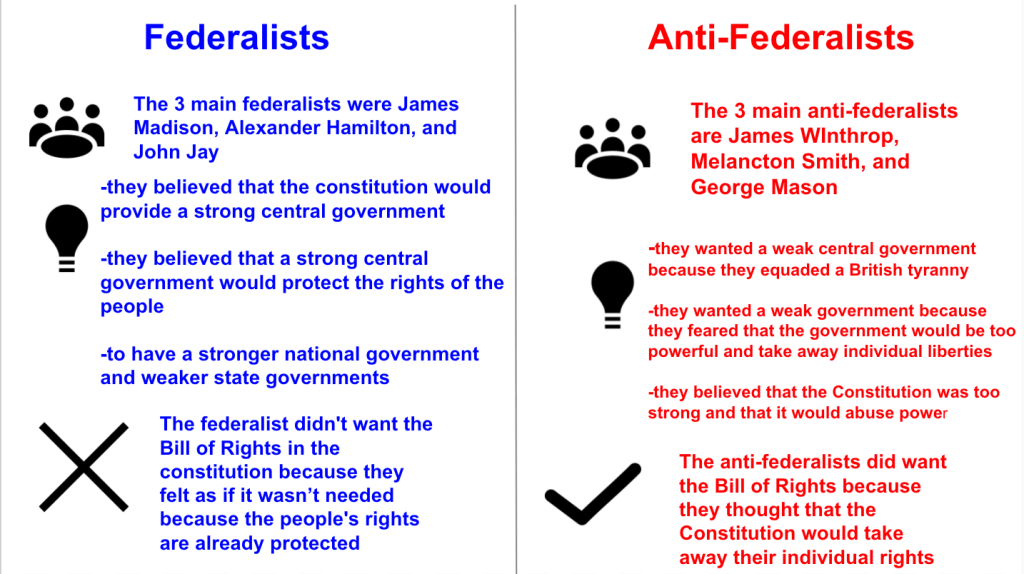
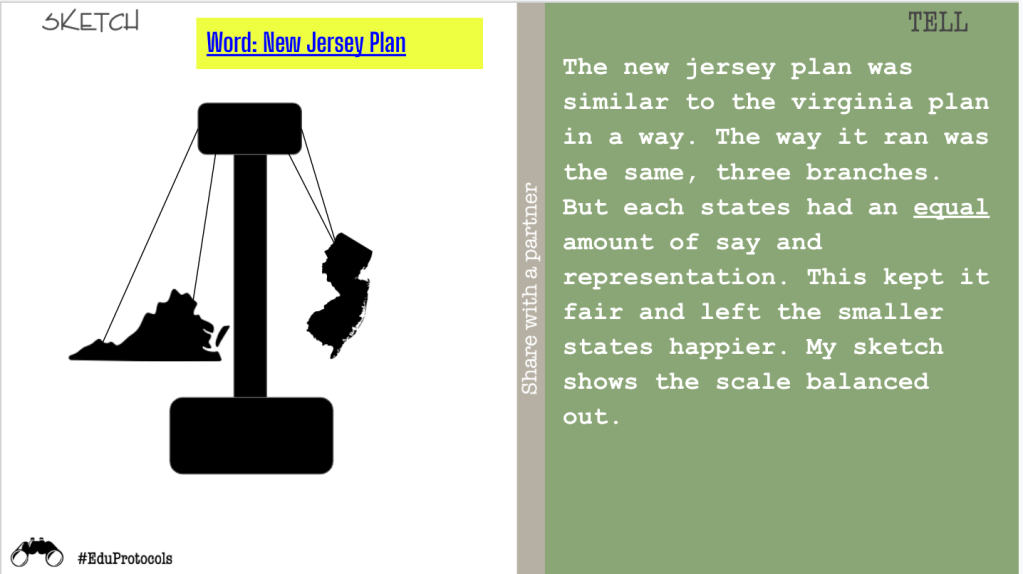
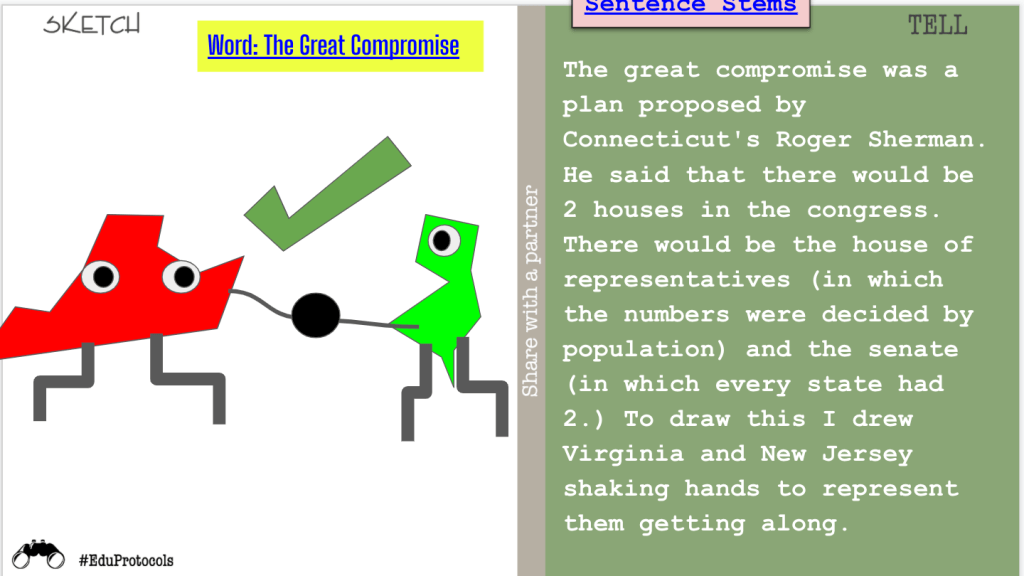
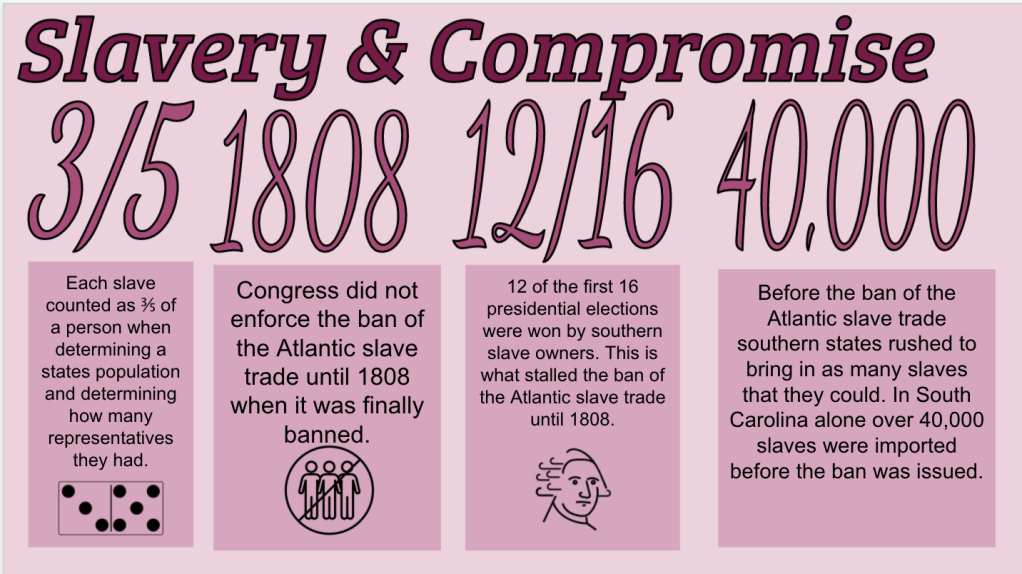
The next step in the lesson was having students show federalism with an Oreo. When I ask students to do this they look at me like I have 5 heads. I don’t show an example and let them think for a little bit. When I show another student example too early, they all want to do the same thing. I share a sketch and tell template with the students and let them create. Here is an example. Here are some samples:


At the end of the lesson we came back with the same Quizizz and here are those results:

Wednesday
Wednesday was a good day for makeup and review. I put together a checklist of every lesson, every assignment, and a link to every quizizz so students could check off their completed work. They could also access the old quizzes and redo them for a higher score if needed. Here is that checklist. For the students that were caught up, we played the new Gimkit Fishtopia – a 2D review game that was AWESOME! The Fishtopia game has students as little blob figures walking around, answering questions to accumulate bait. Then you can take the bait and fish in a pond. Then students could sell the fish and collect money to earn better gear or earn special trips to ponds with better fish. The students told me to set it for 30 minutes or longer because that amount of time would allow them to actually accumulate enough fish, money, and objects. I joined in with the game and had a great time.
Thursday and Friday
Thursday brought our next principle of the Separation of Powers. Before this lesson, I borrow the tug of war rope from the PE teacher and set up my room for the day. About 6 years ago, I learned this idea from Dave Burgess – I saw a picture on Twitter of a rope and some papers with words on them and I sat and I thought about what was happening. It finally occurred to me what he did with that rope and papers….
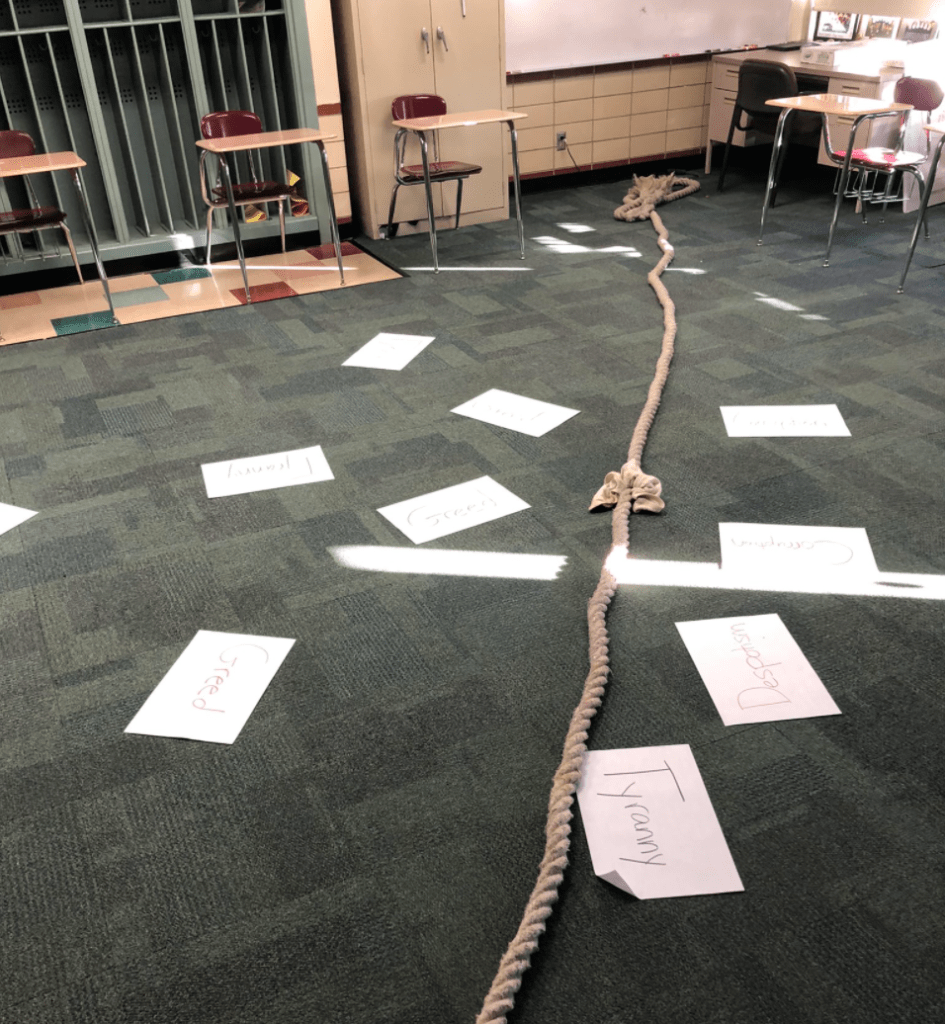
When students walked in 505 Thursday, the desks were cleared out of the way and I had a large tug of war rope running diagonally corner to corner. On the ground I had papers with the words, “Greed, Tyranny, Despotism, and Corruption,” written on them. Right away students are interested.
I ask the students, “Are the words on the ground negative or positive words?” Then I have them look up Despotism and Tyranny. I also remind them forms of the words Despotism and Tyranny were used in the Declaration of Independence. Then I ask, “Who thinks they can lift this rope off the ground, by themselves, out of the negativity? You can’t bunch it up, rest it over objects, or stretch it out.” I have a student come up and they realize they can’t do it alone. Then I have another students come up and they begin to think it’s possible, but it’s not. Then a third students come up and they get it done. I explain that power divided among three people, or three branches is what allows this rope to lifted out of the negativity. It’s a perfect demonstration for the Separation of Powers.
After the demonstration, we go into the Separation of Powers choice board. On the choice board I included activities that would appeal to students with different processing styles. Examples include:
- Concept Sort
- Studying with Quizlet
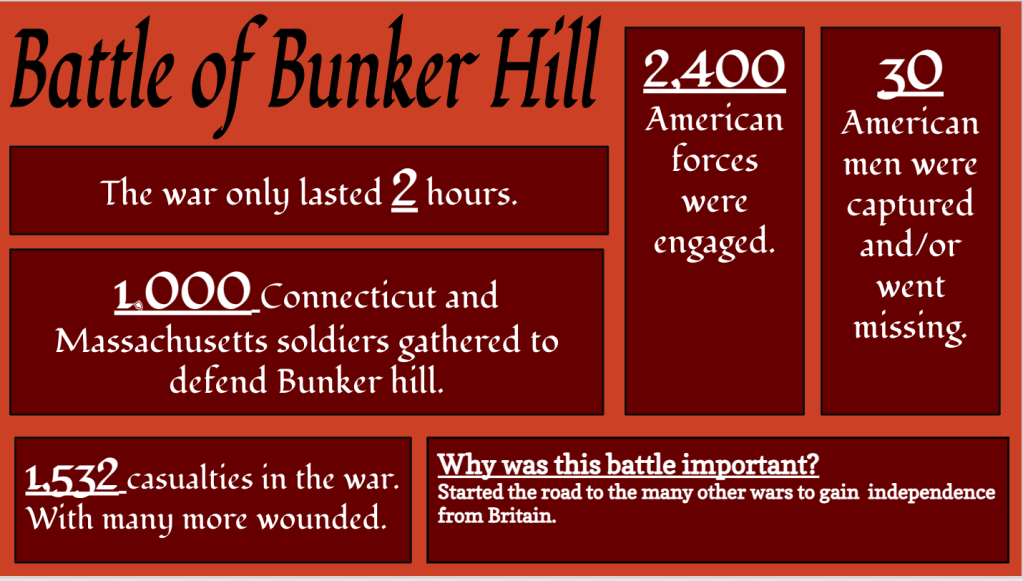
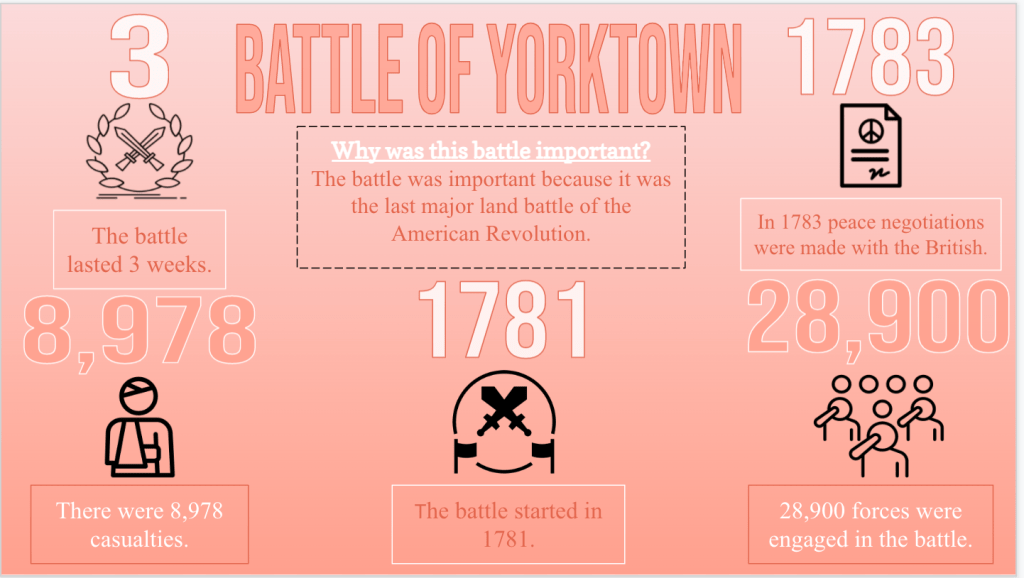
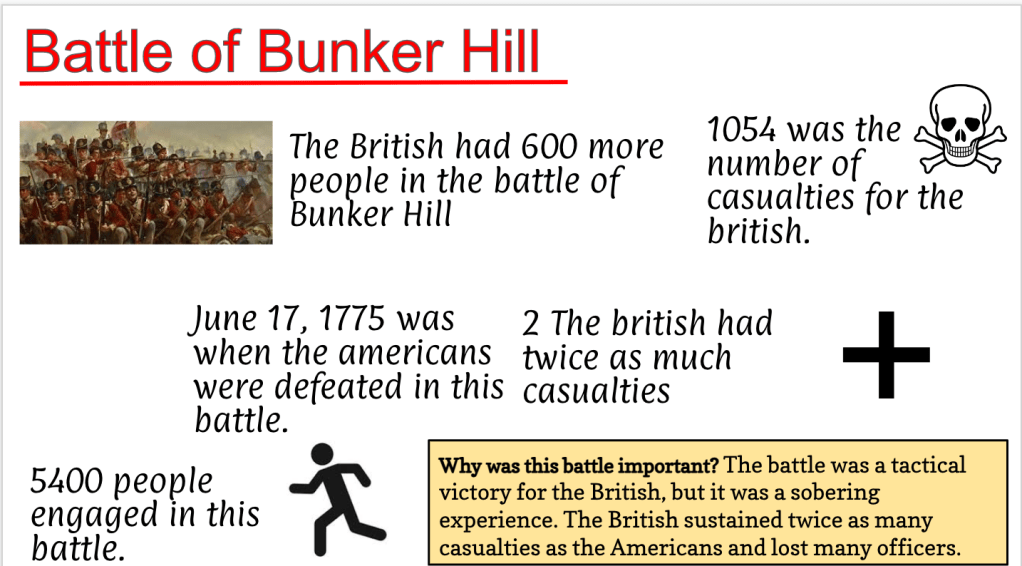
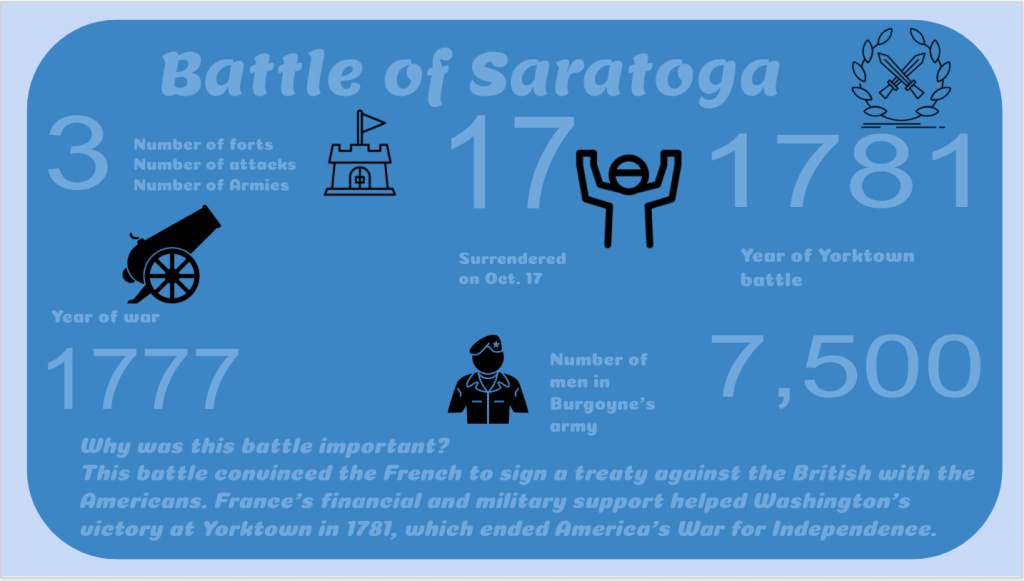
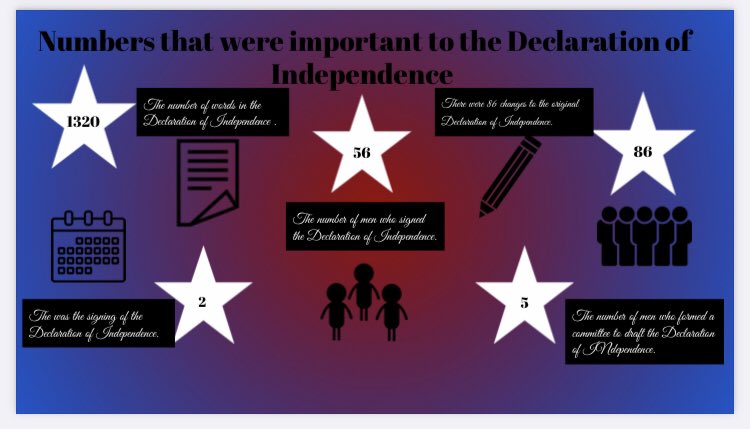
- Design an Infographic
- Go on a virtual tour of Washington DC and learn about the branches of government.
- Frayer models and Sketch notes
On the choice board students can choose 3 activities horizontally, vertically, or diagonally, but they can’t repeat the same activity. I encourage the students to not focus on what’s easiest, rather, focus on what’s best or better for them.
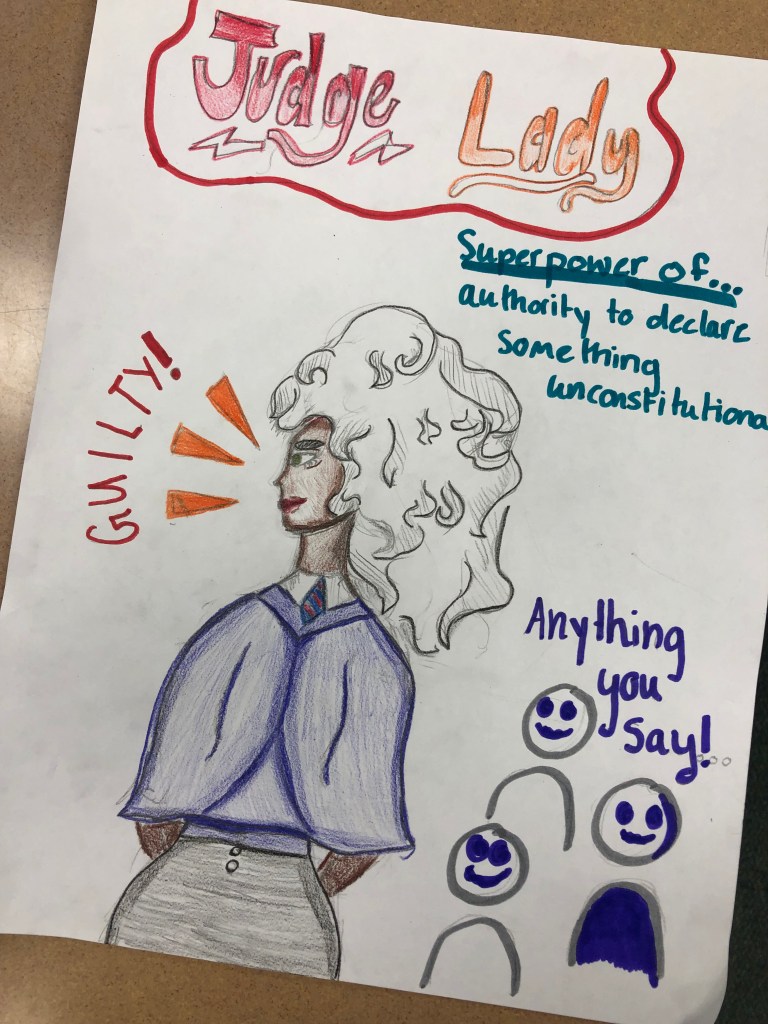
The application activity for the choice board is turning one branch of government into a superhero. Here was my criteria:
- Choose a branch of government (Legislative, Executive, or Judicial).
- If your branch of government was a superhero – what would it look like? What powers would it have?
- Give your superhero a name
- Include 3-4 symbols to represent the power.
- Label those powers.
- Write a brief paragraph explaining your superhero and the powers they have.
Here are some examples from students who finished:


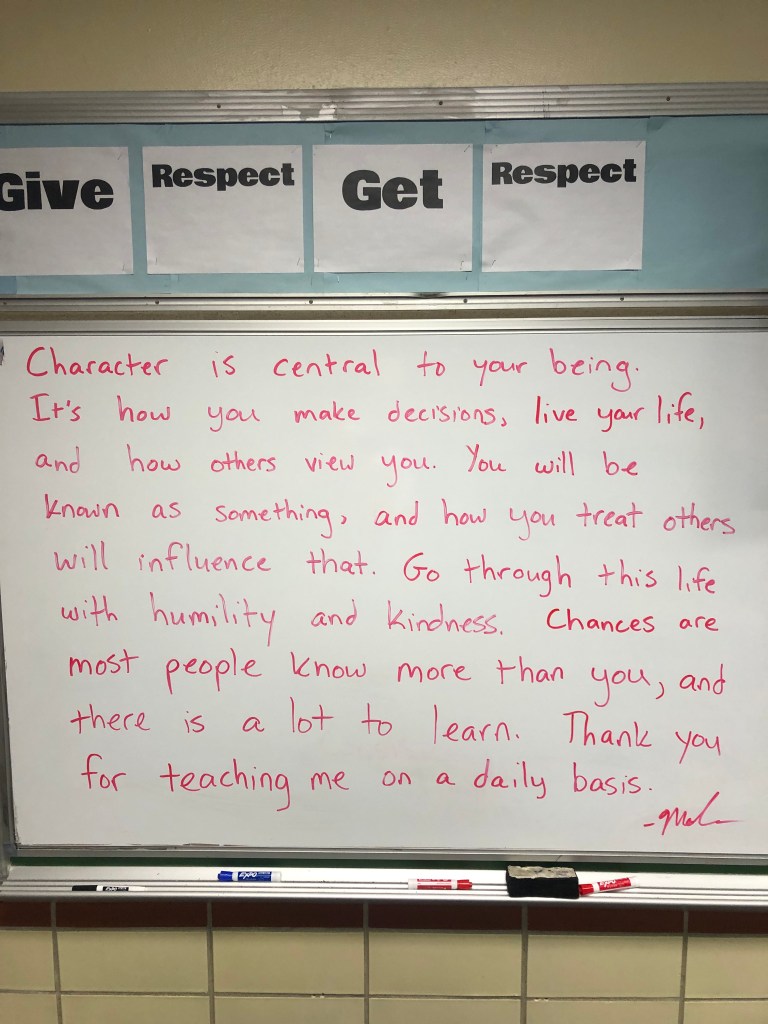
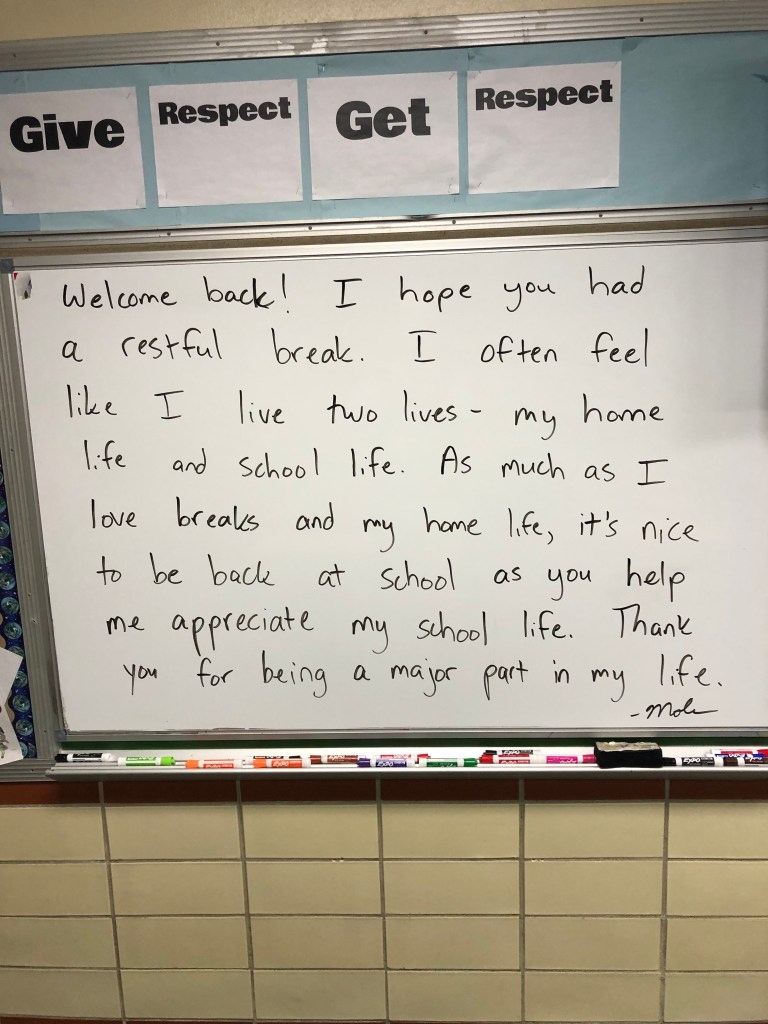
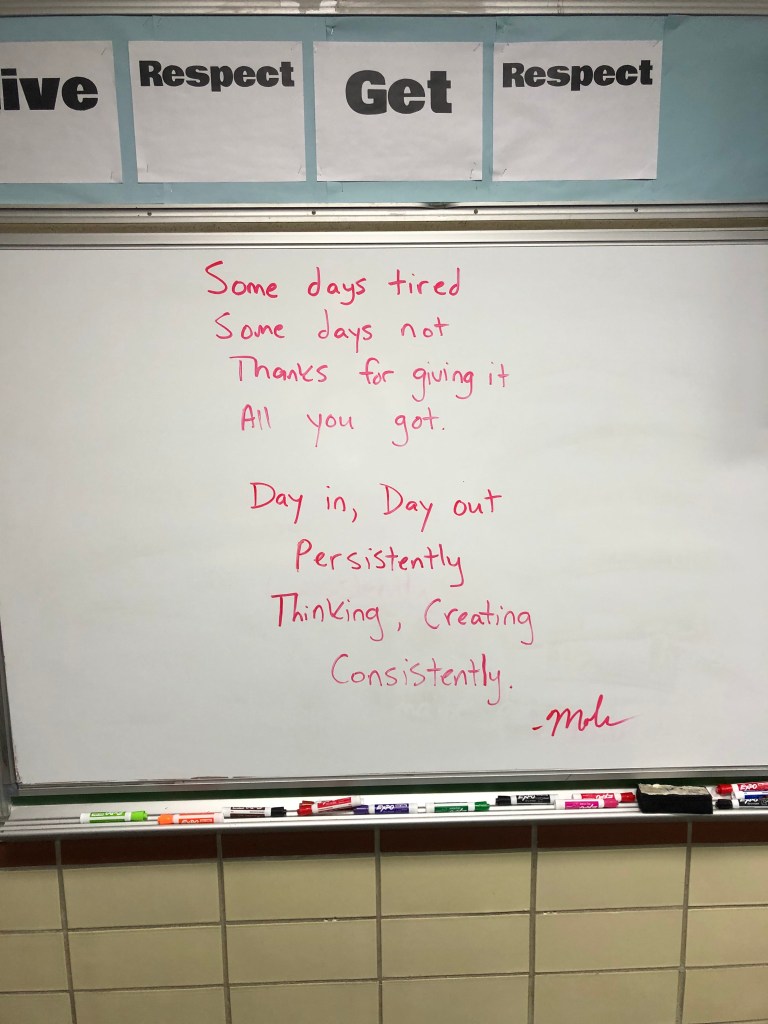
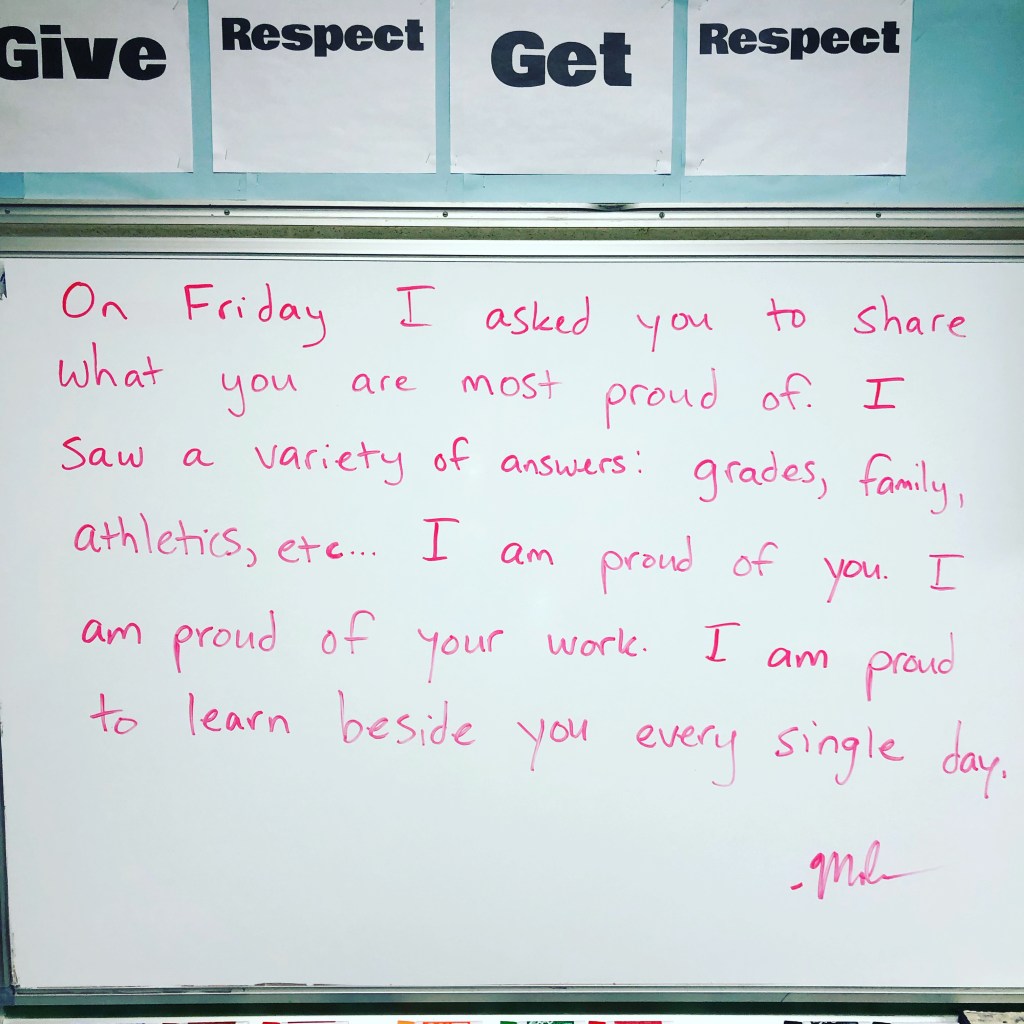
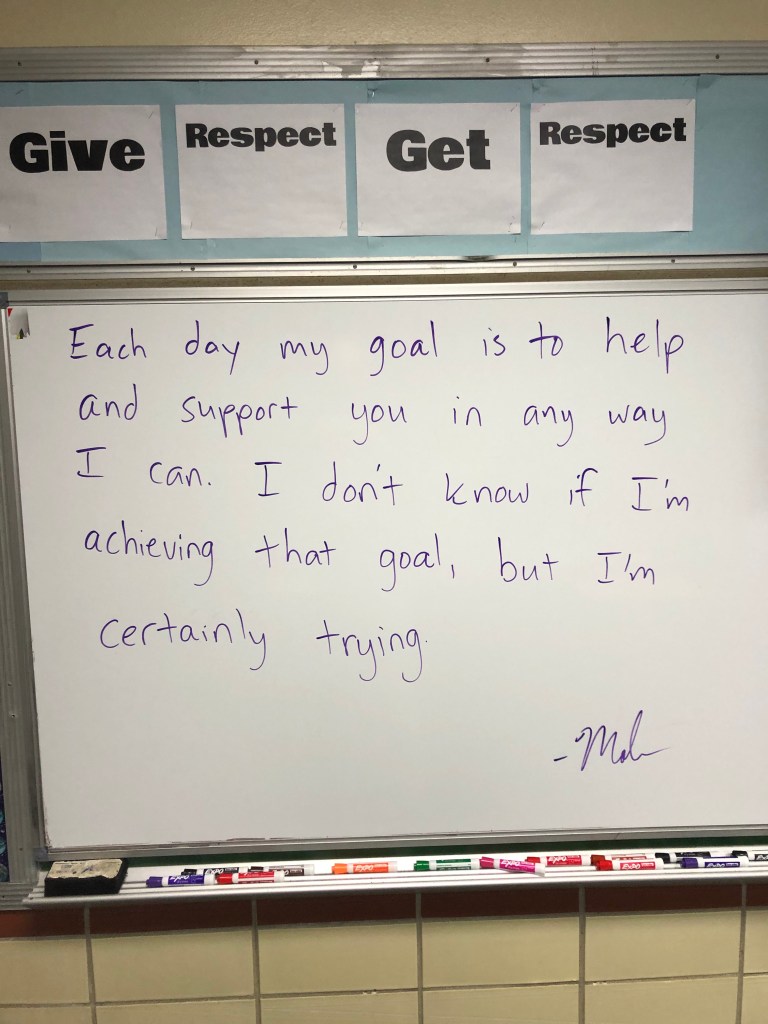
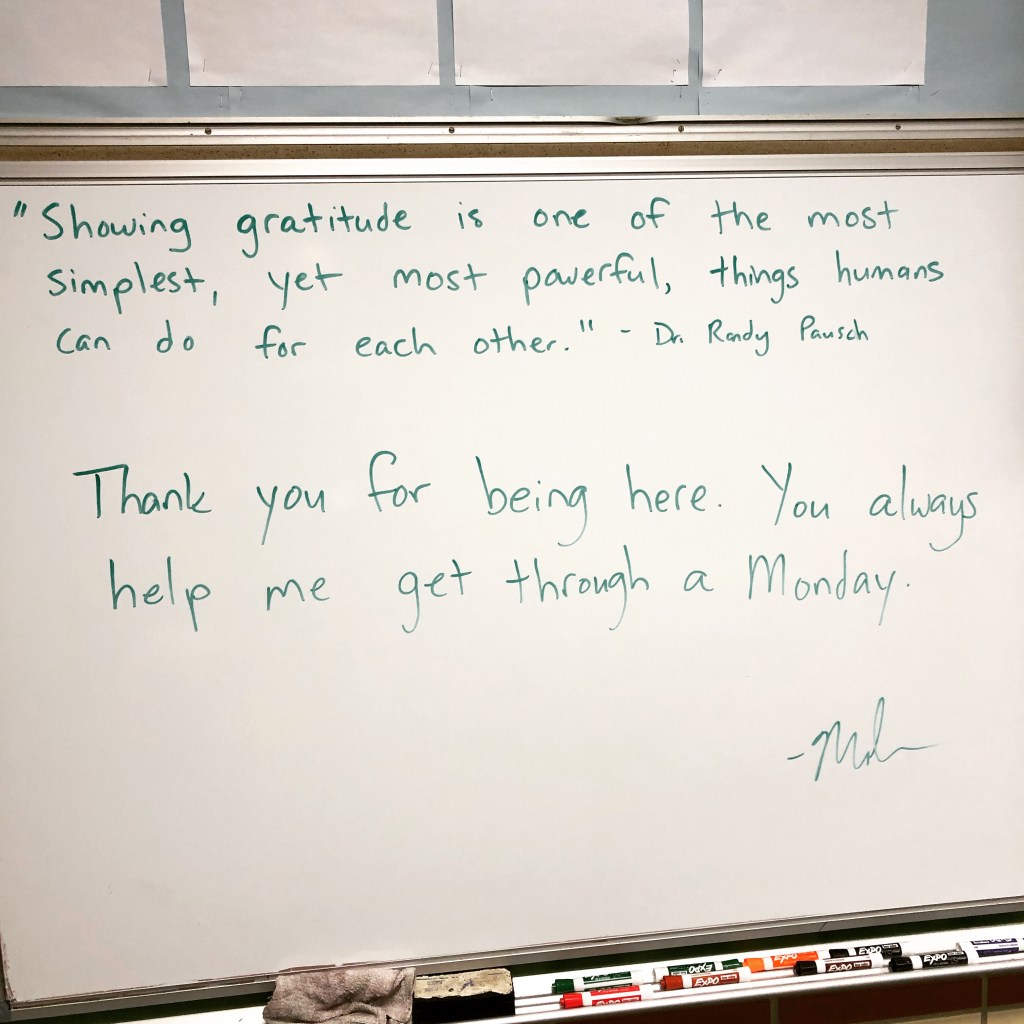
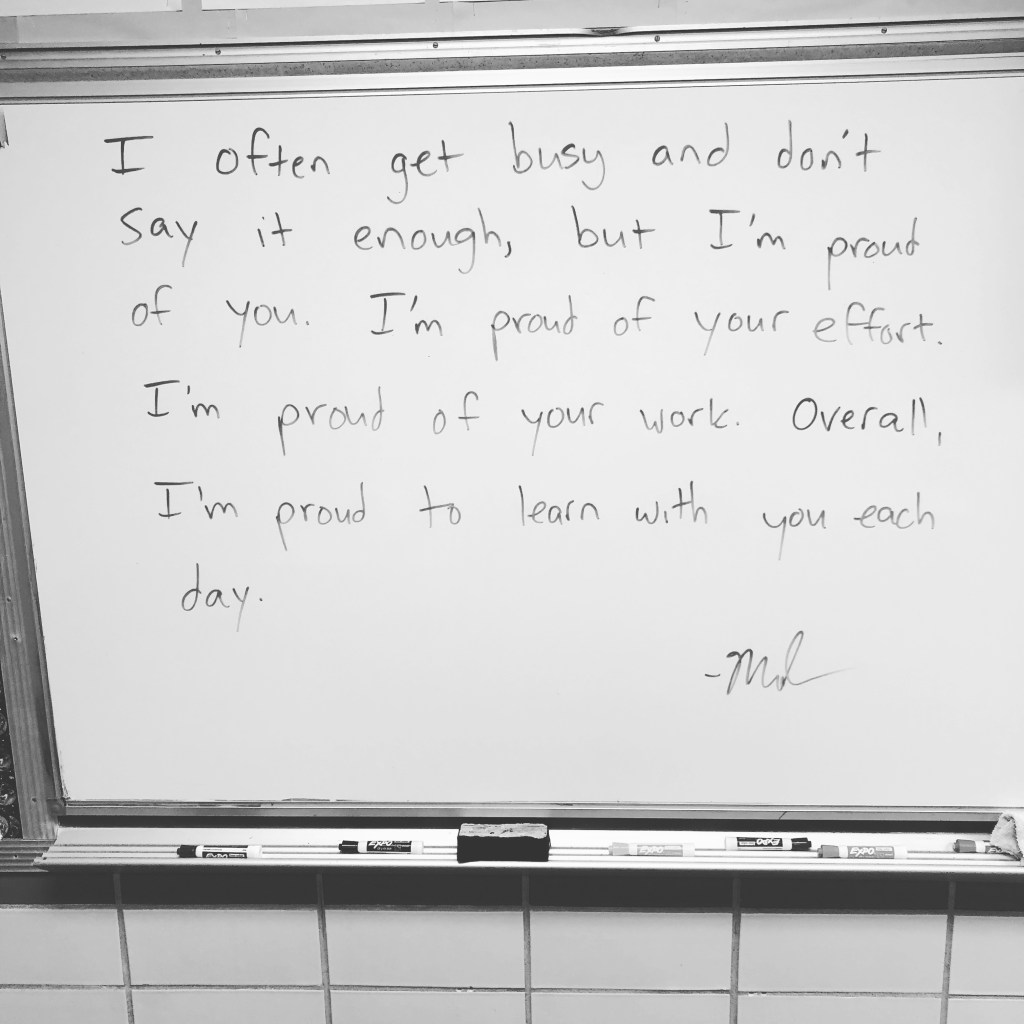
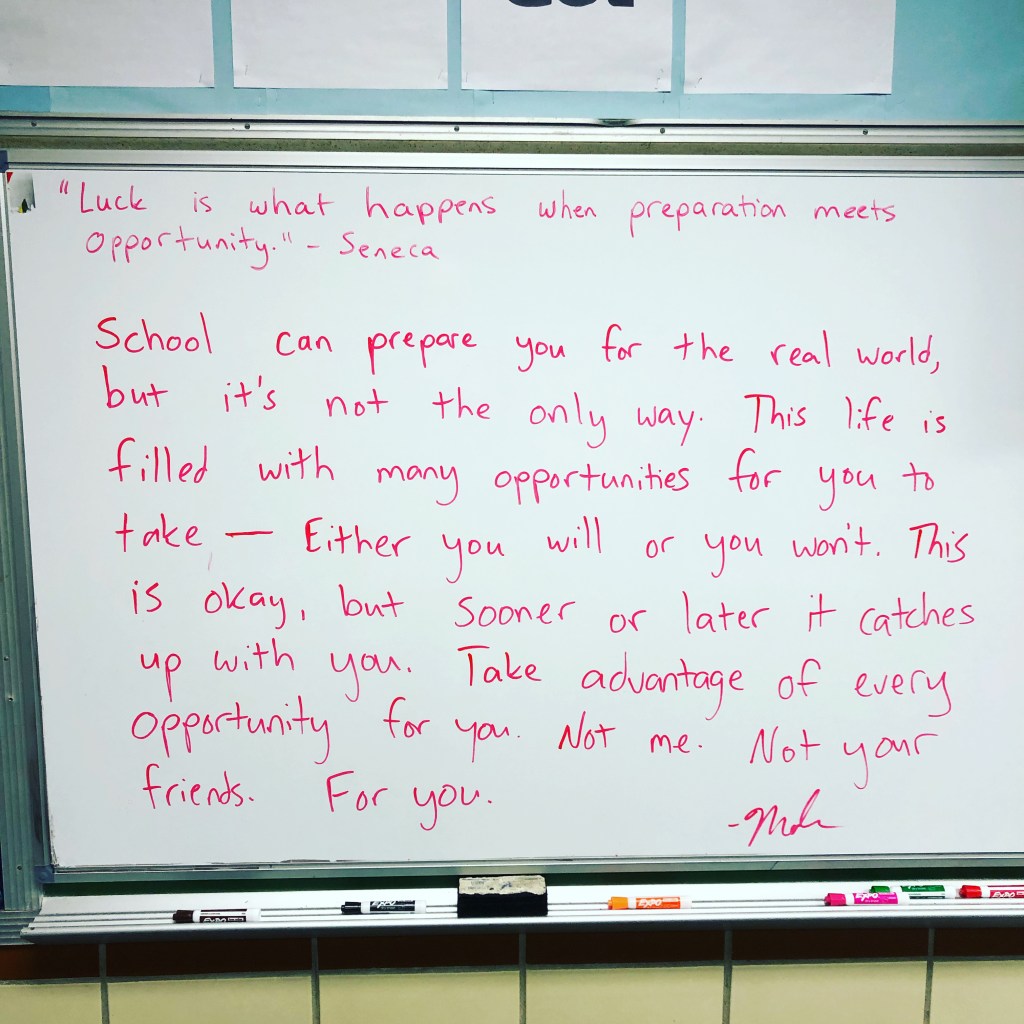
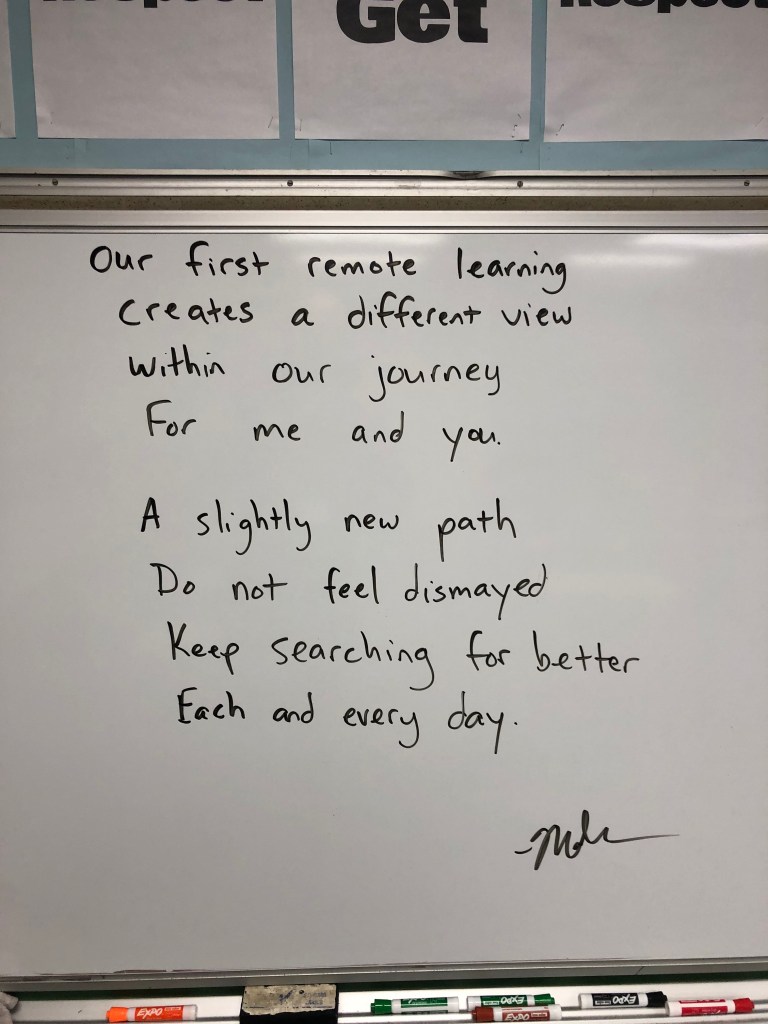
505’s Daily Messages