History teacher at New Richmond Middle School. Tennis coach at SUA, Beechmont Racquet and Fitness, Lunken Playfield, and KCC. Striving to learn, create, and innovate one day at a time.
This week was all about making learning meaningful, engaging, and interactive. We started with a retest—one that actually reflected what students had learned rather than tripping them up with ridiculous wording. Then, we dove into a Black History Month lesson that highlighted lesser-known historical figures using The Great American Race and Superlatives, leading to some of the best discussions we’ve had all year. We wrapped up the week with Game of Quotes, where students turned a Grimm’s fairy tale into a hilarious, text-based competition. This week was a reminder that when students are engaged, they learn—and they actually enjoy the process.
On Tuesday, I sat down to rewrite the Early Republic unit test—not just to make it easier, but to make it make sense.
The original test was full of college-level questions that buried key concepts under overly complex wording. I want my students to be challenged, but I also want them to engage with history—not feel defeated by it.
So, I kept some of the previous test questions but reworded them to align with how 8th graders actually talk and think. I also added new questions focused on what we actually covered in class—things that reflected the way we analyzed history, not just the way the textbook framed it.
The biggest change was the short answer section. Instead of a vague prompt that left students unsure of where to start, I shifted to a clear, structured writing task:
Choose from multiple prompts (giving students ownership)
Construct a basic paragraph with a topic sentence, supporting details, and a conclusion
Focus on historical thinking, not just memorization
And then came the results.
Before the unit, students took a pre-assessment to gauge what they knew coming in:
22%, 22%, 24%, 27%
No surprises there—most students walked in without much prior knowledge.
The first round of testing, using the original assessment, had some improvement:
Multiple choice only: 63%, 57%, 60%, 65%
With writing prompts included: 55%, 45%, 52%, 55%
That writing section killed their scores, but it wasn’t because they didn’t understand the content—it was because the original prompts didn’t give them the structure they needed.
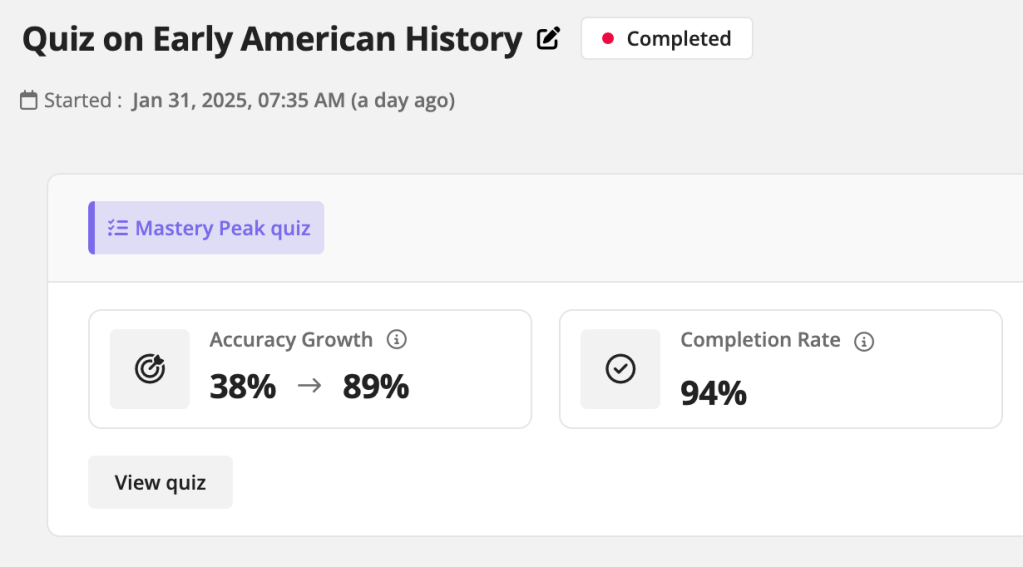
Then, after using the revised test, which kept rigor while focusing on clarity and student success, here’s what happened:
New test with structured writing prompts: 74%, 65%, 74%, 76%
That’s growth. That’s students showing what they actually learned. That’s a test that measures understanding instead of tricking them with wording gymnastics.
Thursday
With Black History Month underway, I wanted to do something different—something that highlighted Black Americans who don’t always make the history books but who played incredible roles in shaping the country.
The inspiration? My daughter’s book, Good Night Stories for Rebel Girls: 100 Tales of Extraordinary Women.
That book does an amazing job of telling engaging, digestible stories about historical figures. So, I took a screenshot of one story, dropped it into ChatGPT, and asked it to analyze the tone, wording, and style. Then, I had it generate a list of lesser-known Black Americans who made significant contributions to history.
The list was incredible—people like:
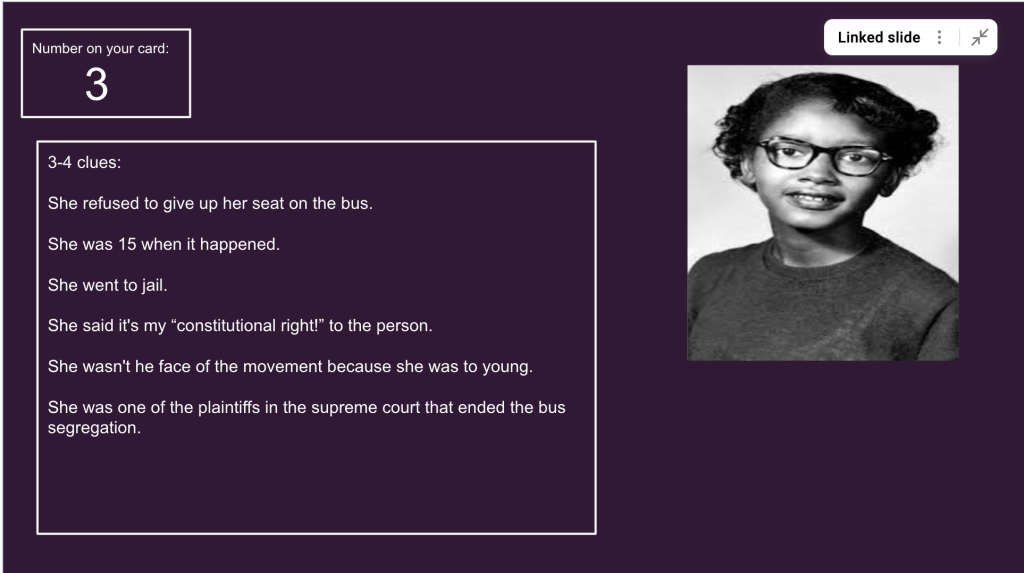
Claudette Colvin – The teen who refused to give up her seat before Rosa Parks.
Robert Smalls – An enslaved man who stole a Confederate ship and became a U.S. congressman.
Bass Reeves – The first Black U.S. Marshal, believed to have inspired the Lone Ranger.
Marie Bolden – The first Black national spelling bee champion in 1908.
Henrietta Lacks – The woman whose cells were used for groundbreaking medical research.
Next, I had ChatGPT craft mini-biographies in the same tone and style as my daughter’s book—and it nailed it. These weren’t just fact dumps; they were narrative-driven, engaging, and built for middle schoolers.
The Great American Race: A Fast-Paced EduProtocol
Now, I had 25 powerful stories, and I wanted to make them interactive. So, I turned to one of my go-to EduProtocols—The Great American Race.
Here’s how it worked:
1️⃣ Each student received a numbered biography—a unique story about one of the Black historical figures. 2️⃣ They created a slide with 3-4 clues about their assigned person, but without revealing the name. 3️⃣ They had 10-12 minutes to create their slide. 4️⃣ Once all slides were arranged and shared, students paired up and raced to guess the correct historical figure based on the clues.
It was fast-paced, fun, and packed with learning. Students were highly engaged, trying to decipher the clues and connect historical achievements to the figures they might have never heard of before.
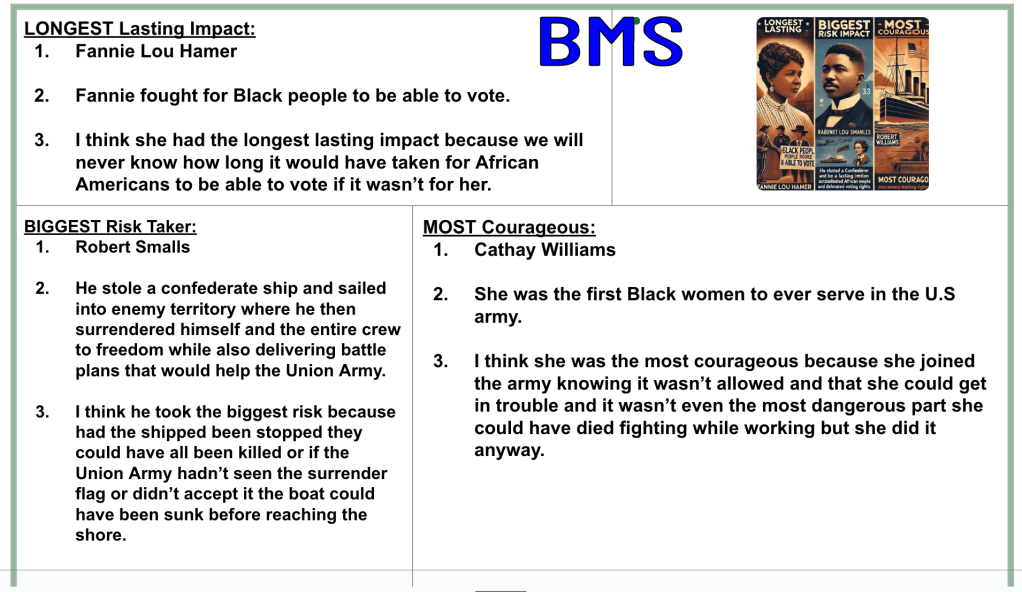
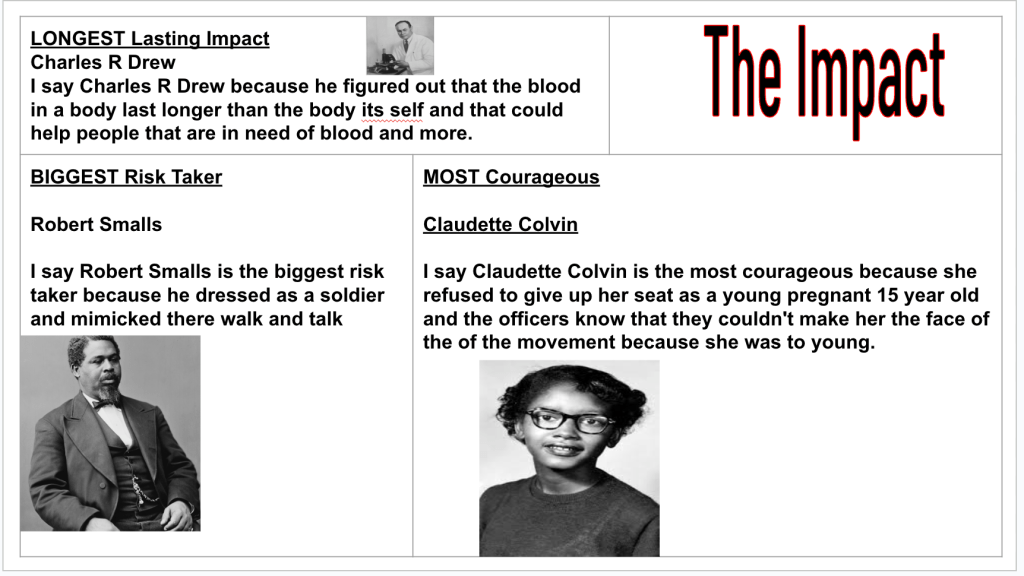
Superlatives EduProtocol: Evaluating Impact
After The Great American Race, I wanted to push students to think critically about these historical figures. That’s where the Superlatives EduProtocol, developed by Kim Voge, came in.
Students paired up and had to discuss, debate, and decide on the following categories:
🏆 Longest Lasting Impact – Which historical figure’s actions had effects that are still felt today? 💡 Biggest Risk Taker – Who made the boldest, most dangerous moves in pursuit of change? 🔥 Most Courageous – Who faced the biggest obstacles and showed the most bravery?
Once they made their choices, they:
✅ Created a title for their slide ✅ Added images to represent their chosen figures ✅ Wrote clear explanations justifying their selections
This was an awesome wrap-up activity. It wasn’t just about listing facts—students had to synthesize information, make comparisons, and justify their reasoning. The discussions were rich, with students arguing for their choices, challenging each other’s reasoning, and making real connections to history.
Why This Works
Students drive the learning. Instead of me telling them the information, they explored it, synthesized it, and shared it in a collaborative and interactive way.
It made Black history personal. By focusing on lesser-known figures, students realized history isn’t just about distant heroes—it’s full of overlooked individuals who changed the world.
The EduProtocol structure made it stick. Instead of a worksheet or textbook reading, students built something, analyzed clues, and worked together—which means they’ll actually remember these figures.
It deepened understanding. The Superlatives had students evaluate the impact and significance, not just memorize facts.
It encouraged discussion and critical thinking. Students had to justify their choices with evidence, building argumentation skills.
Friday: Game of Quotes – Valentine’s Day Edition
Friday was one of those weird reward days, so I decided to try out the Game of Quotes EduProtocol with a Valentine’s twist. Since it was a more relaxed day, I wanted to keep students engaged while still working on reading, writing, and critical thinking.
Choosing the Right Story
I asked Claude AI for Grimm’s fairy tales that would work for 8th graders, and it suggested Clever Elsie. I skimmed through it, made a Google Doc, and shared it with students.
Before diving in, I gave students two minutes to skim the text. Then, I gave them a quick summary of Clever Elsie:
Clever Elsie is a character from a Grimm’s fairy tale also known as Clever Else or Clever Elisabeth. In the story, she is a young woman who overthinks everything to an absurd degree. The most famous part of the tale involves her becoming paralyzed with worry about a potential future scenario: while in her cellar, she sees a pickaxe hanging on the wall and becomes consumed with anxiety that if she marries and has a child, the pickaxe might fall and kill the child. This leads to a chain of events where others join her in crying over this hypothetical tragedy that hasn’t (and may never) happen.
The tale is often interpreted as a satire about overthinking and creating problems out of nothing.
Game of Quotes with Socrative
Once students had a basic understanding of the story, I introduced Game of Quotes—an EduProtocol where students find evidence from the text to match creative prompts.
We used Socrative to submit responses, and I used pre-made Valentine’s-related prompts from Martha Klein Conway (found in the EduProtocols Facebook Group).
Here’s how it worked:
I posted a prompt in Socrative.
As soon as one student submitted a response, everyone else had one minute to add their own.
Once time was up, I hit “Start Vote,” and students voted on the best or funniest response.
Laughter, discussion, and a whole lot of engagement followed.
This was awesome. Students were skimming the text, finding evidence, laughing, reading, and rereading—all while competing in a friendly, creative game.
Valentine’s Day Prompts We Used
Something you never want your crush to say to you:
“if she’s not actually clever, I won’t marry her.”
“future child?”
What Cupid said when his arrow missed the target:
“…if only someone would want to marry her!”
“take a nap”
Title of a Valentine’s Day song
“Possible Future Tragedy”
“…future disaster.”
A saying you would be surprised to see on a conversation candy heart (must be one or two words)
“Watch out!”
“…get away”
“kill them!
“Die”
Why This Works
Students had to engage with the text—even if they didn’t realize it. They had to think critically about how to connect a quote to a humorous, creative prompt. The competition element kept them invested. Laughter equals engagement. They weren’t just reading—they were enjoying the process.
This was a perfect way to wrap up the week—a low-stakes, high-engagement activity that still reinforced text analysis, comprehension, and creative thinking. I’ll definitely use Game of Quotes again.
When I think of teaching the Early Republic, I think about political parties, presidential decisions, and how those decisions shaped the federal government. I think about how the first five presidents kept us out of wars, expanded federal power, and navigated political tensions. I think about how political parties influenced those choices and how the nation evolved under their leadership. But this damn textbook has other plans.
Instead of keeping the focus on political parties, foreign policy, and domestic growth, it randomly throws in sectionalism, the Missouri Compromise, the Industrial Revolution, and some random westward expansion facts—all jammed into two weeks. It’s way too much, and it makes no sense. This is the Early Republic, not a scattershot of everything that happened between 1800 and 1825.
Then Friday rolled around, and we hit the common assessment from the textbook—a test that somehow completely ignores the Monroe Doctrine but includes a question asking students to identify three battles from the War of 1812. Who cares?! It’s not even an important part of the unit.
But I digress.
So, with all that, we kicked off Monday learning about growing sectionalism after the War of 1812. SMH.
We kicked off Monday with a Content Compactor that acted as a quick review of the causes of the War of 1812. This got students thinking about the political, economic, and regional tensions that led to the war while allowing them to summarize key ideas concisely—an essential skill as we transitioned into the concept of sectionalism.
Frayer Model: Defining Sectionalism
Next, we tackled sectionalism with a Frayer Model. Students defined the term, provided examples and non-examples, and listed key characteristics. The goal was to help students see sectionalism not just as a word, but as a major force that would shape U.S. history for decades. This activity ensured that students grasped the economic, political, and social divisions developing between regions of the country.
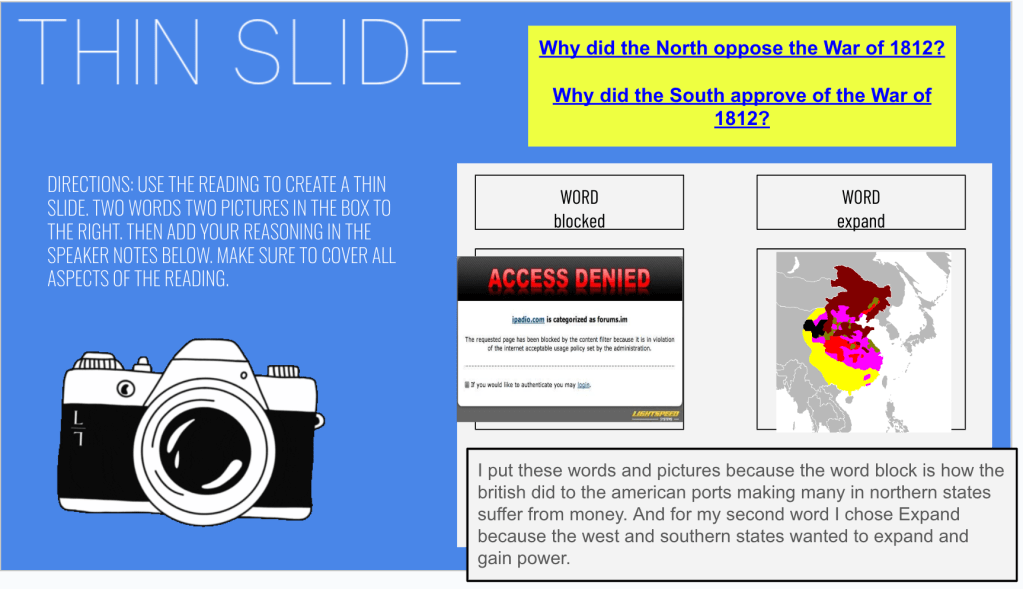
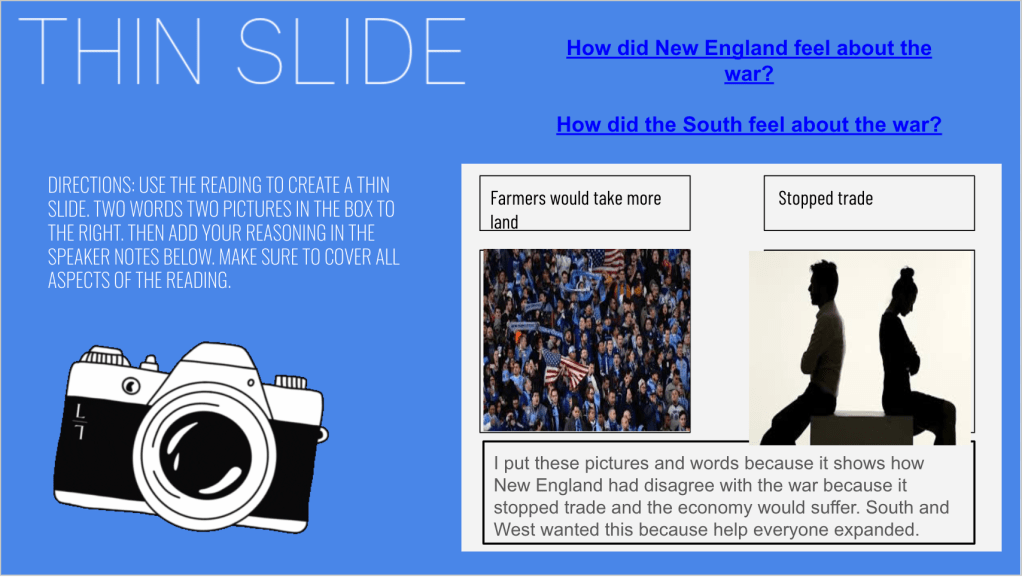
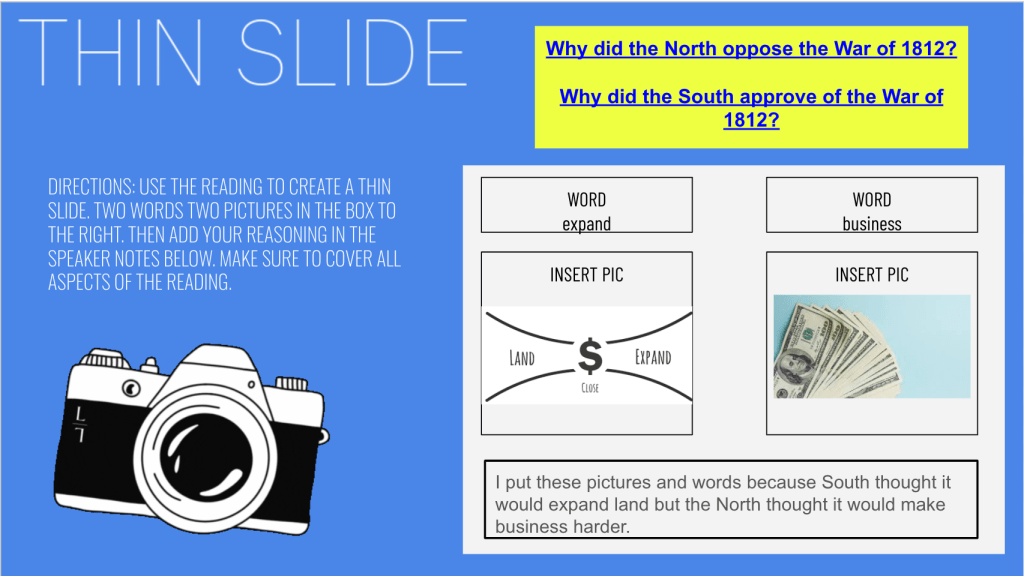
Thin Slides: Visualizing Sectionalism
Once students had a working definition, they moved into a Thin Slides activity. Using a short reading on sectionalism, they selected two words and two images that best represented how sectionalism grew after the War of 1812. In the speaker notes, they explained their choices, addressing:
Why did the North oppose the war?
Why did the South support it?
How did economic and political differences lead to sectionalism?
This was a quick, low-stakes way for students to process how sectional tensions formed and why they mattered.
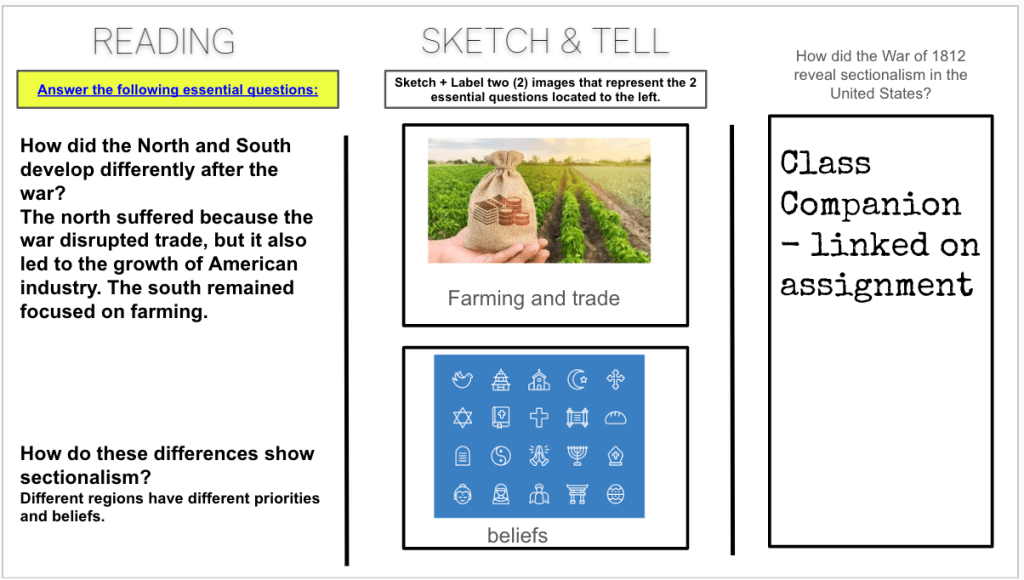
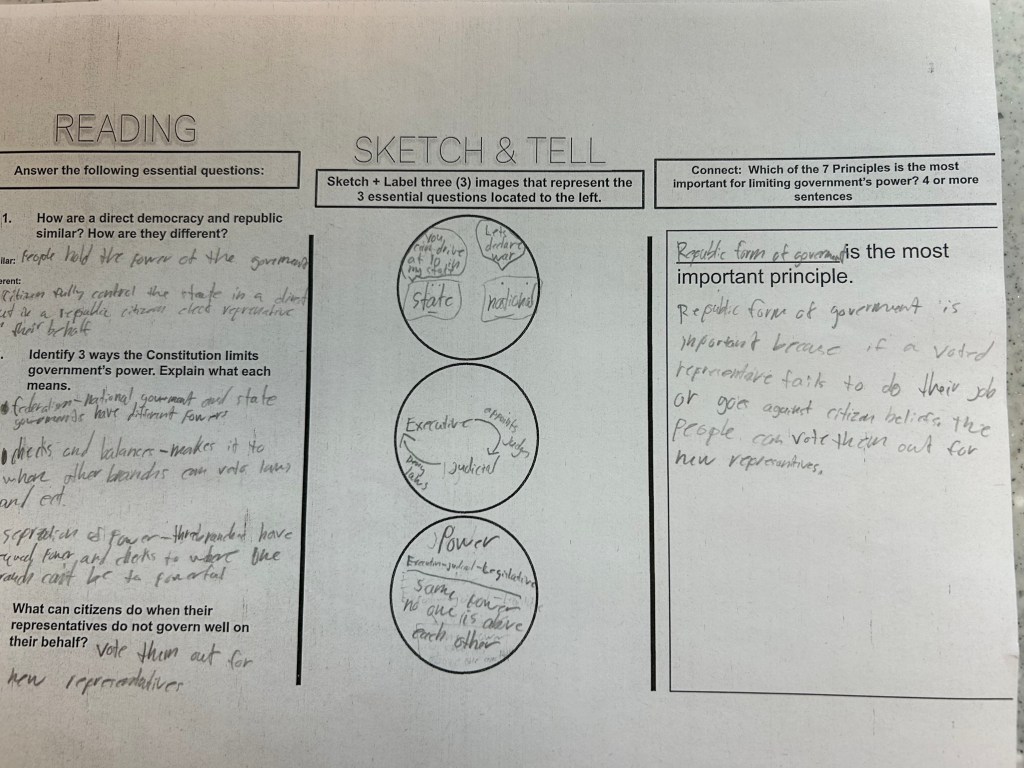
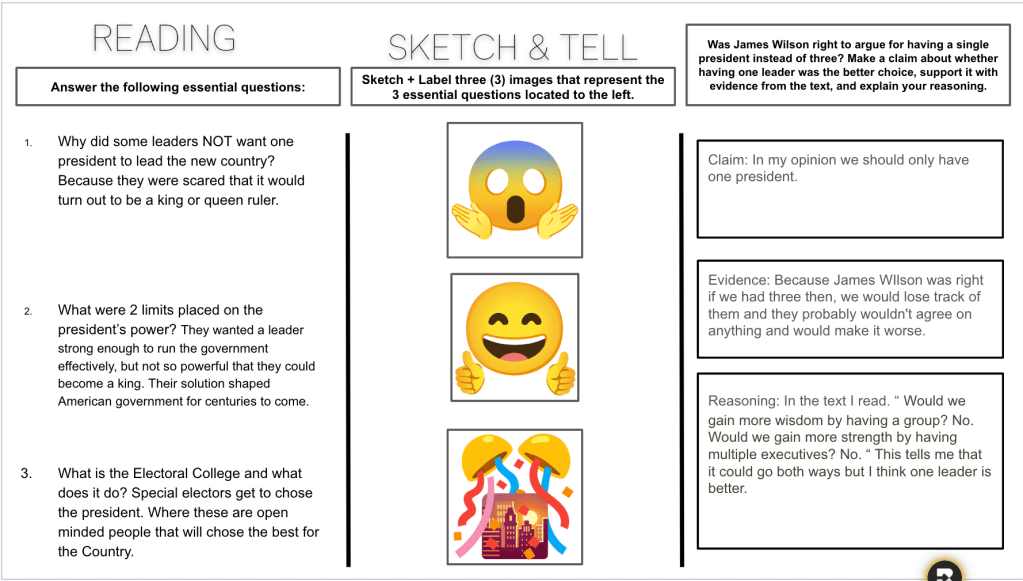
Sketch & Tell: Answering Essential Questions
Students then tackled three essential questions through a Sketch & Tell activity: 1️⃣ How did the North and South develop differently after the war? 2️⃣ How did these differences contribute to sectionalism? 3️⃣ How did the War of 1812 reveal sectionalism in the U.S.?
They created two labeled sketches that visually represented their answers, reinforcing how regional differences in economy, industry, and policy contributed to rising sectional tensions.
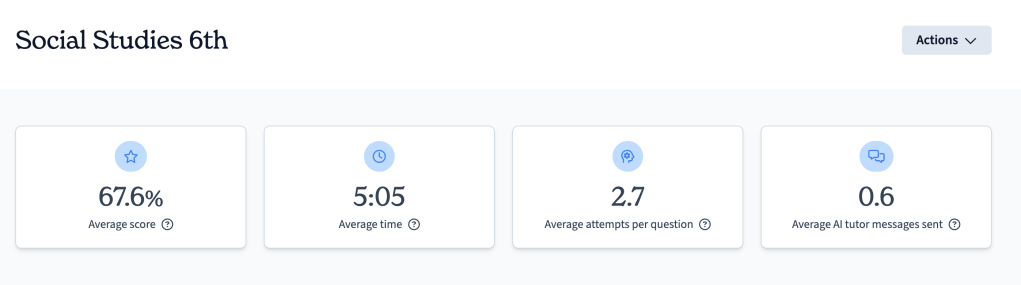
Class Companion: Writing About Sectionalism
To wrap it up, students used Class Companion to answer the question: 💡 How did the War of 1812 reveal sectionalism after the war?
This allowed students to take their thoughts from their sketches and turn them into a structured response with real-time AI feedback. Since some students needed more time to refine their writing, we carried this over into Tuesday, giving them an opportunity to perfect their responses and ensure they fully understood sectionalism’s impact.
Why This Works
Content Compactor helped students refresh prior knowledge in a concise, engaging way.
Frayer Model ensured students developed a strong conceptual foundation before moving forward.
Thin Slides encouraged visual learning and synthesis of ideas.
Sketch & Tell helped students explain complex historical trends in a creative, student-centered way.
Class Companion allowed students to organize their thoughts in writing with immediate, personalized feedback.
Instead of just reading about sectionalism, students were building their understanding step by step, using visual, discussion-based, and writing activities to make the concept stick.
Tuesday & Wednesday
We started Tuesday by finishing up Class Companion responses from Monday on how the War of 1812 revealed sectionalism. Once students submitted their final responses, we pivoted to the Industrial Revolution—a topic that the unit test oddly prioritizes with fill-in-the-blank questions on patents, corporations, and capitalism, but barely acknowledges the Monroe Doctrine or foreign policy under the early presidents. Because that makes total sense.
Gimkit Fast & Curious: Industrial Revolution Vocab
Since the test focuses so much on random economic terms, we ran a Gimkit Fast & Curious with key Industrial Revolution vocabulary—words like patent, corporation, free enterprise, and capitalism. First round: class averages were pretty bad. After giving a quick mini-lesson on the most-missed words, we ran the Gimkit again, and scores jumped up significantly.
To lock in the most commonly missed terms, we followed up with Frayer Models for: 🔹 Patent 🔹 Corporation 🔹 Free Enterprise
Reading, Videos & Thick Slides
After breaking down the vocabulary, students read about key innovations of the Industrial Revolution—factories, mechanization, interchangeable parts, and yes, the cotton gin (because clearly, that fits into an Early Republic unit 🤦♂️).
To help process the reading, students worked on Thick Slides focused on four ways the Industrial Revolution transformed America. They had to: ✅ List four key impacts ✅ Find an image to represent industrialization ✅ Compare the North and South’s role in industrialization
Why This Works
Gimkit Fast & Curious ensured students got multiple reps with essential vocabulary.
Thick Slides helped synthesize and apply learning, rather than just memorizing random terms.
Multiple formats (reading, videos, notes, discussion, and visuals) ensured everyone had a way to engage with the content.
Even though this topic was awkwardly shoved into the unit, we made it work in a way that actually helped students understand and retain the material—instead of just cramming information for a test.
Thursday
With the unit test coming up, I wanted to make sure students had multiple opportunities to review key concepts in an engaging and structured way. Enter Brain, Book, Buddy, Boss—one of my favorite review strategies because it reinforces retrieval practice, collaboration, and teacher-guided clarification all in one lesson.
Step 1: Brain (Independent Recall)
Students received the review sheet (matching terms, short answer questions, and key concepts from The Early Republic). Before looking at any resources, they went through the entire review sheet independently, answering as many questions as they could from memory.
The goal? Get a sense of what they already know.
Some students flew through it, while others stared blankly at the paper. That’s the beauty of this step—it exposes strengths and gaps immediately.
Step 2: Book (Reference-Based Learning)
Next, students used their notes, textbooks, and classwork to fill in missing answers and correct any mistakes. This phase is where light bulbs start going off as students piece together information they’ve seen throughout the unit.
Of course, this is also where they discover just how terribly worded some of these test questions are.
For example, here’s an actual test question: “What were some effects of the Alien and Sedition Acts?”
A. The policy of nullification became largely discredited. B. The French stopped attacking U.S. ships. C. Fewer people immigrated to the United States from Europe. D. The principle of states’ rights gained public support.
This question assumes a level of vocabulary knowledge that most 8th graders simply don’t have. The wording is vague enough to confuse even students who understand the Alien and Sedition Acts. What 8th grader uses discredited in conversation?
Step 3: Buddy (Peer Discussion & Comparison)
After self-correcting with their books, students paired up to compare answers and discuss any remaining gaps. If they disagreed on an answer, they had to explain their reasoning to each other.
These conversations were gold—students challenging each other, correcting mistakes, and realizing where they were off-track. They got into heated debates over Federalist vs. Republican beliefs and the importance of Marbury v. Madison. This step solidified a lot of key concepts.
Step 4: Boss (Teacher Q&A)
For the final step, I opened the floor for questions. Students could ask me about anything still unclear—but with a catch:
They only had 8 minutes.
Once the timer hit zero, I was done answering. This forces students to prioritize their questions and keeps the review focused and efficient.
Book helps reinforce accuracy and self-correction.
Buddy provides peer discussion and clarification.
Boss allows for focused teacher intervention in a structured way.
By the end of class, students had worked through misconceptions, clarified their understanding, and felt more confident about the material. It was one of the best review strategies for this test, and it reinforced just how flawed some of the test’s wording really was.
Friday: Test Day
Friday was test day, and I had everything set up on Class Companion for the short answer questions, while using McGraw Hill’s testing program for the multiple-choice and fill-in-the-blank sections.
One of the fill-in-the-blank questions asked about the beliefs of Democratic-Republicans. Most students simply typed “Republicans”, which is a reasonable answer considering the textbook even calls them that at times.
But McGraw Hill marked it wrong because they didn’t type the answer exactly as programmed: “Democratic-Republicans, Republicans”. I wish I were making this up.
So now, instead of assessing whether students actually understood the beliefs of the party, we were stuck in a battle of formatting.
Class Companion: At Least It Scored Correctly
For the short answer responses, Class Companion scored and provided feedback, but students only had one attempt—no revisions, just one shot. At least it evaluated their responses based on content rather than formatting nonsense.
Last week was all about layering EduProtocols to tackle complex historical topics in engaging, meaningful ways. From political parties to the War of 1812, we used Thin Slides, Archetype Four Square, Frayer Models, Progressive Sketch and Tell, Map and Tell, and Class Companion to help students synthesize, visualize, and apply their knowledge. Instead of passively reading from the textbook, students were analyzing, predicting, debating, sketching, and writing, making these historical moments stick. Here’s a breakdown of how EduProtocols transformed our week and why they worked.
Monday: The Birth of Political Parties and the Election of 1796
If I had my way, I’d start the Early Republic unit with political parties and go deep. I’d have students analyze the decisions of early presidents through the lens of Federalists and Democratic-Republicans, helping them connect ideology to action. But instead, I’m following the textbook—a textbook that does a poor job of explaining how early party beliefs shaped America’s foreign and domestic policies and ultimately led to the War of 1812.
Rather than let the textbook dictate a shallow, disconnected lesson, I did what I always do—I adapted, structured, and layered EduProtocols to make political parties click for my students.
Quick Notes: Laying the Foundation
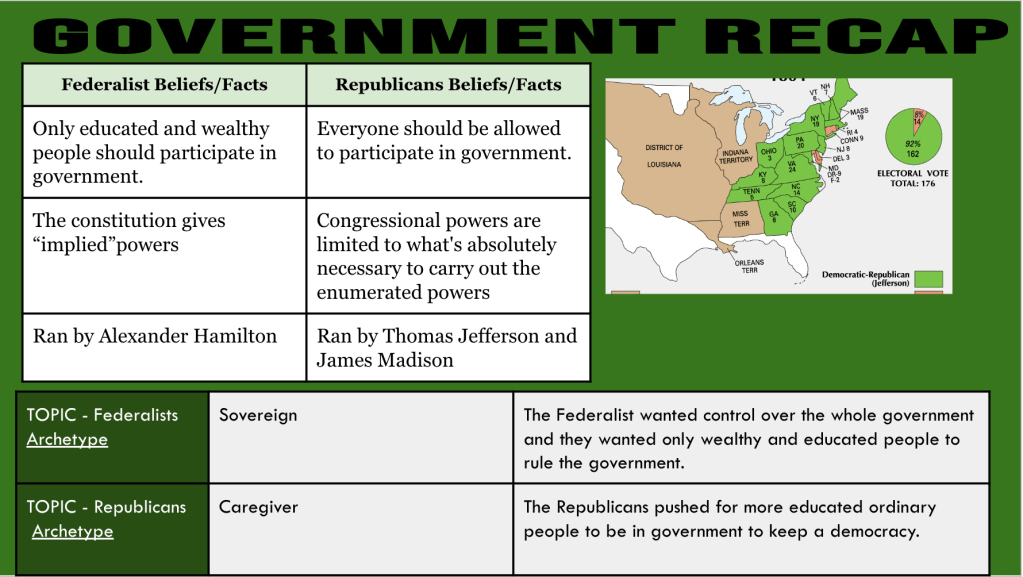
We started with quick notes to introduce how political parties formed in the 1790s, the key differences between Federalists and Democratic-Republicans, and the founding figures behind each party—Alexander Hamilton vs. Thomas Jefferson. These notes were designed to be brief and targeted—just enough to set up the next activity while keeping students engaged.
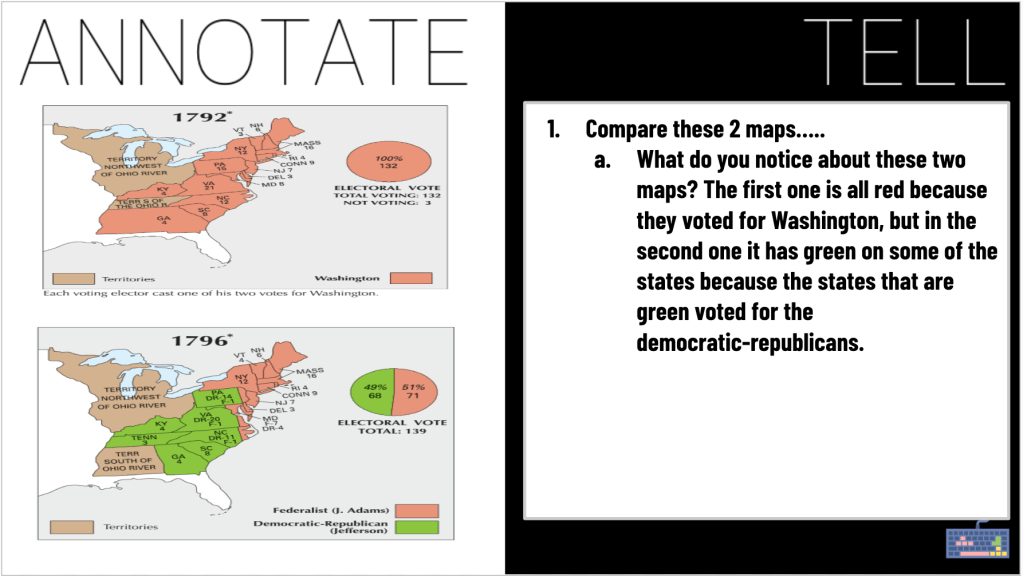
Map and Tell: Visualizing Political Divides
Next, we used a Map and Tell to analyze the elections of 1792 and 1796. Students examined who won the elections (Washington in 1792, Adams in 1796), where each party gained support (Federalists dominated New England, Democratic-Republicans gained strength in the South and West), and how political divisions emerged geographically. This was eye-opening for many students, who could see how early America was already divided in ways that still echo in modern politics.
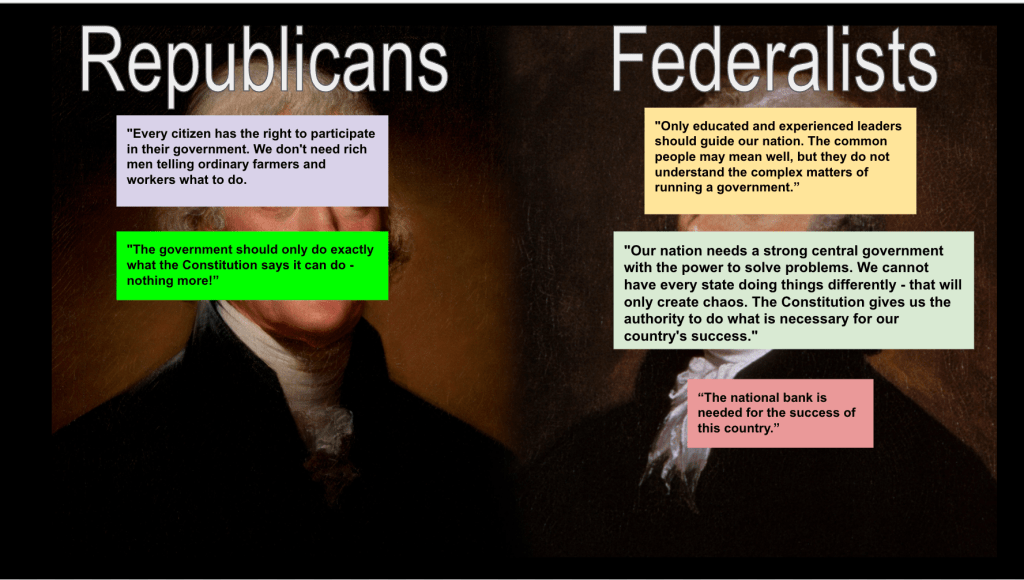
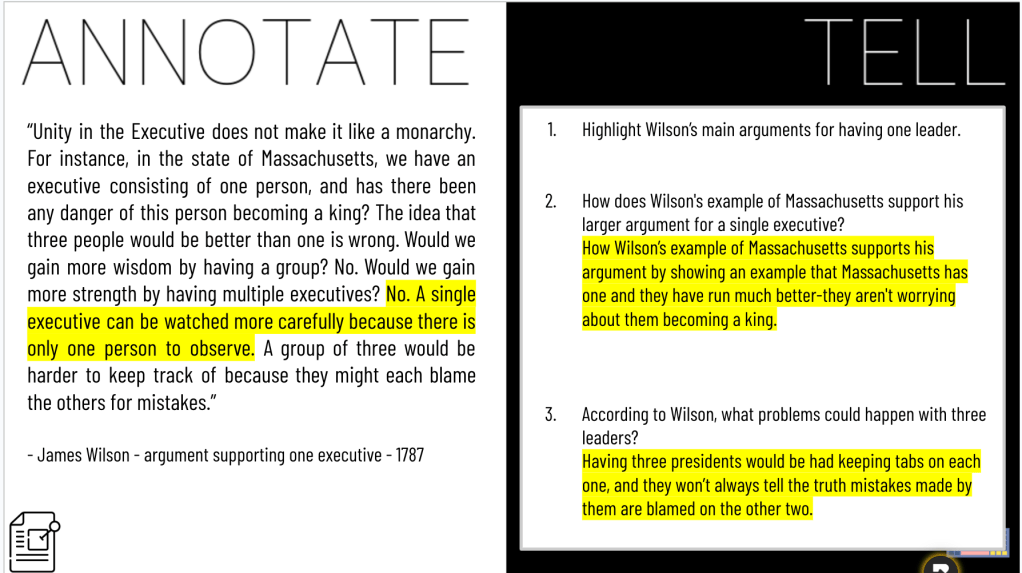
Annotate and Tell: Organizing Party Beliefs
To make sense of the ideological divide, students used Annotate and Tell to highlight and code their readings. They highlighted Federalist beliefs in blue and Democratic-Republican beliefs in green. By the end, students had color-coded party perspectives on government power, the economy, foreign relations, and constitutional interpretation. This strategy helped students organize and visualize each party’s stance, making it easier to compare and contrast.
Quote Sort: Who Said It?
Now that students had a solid grasp of each party, we moved into a Quote Sort. I gave them statements from historical figures, and they had to drag and drop them under either Federalists or Democratic-Republicans. Examples included:
“The country should be led by the wealthy and educated.” → Federalists
“States should have more power than the national government.” → Democratic-Republicans
This activity forced students to think critically and apply their knowledge, reinforcing party beliefs in a hands-on way.
Thick Slide: Bringing It All Together
To synthesize everything, students completed a Thick Slide where they assigned archetypes to Hamilton and Jefferson, compared Federalist vs. Democratic-Republican beliefs, and found images that represented each party’s values. This final layer helped students see patterns, make connections, and process the big picture in a creative, visual way.
Class Companion: Writing on the Election of 1796
To wrap it all up, students used Class Companion to answer: How did disagreements between Hamilton and Jefferson lead to both the creation of political parties AND an unusual outcome in the election of 1796?
Class Companion provided real-time feedback, pushing students to refine their writing. The AI-driven scoring gave them a clear sense of what worked—and what needed improvement. Since they had multiple attempts, students were motivated to revise and improve their responses in real time. Some students got competitive, trying to perfect their answers on their third attempt. Seeing them actually excited about revising their writing was a huge win.
Why This Works
Map and Tell gives students a visual connection to political divisions.
Annotate and Tell helps students organize party beliefs clearly.
Quote Sort turns ideological differences into an interactive challenge.
Thick Slides encourage students to synthesize information creatively.
Class Companion makes writing engaging, immediate, and iterative.
Students analyzed, compared, discussed, and created. This layered approach made early political parties meaningful, memorable, and real.
Tuesday: John Adams
I’ve been using the textbook, but I’m running out of time. The reality of trying to fit everything into the unit assessment timeline has me teaching to a test instead of focusing on deep learning and real understanding. This is not education. I feel like a robot, checking boxes rather than tailoring lessons to what my students actually need. But, despite the constraints, I found ways to layer in engagement and critical thinking while still covering the required content.
Quick Notes: Laying the Foundation
I started class with quick notes to introduce:
Background on John Adams—his role in the revolution, his Federalist views, and his leadership style.
Foreign policy challenges—especially rising tensions with France.
The XYZ Affair—what happened and how it impacted U.S.-French relations.
The Alien and Sedition Acts—why Adams passed them and how they divided the nation.
These notes set the stage, ensuring students had context before diving into deeper analysis.
Fast and Curious Gimkit: Reinforcing Key Ideas
Next, we ran a Gimkit Fast and Curious with questions on John Adams and political parties. Students played for three minutes, I provided instant feedback, and we played again. This quick retrieval practice helped reinforce key concepts, ensuring they recognized important terms and events before moving forward.
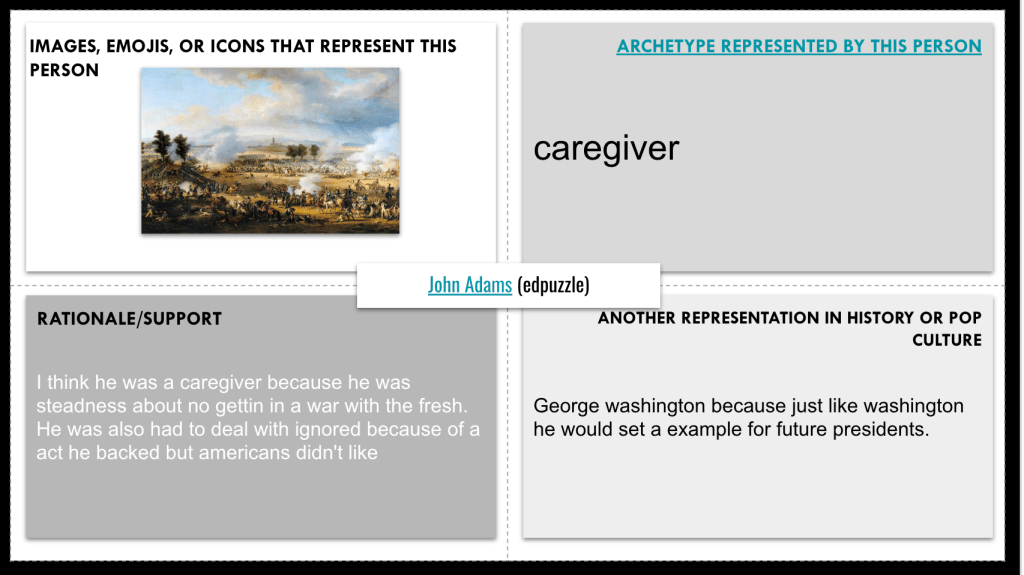
Archetype Four Square: Understanding John Adams
To push students toward higher-order thinking, we used an Archetype Four Square activity.
Students watched an EdPuzzle on John Adams while thinking about which archetype best fit him. Was he:
A Protector, trying to defend the country from French interference?
A Ruler, who prioritized law and order with the Alien and Sedition Acts?
A Visionary, thinking ahead for what was best for the country long-term?
They had to choose an archetype, justify their reasoning, and discuss with a partner. This helped them see Adams as more than just another name in the textbook—they began analyzing his motivations and leadership style.
Sketch and Tell Connect: Breaking Down the Issues
We then moved into a Sketch and Tell Connect, where students answered four guided questions pulled from the textbook’s guided reading section. The goal was for them to process and organize what they had learned.
To push them further, I used a Somebody Wanted But So Then (SWBST) structure for the sketches:
Somebody (John Adams or France)
Wanted (to protect the U.S., avoid war, maintain Federalist power, etc.)
But (tensions with France, backlash to Alien and Sedition Acts, etc.)
So (the government took action)
Then (the impact on the country and his presidency)
This was challenging for them. Synthesizing content like this is a higher-order skill, and many struggled to condense complex events into simple cause-and-effect relationships. But that’s the whole point—we’ll keep practicing.
Class Companion: Writing on Adams’ Presidency
To wrap up, students used Class Companion to summarize the major problems Adams faced as president. They had to explain the XYZ Affair, the Alien and Sedition Acts, his dealings with France, and the Federalist Party split.
The AI-powered feedback helped students clarify their writing, refine their ideas, and strengthen their arguments. Some improved their responses after multiple attempts, realizing where they needed stronger evidence and explanations. Seeing students revise and rethink their work in real time was a win.
Why This Works
Fast and Curious Gimkit reinforced content through repetition and quick retrieval.
Archetype Four Square encouraged critical thinking about Adams’ leadership style.
Sketch and Tell Connect with SWBST pushed students to synthesize information visually and see the cause-and-effect relationships in history.
Class Companion writing gave students instant feedback, helping them improve their ability to explain and analyze historical events.
Even though I felt trapped by the textbook and assessment timeline, I made sure students weren’t just memorizing—they were thinking, discussing, and applying. That’s what makes learning stick.
Wednesday: Marbury v. Madison
One of the essay questions on the textbook unit assessment asks students to write about Marbury v. Madison. So, as I continue teaching to a test (insert sarcasm), I put together a lesson solely focused on the case. What’s funny is that the pre-assessment for the unit didn’t include a single question on Marbury v. Madison, yet somehow, students are expected to write an essay about it at the end of the unit. The textbook dedicates two paragraphs to explaining the case—two paragraphs—and assumes that’s enough for middle schoolers to write an in-depth response.
Luckily, I already had a lesson from last year that actually helps students understand this case in a meaningful way. It’s structured, layered, and built for comprehension rather than memorization.
Quick Notes: The Supreme Court Before Marbury v. Madison
We started with quick notes on the weaknesses of the Supreme Court before this landmark case. The Court was not seen as a powerful branch, and many people questioned its authority. Marbury v. Madison changed that by firmly establishing the Court’s power of judicial review—the ability to declare laws unconstitutional.
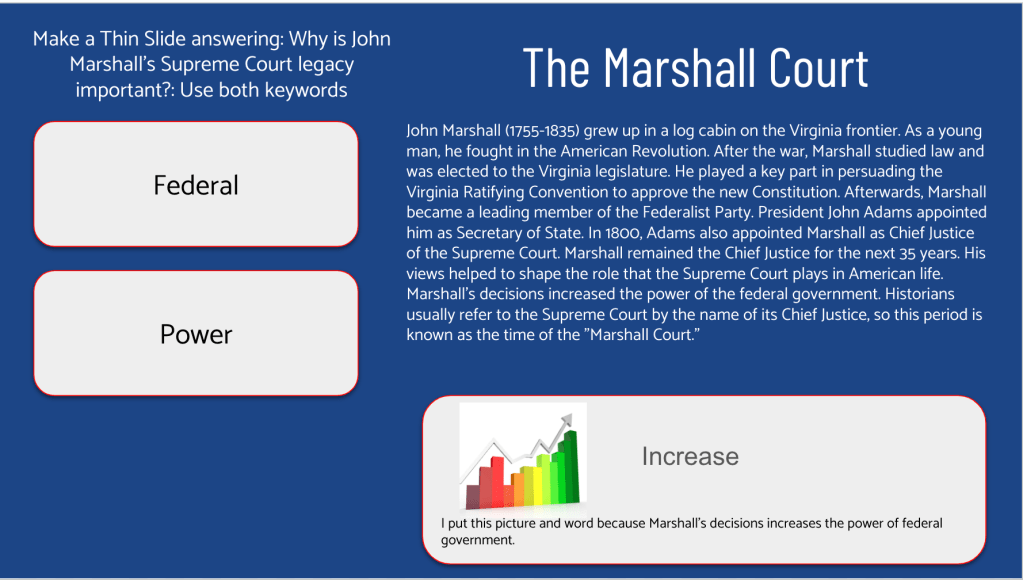
Thin Slide: John Marshall’s Supreme Court Legacy
To introduce John Marshall, students completed a Thin Slide answering: Why is John Marshall’s Supreme Court legacy important?
Students added one word and one picture to represent his impact and responded to the question. This quick, low-stakes activity gave them an opportunity to process key ideas visually before we dove deeper.
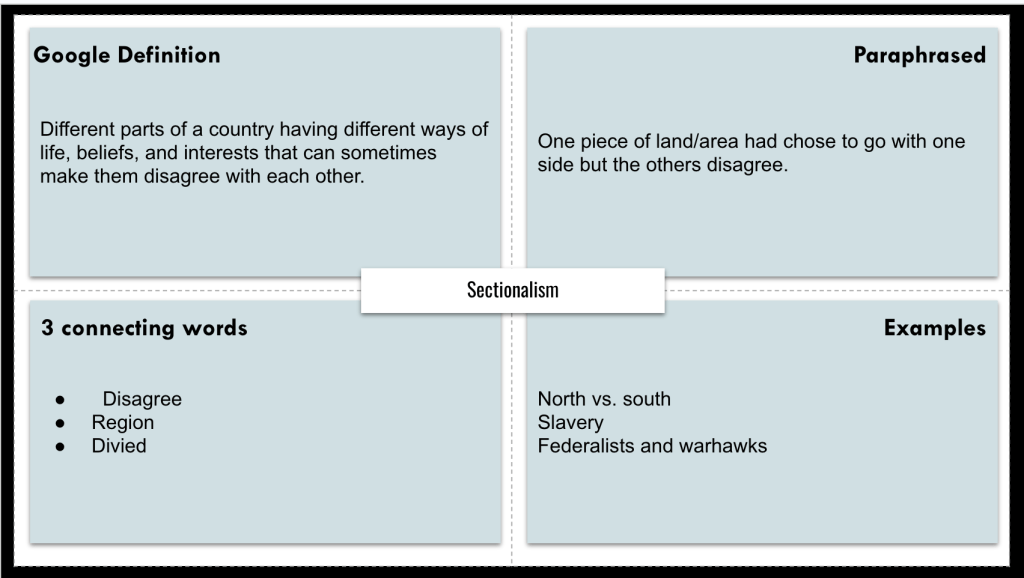
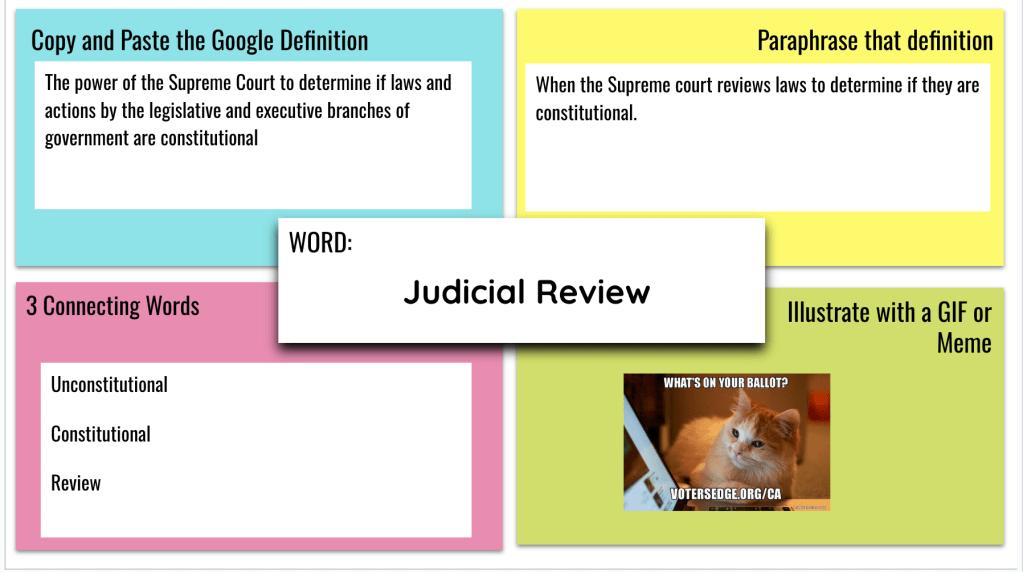
Frayer Models: Breaking Down Key Concepts
Next, students built background knowledge using two Frayer models—one for judicial review and one for writ of mandamus.
For each concept, they:
Defined it in their own words.
Paraphrased a Google definition (to compare with their explanation).
Came up with three connecting words to reinforce meaning.
Illustrated the concept using a GIF or meme.
This structured approach helped students grasp difficult legal terms and connect them to real-world applications.
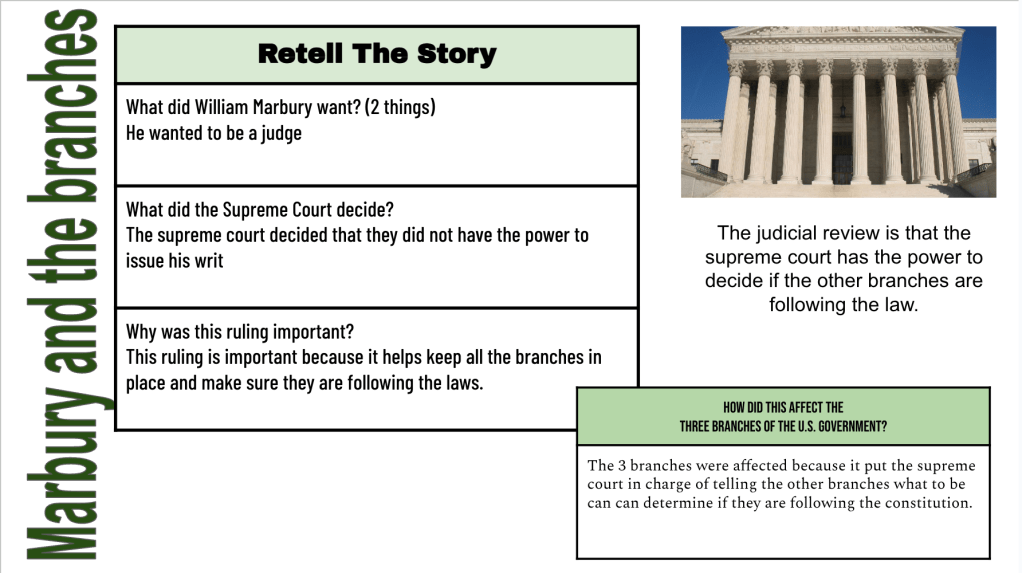
Reading the Case: Making It 8th-Grade Friendly
The textbook’s two-paragraph explanation wasn’t enough, so I adapted an iCivics reading to simplify the language while maintaining accuracy.
Students read about:
What William Marbury wanted (his commission as a judge).
What the Supreme Court decided (they couldn’t force Madison to deliver the commission).
Why the ruling was important (it established judicial review).
Students completed a Thick Slide to organize their learning, breaking the case into cause, decision, and impact—a direct alignment with the essay question they’ll face on the unit test.
Annotate and Tell: Marshall’s Ruling
We then moved to primary source analysis. Students read excerpts from John Marshall’s ruling and used Annotate and Tell to highlight key ideas.
As they read, they:
Highlighted Marshall’s views on who should have the final say in interpreting the Constitution.
Answered: What does Marshall say is the Supreme Court’s job and responsibility? Why is this important to his argument?
This activity reinforced the central argument of judicial review—that the Supreme Court’s job is to interpret the Constitution and override laws that contradict it.
Gimkit Fast and Curious: Wrapping It Up
To cement understanding, we ended class with a Gimkit Fast and Curious on Marbury v. Madison. After one round, I gave feedback, and we played again. By the second round, students were improving their recall and accuracy, showing that the layered approach to this lesson worked.
Why This Works
Thin Slides helped students preview the key figure (John Marshall) in a quick, engaging way.
Frayer Models broke down complex legal concepts into manageable, student-friendly chunks.
A carefully adapted reading ensured that all students could access the information—not just the ones who can decipher legal jargon.
Thick Slides allowed students to process the case visually and organize their learning for the upcoming essay.
Annotate and Tell built close reading skills and helped students engage with Marshall’s ruling in a meaningful way.
Gimkit Fast and Curious reinforced content through repetition and retrieval practice, strengthening student recall.
I made sure students actually understood Marbury v. Madison instead of just skimming two textbook paragraphs and hoping for the best. That’s why this approach works.
Thursday: The Louisiana Purchase
The textbook’s approach to the Louisiana Purchase makes zero sense. It spends an entire chapter on Napoleon, French colonies, and the lead-up to the purchase, yet barely covers what the purchase meant for the U.S. Then, it dedicates multiple pages to Lewis and Clark, even though there isn’t a single question about them on the unit assessment. Meanwhile, Marbury v. Madison gets two textbook paragraphs, but the test expects students to write a full essay on it. Make it make sense.
Instead of wasting time on unnecessary details, I cut straight to the heart of the matter—why the Louisiana Purchase mattered, why Jefferson took the risk, and why Federalists hated it.
Map and Tell: Predicting Motives
We started class with a Map and Tell prediction slide with the following setup:
“The Democratic-Republican President, Thomas Jefferson, had a bold vision for American expansion that led him to create the Louisiana Purchase of 1803, which doubled the size of the United States for just 3 to 4 cents per acre—arguably the greatest real estate deal in history.”
Students then made predictions:
Why do you think France was willing to sell such a huge territory to the United States?
Why do you think the Federalists hated this purchase of Louisiana?
This activity got them thinking before diving into the details. It also highlighted misconceptions early so we could clear them up as we went.
EdPuzzle: Understanding Jefferson’s Vision
Next, students watched an EdPuzzle on Thomas Jefferson to ground them in his mindset—his strict interpretation of the Constitution, his agrarian ideals, and his vision for westward expansion.
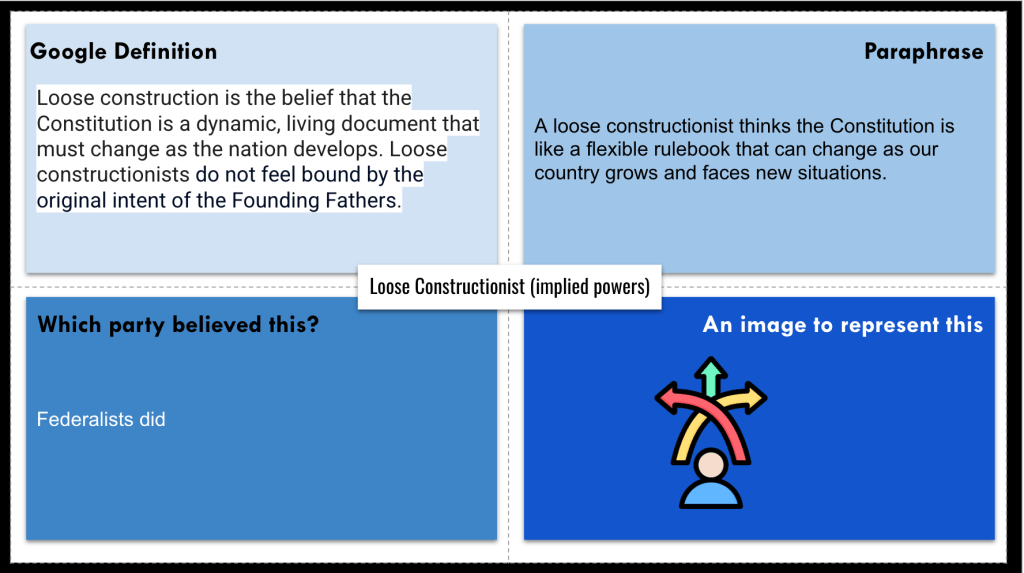
Frayer Models: Strict vs. Loose Constructionists
Since one of the biggest issues with the purchase was that Jefferson had to go against his own beliefs, students completed two Frayer models:
Strict Constructionist (following the Constitution exactly as written)
Loose Constructionist (interpreting the Constitution more broadly)
This set up the big debate—how Jefferson, a strict constructionist, justified loosening his interpretation to make the purchase happen.
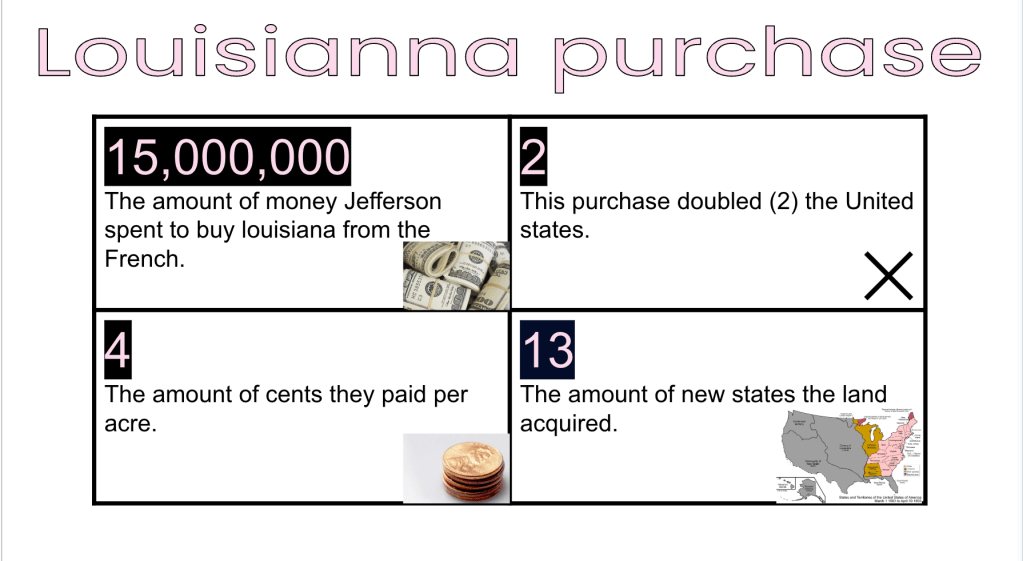
Number Mania: Proving a Statement with Data
Next, we read about the Louisiana Purchase and completed a Number Mania.
For this activity, I gave students a statement they had to prove true using numerical evidence from the text:
“Expanding the country west was a key goal for Jefferson. So even though it went against some of his usual policies, Jefferson made the daring choice to buy all of Louisiana from France.”
Students had to find and highlight numbers that supported this idea, such as:
The price of the purchase ($15 million, about 3-4 cents per acre)
The Senate approval vote (26-6 in favor)
How the purchase doubled the size of the U.S.
Instead of just listing facts, they had to find numbers that connected directly to the bigger argument, reinforcing why the purchase was such a big deal.
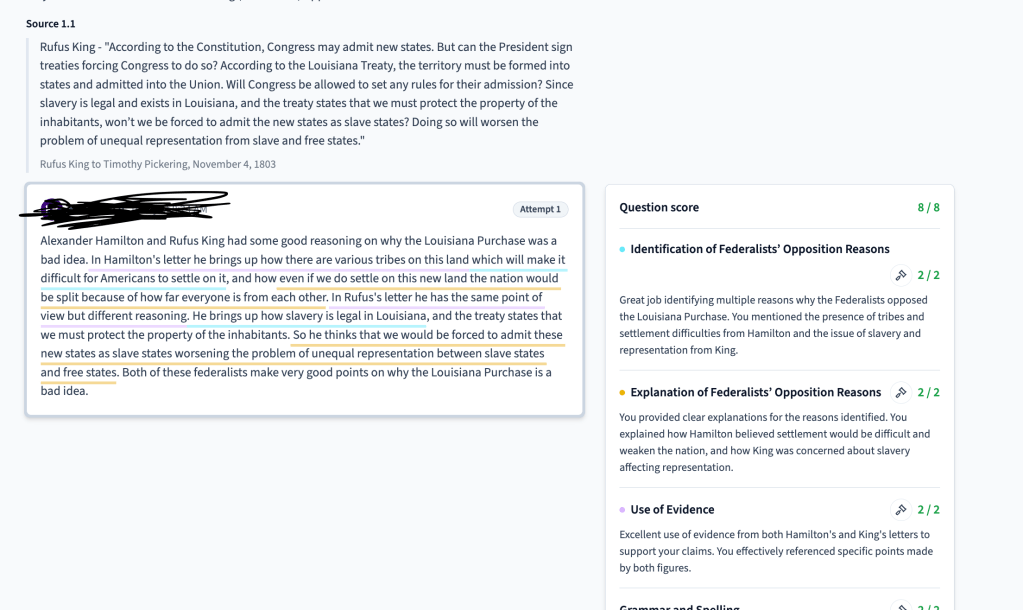
Class Companion: Federalist Opposition to the Purchase
To wrap it up, students went to Class Companion, where they read letters from Alexander Hamilton and Rufus King criticizing the Louisiana Purchase.
Using what they learned from the lesson, they had to write a response explaining why Federalists opposed the purchase. This final step connected everything—Jefferson’s decision, the constitutional debate, the numbers proving its significance, and the political pushback from Federalists.
Why This Works
Map and Tell made students predict historical motives, encouraging critical thinking before reading.
EdPuzzle gave students context on Jefferson’s philosophy, making the purchase easier to understand.
Frayer Models clarified the strict vs. loose interpretation debate, the core constitutional issue of the purchase.
Number Mania forced students to use evidence-based reasoning, proving why the purchase was so monumental.
Class Companion writing allowed students to engage with primary sources and articulate historical perspectives.
Even though the textbook wasted pages on unnecessary details, this lesson cut straight to the point, ensuring students understood the key issue—the Louisiana Purchase doubled the U.S., forced Jefferson to change his beliefs, and created major political controversy. That’s what actually matters.
Friday: The War of 1812
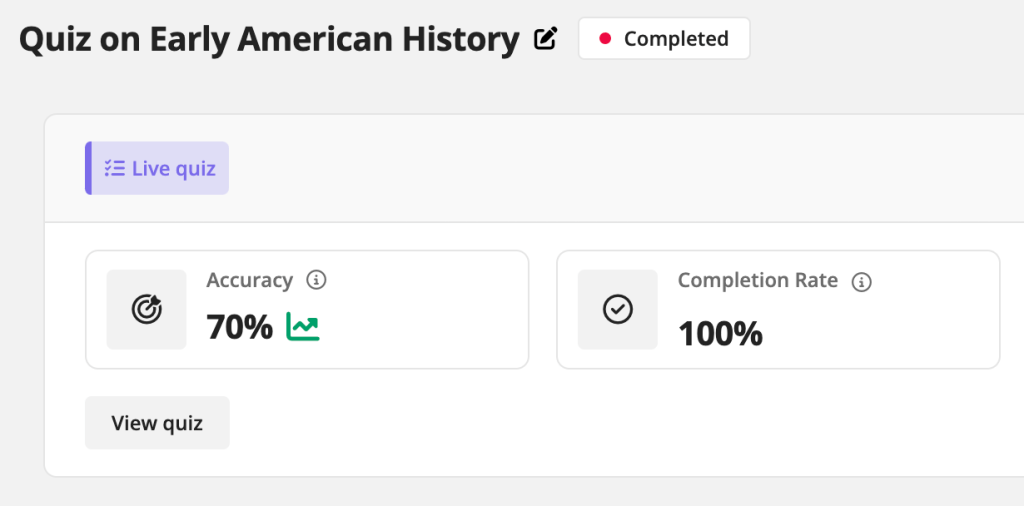
Friday began with an experiment—a frustrating but eye-opening one. I took questions directly from the unit test and gave them to 1st and 2nd bell as written. The class averages? 32% and 38%.
Then, I took those same questions, rewrote them in more appropriate vocabulary, and gave them to 5th and 6th bell. The class averages? 70% and 77%.
The results speak for themselves. The kids know the content, but when questions are loaded with unnecessary wording, they struggle—not because they don’t understand history, but because they’re being asked to decode convoluted language.
They are 8th graders, not college students. Why do we keep equating big words with rigor? When I saw 32% and 38%, I felt like a lousy teacher, but I know these kids understand the material. It’s not a comprehension issue—it’s a wording issue.
After that eye-opener, we moved into the War of 1812 with a series of layered activities to connect causes, events, and outcomes.
Quick Notes: The Web of War
We started with quick notes outlining the complex web of decisions that led to the War of 1812.
The Embargo Act weakened the economy but failed to stop British and French interference.
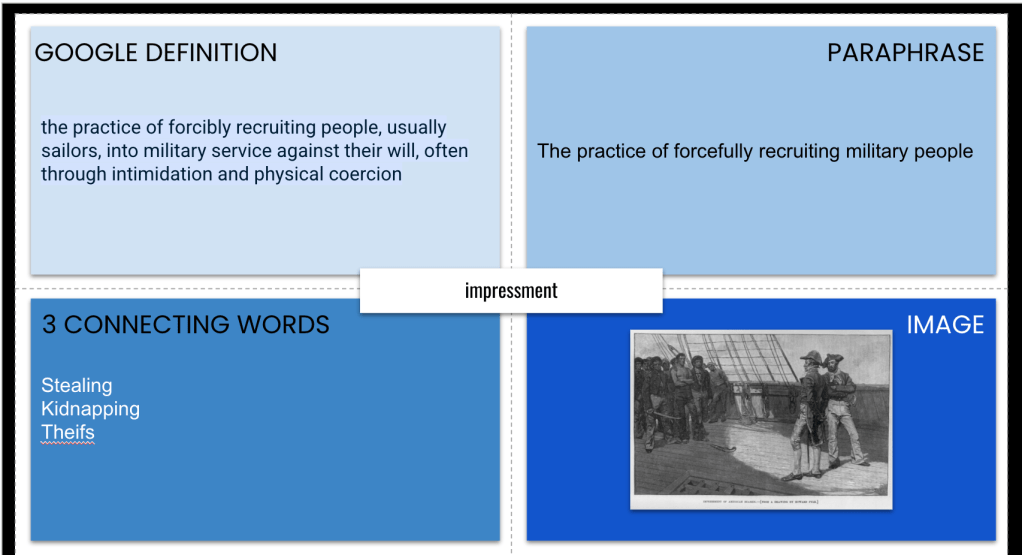
Impressment angered Americans as British ships kidnapped U.S. sailors and forced them into service.
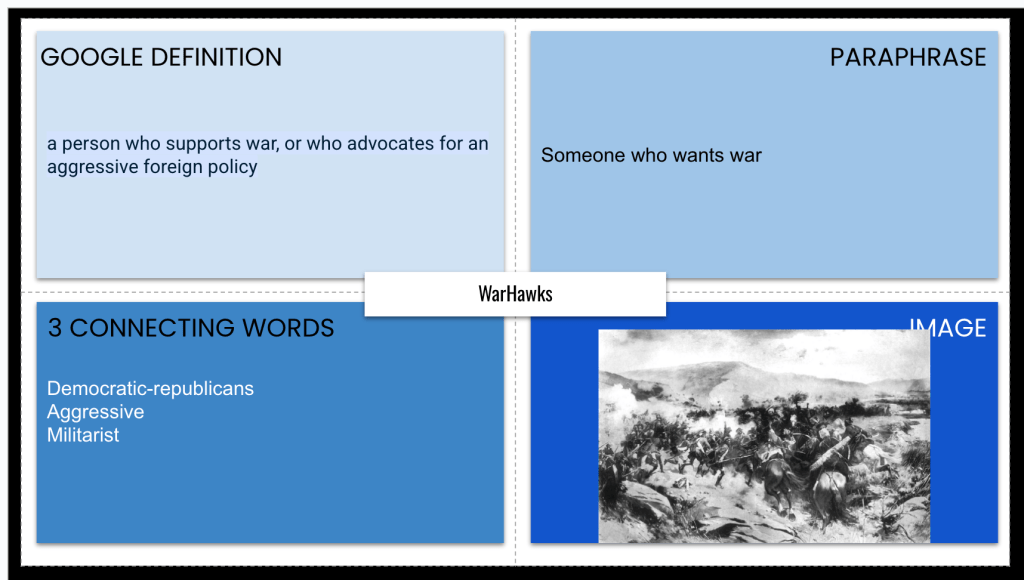
War Hawks in Congress pushed for military action, believing Britain was disrespecting American sovereignty.
Madison’s Presidency—he inherited the diplomatic failures of Jefferson and ultimately led the country into war.
This framing helped students see the cause-and-effect relationships instead of treating each event as an isolated fact.
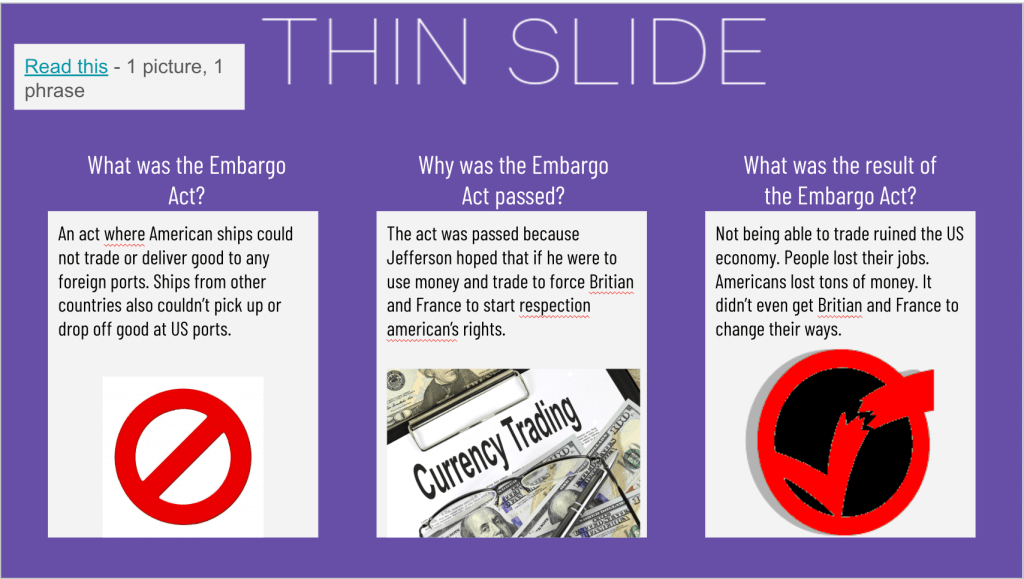
Thin Slide: The Embargo Act
Next, students completed a Thin Slide focusing on the Embargo Act. They read a short description and chose:
One word that represents the act’s impact.
One image that visually represents the act.
A quick response to explain their choices.
This forced students to synthesize their thinking quickly and connect the Embargo Act’s impact to the bigger picture.
Archetype Four Square: James Madison’s Leadership
With the Archetype Four Square, students examined James Madison’s leadership and determined which archetype best fit him in the context of the war.
Was he a Peacemaker, trying to avoid war as long as possible?
Was he a Reluctant Warrior, forced into action despite hesitations?
Was he a Commander, embracing war as necessary?
Students had to justify their choices and discuss them with a partner, leading to great conversations about how presidents make wartime decisions.
Frayer Models: Impressment and War Hawks
To reinforce key terms, we completed two Frayer Models—one for impressment and one for War Hawks.
For each, students:
Defined the term in their own words.
Identified a real-world connection or comparison.
Illustrated the term with an image, symbol, or icon.
Listed key facts from the reading to support their understanding.
This helped break down two critical causes of the war into student-friendly explanations.
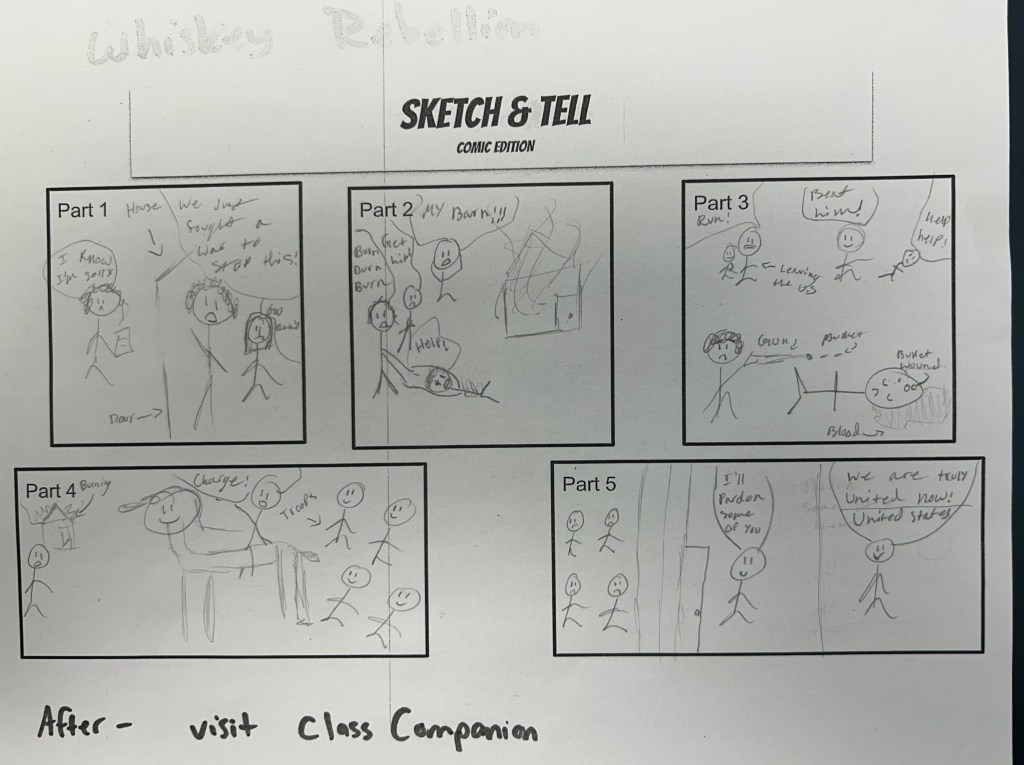
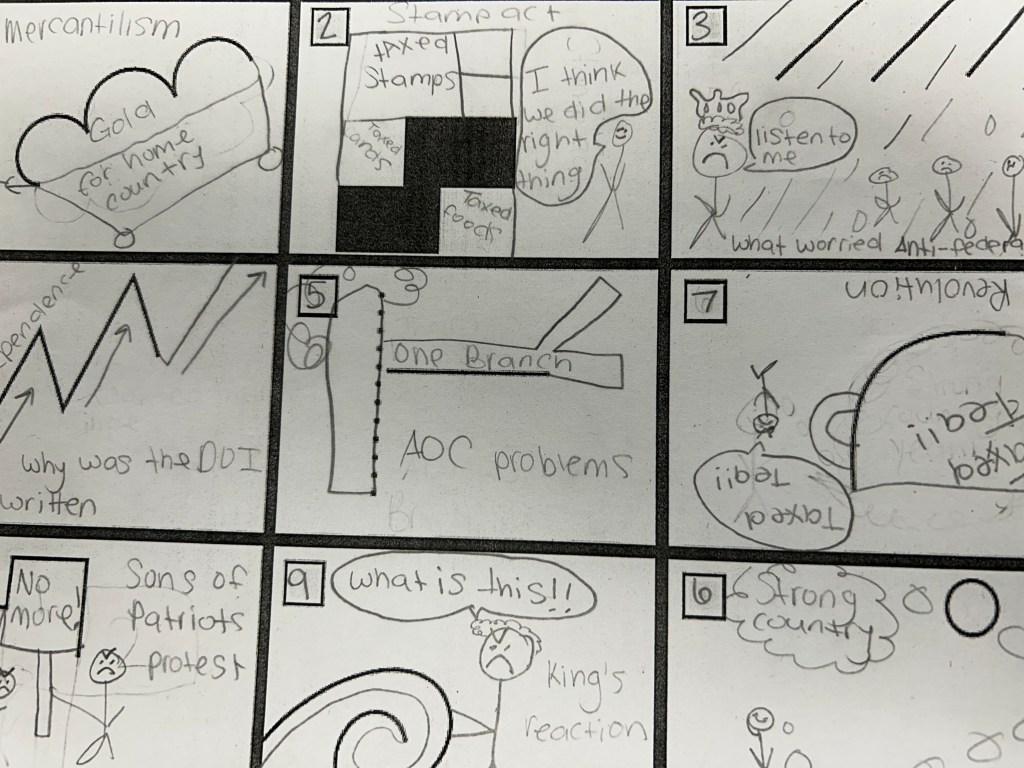
Progressive Sketch and Tell: The Story of the War
For the main event, we did a Progressive Sketch and Tell to break down the War of 1812 into digestible chunks.
I took the textbook section and had AI split it into five parts.
Each student received one part at a time.
They created a sketch and tell comic strip for their section.
After three minutes, they shared with a partner to explain their visual representation.
Then, they received the next section and repeated the process.
This step-by-step visual storytelling made a complex war easy to understand. It also helped students see connections between different events rather than treating them as random battles.
Why This Works
Quick notes created a clear cause-and-effect web instead of just listing events.
Thin Slides encouraged quick synthesis of key concepts.
Archetype Four Square made students think critically about Madison’s leadership.
Frayer Models reinforced essential vocabulary through multiple connections.
Progressive Sketch and Tell broke the war into digestible chunks, making it memorable and interactive.
Instead of just reading about the War of 1812, students analyzed, created, discussed, and applied what they learned. And that’s what makes the learning stick.
This week in 8th-grade social studies, we brought history to life with engaging EduProtocols that helped students dive deep into the Early Republic and key moments like the Whiskey Rebellion. From Sketch and Tell-O activities that broke down complex ideas to Progressive Sketch and Tell timelines that visualized historical events, we kept creativity at the forefront. Class Companion added an exciting layer of AI-driven writing feedback, while Fast and Curious Gimkits and CyberSandwiches reinforced foundational knowledge and sparked meaningful discussions. These protocols not only engaged students but also helped them build connections, improve comprehension, and master essential skills.
This week, we dove into a new unit on the Early Republic, which will culminate in a common assessment. Starting with a pre-assessment right out of the textbook, I had students tackle 20 of the most challenging, oddly worded questions filled with difficult vocabulary. The pre-assessment was designed to gauge their baseline knowledge and took about 10–15 minutes. Predictably, it was tough, but it gave me a sense of where they stood as we started the unit.
Introducing the Unit with a CyberSandwich
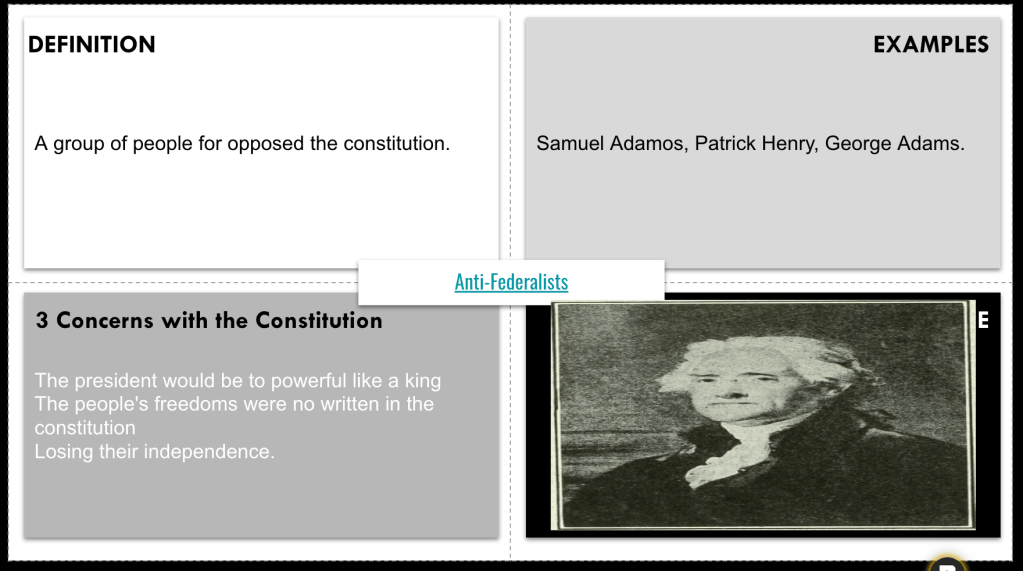
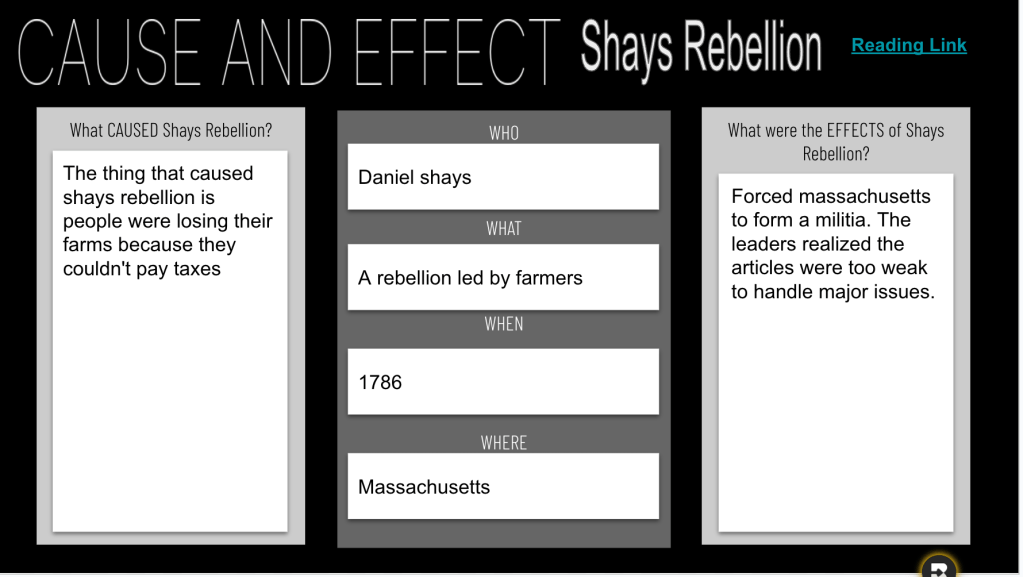
One thing I like about the textbook’s first lesson in this unit is how it revisits key foundational topics that lead into the Early Republic. It highlights the weaknesses and problems in America before the Constitution—like taxation without representation, the Articles of Confederation, Shays’ Rebellion, and foreign and domestic disputes—and positions the Constitution as the solution.
The irony? The textbook doesn’t explicitly connect these issues to the Early Republic or explain how the first five presidents put the Constitution to work and expanded federal power. So, I decided to bridge the gap myself using a CyberSandwich EduProtocol.
Here’s how it went:
Simplified Reading: Instead of fumbling with the textbook or logging into the website, I printed out the reading directly from the online textbook. Paper copies are quick, easy, and let students highlight and annotate as they read.
Guiding Questions: Students spent 12 minutes reading and answering five guiding questions that I generated with AI to focus their attention on key details.
Partner Discussion: After reading, students listed two problems and one solution from the text and discussed their findings with a partner, comparing ideas.
Fixing a Paragraph: To practice critical thinking and writing, I gave them a poorly written paragraph (also AI-generated) about the topic and gave them 10 minutes to improve it.
Wrapping Up with Gimkit
We ended the class with a Gimkit featuring nine questions I pulled from the summative assessment for this unit. The scores showed where we have room to grow:
57%, 47%, 39%, and 42%.
While the scores were low, it was a good baseline and a chance to familiarize students with the material they’ll need to master.
Wednesday: George Washington Takes Office
We jumped into Lesson 2: George Washington Takes Office, diving into how Washington and Congress worked to strengthen the federal government. While the textbook suggests this lesson could take two days, I find that assumption wildly unrealistic. It’s packed with readings, activities, writing tasks, and reviews that assume students have extensive social studies background knowledge—something many students simply don’t have due to the limited time spent on the subject in earlier grades. The disconnect between textbook expectations and real classroom realities is frustrating.
Quick Notes: Setting the Stage
To start the lesson, I introduced key topics through a short lecture. These quick notes laid out the big ideas students would encounter in the lesson:
Washington’s leadership style.
The establishment of key government structures.
The significance of neutrality and Jay’s Treaty.
The goal was to give students a foundation before diving into deeper activities.
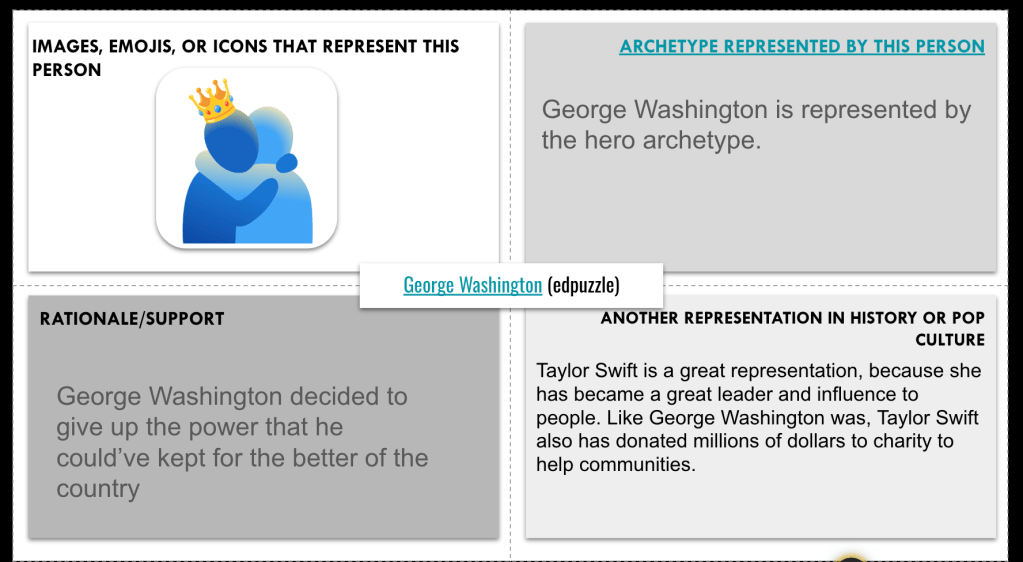
Archetype Foursquare: Connecting History to Stories
Next, I introduced archetypes—a fun and engaging way to connect historical figures to familiar characters. Students brainstormed archetypes in their favorite movies, TV shows, or books and discussed how every character fits an archetype (e.g., hero, mentor, trickster).
We followed this with an EdPuzzle on George Washington, a 4-minute video highlighting his leadership and challenges. While watching, students thought about which archetype best described Washington.
Afterward, students spent 8 minutes completing an Archetype Foursquare for Washington. They:
Identified an archetype for him (e.g., “hero” or “sage”).
Provided evidence from the video to support their choice.
Connected George Washington to someone else.
Compared their archetype ideas with a partner in a quick discussion.
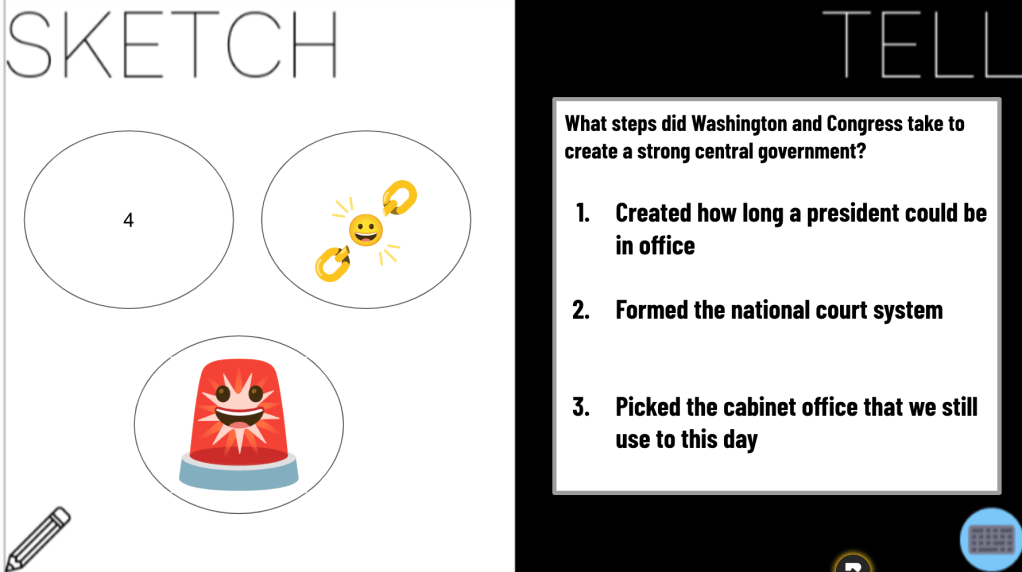
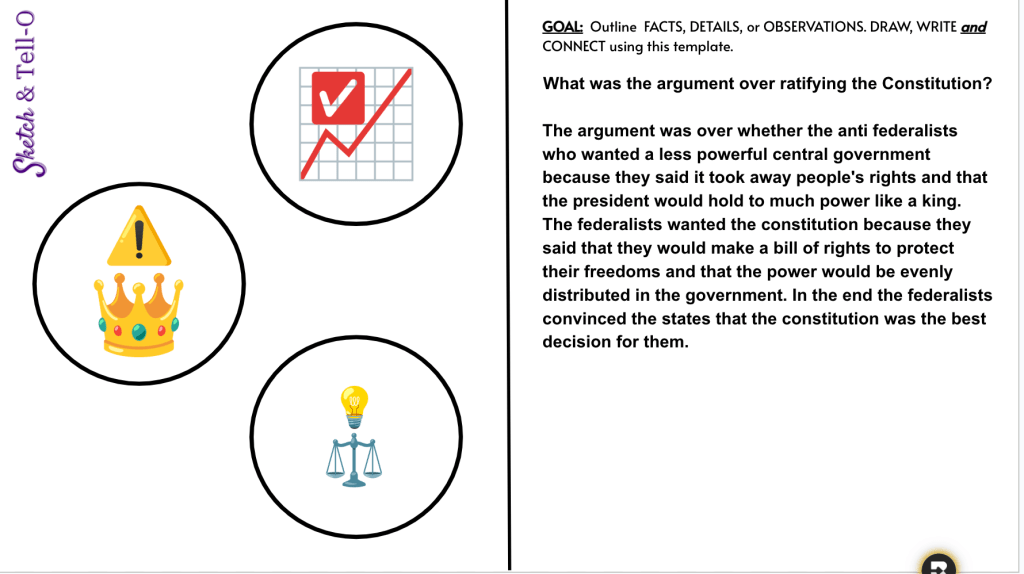
Sketch and Tell-O: Strengthening the Federal Government
We then transitioned into the textbook’s reading on how Washington and Congress strengthened the federal government. Using a Sketch and Tell-O template, students sketched visuals to represent key ideas, such as:
The creation of executive departments.
The establishment of the federal court system.
This visual and creative approach helped break down the dense content into manageable chunks.
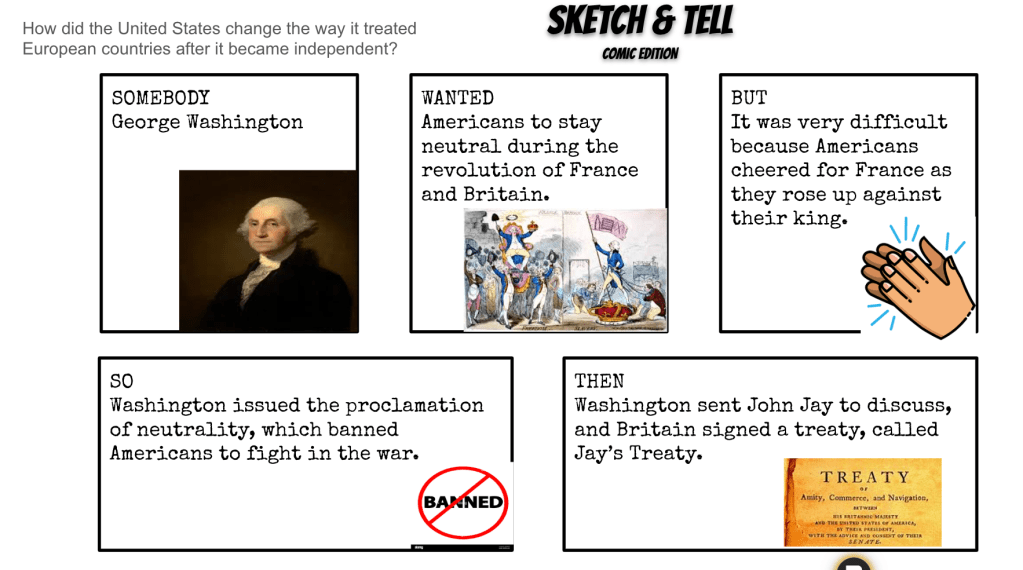
SWBST Sketch and Tell: Neutrality and Jay’s Treaty
Next, we tackled Washington’s foreign policy and Jay’s Treaty using a Somebody, Wanted, But, So, Then (SWBST) Sketch and Tell template. Students read about the challenges of maintaining neutrality during international conflicts and how Jay’s Treaty attempted to resolve tensions with Britain.
The SWBST activity allowed students to:
Summarize the main ideas.
Use both words and pictures to represent what they learned. This strategy is always a hit because it combines comprehension with creativity, making abstract concepts more concrete.
Wrapping Up with Fast and Curious
To close out the lesson, we ran a Fast and Curious Gimkit round focused on key vocabulary and ideas from the day.
Students played for 3 minutes.
I provided immediate feedback on commonly missed questions, reinforcing learning.
Thursday: Hamilton’s Plan
Thursday was all about diving into Hamilton’s financial plan, though I initially hoped to also cover Washington’s domestic issues like the Whiskey Rebellion. My ambition outpaced reality, and we only made it through Hamilton’s plan. That said, the day was packed with meaningful activities that helped students grasp these foundational concepts.
Quick Notes: The Foundation of Hamilton’s Plan
We began class with quick notes to outline Hamilton’s financial plan, focusing on:
Assuming state debts to strengthen the national government.
Establishing a national bank to regulate finances.
Implementing tariffs to protect American industry.
These notes took about 10 minutes and provided the background knowledge students needed for the activities that followed.
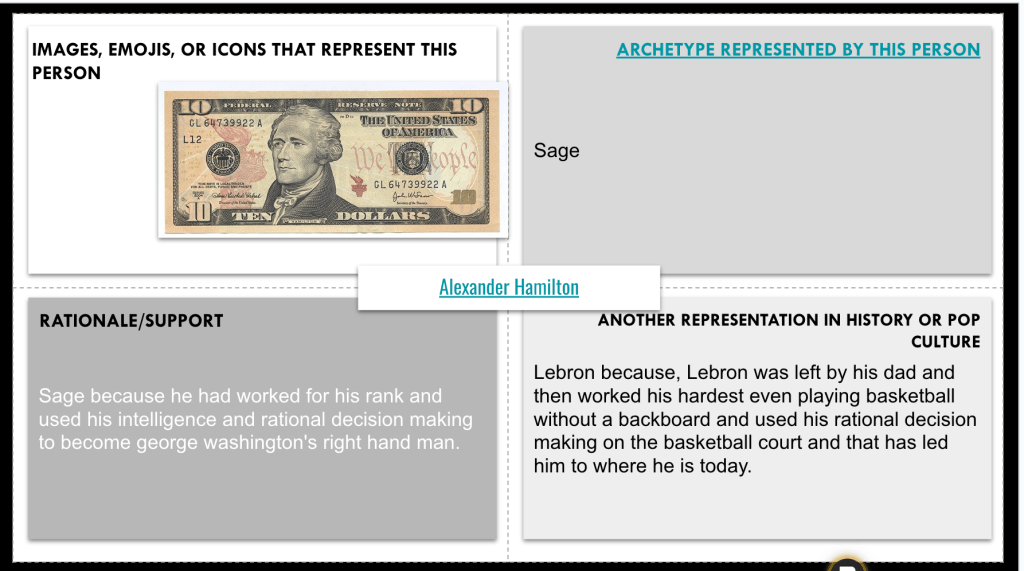
Archetype Activity: Understanding Hamilton
To make Hamilton more relatable, I used the brief biography from the textbook to introduce him as a historical figure. Then, we revisited the archetype activity from Wednesday, applying it to Hamilton. Students identified archetypes like “visionary,” “strategist,” or even “rebel,” depending on their interpretations.
This activity was quicker than Wednesday’s, but still sparked great discussion as students shared their archetype choices with partners and justified their reasoning.
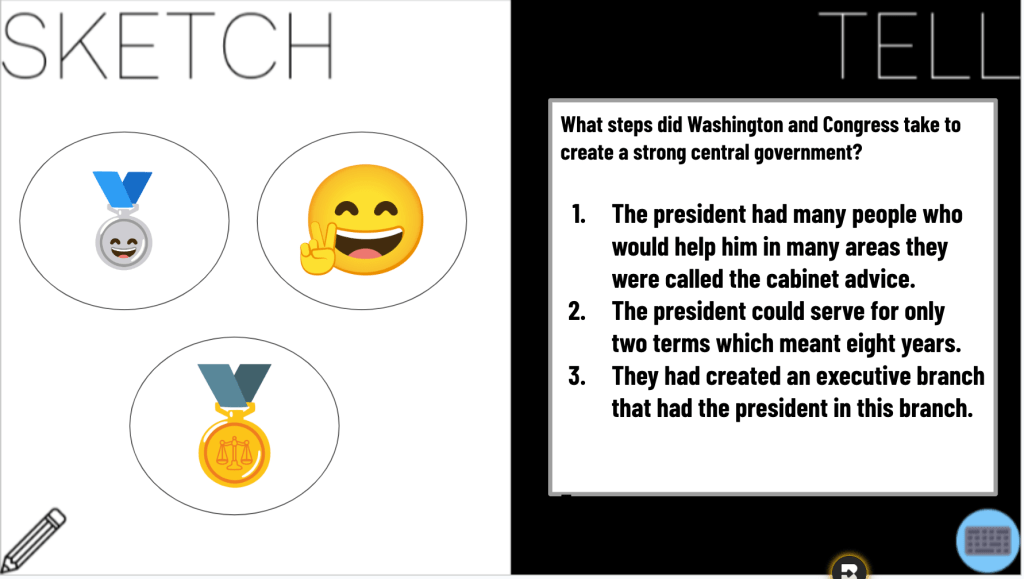
Reading, Questions, and Sketch and Tell-O
We transitioned to a reading about Hamilton’s financial plan, using a combination of structured questions, creative visualizations, and a connections summary. Here’s how it worked:
Read and Respond: Students answered comprehension questions about Hamilton’s plan, focusing on why he wanted to assume state debts, how the national bank would work, and the purpose of tariffs.
Sketch and Tell-O: Students used a Sketch and Tell-O template to represent key ideas from Hamilton’s plan. For example:
A chain symbolizing the unification of state debts under the federal government.
A vault or dollar sign representing the national bank.
Connections Summary: To wrap up, students found an emoji or picture that connected with their answers and explained why they chose it.
I originally planned to use Class Companion, an AI feedback tool, to give students immediate feedback on their summaries. Unfortunately, it was blocked! I emailed the IT department to get it unblocked, but for now, we relied on peer discussions and my feedback instead.
Wrapping Up with Gimkit
We ended class with another Gimkit to reinforce the material. This time, the averages showed improvement:
80%, 74%, 68%, and 70%.
Friday: The Whiskey Rebellion and Government Strength
On Friday, I wrestled with whether to skip the Whiskey Rebellion and dive straight into political parties, but I decided against it. The Whiskey Rebellion perfectly ties back to our first lesson: the Constitution made the government stronger, and putting down the rebellion proved that strength. This connection was too important to pass up, so we dedicated the day to exploring the Whiskey Rebellion in-depth.
Progressive Sketch and Tell: Unpacking the Story
Inspired by Jake Carr and Justin Unruh, we used a Progressive Sketch and Tell to break the rebellion into digestible chunks. I used AI to divide the Whiskey Rebellion story into five parts, making it manageable and engaging for students.
Setup: Each student received a paper with five Sketch and Tell boxes.
Round 1: I handed out the first part of the story, giving students 3 minutes to read and sketch a visual representation of what they’d read. They then discussed their sketches with a partner.
Rounds 2–5: For each subsequent part, students repeated the process—read, sketch, discuss. This structure kept the class moving while building a deeper understanding of the rebellion.
By the end, students had created a complete visual timeline of the Whiskey Rebellion.
Introducing Class Companion for Writing Feedback
After completing their comics, students used Class Companion, an AI feedback tool, to summarize their Whiskey Rebellion comics in writing. This was my first time successfully using Class Companion after IT unblocked it, and it was a game-changer.
Here’s how it worked:
I set up the assignment by feeding information about the Whiskey Rebellion from our reading into Class Companion.
Students typed their summaries into the platform, receiving real-time feedback and scores on their writing.
They had three attempts to improve their summaries, with each attempt allowing them to act on AI-generated suggestions.
The feedback was eye-opening for many students. It pointed out areas for improvement in clarity, structure, and grammar, and the rubric generated by the AI made expectations crystal clear. Some students became competitive, determined to get the highest score possible by their third attempt.
The results were amazing. Students were engaged in improving their writing and motivated by the detailed feedback. The data Class Companion provided was also incredibly helpful for me to track progress.
Wrapping Up with Gimkit
We ended the day with a Gimkit review on Lesson 2. The class averages were impressive:
91%, 80%, 88%, and 85%.
And just like that – a suggested 2 day lesson took 3 days and probably could have taken another day to do the lesson justice.
Last week, I kicked off my social studies unit with a pre-assessment using a citizenship test. The goal for my students was to answer six or more questions correctly. Out of the 89 students I teach across four periods, only six met that benchmark.
Faced with a tight timeline, I knew I had to make every lesson count. By the end of the week, after incorporating engaging EduProtocols, 70 out of 89 students achieved a score of six or higher on the same test. The growth was incredible and a testament to how these strategies support both understanding and retention.
Focusing on all seven principles of the Constitution is overwhelming for 8th graders, so I start by introducing separation of powers as the foundation of understanding how the government works. My goal is to connect the concept to the branches of government and their basic functions, creating a clear starting point for students.
Tug of War: Introducing Separation of Powers
When students entered the classroom, they were met with a tug of war rope stretched across the room. The curiosity was instant—”Are we playing tug of war?” they asked. Instead of answering directly, I invited them to imagine the floor surrounding the rope represented tyranny, greed, corruption, and despotism.
I asked, “Should a government be surrounded by these negative forces?” Of course, the answer was “no.”
Round 1: One volunteer attempted to lift the rope out of the “corruption.” The catch? They couldn’t bunch it up or stretch it too far—it had to stay taut. Predictably, it didn’t work.
Round 2: A second volunteer joined, but the rope still couldn’t be lifted properly.
Round 3: With three volunteers, the rope was successfully lifted out of the corruption.
I explained that this is why we have separation of powers—no single branch can do it alone. By dividing power, we prevent tyranny and ensure the government operates effectively.
Quick Notes and Fast and Curious
Next, I introduced the three branches of government—executive, legislative, and judicial—through a brief set of notes. These quick notes provided an overview of the branches and their basic responsibilities.
We followed this up with a Fast and Curious Gimkit round, focusing on vocabulary and key concepts like the branches and their roles. Students played for 3 minutes, and I reviewed the most-missed questions afterward to clarify misunderstandings.
Sketch and Tell-O: Exploring the Branches
Using an article from iCivics, students explored each branch in more depth through a Sketch and Tell-O activity. For each branch, they:
Sketched a visual representation of the branch’s role (e.g., a gavel for judicial).
Wrote a brief description summarizing its main function.
This activity helped students connect abstract ideas to tangible visuals and concise explanations.
Fast and Curious: Reinforcing Understanding
After the Sketch and Tell-O, we returned to Gimkit for two more Fast and Curious rounds, each lasting 3 minutes. The goal was to reinforce what students had just learned about the branches of government. Scores improved noticeably, and the repetition solidified their understanding of the material.
Sneaker Sketch and Tell: Creative Connections
To wrap up the day, we used a Dominic Helmstetter Sketch and Tell Sneaker activity. Students designed a sneaker to represent one branch of government and wrote a brief summary explaining their design.
Tuesday: Checks and Balances
Continuing with the principles of the Constitution, Tuesday’s focus was checks and balances. This lesson aimed to go beyond the basics and help students connect vocabulary, real-world applications, and creative thinking to demonstrate their understanding.
Quick Notes: Setting the Stage
To begin class, I gave a brief lecture introducing checks and balances, focusing on key terms like impeach, override, and veto. I also provided basic examples:
The president can veto a bill passed by Congress.
Congress can override a veto with a two-thirds majority.
The judiciary can rule laws unconstitutional.
These quick notes established foundational knowledge for the activities that followed.
Scenario-Based Analysis
Each student received a detailed checks and balances chart, categorizing the actions of each branch and how they could be checked by another branch. Students worked through three simple scenarios requiring them to infer how checks and balances worked in practice.
For example:
“A potential bill was vetoed.”
Students identified that the executive branch (president) has the power to veto a bill.
Then, they determined that the legislative branch (Congress) could check this action by overriding the veto.
These scenarios required students to apply their understanding of the chart and start thinking critically about the system.
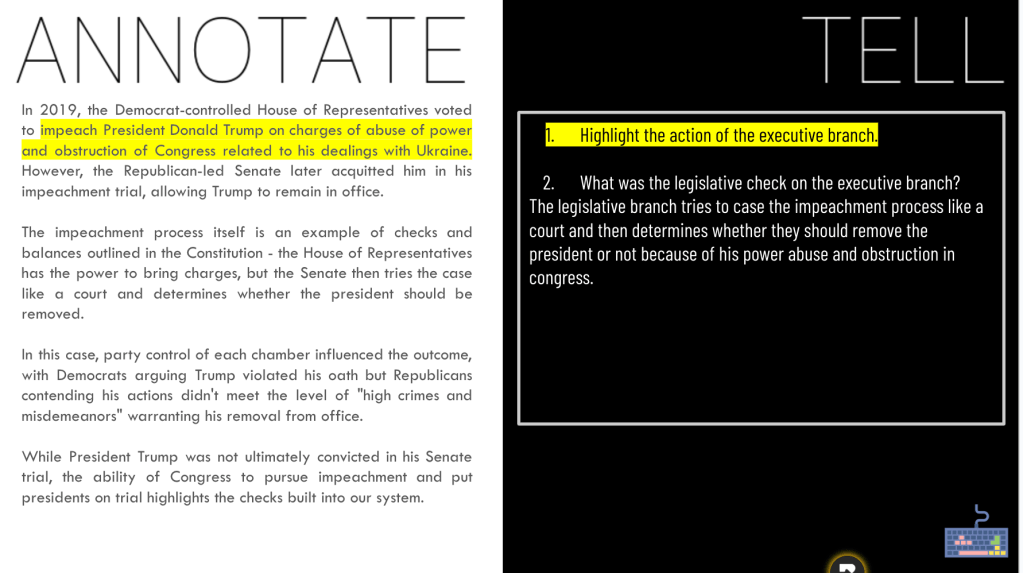
Annotate and Tell: Real-World Examples
Next, students examined three AI-generated short stories based on recent events tied to checks and balances:
Trump’s impeachment.
Obama’s executive orders on gun control.
Biden’s exploration of student debt cancellation.
For each story, students:
Annotated key actions by the executive branch.
Answered analysis questions, such as:
How did the legislative branch check the president in this example?
What role did the judiciary play (if any)?
This activity added context and relevance, showing students how checks and balances function in modern government.
Sketch and Tell Comic: Bringing Stories to Life
To wrap up, students used the Sketch and Tell comic format paired with the SWBST (Somebody, Wanted, But, So, Then) storyboarding technique. Students had two options:
Create an original scenario that demonstrated checks and balances in action.
Illustrate one of the AI-generated stories from earlier in class.
Each comic needed to show how multiple branches interacted, with annotations explaining the characters’ roles and the checks and balances applied.
As students shared their creations, they articulated detailed descriptions of the interactions between branches. For example, one student illustrated Congress overriding a veto with a vivid depiction of lawmakers “lifting” a veto stamp off a bill, while another highlighted a Supreme Court decision striking down an executive order.
Wednesday: Federalism
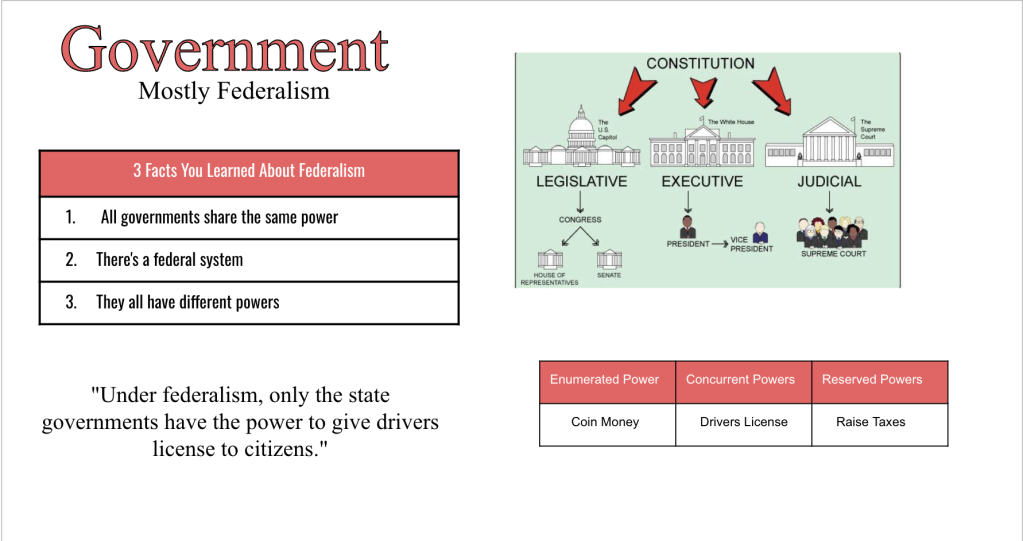
For my federalism lesson this year, I decided to switch things up while keeping the core elements that have worked well in the past. The focus was on making the concept of federalism relatable and interactive, while emphasizing key ideas like enumerated, reserved, and concurrent powers.
Thin Slides: Federalism in Context
The lesson began with Thin Slides, which provided a quick and creative way for students to process information.
For the first slide, students read a brief description of federalism and chose:
One word to represent federalism.
One picture that symbolized the idea.
They then explained their choices, sharing insights like “I chose ‘shared’ because both the state and national government share responsibilities.”
The second Thin Slide focused on real-world examples of federalism. Students looked up the legal driving age in Ohio and compared it to other states. We discussed who sets these laws (state governments) and why they vary.
This activity transitioned into another research task: students looked up the minimum wage in Kentucky, Ohio, and California, noting how state laws differ and how federalism allows for this variation.
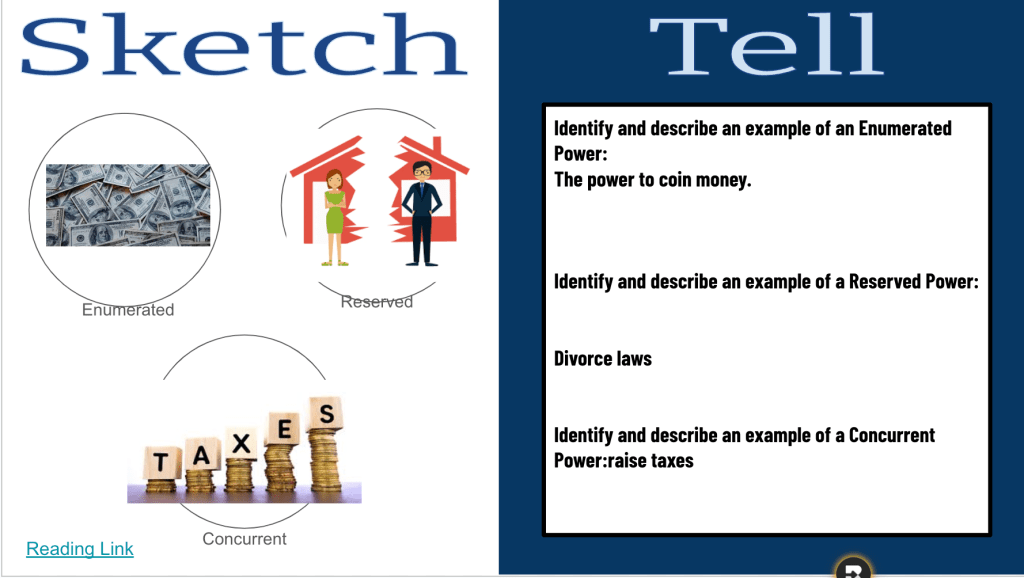
Sketch and Tell: Breaking Down Federalism
Students used a Sketch and Tell template to dive deeper into the structure of federalism.
Using an infographic or a modified textbook reading, students visualized expressed powers, state powers, and concurrent powers.
They created drawings or used icons to represent examples, like a scale for concurrent powers (taxation) or a dollar sign for state powers (setting minimum wage).
This activity helped students connect abstract terms to concrete examples, reinforcing the distinctions between the different types of powers.
Thick Slide: Synthesizing Learning
To wrap up the lesson, students completed a Thick Slide, which allowed them to reflect and synthesize their learning. On their slides, they included:
Three things they learned about federalism.
Examples of enumerated, reserved, and concurrent powers.
A picture that represented federalism.
A correction task, where they fixed an incorrect statement about federalism to make it true.
Thursday: Upgrading Bill of Rights Knowledge
The Bill of Rights can be tricky for 8th graders to memorize and understand, so Thursday was all about making the amendments memorable, engaging, and accessible. I kicked off class with a 10-question Quizizz to assess students’ baseline knowledge. As expected, most students remembered the 1st and 2nd Amendments but struggled with the rest. Class averages reflected this, coming in at 34%, 33%, 41%, and 34%. It was clear we needed a creative strategy to make these amendments stick.
Sketch and Tell-O: Prepping for Memory Aids
I handed out a Sketch and Tell-O template with 10 empty circles, one for each amendment. Students would use this to jot down sketches or notes based on the memory aids I shared during the lesson.
Memorable Mnemonics: Learning from Dave Burgess
For each amendment, I used a fun, engaging strategy inspired by Dave Burgess to help students connect the concept to something they could easily recall.
3rd Amendment: I told the story of Goldilocks making herself at home in the Three Bears’ house, linking it to the prohibition of soldiers being “quartered” in homes without consent.
6th Amendment: I showed a clip of an NFL player’s quick “pick six” interception to emphasize the idea of a speedy trial.
The students were laughing, engaged, and eagerly sketching the memory aids into their templates. They loved the zany connections and seemed to absorb the material effortlessly.
Assessing Growth with Quizizz
After finishing the activity, I had students tuck away their sketches and notes. Then we launched the same Quizizz again to check for growth. The results were encouraging:
Class averages jumped to 74%, 77%, 68%, and 77%.
While the scores were slightly lower than last year’s averages, the improvement from the first round showed the power of these memory tricks. I’ll tweak a few things next time to fine-tune the approach, but overall, this was a win.
Friday: Applying the Bill of Rights
With the foundational knowledge of the Bill of Rights in place, Friday was all about applying that learning to real-world Supreme Court cases. The goal was to help students see how the amendments are interpreted and used in real-life scenarios—especially those that resonate with their own experiences as 8th graders.
Starting with EdPuzzle
Class began with an EdPuzzle video explaining the Supreme Court and how cases make their way to the highest court in the land. This gave students a framework to understand the cases they’d be analyzing later in the lesson.
Landmark Supreme Court Cases: An Interactive Experience
I curated a selection of Supreme Court cases that focused on issues students could relate to, such as:
The Pledge of Allegiance in schools.
Social media speech.
School punishment policies.
Prayer in schools.
Each case summary was printed onto cards and placed in envelopes around the room. To add an extra layer of engagement, one envelope included a bonus Bill of Rights Quizizz (which the students were now averaging 75–80% on—a huge improvement!).
The Activity
Students were divided into small groups and given 25 minutes to circulate through the envelopes and analyze as many cases as possible. For each case, their tasks were to:
Guess which Constitutional amendment was in question.
Predict how the Supreme Court ruled on the case.
The students did a great job identifying the relevant amendments, but the real excitement came when I shared the actual rulings. Many of the decisions surprised them or conflicted with their personal opinions, sparking lively discussions about how amendments are interpreted and applied.
Citizenship Test: Wrapping Up the Week
To end class, we returned to the same citizenship test we started with earlier in the week. The results were remarkable:
At the beginning of the week, only six out of 89 students scored six or higher.
By Friday, after incorporating engaging lessons and EduProtocols, 70 out of 89 students achieved that benchmark.
Coming back from winter break, we hit the ground running with the principles of the Constitution. The transition wasn’t easy—snow delays and uneven class times on Wednesday threw off our rhythm, and the textbook’s overwhelming vocabulary and dense content didn’t help. After some reflection and collaboration with a trusted colleague, I decided to adjust my approach.
This week, I focused on balancing structured teaching with interactive activities. By combining brief lectures, discussions, and EduProtocols, I aimed to make the principles of the Constitution accessible, engaging, and meaningful for my students. Here’s how the first two days unfolded.
Wednesday
After a snow-filled delay, Wednesday marked our first day back from winter break—and what a chaotic return it was. With a 2-hour delay, my classes were unevenly shortened to 30–46 minutes, and the pressure to cram an entire week’s worth of lessons into a limited timeframe only added to the frustration.
Teaching the principles of the Constitution is one of my favorite units, but the constraints of the textbook and deadlines imposed by common assessments make it hard to teach the way I know my students need. The textbook oversimplifies and overcomplicates at the same time—cramming seven principles into one chapter, with little focus on building foundational knowledge like understanding the branches of government or their roles. Cognitive load theory is completely ignored, and it’s clear the materials weren’t designed with middle school learners in mind.
Despite the challenges, I’m determined to make this unit engaging and meaningful for my students. Teaching shouldn’t feel like a race against a textbook or an arbitrary deadline—it should be about meeting students where they are and guiding them to where they need to be.
Starting with a Pre-Assessment
Given the shortened day and the need for a strong foundation, I kicked off the unit with a pre-assessment using questions from the U.S. citizenship test. I chose 10–11 questions that were directly tied to the principles of the Constitution. To keep the focus on critical thinking, I didn’t include answer choices—students had to come up with their responses based on their prior knowledge.
Here’s how the activity worked:
Read Aloud: I read each question aloud, giving students time to think and respond.
Trade and Grade: Students swapped papers with a partner to grade each other’s responses.
Discussion: We went over each question as a class, discussing the correct answers and why they mattered.
Why It Worked
This activity served as both a pre-assessment and an opportunity to spark curiosity. Students were engaged in the discussion, and it gave me a sense of where they stood in terms of their knowledge of the Constitution’s principles. It also set the stage for deeper dives into each principle later in the week.
Reflection
It wasn’t the most exciting day, but it was an important one. The citizenship test questions provided a low-stakes way to ease back into learning while laying the groundwork for the unit. With the time crunch and external pressures, it’s not the start I wanted, but I’m determined to make the most of the days I have.
This week will be about finding ways to engage my students, break down complex ideas, and show them why the principles of the Constitution still matter today—despite the challenges of the snow, the textbook, and the ticking clock.
Thursday
After reflecting on Wednesday and discussing with my colleague Drew Skeeler, I decided to adjust my approach to teaching the principles of the Constitution. While I typically avoid lecturing, it became clear that short, focused direct instruction was what my students needed to build foundational knowledge. The plan was simple: 5–10 minutes of direct teaching, followed by turn-and-talks, and then an activity that built on the lecture using EduProtocols.
This shift felt necessary. Even though it’s not my preferred teaching style, it aligns with what will help my students engage with and understand the content right now.
The Lesson Plan
1. Lecture and Turn-and-Talks I started with a 10-minute lecture introducing the seven principles of the Constitution:
Popular Sovereignty
Limited Government
Separation of Powers
Checks and Balances
Federalism
Republicanism
Individual Rights
The goal was to provide a high-level overview with examples to make each principle relatable. For example, I explained checks and balances by describing how the president can veto a law passed by Congress, but Congress can override that veto.
After the lecture, students turned to a partner to discuss two questions:
Which principle seems the most straightforward to you?
Which principle do you think will be the hardest to understand?
These quick discussions helped students process the information and gave them a chance to voice initial thoughts or questions.
2. Fast and Curious Gimkit Next, we jumped into a Fast and Curious Gimkit to reinforce the principles. The game included vocabulary and short explanations related to each principle.
Students played for 3 minutes.
I provided feedback on commonly missed questions.
We ran the Gimkit again to improve accuracy.
3. Worksheet and Activity I pulled a worksheet from the textbook, but as usual, the vocabulary and phrasing were too complex for my 8th graders. To make it accessible:
I simplified the questions to focus on key ideas like Why is separation of powers important?
On the back, I added a Sketch and Tell-O activity where students drew a symbol for one of the principles and explained their choice.
I also included a reflection question: Which principle do you think is the most important? Why?
4. Closing with Fast and Curious We ended the lesson with one more round of the Gimkit to lock in what they’d learned. By the third round, scores were improving, and I could see the growth in their confidence.
Reflection
This lesson was a blend of compromise and creativity. The short lecture laid a clear foundation, the turn-and-talks helped students process the information, and the combination of EduProtocols and a modified worksheet gave them multiple ways to engage with the content.
While lecturing isn’t my favorite approach, it felt like the right choice today. Pairing it with interactive and creative activities made the lesson balanced and effective. Watching my students improve through the Fast and Curious Gimkit rounds and seeing their creativity in the Sketch and Tell-O reminded me that sometimes, adapting is the best way to meet students where they are.
The past few weeks have been challenging—probably some of the toughest I’ve faced as a teacher. Being sick on and off for nearly a month has left me drained, both physically and mentally. Adjusting to a new school setting, new students, and trying to figure out what works has added to the weight. This year has forced me to stray from some of my core teaching philosophies. I’ve had to rely on strategies like extra credit, guided notes, and even the textbook more than I’d like.
I’m not relying on the textbook entirely, but it’s jam-packed with far too much information for 8th graders to process effectively. Pair that with vocabulary that feels overwhelming—words like negotiate, stimulate trade, inland, and emerged—and it’s clear the textbook isn’t a practical tool for building understanding. The challenge of teaching Tier 1 and Tier 2 vocabulary alongside complex historical concepts often feels insurmountable. When a student recently asked me, “What’s a stencil?” (I’m serious), I realized just how wide the gap can be.
The workload is also a challenge. There’s so much material to cover, and balancing meaningful activities with manageable workloads has been a constant juggling act. It’s hard not to feel like everything is just too much—for my students and for me.
I love writing in this blog; it’s a space to reflect and process. But lately, it’s felt like one more thing I can’t always keep up with. From here on, I’ll write when I can and focus on sharing what feels meaningful.
This week, though, I had three big wins. These are moments where my students were engaged, excited, and learning—and that’s what keeps me going.
What It Is: Gimanji is a competitive review activity created by Alexis Turnbull that combines Gimkit, Blooket, Quizizz, Kahoot, or any mix of platforms. It’s a hit with students because it’s fast-paced, fun, and team-based.
How to Run It:
Start with a Gimkit
Create a short, themed quiz. For example, I made a holiday-themed Gimkit with 12 questions about winter holidays.
Run the game for about 5 minutes and let the top 4 or 5 finishers choose their teams.
Switch to a Blooket
Pick a mode that keeps the energy high. For our holiday version, I chose Santa’s Workshop, which is based on speed and luck.
Award points to the top 5 finishers—5 points each worked well for us.
Add a Kahoot
Create a Kahoot quiz based on a fun theme. Ours was holiday songs represented by emojis. Students earn points based on accuracy and speed.
Keep it short—5 to 8 minutes is perfect.
End with Quizizz
Finish with another short quiz. We did a round on holiday cookies.
Again, the top 5 finishers earned points for their team.
Why It Worked: The variety of platforms kept students engaged, and the team-based competition added an extra layer of excitement. By rotating through different tools, you can cater to a range of learning styles and keep the activity fresh. Gimanji is flexible—you can adapt it to any subject or theme.
2. WeWillWrite: Gamified Writing
What It Is: WeWillWrite is a platform that turns writing into a gamified activity. Students respond to creative prompts in secret teams, assess their peers’ writing, and compete for points.
How to Run It:
Sign Up and Create a Session
Log in to WeWillWrite and create a session. The platform has premade prompts for all grade levels.
Introduce the Activity
Students join with a code, similar to Gimkit or Blooket.
The platform automatically places them into secret teams.
Write and Assess
Display the first prompt (e.g., “Convince your grandma her cringe gift is perfect”).
Students write for 3 minutes—there’s no submit button, so they’re encouraged to write the entire time.
After writing, students self-assess and read the work of their teammates.
Vote and Award Points
Teams vote on the best, funniest, or most thoughtful piece.
Winning entries are displayed, and AI highlights literary elements like metaphors, adjectives, and personification.
Repeat for Additional Rounds
Continue with new prompts, tracking team scores along the way.
Why It Worked: The prompts were fun and accessible, encouraging even reluctant writers to participate. The anonymity of secret teams removed the fear of judgment, and the AI feedback added a layer of validation and learning. It was exciting to see students so invested in writing, and the self-assessment piece encouraged reflection on their work.
3. Finish the Drawing
What It Is: This activity, inspired by Howson History, combines creativity with content. Students complete partially drawn images based on prompts tied to your curriculum.
How to Run It:
Prepare the Drawings
Create a sheet with 9 unfinished drawings—simple shapes or partial designs that students can build upon.
Provide space under each box for labels.
Randomize and Assign Prompts
Have students randomly number the boxes on their sheet.
Call out prompts one at a time. For example:
“How would King George react to the Declaration of Independence?”
“Illustrate mercantilism in action.”
“What worried Anti-Federalists about the Constitution?”
Drawing and Labeling
Give students 3 minutes to complete their drawing and label it with key terms or ideas.
Repeat and Discuss
Continue with new prompts, encouraging students to share and explain their drawings as time allows.
Why It Worked: This activity made abstract concepts more tangible. Students who might struggle with writing or vocabulary could still demonstrate understanding through visuals. It sparked great discussions and could easily transition into a Sketch and Tell or Sketch and Tell-O.
Final Thoughts
This week reminded me why I love teaching, even during tough seasons. These activities—Gimanji, WeWillWrite, and Finish the Drawing—brought energy and engagement back into my classroom. They provided ways to work around vocabulary gaps while keeping students focused and excited.
If you’re looking for ways to shake up your lessons and get your students excited, I highly recommend trying these strategies. They’re flexible, fun, and effective—proving that a little creativity can make a big difference!
This week in 8th-grade social studies, we dove deep into the Constitutional Convention and the ratification debates, using a variety of EduProtocols to engage students and build understanding. From Frayer Models to define key terms and concepts, to Sketch and Tell-O and 8Parts Sourcing for visual analysis and critical thinking, each day offered a structured and interactive way for students to connect with history.
Activities like Gimkit, Quizizz Mastery Peak, and Emoji Kitchen kept the energy high and provided opportunities for review, creativity, and synthesis. Through consistent protocols and thoughtful lessons, students explored the compromises, debates, and decisions that shaped the U.S. Constitution.
Even though I was out sick, I wanted to ensure my students had meaningful, engaging lessons to kick off our exploration of the Constitutional Convention. With EduProtocols and structured activities, I aimed to keep students on track while fostering curiosity and understanding.
Starting with the Purpose
Every lesson on the Constitutional Convention begins with the question: “What was the purpose of the Constitutional Convention?” To set the stage, I assigned an EdPuzzle that introduced the basics of the event. EdPuzzle is always a reliable tool when I’m out—it keeps students engaged with videos while offering questions to ensure they’re following along.
Building Vocabulary with Gimkit
Next, I created a Gimkit with key terms students would encounter throughout the week, including federalist, anti-federalist, compromise, republic, and constitution. Vocabulary is critical for understanding the bigger picture, and Gimkit’s game-like format keeps students motivated while helping them retain these foundational terms.
Deep Dive with a Frayer Model
To dive deeper into the Constitutional Convention, students completed a Frayer model. They defined the convention, identified three key figures who attended, listed three important facts, and added an image to tie it all together. This activity helped them organize their initial understanding while highlighting the significant people and ideas of the event.
Sketch and Tell-O: Synthesizing Purpose
Students then read about the purpose of the Constitutional Convention and created a Sketch and Tell-O. They sketched out three important facts from the reading and wrote a summary answering the essential question: Why was the Constitutional Convention necessary? This activity combined visual and written processing, encouraging them to connect details to the broader purpose of the event.
Tuesday
Still out on Tuesday, I kept the focus consistent and structured, guiding students through the key compromises made at the Constitutional Convention. With a mix of graphic organizers, interactive mapping, and creative synthesis, students had the opportunity to deepen their understanding of the Great Compromise and the Three-Fifths Compromise.
Starting with Vocabulary
We began with a Gimkit review of the vocabulary introduced on Monday. Terms like federalist, anti-federalist, compromise, republic, and constitution are foundational, and revisiting them daily helps reinforce understanding while building fluency.
Graphic Organizers: Breaking Down the Compromises
To tackle the Great Compromise and the Three-Fifths Compromise, I created two graphic organizers.
The Great Compromise Organizer
Students read a brief article about the Great Compromise, identifying:
The issue at stake
The two opposing sides
The compromise itself
This activity helped them see how differing viewpoints shaped the structure of Congress and highlighted the balance of interests between large and small states.
The Three-Fifths Compromise Organizer
After reading a second article, students completed the same organizer for the Three-Fifths Compromise, focusing on:
The issue of representation and slavery
The opposing perspectives of Northern and Southern states
The resulting compromise
By structuring the readings and graphic organizers this way, students were able to make direct comparisons between the compromises while seeing how both contributed to strengthening the national government.
Map and Tell: Connecting Compromises to Modern Context
To reinforce their understanding of the Great Compromise, students engaged in a Map and Tell activity. Using a map showing the current number of representatives for each state, students answered the following questions:
Which state currently has the most people?
Identify a state with the fewest people.
In 2019, Ohio had 16 representatives in the House. Why do you think they only have 15 now? (Hint: It’s not because they died!)
Every state has 2 senators. How many senators are in the U.S. Senate?
These questions required students to apply what they learned about representation and the legislative structure created by the Great Compromise. The activity added relevance and encouraged them to connect historical decisions to the modern-day functioning of government.
Sketch and Tell-O: Synthesis
Students ended the day with a Sketch and Tell-O activity addressing this essential question:
“How did the leaders at the Constitutional Convention compromise to strengthen the central (national) government?”
Their responses needed to include the terms great compromise, representation, and three-fifths compromise. By combining visual representation with written explanation, students synthesized their learning while reinforcing the central role of compromise in the Convention.
Wednesday
For the third day in a row, I was out, but the focus on the Constitutional Convention’s compromises remained strong. Wednesday’s lesson tackled the debate over the executive branch—whether the nation should have one president or three, and how that leader should be chosen. The structure and consistency of the lessons helped students stay engaged and build on their understanding of the compromises that shaped the U.S. government.
Starting with Vocabulary
As always, the day began with a Gimkit review of the key vocabulary terms from earlier in the week. Repetition is key to reinforcing these foundational terms, and Gimkit’s interactive format ensures students stay motivated and focused.
Frayer Model: Defining the Executive Branch
Next, students created a Frayer model for the term executive branch. They:
Defined the term.
Provided examples (e.g., the president, the cabinet).
This activity helped students clarify the role and function of the executive branch, setting the stage for the deeper analysis to follow.
Graphic Organizer: Breaking Down the Debate
Students then read about the debate over the executive branch, focusing on the key issues:
Should the country have one president or three?
How should the president be chosen?
Using the same organizer from the previous days, they identified:
The issue at hand.
The two opposing sides of the debate.
The compromise that resolved the conflict.
This consistent structure helped students compare this debate with the previous ones, reinforcing the importance of compromise in shaping the Constitution.
Annotate and Tell: Analyzing James Wilson’s Argument
To deepen their understanding, students analyzed a primary source excerpt from James Wilson, who argued for having one president. Through an Annotate and Tell activity, they highlighted key points and answered these questions:
What are Wilson’s main arguments for having one leader?
How does Wilson’s example of Massachusetts support his argument for a single executive?
According to Wilson, what problems could arise with three leaders?
This activity encouraged critical thinking and connected historical perspectives to the broader debate over the executive branch.
Wrapping Up with Synthesis
To conclude, students worked on three tasks:
Answering Essential Questions: Students reflected on the executive branch’s role and how the Constitutional Convention resolved its structure.
Sketch and Tell-O: They illustrated their understanding of the debate, including key issues, arguments, and the compromise reached.
CER Writing: Students crafted a Claim-Evidence-Reasoning paragraph responding to the question: Should we have one president or three?
Thursday
It’s rare for me to miss three days in a row, so when I returned to class today, I faced the challenge of pulling together three days’ worth of content—some completed on Chromebooks, some on paper. The goal for the day was simple: consolidate the material, assess understanding, and help students connect the dots.
Starting with Quizizz
I kicked off the lesson with a 10-question Quizizz that covered key points from the past three days. Quizizz’s format, where each question is asked once, allowed me to see how students performed on a broad range of topics. Unfortunately, the results revealed significant gaps, with class averages at 45%, 47%, 54%, and 59%. The data didn’t point to one specific area of struggle; it was clear the students needed a comprehensive review to piece everything together.
Curipod to the Rescue
To address the gaps, I turned to Curipod—a tool that continues to impress me with its versatility and ability to engage students. I uploaded a premade presentation summarizing the key points of the Constitutional Convention, and Curipod enhanced it with interactive features that brought the content to life.
Guided Notes: Students worked on guided notes as we moved through the presentation, grounding them in the essentials of the Great Compromise, the Three-Fifths Compromise, and the executive branch debate.
Interactive Features:
Students submitted open-response questions, such as one where they could “ask James Madison a question.”
Curipod provided AI feedback for their responses, making the review process more engaging and personalized.
The AI whiteboard feature asked students to draw how the Founding Fathers balanced representation between big and small states with the Great Compromise. AI analyzed their drawings and offered feedback.
Voting on Responses: Students anonymously voted on open-response answers, with the top three being displayed at the end. I love this feature because it minimizes bias and encourages thoughtful participation.
Curipod’s interactive elements made the material engaging and accessible, and the guided notes ensured students had something tangible to refer back to as we reviewed.
Wrapping Up with Quizizz
We ended class by retaking the same Quizizz from the beginning of class. The results spoke volumes:
47% jumped to 76%.
45% increased to 80%.
54% rose to 77%.
59% climbed to 80%.
The improvement showed that the combination of Curipod, guided notes, and interactive features helped students consolidate their understanding and apply it effectively.
Friday
By Friday, we were back on track and moving forward with the next big question in our unit: “What were the arguments over ratifying the Constitution?” This lesson delved into the emergence of Federalists and Anti-Federalists, emphasizing how the newly proposed Constitution required states to not only understand but also buy into the vision for a federal government.
Starting with Mastery Peak
We began with the Mastery Peak feature in Quizizz, using the same questions from Thursday to refine understanding. The growth in scores was impressive:
77% → 100%
70% → 93%
77% → 96%
67% → 96%
This demonstrated that students were solidifying their grasp of the material as we continued to revisit and apply it.
Introducing Ratification with Gimkit
Next, I ran a quick 2-minute Gimkit with six questions about the ratification of the Constitution. This short review prepared students for the day’s focus and introduced key terms like Federalists, Anti-Federalists, and ratification.
I framed the lesson with the question: “What were the arguments over ratifying the Constitution?” This served as a springboard to discuss how Federalists and Anti-Federalists debated the need for state approval and public buy-in to legitimize the new government.
Sourcing with 8Parts: The Federal Pillars
We began our exploration with the Federal Pillars image, using the 8Parts Sourcing Protocol to analyze it. Students:
Identified nouns, verbs, adjectives, and prepositions in the image.
Summarized the artist’s message about the ratification process.
This visual analysis helped students interpret how the artwork symbolized the growing support for ratification while emphasizing the states’ critical role in the process.
Frayer Models: Federalists vs. Anti-Federalists
Next, students completed two Frayer models, one for Federalists and one for Anti-Federalists. They defined each group, listed key characteristics, included examples of prominent figures, and noted non-examples. This activity helped clarify the contrasting perspectives on the Constitution:
Federalists advocating for a strong central government.
Anti-Federalists emphasizing states’ rights and the need for a Bill of Rights.
To wrap up, students used Emoji Kitchen to visually represent three arguments over ratification. They selected emojis to symbolize each argument and wrote a summary answering our essential question: “What were the arguments over ratifying the Constitution?” This activity added a creative and personal element to the lesson, encouraging students to connect with the material in a unique way.
Ending with Gimkit
We finished class with the same Gimkit as earlier, reinforcing the key concepts about ratification. This repetition helped solidify understanding while ending the day on an engaging note.
The Ohio EduProtocols Roadshow on October 25, 2024, at the Northern Buckeye Education Council’s headquarters brought together educators from Ohio, Indiana, Michigan, and West Virginia for an unforgettable day of learning, collaboration, and inspiration. This transformative professional development event showcased the power of EduProtocols to revolutionize teaching, engage students, and create lasting impacts in classrooms, schools, and districts.
EduProtocols in Action
The day featured a lineup of authors and hotshots who modeled EduProtocols in real time, helping attendees see how these strategies could transform their classrooms:
Jon Corippo, co-founder of EduProtocols, energized the room with his dynamic presentations on Fast and Curious and Random Emoji Paragraph. Teachers saw how these strategies transform formative assessments into interactive, game-like experiences and writing tasks into creative, student-centered activities.
Adam Moler, co-author of the EduProtocols Field Guide Social Studies Edition, engaged participants with his session on Sketch and Tell-O. He demonstrated how blending visual storytelling with core content gives students meaningful opportunities to express understanding in innovative ways while building their creativity and engagement.
Dominic Helmstetter, a national presenter and EduProtocols hotshot, wowed attendees with his session on Thin Slides. He showed how students could synthesize information and develop presentation skills in under five minutes, sparking both creativity and confidence while making learning dynamic and efficient.
Dr. Randall Sampson, an EduProtocols champion, brought a unique perspective to the event by offering CEUs for participants and sharing compelling student growth data tied to EduProtocols. Randall highlighted how these strategies have led to measurable improvements in academic achievement, engagement, and classroom efficiency. His session inspired educators to think critically about how EduProtocols can foster long-term growth and success for their students.
One of the most valuable aspects of the Roadshow was its emphasis on addressing real-world classroom challenges with practical solutions. At the end of the Roadshow, a Padlet board was set up and used for participants to ask questions and have them answered in real time. Key questions raised during the sessions highlighted the adaptability and effectiveness of EduProtocols in diverse settings:
Grading Simplified Yet Impactful A recurring question from attendees was: “How do I grade these activities?” Presenters emphasized keeping it simple. Most EduProtocols are designed for formative assessment during the week, relying on pass/fail or completion checks. Summative assessments, like final Thin Slides or Sketch and Tell-O presentations, can involve clear, rubric-based grading. For example, participation-based grading (e.g., completing 80% of Gimkit or Sketch tasks) or letter grades for final synthesis projects ensures accountability while reducing teacher workload.
“EduProtocols aren’t about piling on work for teachers or students—they’re about making learning visible and simplifying assessment in meaningful ways.”
Tools That Support Engagement and Collaboration Participants were curious about the best tools to use with EduProtocols. Presenters highlighted versatile platforms like Google Slides for Thin Slides, Padlet for Iron Chef-style collaboration, and Curipod for interactive, AI-driven lessons. These platforms make it easy for students to share, engage, and collaborate, fostering a classroom environment where every voice matters.
“The right tools make EduProtocols seamless and accessible. It’s about finding what works best for your students and classroom needs.”
Creating a Safe, Collaborative Classroom Culture A significant topic was how to foster a safe space where students feel confident sharing their work. Strategies included:
Using anonymous tools like Curipod for responses to avoid popularity bias. Keeping activities fast-paced and light to reduce anxiety. Reinforcing classroom norms and shutting down negativity quickly. “EduProtocols build confidence because they focus on the process, not perfection. Students feel safe to try, share, and grow.”
Balancing Engagement with Accountability Educators asked: “What about students who only work if it’s graded?” The experts reassured them that the engagement built into EduProtocols—like the competition in Fast and Curious or the creativity in Sketch and Tell-O—naturally motivates students. For those who still struggle, incorporating visible progress, like tracking Gimkit scores or showcasing Thin Slides, can provide the accountability they need.
“When students see their progress in real time and know their work matters, engagement follows.”
A Teacher’s Perspective
The collaborative, solution-driven nature of the event resonated with educators. Angie Behnfeldt, a teacher from Stryker Schools, shared:
“I attended alone since EduProtocols are not yet widely known in my district, but now I can’t wait to share what I’ve learned. The testimonies, anecdotes, and data shared throughout the day were incredible. You’ve inspired all of us to roll up our sleeves and start teaching better while working less!”
Transform Your Teaching
The Ohio EduProtocols Roadshow wasn’t just another professional development session—it was a movement. Teachers left with practical tools, actionable strategies, and a renewed sense of purpose. The modeling of EduProtocols in real time showed how these tools can be adapted to any subject or grade level, creating classrooms where students are engaged, teachers are energized, and learning is visible.
“Watching educators light up as they realized how these tools could transform their classrooms reminded me why I love this work.” – Dominic Helmstetter
Don’t miss your chance to experience the EduProtocols Roadshow and join a growing community of educators transforming teaching and learning. Visit the EduProtocols Plus site and mark your calendar for the next event and prepare to unlock the full potential of your classroom!
This week, we dug into the foundations of the United States government and explored how early laws shaped the country’s growth. EduProtocols were front and center as we kept students engaged and active in their learning:
EduProtocols made this week dynamic and interactive, helping students dive deeper into complex topics while keeping them engaged and excited to learn!
Monday
Today, we began our new unit on the Constitutional Convention, which will cover topics like the Articles of Confederation, Shays’ Rebellion, the Northwest Ordinance, key compromises, and Federalists vs. Anti-Federalists. To set the stage, I introduced the concept of different government systems—some familiar, some new—and used a mix of EduProtocols to keep students engaged and thinking critically.
Starting with Gimkit: Activating Prior Knowledge
We started class with a quick 2-minute Gimkit on types of governments, focusing on basic terms and concepts. After the first round, I gave immediate feedback, clarifying any misunderstandings, and then we jumped into a second round. Repetition and feedback in short bursts like this are a great way to activate prior knowledge and boost confidence, especially as we dive into new material.
Introducing the Tier List: A Fun New Protocol
Next, I introduced a new EduProtocol: The Tier List (created by Eric Curts). Many students were already familiar with it, which made for a seamless introduction. We began by ranking fast food chains using the S-F ranking system. Students had three minutes to place their rankings, with the flexibility to leave tiers blank or include multiple restaurants in the same tier.
The real value of the Tier List came in the next steps:
Partner Discussions: Students paired up to compare rankings and explain their reasoning, fostering meaningful discussions about personal preferences and decision-making.
Live Class Results: As students submitted their rankings through a Google Form, the live results appeared on the board. This led to a fun, interactive class discussion about trends and outliers in the rankings.
This warm-up not only got students talking but also built their familiarity with the Tier List format, which we’ll use again for academic topics later in the unit.
Diving into Government Systems with Iron Chef
For the main activity, we used an Iron Chef format paired with Padlet to explore six government systems: direct democracy, monarchy, republic, authoritarian, anarchy, and confederation (I left out theocracy this time). Here’s how it went:
Distributing Readings: Students received a half-page reading about their assigned government system.
Padlet Contributions: Each group shared:
A definition of their government system
Two characteristics of that system
Potential problems or limitations
An AI-generated symbolic image to represent it
This collaborative activity gave students ownership over their topic and ensured a wide range of perspectives for the class to learn from.
Sketch and Tell-O: Processing and Synthesizing
To reinforce what they learned, students moved into a Sketch and Tell-O Notes activity. As they reviewed each Padlet post, they sketched a quick picture, wrote a definition, and jotted down key facts for each government style. This protocol helps students process information visually and create a set of notes they can reference throughout the unit.
Wrapping Up with Gimkit
We ran out of time, but I squeezed in a final 3-minute Gimkit to reinforce what we’d covered. Quick reviews like this are an excellent way to close a packed lesson and leave students feeling confident in their understanding.
Reflection
Today’s mix of protocols and activities was all about building foundational knowledge in an engaging and interactive way. The Tier List added a fun twist to class discussions, while Iron Chef and Sketch and Tell-O helped students dive deeper into the nuances of different government systems. Although we ran out of time, the energy and focus in the room made for a strong start to this new unit.
Today, I realized we needed to shake things up. After starting class with a Gimkit on government systems, I noticed the results were still stagnant—students weren’t making the progress I’d hoped for. If they were struggling with basic questions, how could they effectively rank and discuss the systems on a Tier List? Time to try something different.
Gummy Bear Representations
Enter the gummy bears. I handed each student a pack of individually wrapped Haribo gummy bears and set up a Padlet. Their task: review monarchy, confederation, and republic styles of government by creating gummy bear representations of each system.
Students got creative:
For monarchy, some built a single gummy bear “king” surrounded by loyal “subjects.”
For confederation, students grouped bears into loose alliances, showing independence but some cooperation.
For republic, gummy bears voted or worked together as equals.
They took pictures of their creations, uploaded them to Padlet, and explained how their setups represented each government style. The energy in the room was fantastic, and students were highly engaged. This hands-on approach turned what could’ve been a dry review into something fun and memorable.
Revisiting Gimkit
After 20 minutes of gummy bear creations, we revisited the Gimkit. The results were much better this time—students had a clearer grasp of the government systems and were able to apply what they’d just reviewed in a meaningful way.
Ranking Governments with the Tier List
Next, we transitioned into the Tier List EduProtocol. This time, students ranked the styles of government we’ve studied so far. After completing their Tier List rankings, they paired up to discuss their choices and submitted their final results through a Google Form.
Wrapping Up with Class Discussion
We ended with a class discussion based on the live Google Form results, comparing trends and outliers. Students defended their rankings, debated the merits of each system, and reflected on what makes some systems more effective than others.
Reflection
Today’s gummy bear activity was a game-changer. It transformed abstract concepts into something tangible, making it easier for students to connect with and understand the material. The improved Gimkit scores showed that this hands-on, creative approach worked, and the Tier List discussion added depth to their understanding. Sometimes, all you need to reinvigorate learning is a little creativity—and a pack of gummy bears. 🍬
Wednesday
While I wasn’t in class today, I left a structured, engaging set of activities to introduce the Articles of Confederation and its connection to Shays’ Rebellion. The plan aimed to build foundational knowledge through vocabulary, visuals, and synthesis tasks, though I anticipated needing Thursday to review and reinforce some of the concepts.
Vocabulary Practice with Gimkit
The lesson began with a Gimkit focused on vocabulary terms related to the Articles of Confederation. This provided a quick, interactive way for students to familiarize themselves with key terms they’d encounter in the reading and activities.
Edpuzzle: Visual and Audio Support
Next, students watched a six-minute Edpuzzle video on the Articles of Confederation. The video served as a concise visual and auditory primer, helping students understand the context and purpose of the Articles while highlighting its strengths and weaknesses.
Frayer Model: Breaking Down the Articles
Students then completed a Frayer model on the Articles of Confederation, paired with a reading. The prompts encouraged them to:
Define the Articles of Confederation.
Explain one reason why the government was intentionally made weak.
List three powers Congress had under the Articles.
Identify four weaknesses of the government.
This activity pushed students to engage with the text critically and organize their understanding in a structured way.
Exploring Shays’ Rebellion
To connect the Articles to its historical impact, I included a Justin Unruh template focused on Shays’ Rebellion. Students identified:
The cause of the rebellion.
The who, what, when, and where of the event.
The effect Shays’ Rebellion had on the call for a stronger federal government.
This task linked abstract governmental weaknesses to a real-world crisis, helping students see how the Articles’ limitations played out in history.
Sketch and Tell Comic: Synthesis
The final activity was a Sketch and Tell comic. Students were tasked with synthesizing the day’s learning by illustrating:
What the Articles of Confederation were.
Two weaknesses of the Articles.
Shays’ Rebellion.
One success under the Articles.
This activity combined creativity and critical thinking, but as expected, many students didn’t finish this part. We’ll use Thursday to revisit and complete it.
Reflection
Today’s plan blended a variety of tools—Gimkit, Edpuzzle, Frayer models, and a Sketch and Tell comic—to help students engage with foundational ideas about early American government. While I wasn’t there to guide them, the scaffolding allowed for independent exploration. Still, Thursday will be key for addressing gaps and ensuring everyone synthesizes these concepts fully. Sometimes, lessons like these are reminders of the importance of follow-up, especially when tackling big, interconnected topics like these.
Thursday
Today was all about getting everyone on the same page with the Articles of Confederation and Shays’ Rebellion. After Wednesday’s independent work, I decided that a more guided and interactive approach was needed to fill gaps and ensure everyone had a clear understanding. Enter Curipod, an AI-powered tool similar to Pear Deck and Nearpod, which helped make today’s lesson engaging and collaborative.
Using Curipod to Guide the Lesson
If you haven’t tried Curipod, let me just say—it’s a game changer! I asked Curipod to generate a lesson for 8th graders about the Articles of Confederation and Shays’ Rebellion. It created a structured lesson with key topics like:
Successes and Weaknesses of the Articles
The Structure of Government
Cause and Effect
Shays’ Rebellion
What makes Curipod especially great are the interactive pieces. For example, it included prompts like:
“Why do you think the founding fathers didn’t create an executive branch with a president?”
“Why do you think they created a central government that couldn’t levy taxes?”
Students had three minutes to respond, thanks to the built-in timer (adjustable if needed). Once time was up, students could read and vote on the most relevant responses—anonymously! This feature is a huge win because it encourages honest, thoughtful answers without turning into a popularity contest.
Curipod also lets you add, edit, or delete information on the slides, making it highly adaptable to fit your classroom needs. The free version alone is incredibly robust, and I loved how it seamlessly tied into today’s goals.
Revisiting and Fixing Frayers and Comics
To start, students opened the Frayer models they had worked on Wednesday. Using the Curipod lesson as a guide, they reviewed and updated their definitions, weaknesses, successes, and other key details about the Articles of Confederation. This ensured they had accurate, complete information while reinforcing what we’d already covered.
Next, we transitioned to their Sketch and Tell comic slides, where students synthesized:
The Articles of Confederation
Two weaknesses of the Articles
Shays’ Rebellion
One success under the Articles
With time to refine their work, the students made meaningful improvements to their comics, bringing together everything they’d learned so far.
Wrapping Up with Gimkit
We ended class with a quick round of Gimkit to reinforce the key terms and ideas. By now, students’ scores were improving steadily, showing their growing confidence with the material.
Reflection
Curipod was the perfect tool for today’s lesson—it brought clarity, engagement, and interactivity to topics that could otherwise feel dry or overwhelming. The anonymous response feature encouraged thoughtful participation, while the guided format helped students fix any misunderstandings from Wednesday’s lesson. Tying everything together with the Frayers, comics, and Gimkit made for a well-rounded day of learning and reflection. If you haven’t tried Curipod yet, I highly recommend it—it’s an absolute game changer for collaborative lessons!
Today’s focus was on two key pieces of legislation: the Land Ordinance of 1785 and the Northwest Ordinance of 1787. These laws laid the groundwork for organizing and settling the Northwest Territory, so our lesson emphasized understanding how land was divided and states were established.
Starting with Gimkit
We kicked off with a 10-question Gimkit that combined review from Thursday’s lesson with new questions about today’s content. This mix kept students on their toes while reinforcing prior learning and previewing key ideas.
Reading and Proving a Statement
Next, we read an article on the Land Ordinance and Northwest Ordinance. I explained how townships were set up, breaking down the system of squares, sections, and their purposes. To apply their learning, I gave students the statement:
“The United States created an organized system to divide land and establish new states in the Northwest Territory.”
Their task was to prove the statement true using four numbers from the readings. This Number Mania activity helped them connect specific details to a broader understanding, encouraging them to think critically and organize evidence to support a claim.
Wrapping Up Early
I originally planned to include more activities, but by the time we finished the Number Mania and ran a second round of Gimkit, I decided that was enough for the day. It’s Friday, Thanksgiving break is around the corner, and the students had been working hard all week. Sometimes, it’s just as important to recognize when they need a break as it is to keep pushing forward.
Reflection
Today’s lesson was a perfect balance of review, new content, and synthesis. The Number Mania helped students focus on key details, while the Gimkit kept them engaged and reinforced their learning. Wrapping up a bit early felt like the right call—it gave students a breather after a week of hard work and set a positive tone heading into the weekend. Sometimes less really is more.