This week in 8th-grade social studies, we brought history to life with engaging EduProtocols that helped students dive deep into the Early Republic and key moments like the Whiskey Rebellion. From Sketch and Tell-O activities that broke down complex ideas to Progressive Sketch and Tell timelines that visualized historical events, we kept creativity at the forefront. Class Companion added an exciting layer of AI-driven writing feedback, while Fast and Curious Gimkits and CyberSandwiches reinforced foundational knowledge and sparked meaningful discussions. These protocols not only engaged students but also helped them build connections, improve comprehension, and master essential skills.
Tuesday – Lesson Intro CyberSandwich
Wednesday – Cabinet and Neutrality
Thursday and Friday – Hamilton and Whiskey Rebellion, Whiskey Story
Class Companion – AI Writing Feedback
Tuesday: Kicking Off the Early Republic
This week, we dove into a new unit on the Early Republic, which will culminate in a common assessment. Starting with a pre-assessment right out of the textbook, I had students tackle 20 of the most challenging, oddly worded questions filled with difficult vocabulary. The pre-assessment was designed to gauge their baseline knowledge and took about 10–15 minutes. Predictably, it was tough, but it gave me a sense of where they stood as we started the unit.
Introducing the Unit with a CyberSandwich
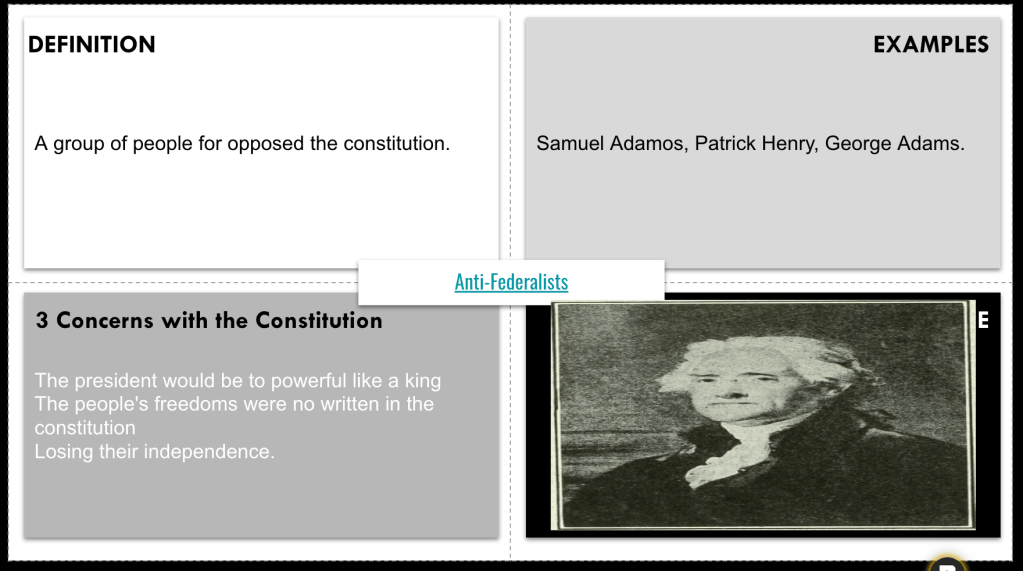
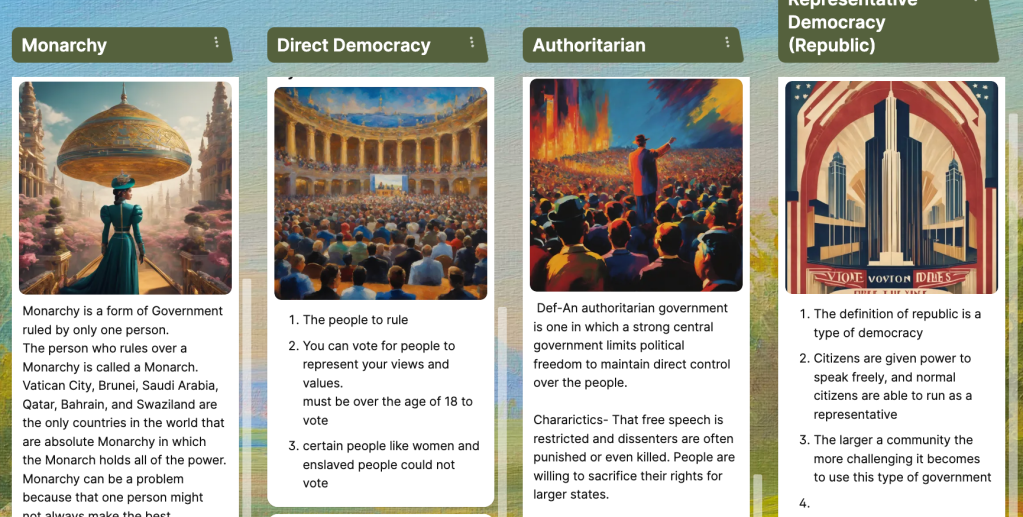
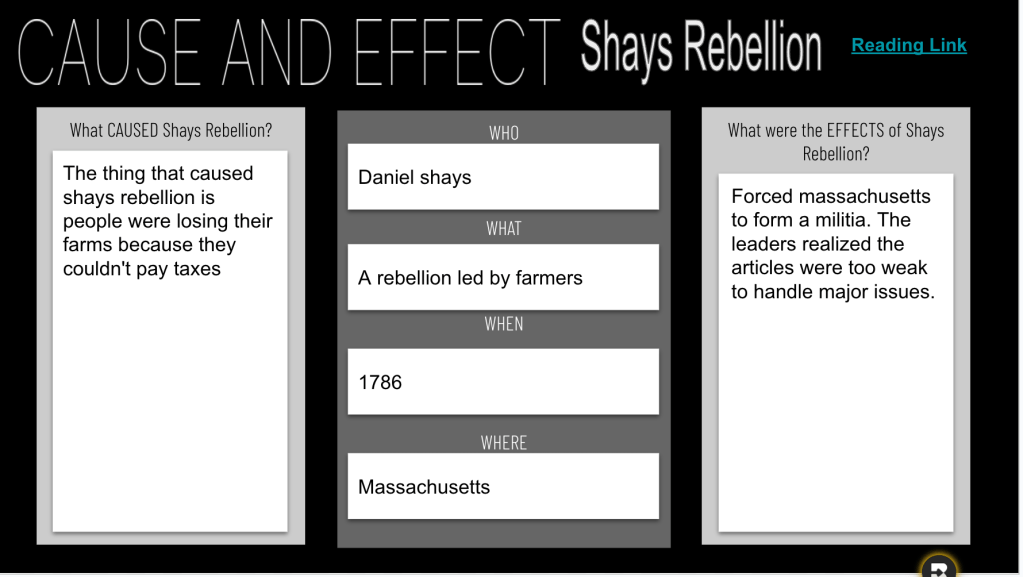
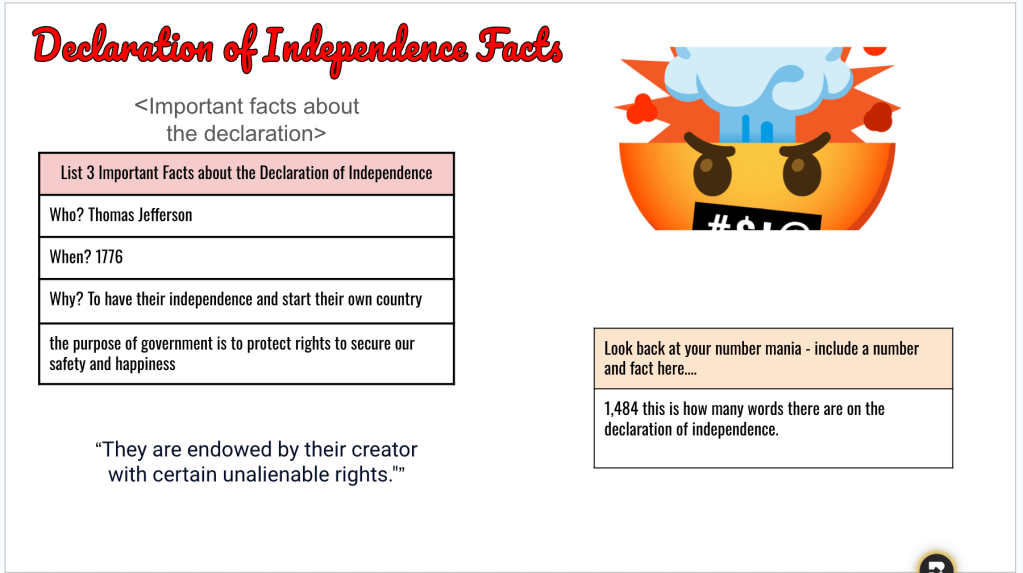
One thing I like about the textbook’s first lesson in this unit is how it revisits key foundational topics that lead into the Early Republic. It highlights the weaknesses and problems in America before the Constitution—like taxation without representation, the Articles of Confederation, Shays’ Rebellion, and foreign and domestic disputes—and positions the Constitution as the solution.
The irony? The textbook doesn’t explicitly connect these issues to the Early Republic or explain how the first five presidents put the Constitution to work and expanded federal power. So, I decided to bridge the gap myself using a CyberSandwich EduProtocol.
Here’s how it went:
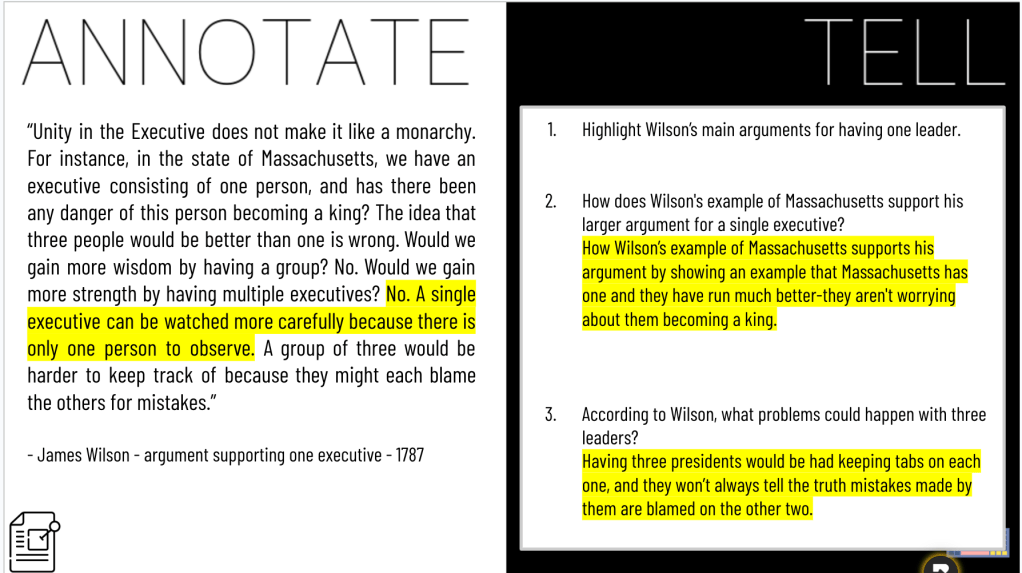
- Simplified Reading: Instead of fumbling with the textbook or logging into the website, I printed out the reading directly from the online textbook. Paper copies are quick, easy, and let students highlight and annotate as they read.
- Guiding Questions: Students spent 12 minutes reading and answering five guiding questions that I generated with AI to focus their attention on key details.
- Partner Discussion: After reading, students listed two problems and one solution from the text and discussed their findings with a partner, comparing ideas.
- Fixing a Paragraph: To practice critical thinking and writing, I gave them a poorly written paragraph (also AI-generated) about the topic and gave them 10 minutes to improve it.
Wrapping Up with Gimkit
We ended the class with a Gimkit featuring nine questions I pulled from the summative assessment for this unit. The scores showed where we have room to grow:
- 57%, 47%, 39%, and 42%.
While the scores were low, it was a good baseline and a chance to familiarize students with the material they’ll need to master.
Wednesday: George Washington Takes Office
We jumped into Lesson 2: George Washington Takes Office, diving into how Washington and Congress worked to strengthen the federal government. While the textbook suggests this lesson could take two days, I find that assumption wildly unrealistic. It’s packed with readings, activities, writing tasks, and reviews that assume students have extensive social studies background knowledge—something many students simply don’t have due to the limited time spent on the subject in earlier grades. The disconnect between textbook expectations and real classroom realities is frustrating.
Quick Notes: Setting the Stage
To start the lesson, I introduced key topics through a short lecture. These quick notes laid out the big ideas students would encounter in the lesson:
- Washington’s leadership style.
- The establishment of key government structures.
- The significance of neutrality and Jay’s Treaty.
The goal was to give students a foundation before diving into deeper activities.
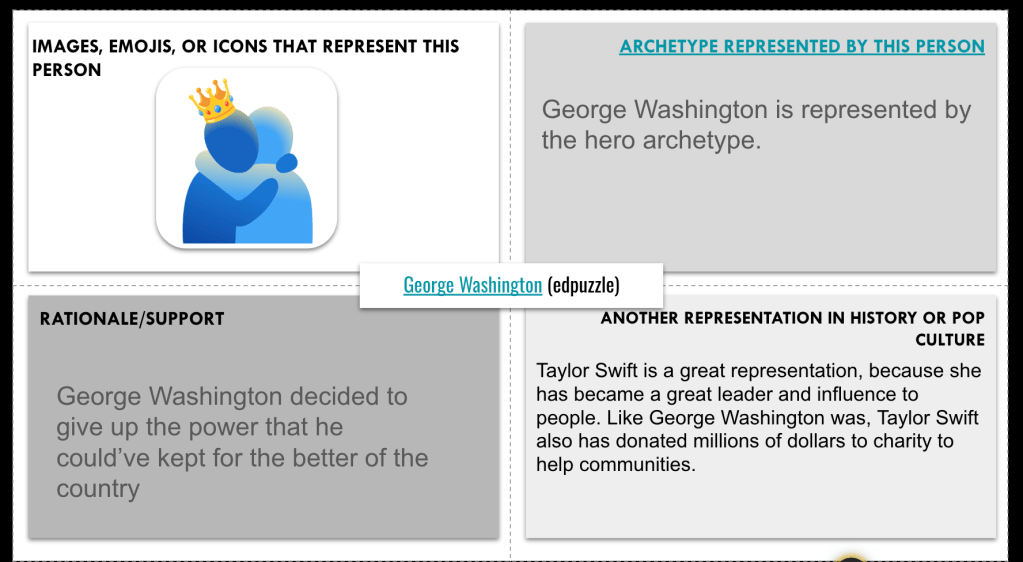
Archetype Foursquare: Connecting History to Stories
Next, I introduced archetypes—a fun and engaging way to connect historical figures to familiar characters. Students brainstormed archetypes in their favorite movies, TV shows, or books and discussed how every character fits an archetype (e.g., hero, mentor, trickster).
We followed this with an EdPuzzle on George Washington, a 4-minute video highlighting his leadership and challenges. While watching, students thought about which archetype best described Washington.
Afterward, students spent 8 minutes completing an Archetype Foursquare for Washington. They:
- Identified an archetype for him (e.g., “hero” or “sage”).
- Provided evidence from the video to support their choice.
- Connected George Washington to someone else.
- Compared their archetype ideas with a partner in a quick discussion.
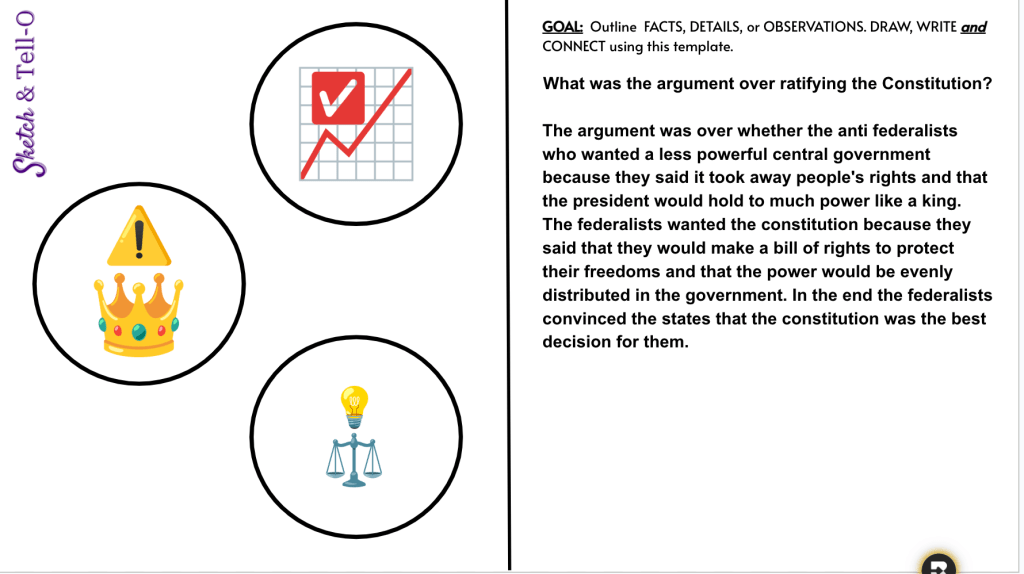
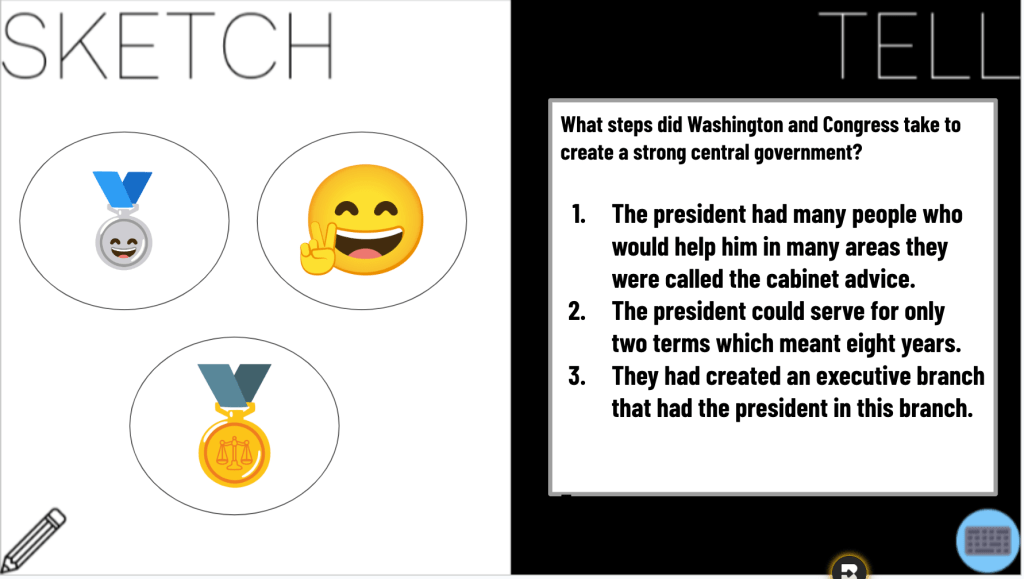
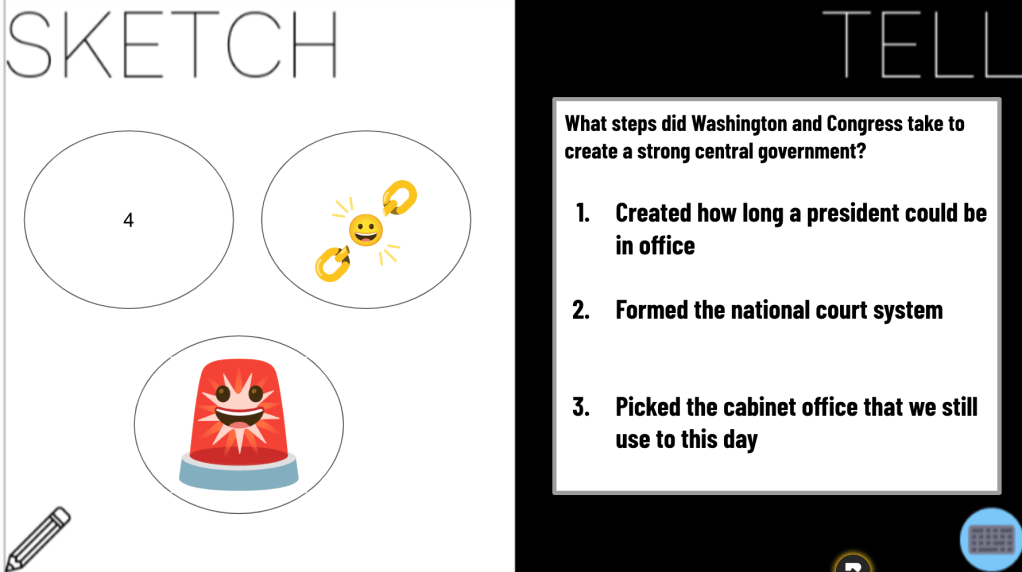
Sketch and Tell-O: Strengthening the Federal Government
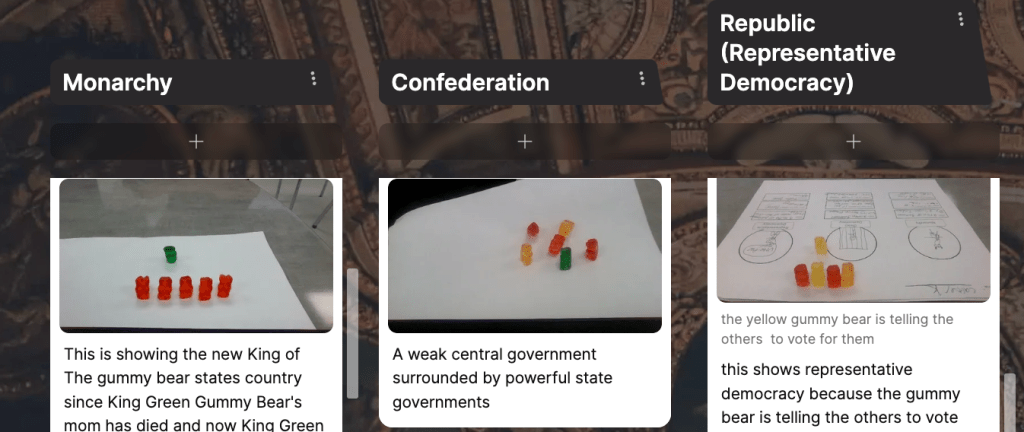
We then transitioned into the textbook’s reading on how Washington and Congress strengthened the federal government. Using a Sketch and Tell-O template, students sketched visuals to represent key ideas, such as:
- The creation of executive departments.
- The establishment of the federal court system.
This visual and creative approach helped break down the dense content into manageable chunks.
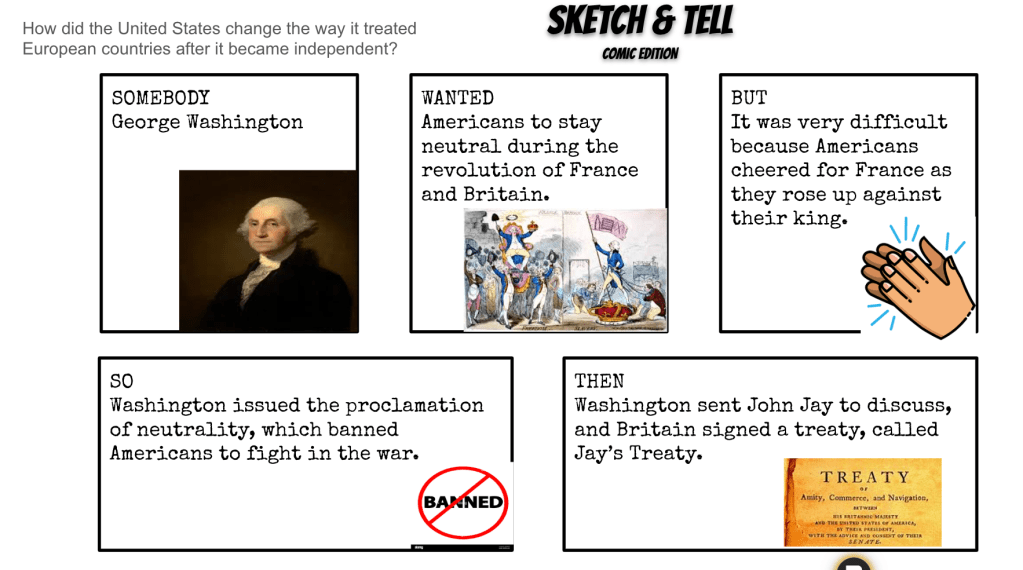
SWBST Sketch and Tell: Neutrality and Jay’s Treaty
Next, we tackled Washington’s foreign policy and Jay’s Treaty using a Somebody, Wanted, But, So, Then (SWBST) Sketch and Tell template. Students read about the challenges of maintaining neutrality during international conflicts and how Jay’s Treaty attempted to resolve tensions with Britain.
The SWBST activity allowed students to:
- Summarize the main ideas.
- Use both words and pictures to represent what they learned.
This strategy is always a hit because it combines comprehension with creativity, making abstract concepts more concrete.
Wrapping Up with Fast and Curious
To close out the lesson, we ran a Fast and Curious Gimkit round focused on key vocabulary and ideas from the day.
- Students played for 3 minutes.
- I provided immediate feedback on commonly missed questions, reinforcing learning.


Thursday: Hamilton’s Plan
Thursday was all about diving into Hamilton’s financial plan, though I initially hoped to also cover Washington’s domestic issues like the Whiskey Rebellion. My ambition outpaced reality, and we only made it through Hamilton’s plan. That said, the day was packed with meaningful activities that helped students grasp these foundational concepts.
Quick Notes: The Foundation of Hamilton’s Plan
We began class with quick notes to outline Hamilton’s financial plan, focusing on:
- Assuming state debts to strengthen the national government.
- Establishing a national bank to regulate finances.
- Implementing tariffs to protect American industry.
These notes took about 10 minutes and provided the background knowledge students needed for the activities that followed.
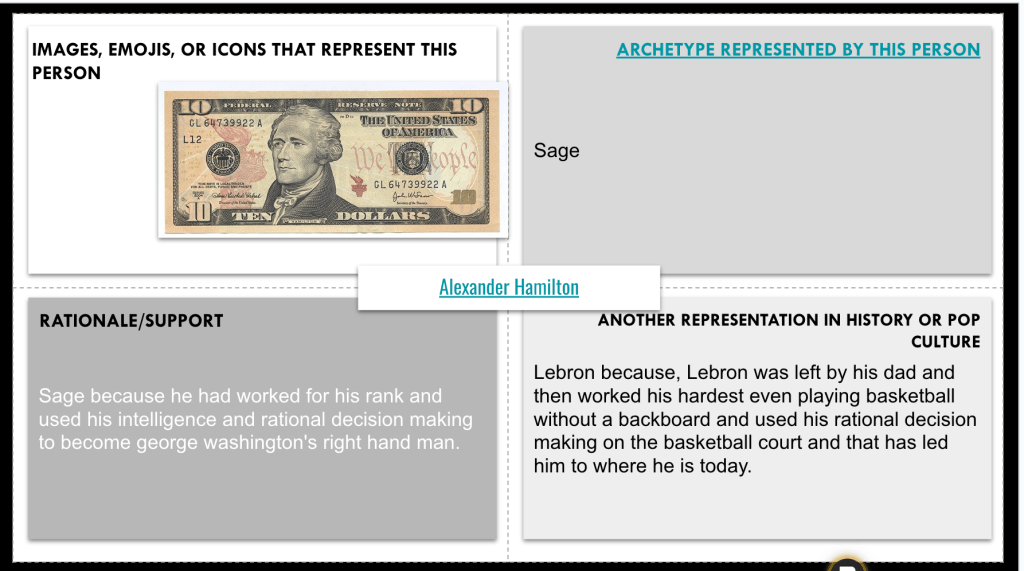
Archetype Activity: Understanding Hamilton
To make Hamilton more relatable, I used the brief biography from the textbook to introduce him as a historical figure. Then, we revisited the archetype activity from Wednesday, applying it to Hamilton. Students identified archetypes like “visionary,” “strategist,” or even “rebel,” depending on their interpretations.
This activity was quicker than Wednesday’s, but still sparked great discussion as students shared their archetype choices with partners and justified their reasoning.
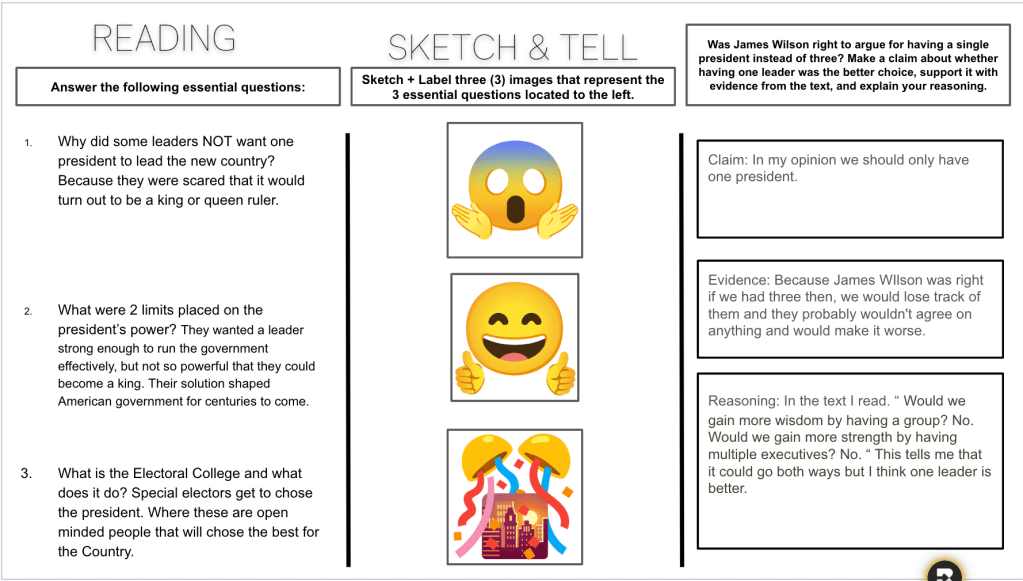
Reading, Questions, and Sketch and Tell-O
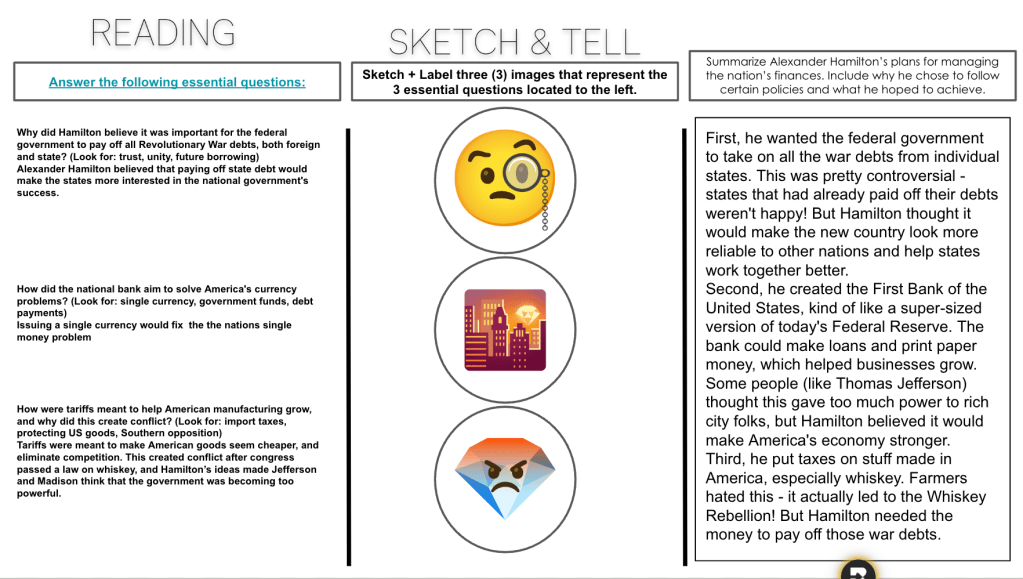
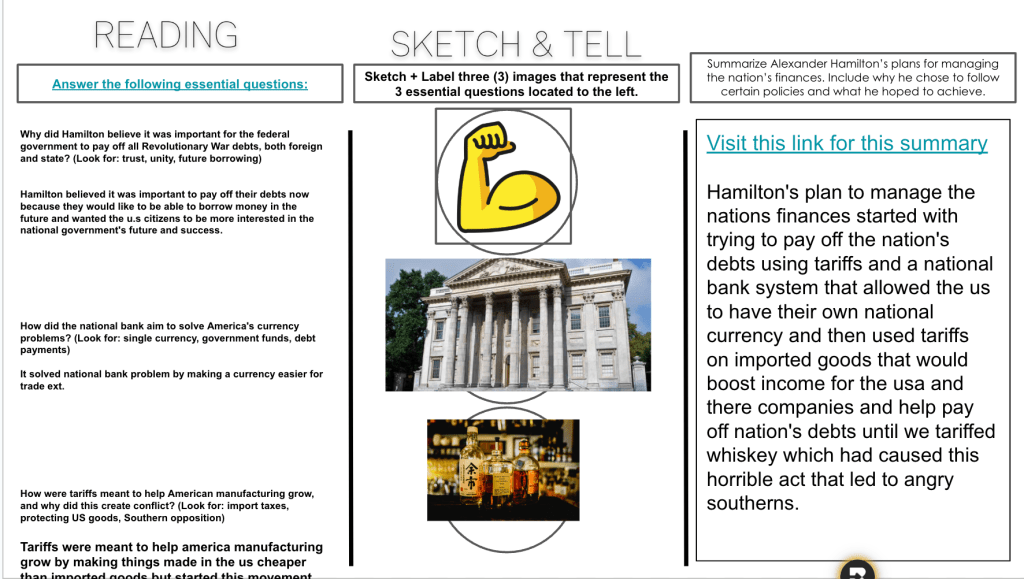
We transitioned to a reading about Hamilton’s financial plan, using a combination of structured questions, creative visualizations, and a connections summary. Here’s how it worked:
- Read and Respond: Students answered comprehension questions about Hamilton’s plan, focusing on why he wanted to assume state debts, how the national bank would work, and the purpose of tariffs.
- Sketch and Tell-O: Students used a Sketch and Tell-O template to represent key ideas from Hamilton’s plan. For example:
- A chain symbolizing the unification of state debts under the federal government.
- A vault or dollar sign representing the national bank.
- Connections Summary: To wrap up, students found an emoji or picture that connected with their answers and explained why they chose it.
I originally planned to use Class Companion, an AI feedback tool, to give students immediate feedback on their summaries. Unfortunately, it was blocked! I emailed the IT department to get it unblocked, but for now, we relied on peer discussions and my feedback instead.
Wrapping Up with Gimkit
We ended class with another Gimkit to reinforce the material. This time, the averages showed improvement:
- 80%, 74%, 68%, and 70%.
Friday: The Whiskey Rebellion and Government Strength
On Friday, I wrestled with whether to skip the Whiskey Rebellion and dive straight into political parties, but I decided against it. The Whiskey Rebellion perfectly ties back to our first lesson: the Constitution made the government stronger, and putting down the rebellion proved that strength. This connection was too important to pass up, so we dedicated the day to exploring the Whiskey Rebellion in-depth.
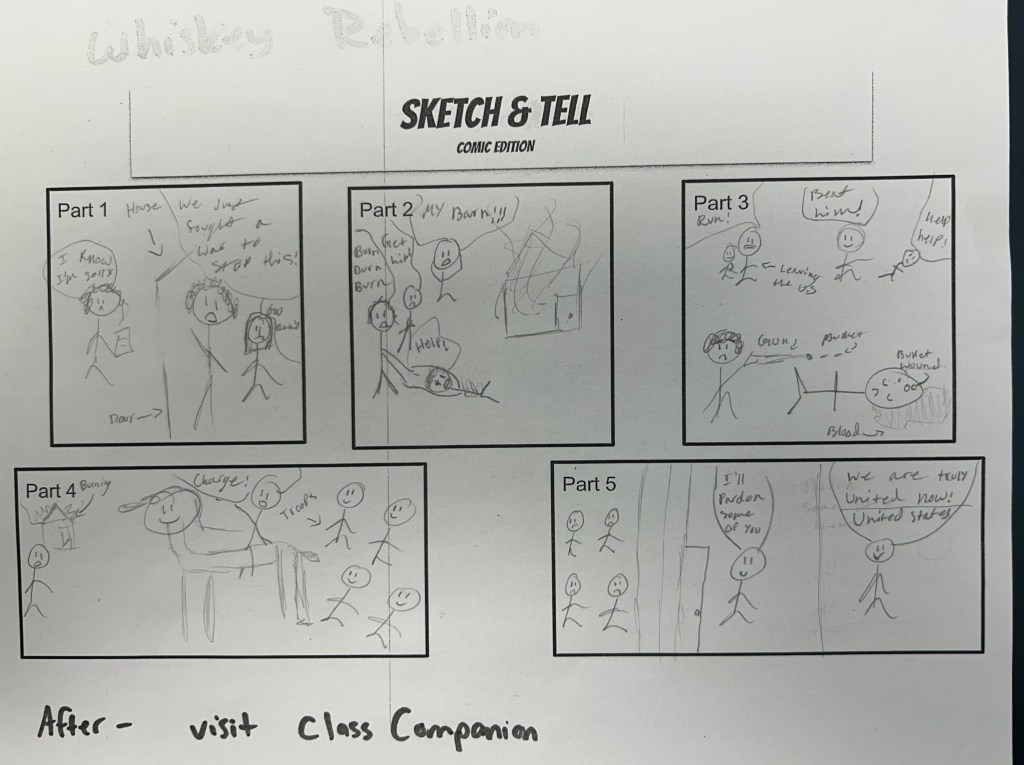
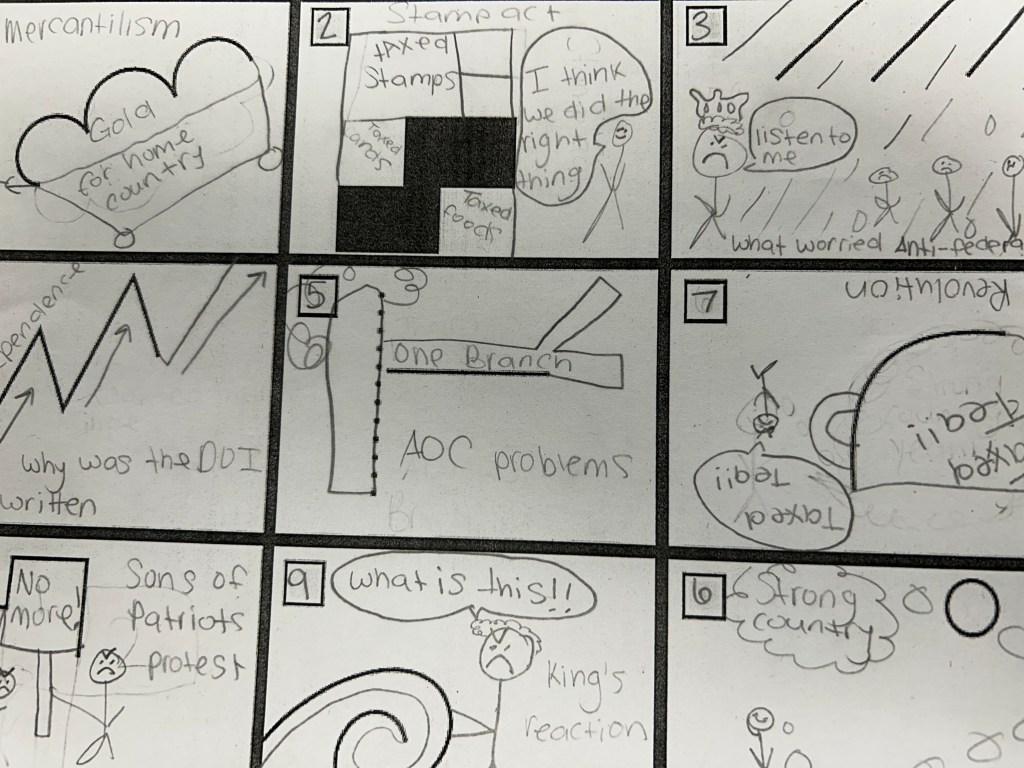
Progressive Sketch and Tell: Unpacking the Story
Inspired by Jake Carr and Justin Unruh, we used a Progressive Sketch and Tell to break the rebellion into digestible chunks. I used AI to divide the Whiskey Rebellion story into five parts, making it manageable and engaging for students.
- Setup: Each student received a paper with five Sketch and Tell boxes.
- Round 1: I handed out the first part of the story, giving students 3 minutes to read and sketch a visual representation of what they’d read. They then discussed their sketches with a partner.
- Rounds 2–5: For each subsequent part, students repeated the process—read, sketch, discuss. This structure kept the class moving while building a deeper understanding of the rebellion.
By the end, students had created a complete visual timeline of the Whiskey Rebellion.
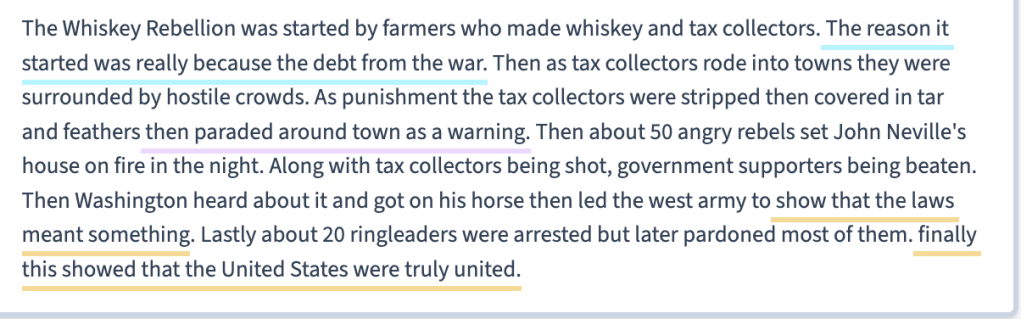
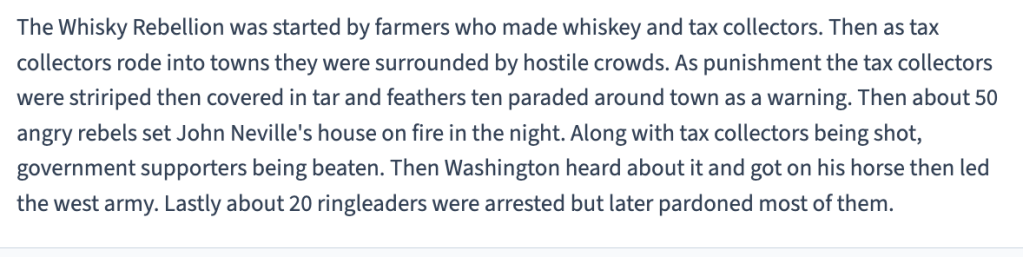
Introducing Class Companion for Writing Feedback
After completing their comics, students used Class Companion, an AI feedback tool, to summarize their Whiskey Rebellion comics in writing. This was my first time successfully using Class Companion after IT unblocked it, and it was a game-changer.
Here’s how it worked:
- I set up the assignment by feeding information about the Whiskey Rebellion from our reading into Class Companion.
- Students typed their summaries into the platform, receiving real-time feedback and scores on their writing.
- They had three attempts to improve their summaries, with each attempt allowing them to act on AI-generated suggestions.
The feedback was eye-opening for many students. It pointed out areas for improvement in clarity, structure, and grammar, and the rubric generated by the AI made expectations crystal clear. Some students became competitive, determined to get the highest score possible by their third attempt.
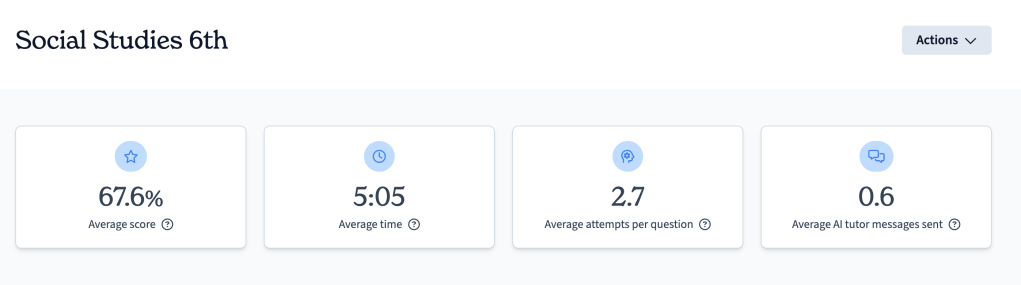
The results were amazing. Students were engaged in improving their writing and motivated by the detailed feedback. The data Class Companion provided was also incredibly helpful for me to track progress.
Wrapping Up with Gimkit
We ended the day with a Gimkit review on Lesson 2. The class averages were impressive:
- 91%, 80%, 88%, and 85%.
And just like that – a suggested 2 day lesson took 3 days and probably could have taken another day to do the lesson justice.